Adding A Receiving Inspection
Step #1
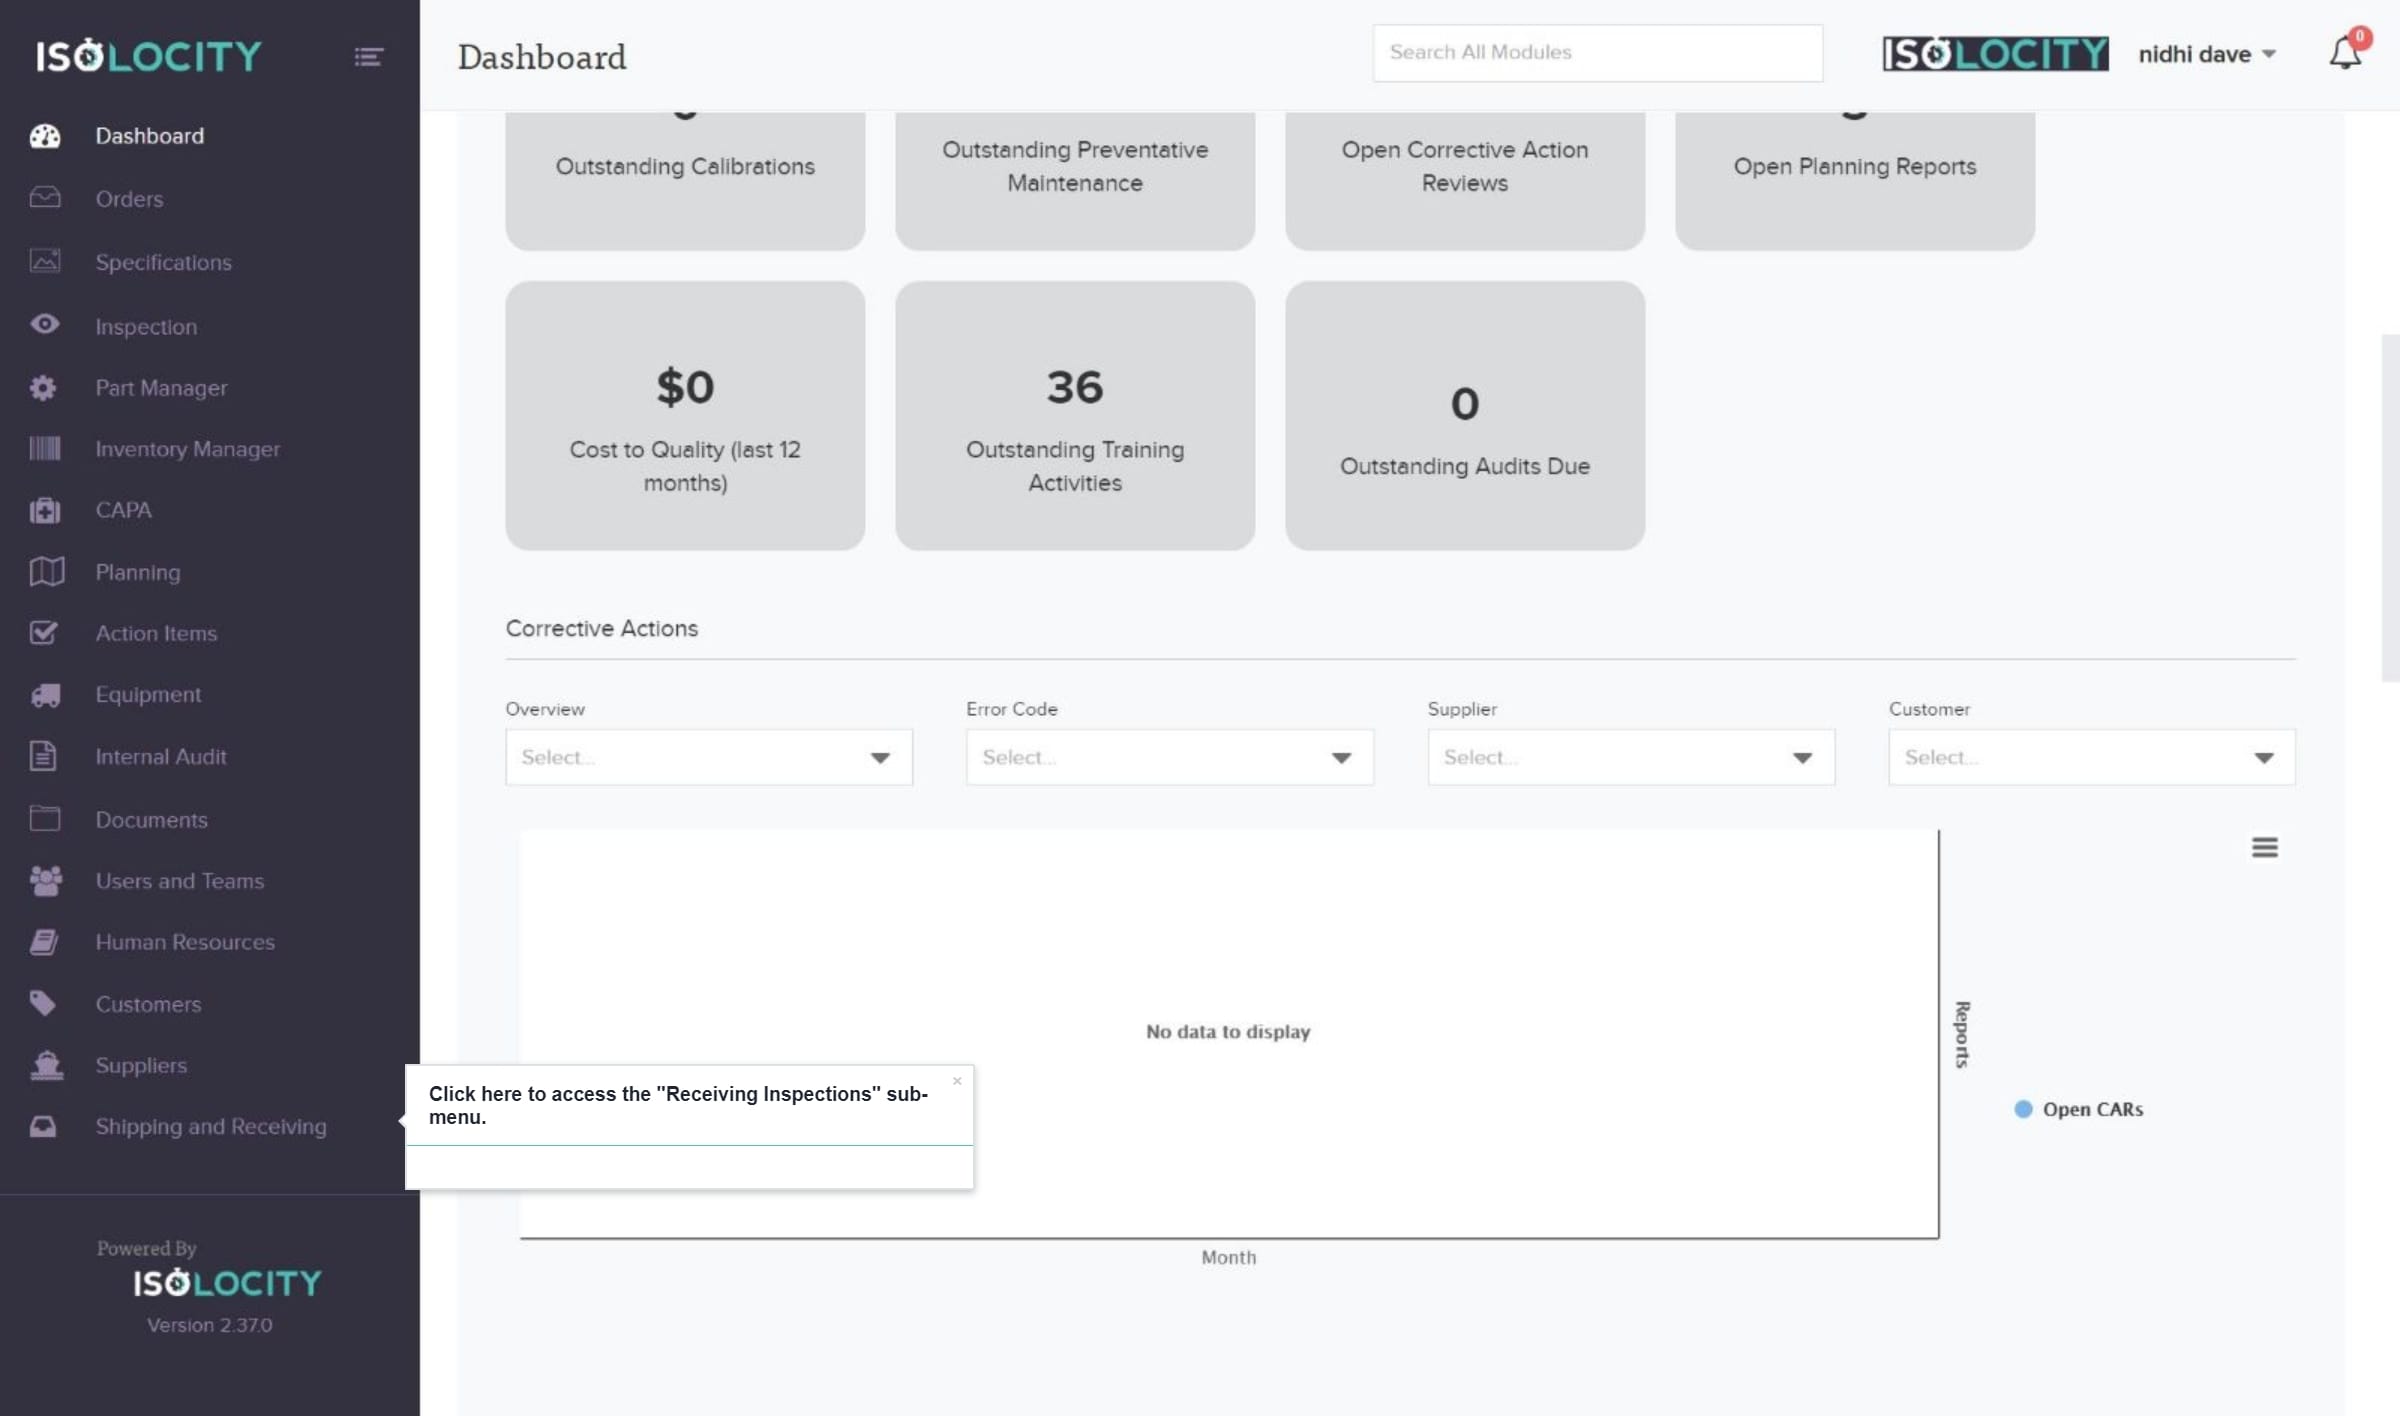
Click here to access the “Receiving Inspections” sub-menu.
Step #2
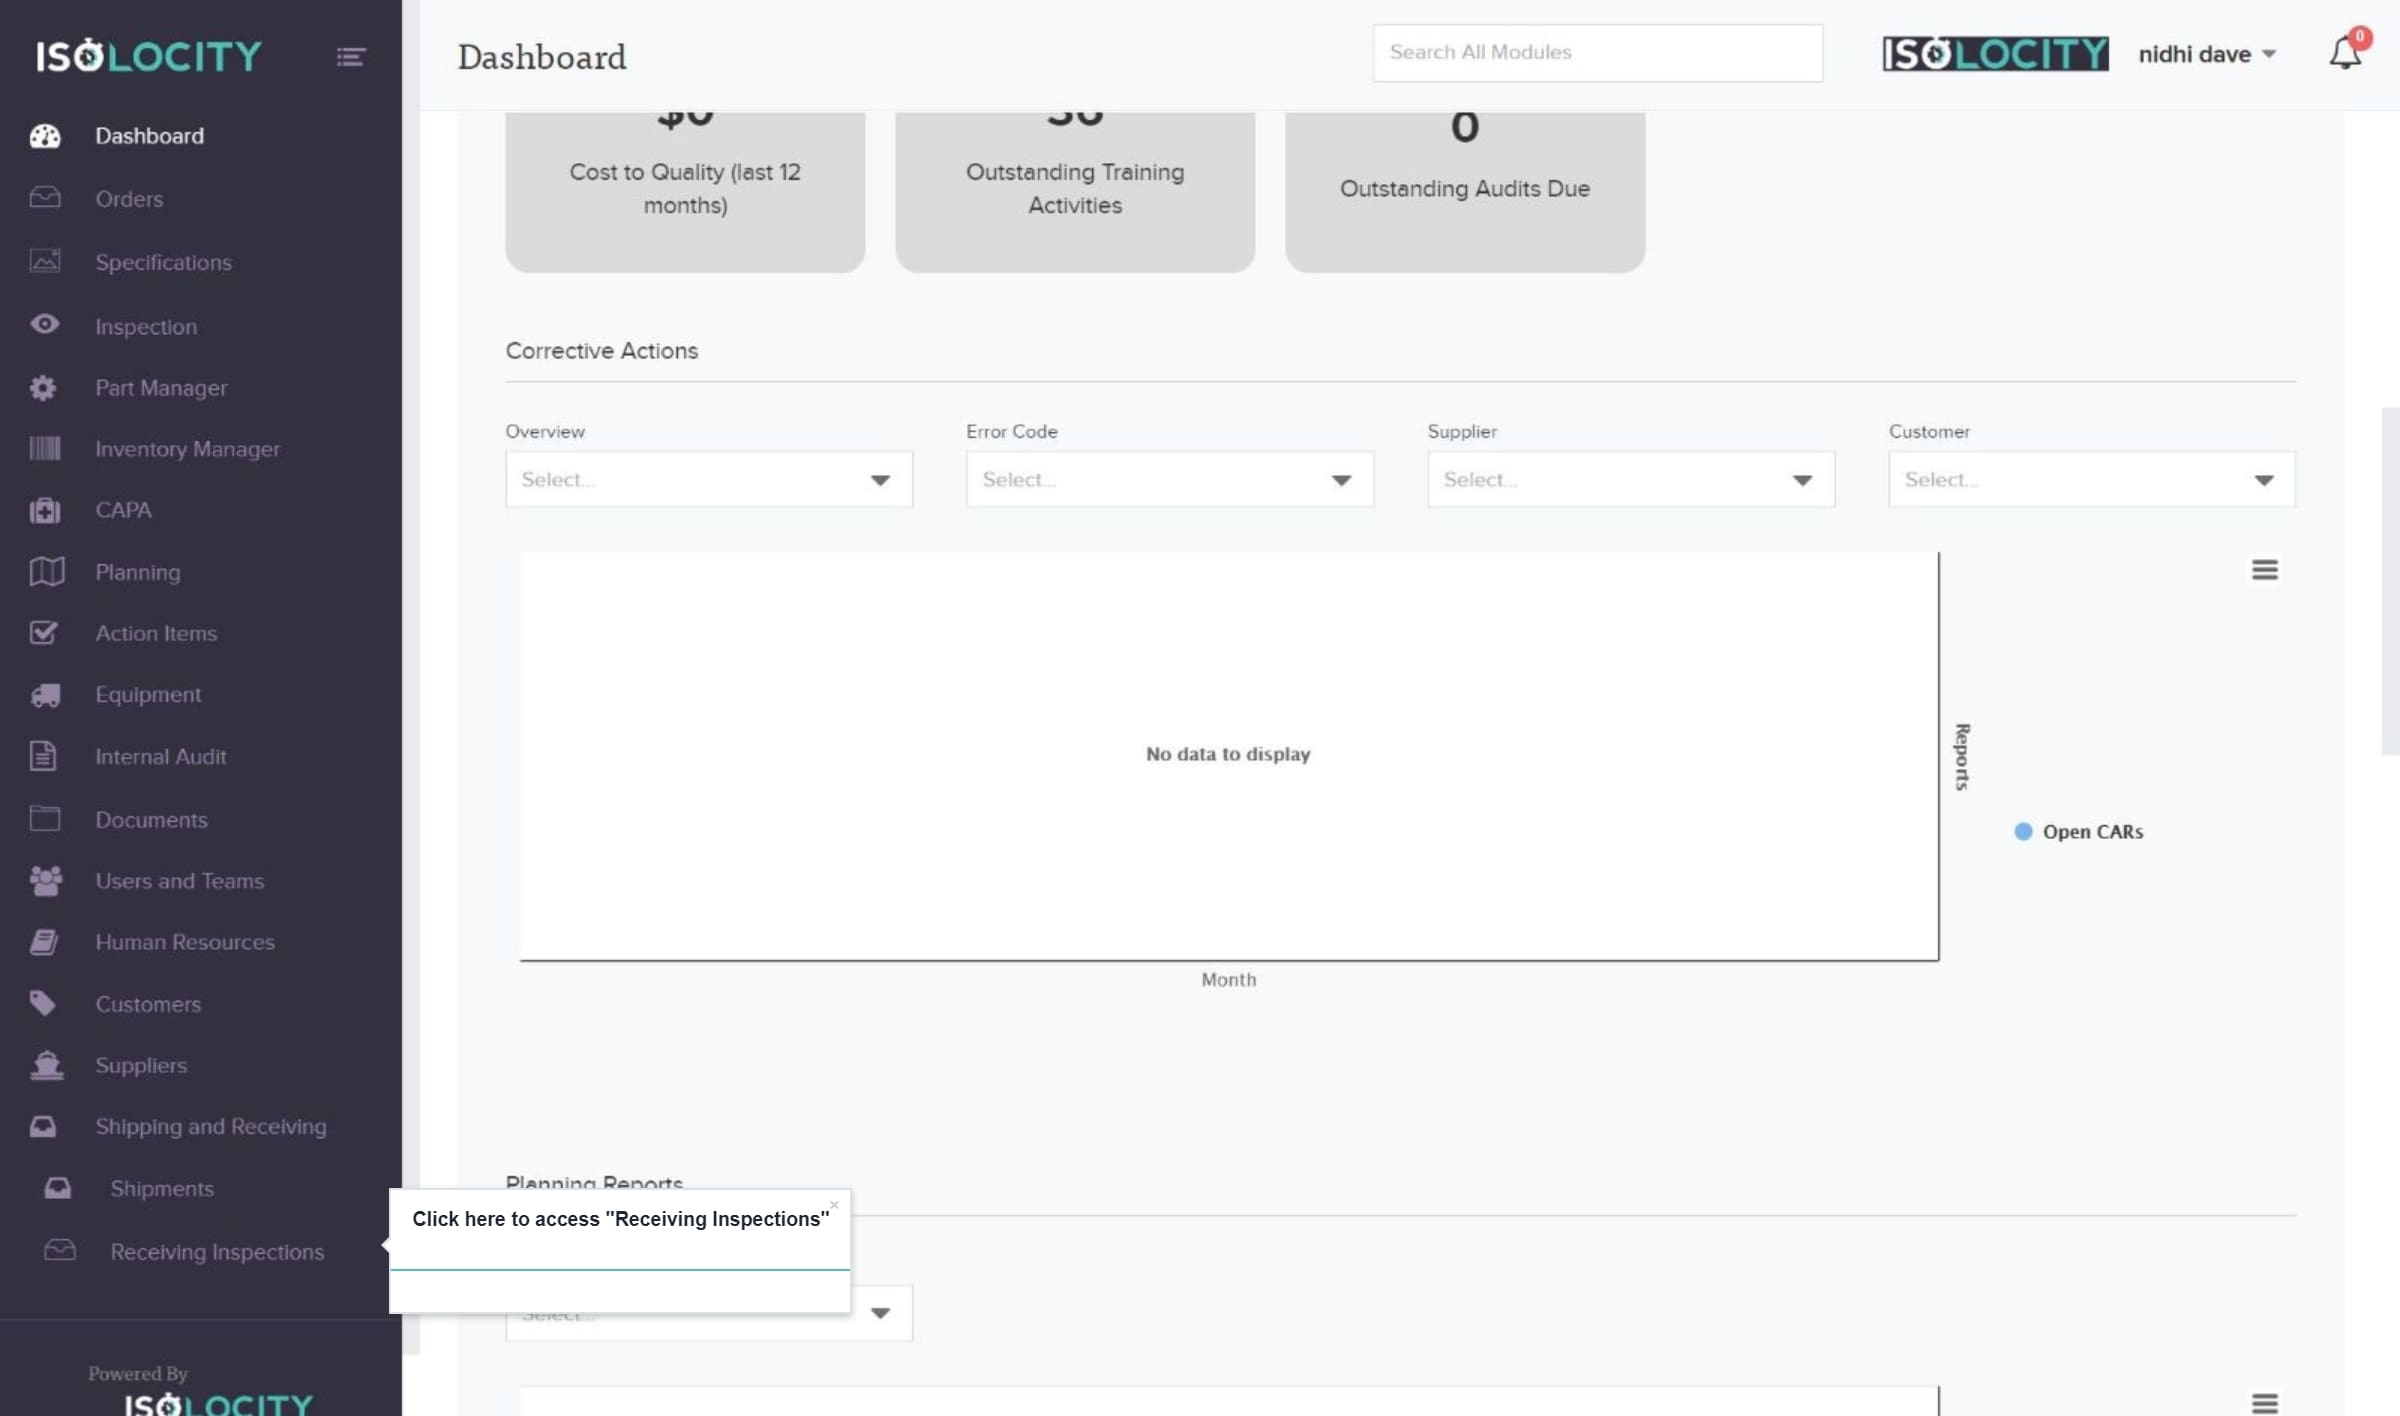
Click here to access “Receiving Inspections”
Step #3
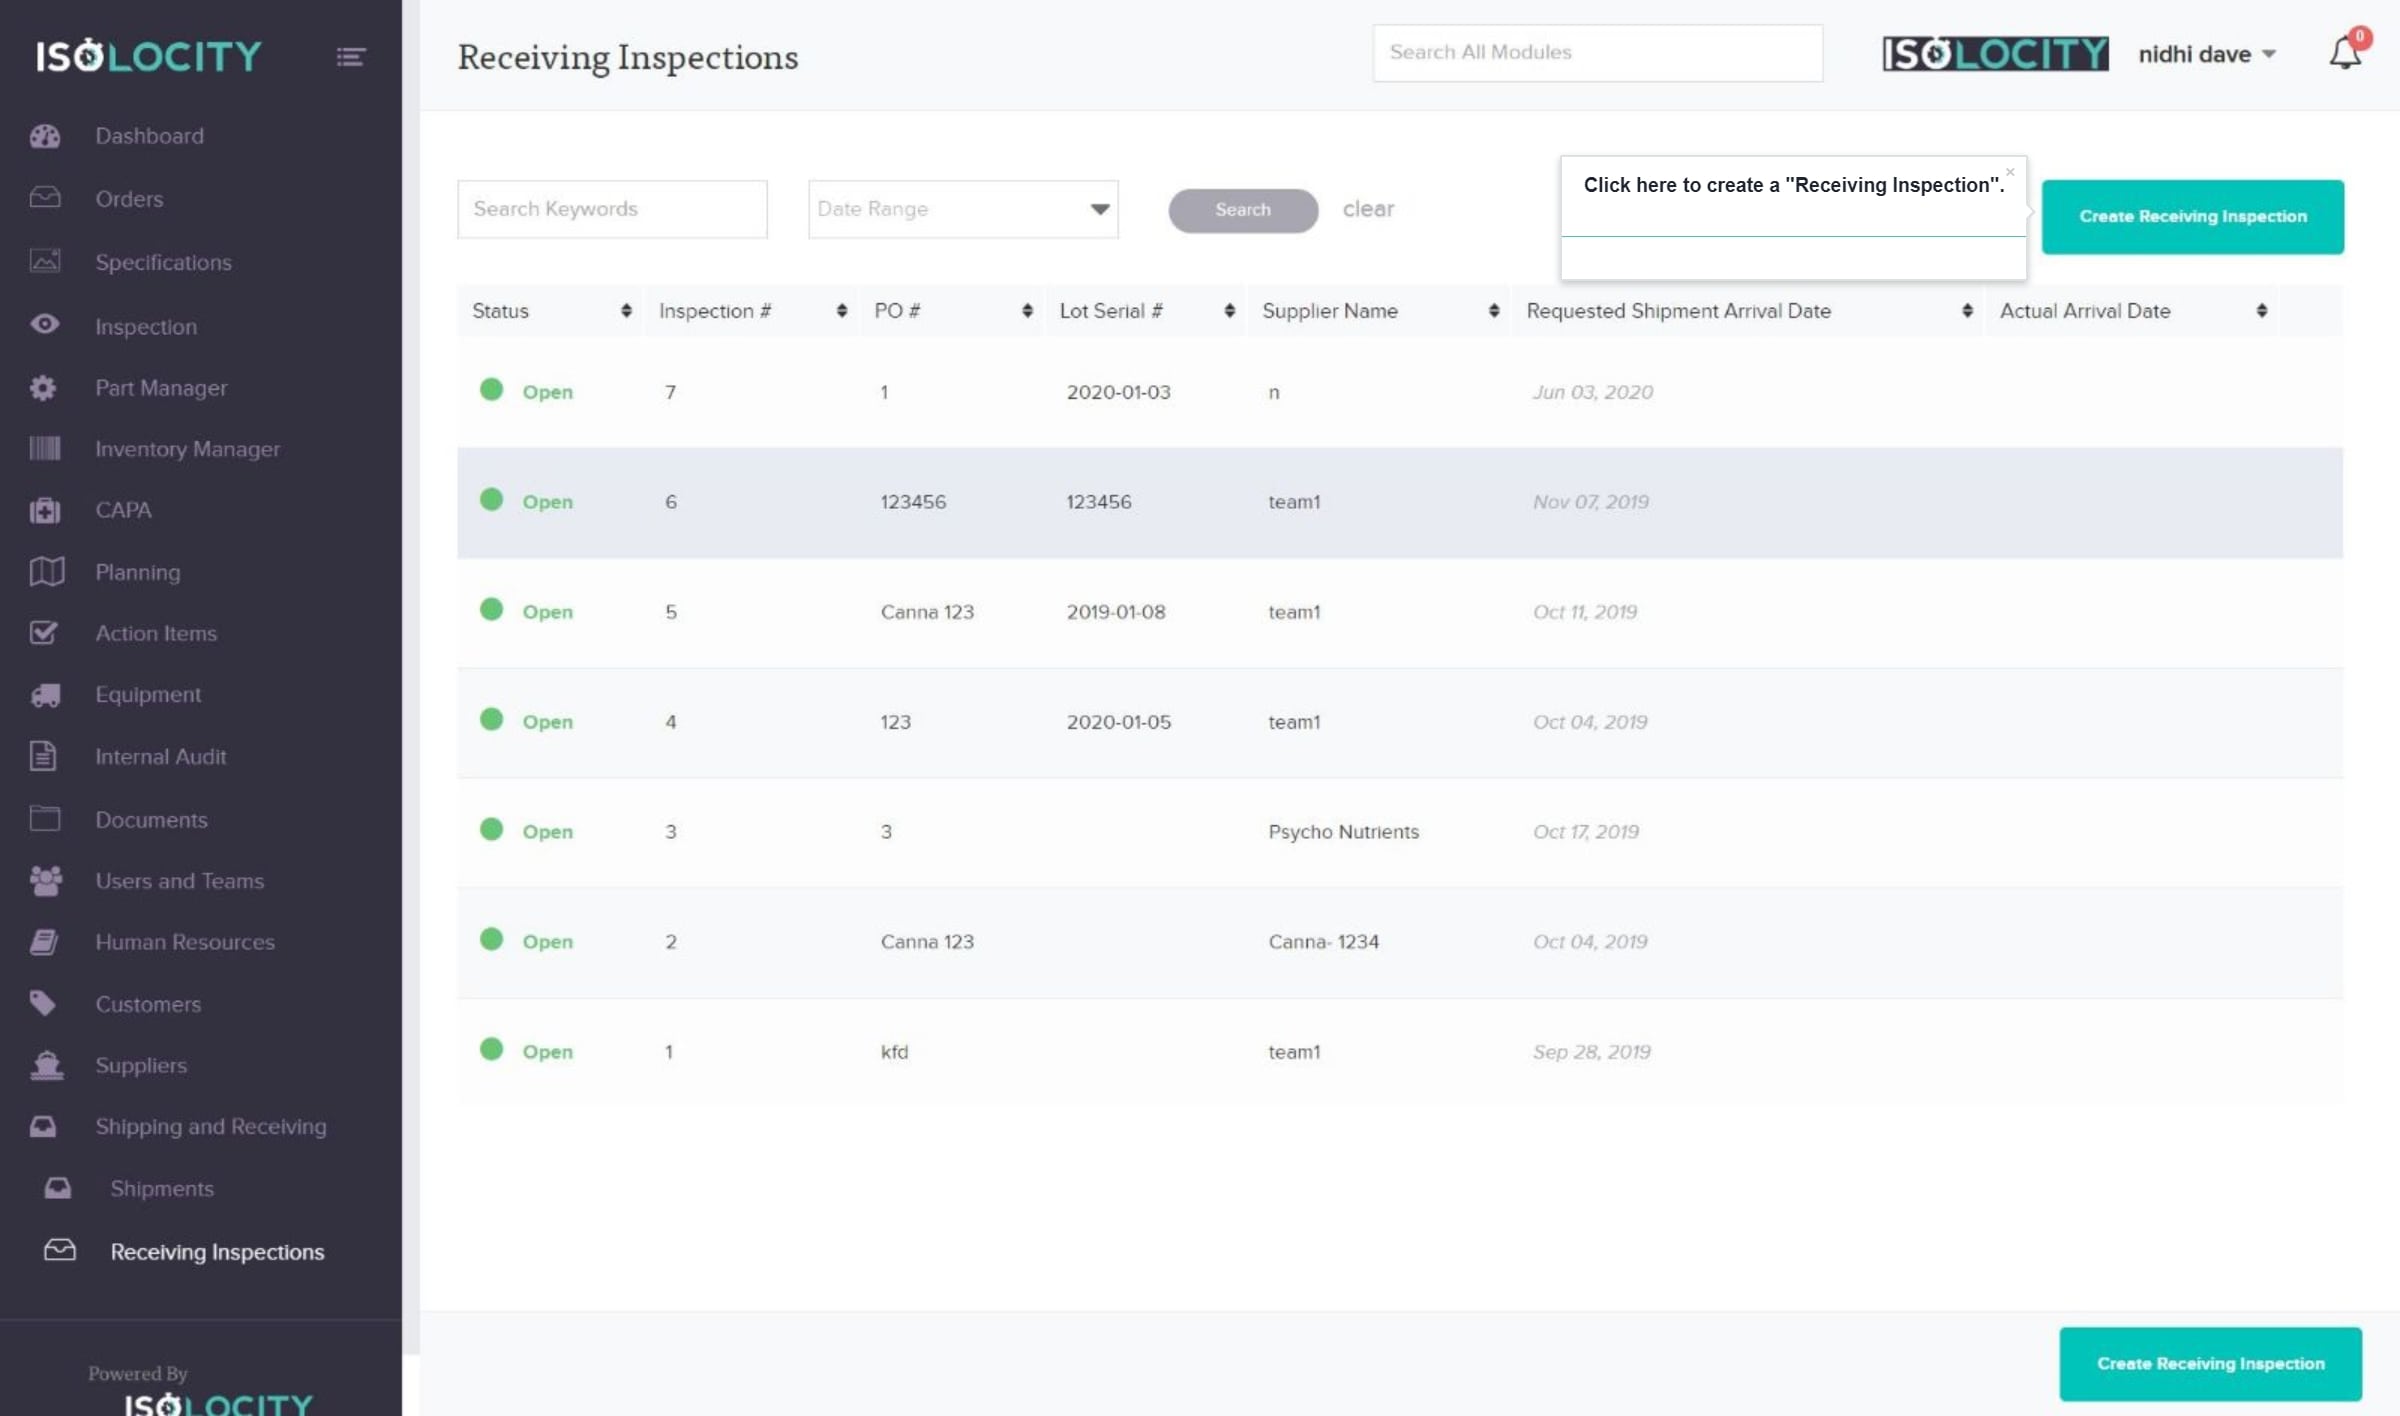
Click here to create a “Receiving Inspection”.
Step #4
Select the “Supplier” of your inventory.

Step #5
Enter your purchase order number.

Step #6
Enter the “Lot Serial #”.

Step #7
Enter the “Requested Shipment Arrival Date”.

Step #8
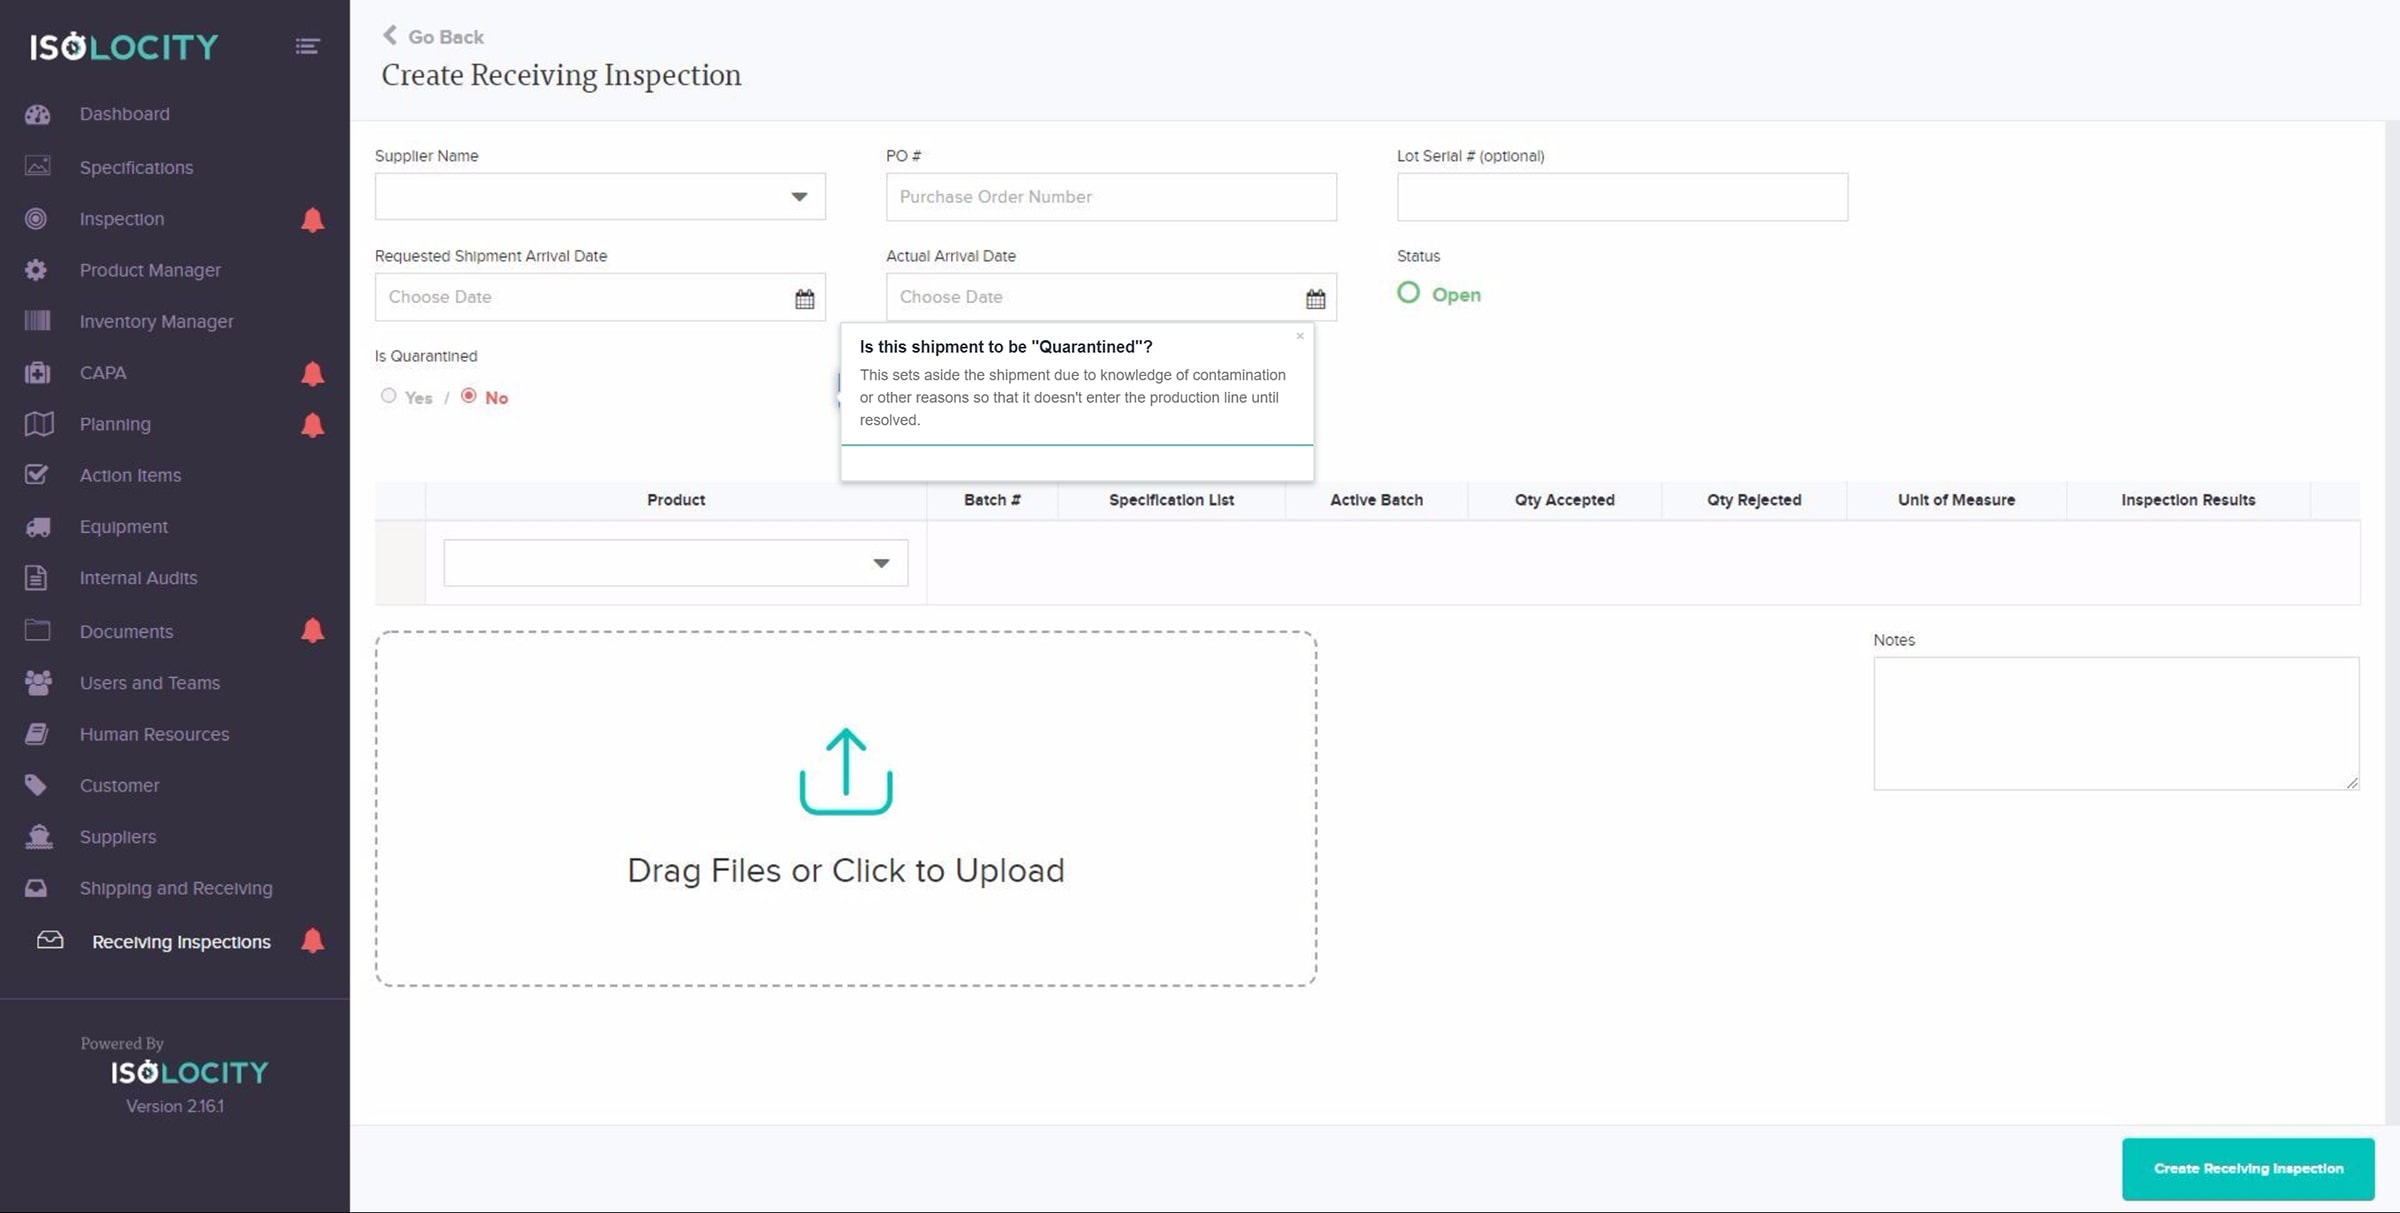
Is this shipment to be “Quarantined”?
Step #9
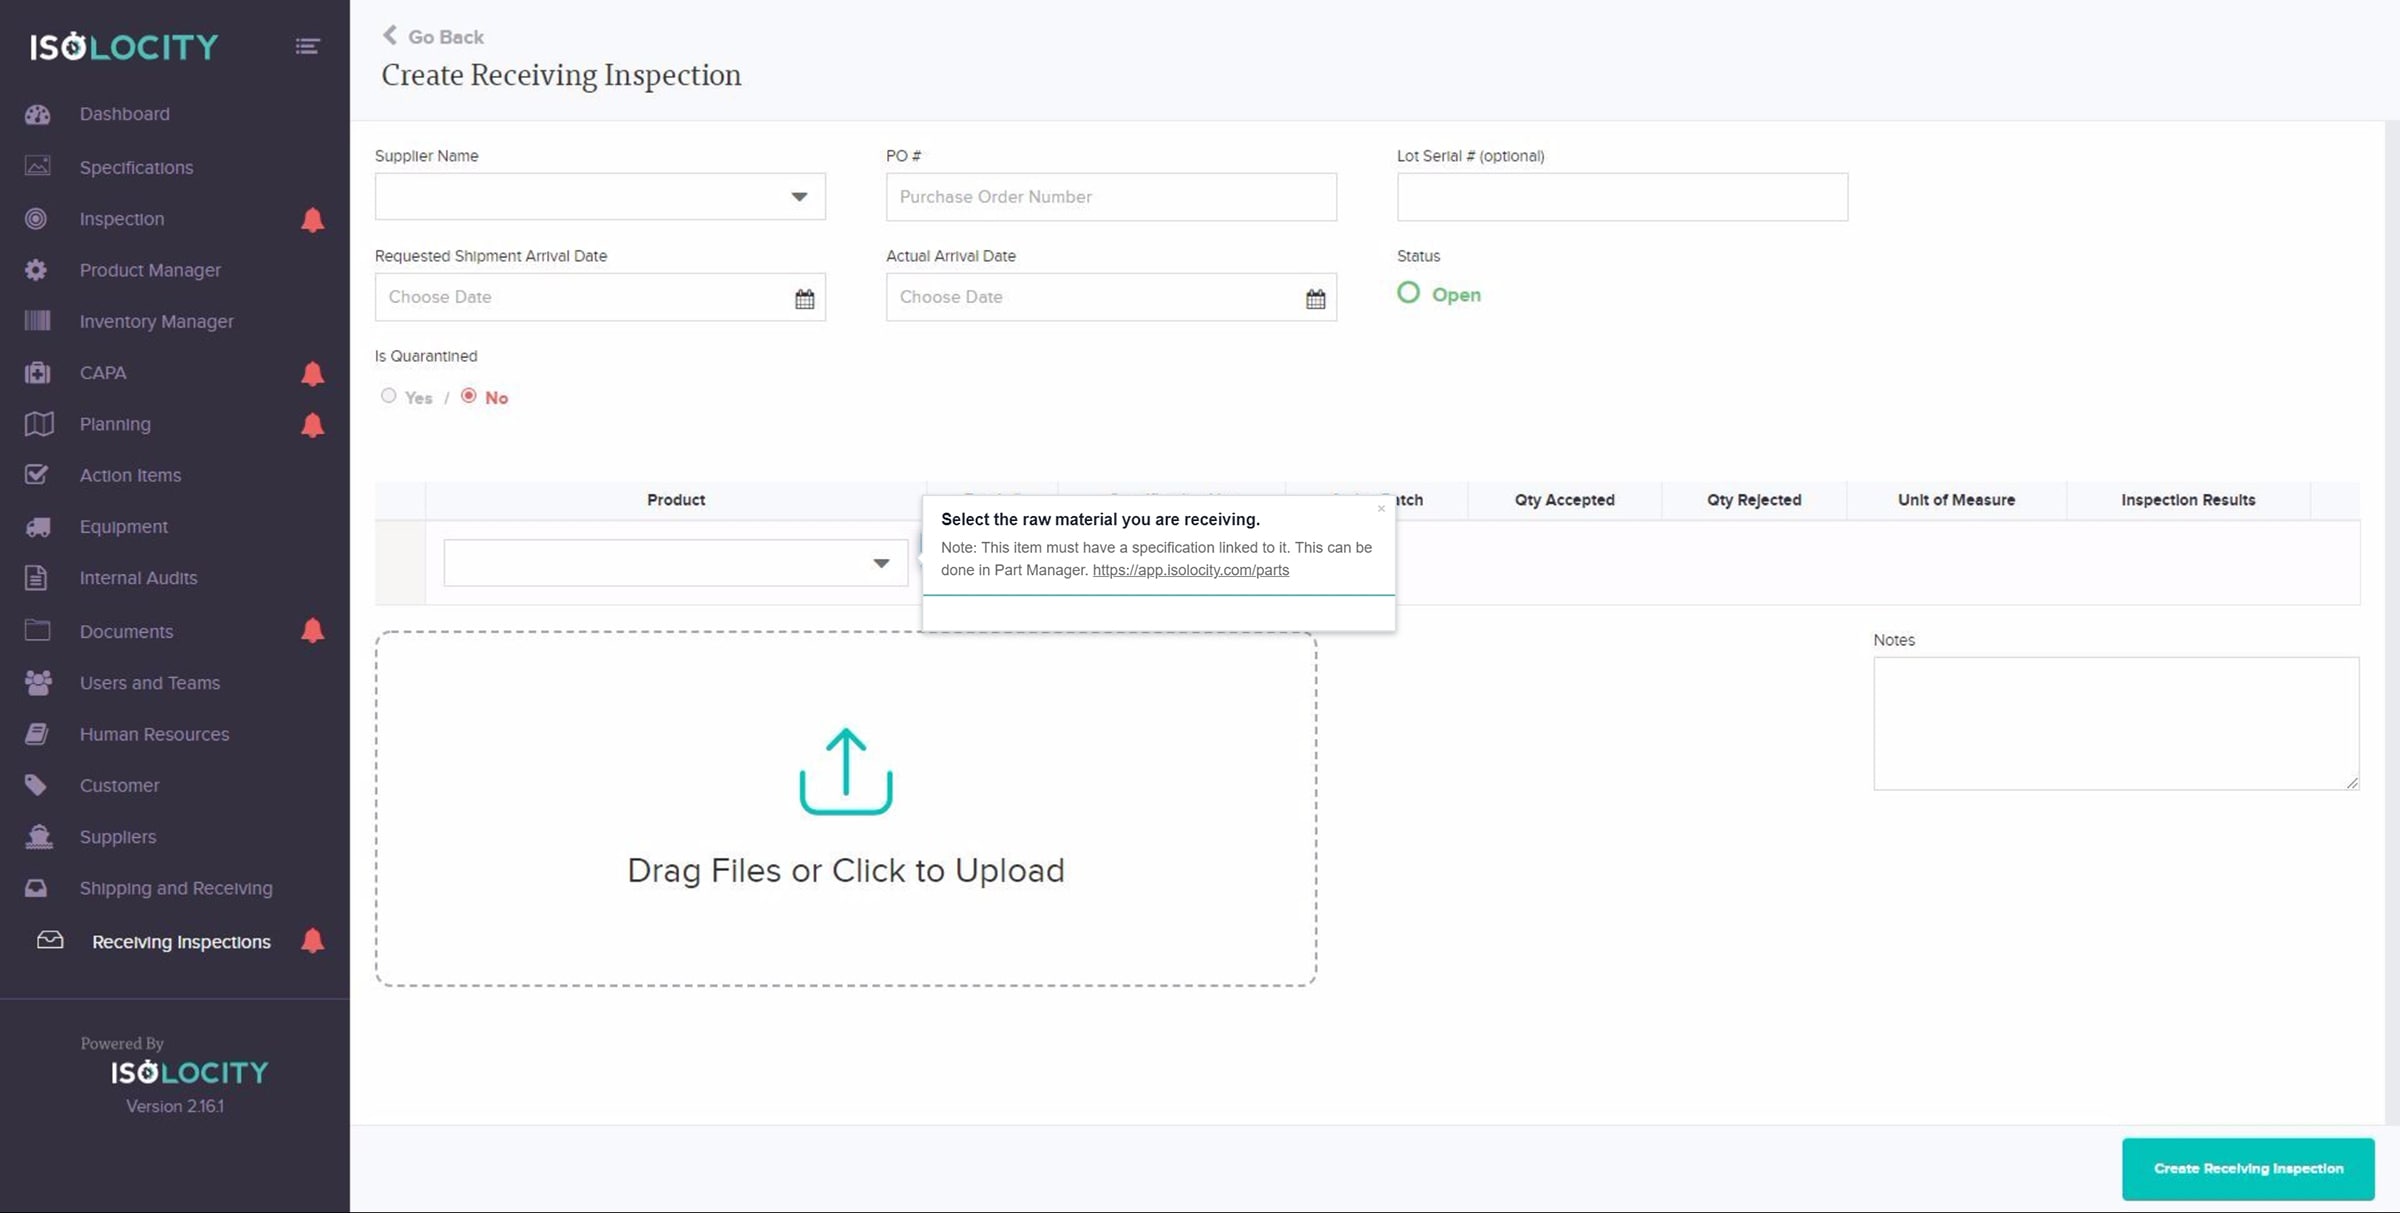
Select the raw material you are receiving.
Step #10
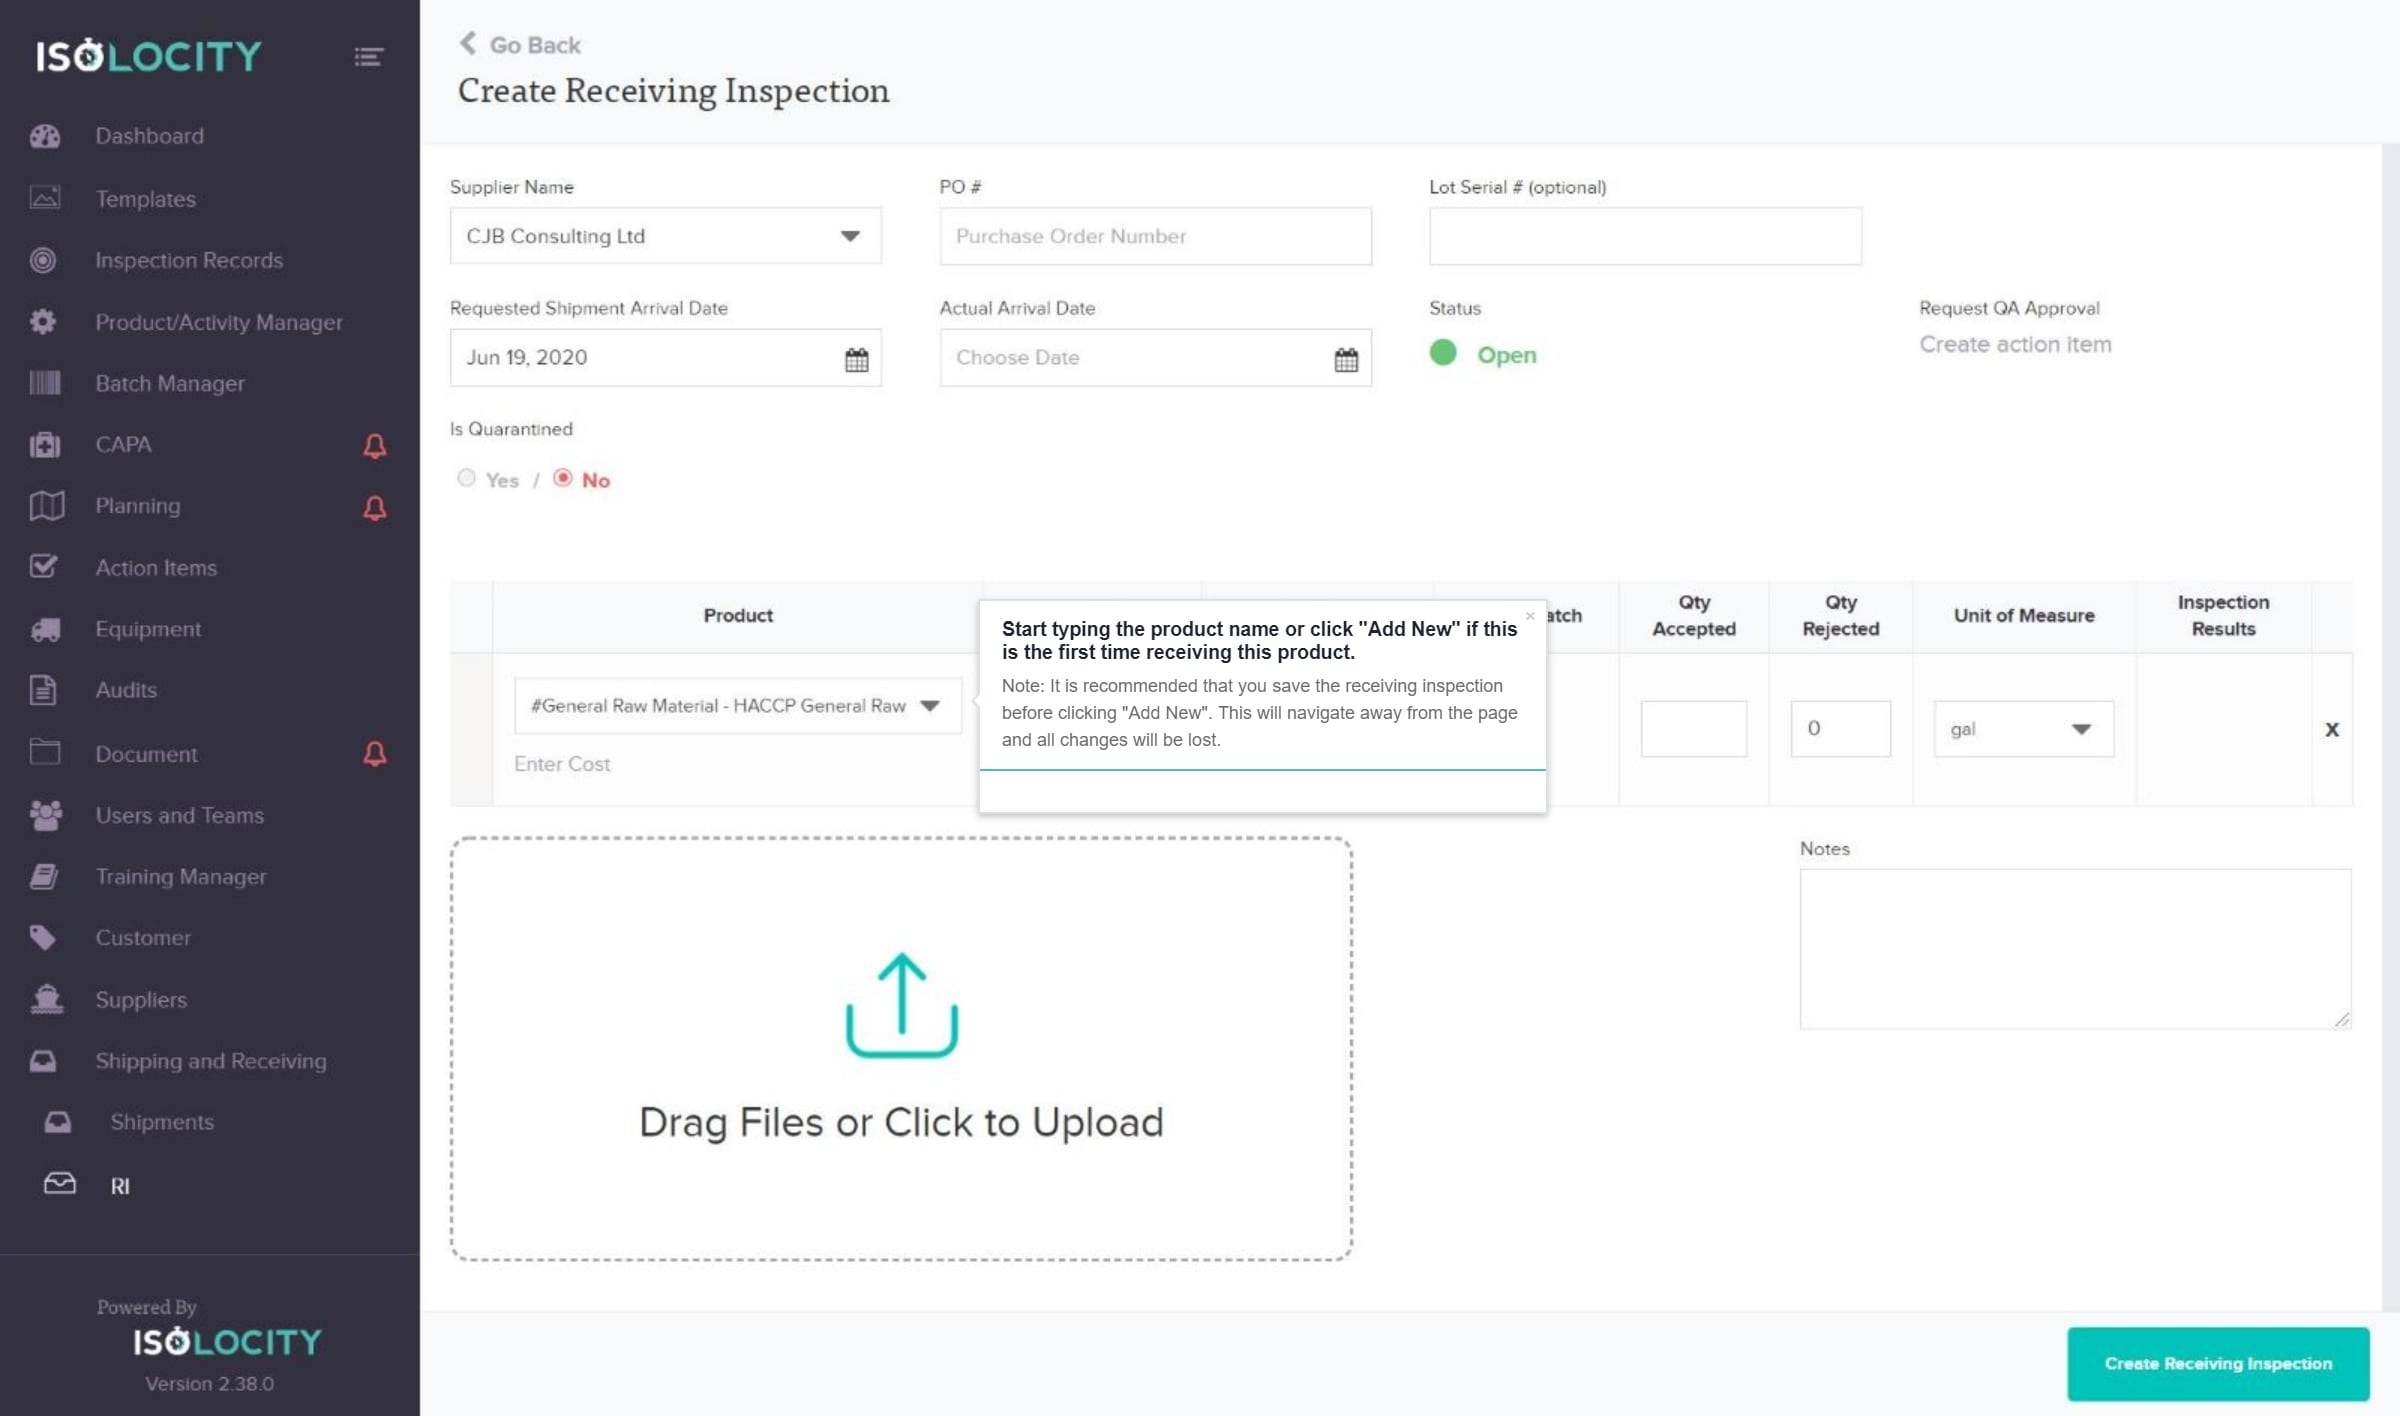
Start typing the product name or click “Add New” if this is the first time receiving this product.
Step #11
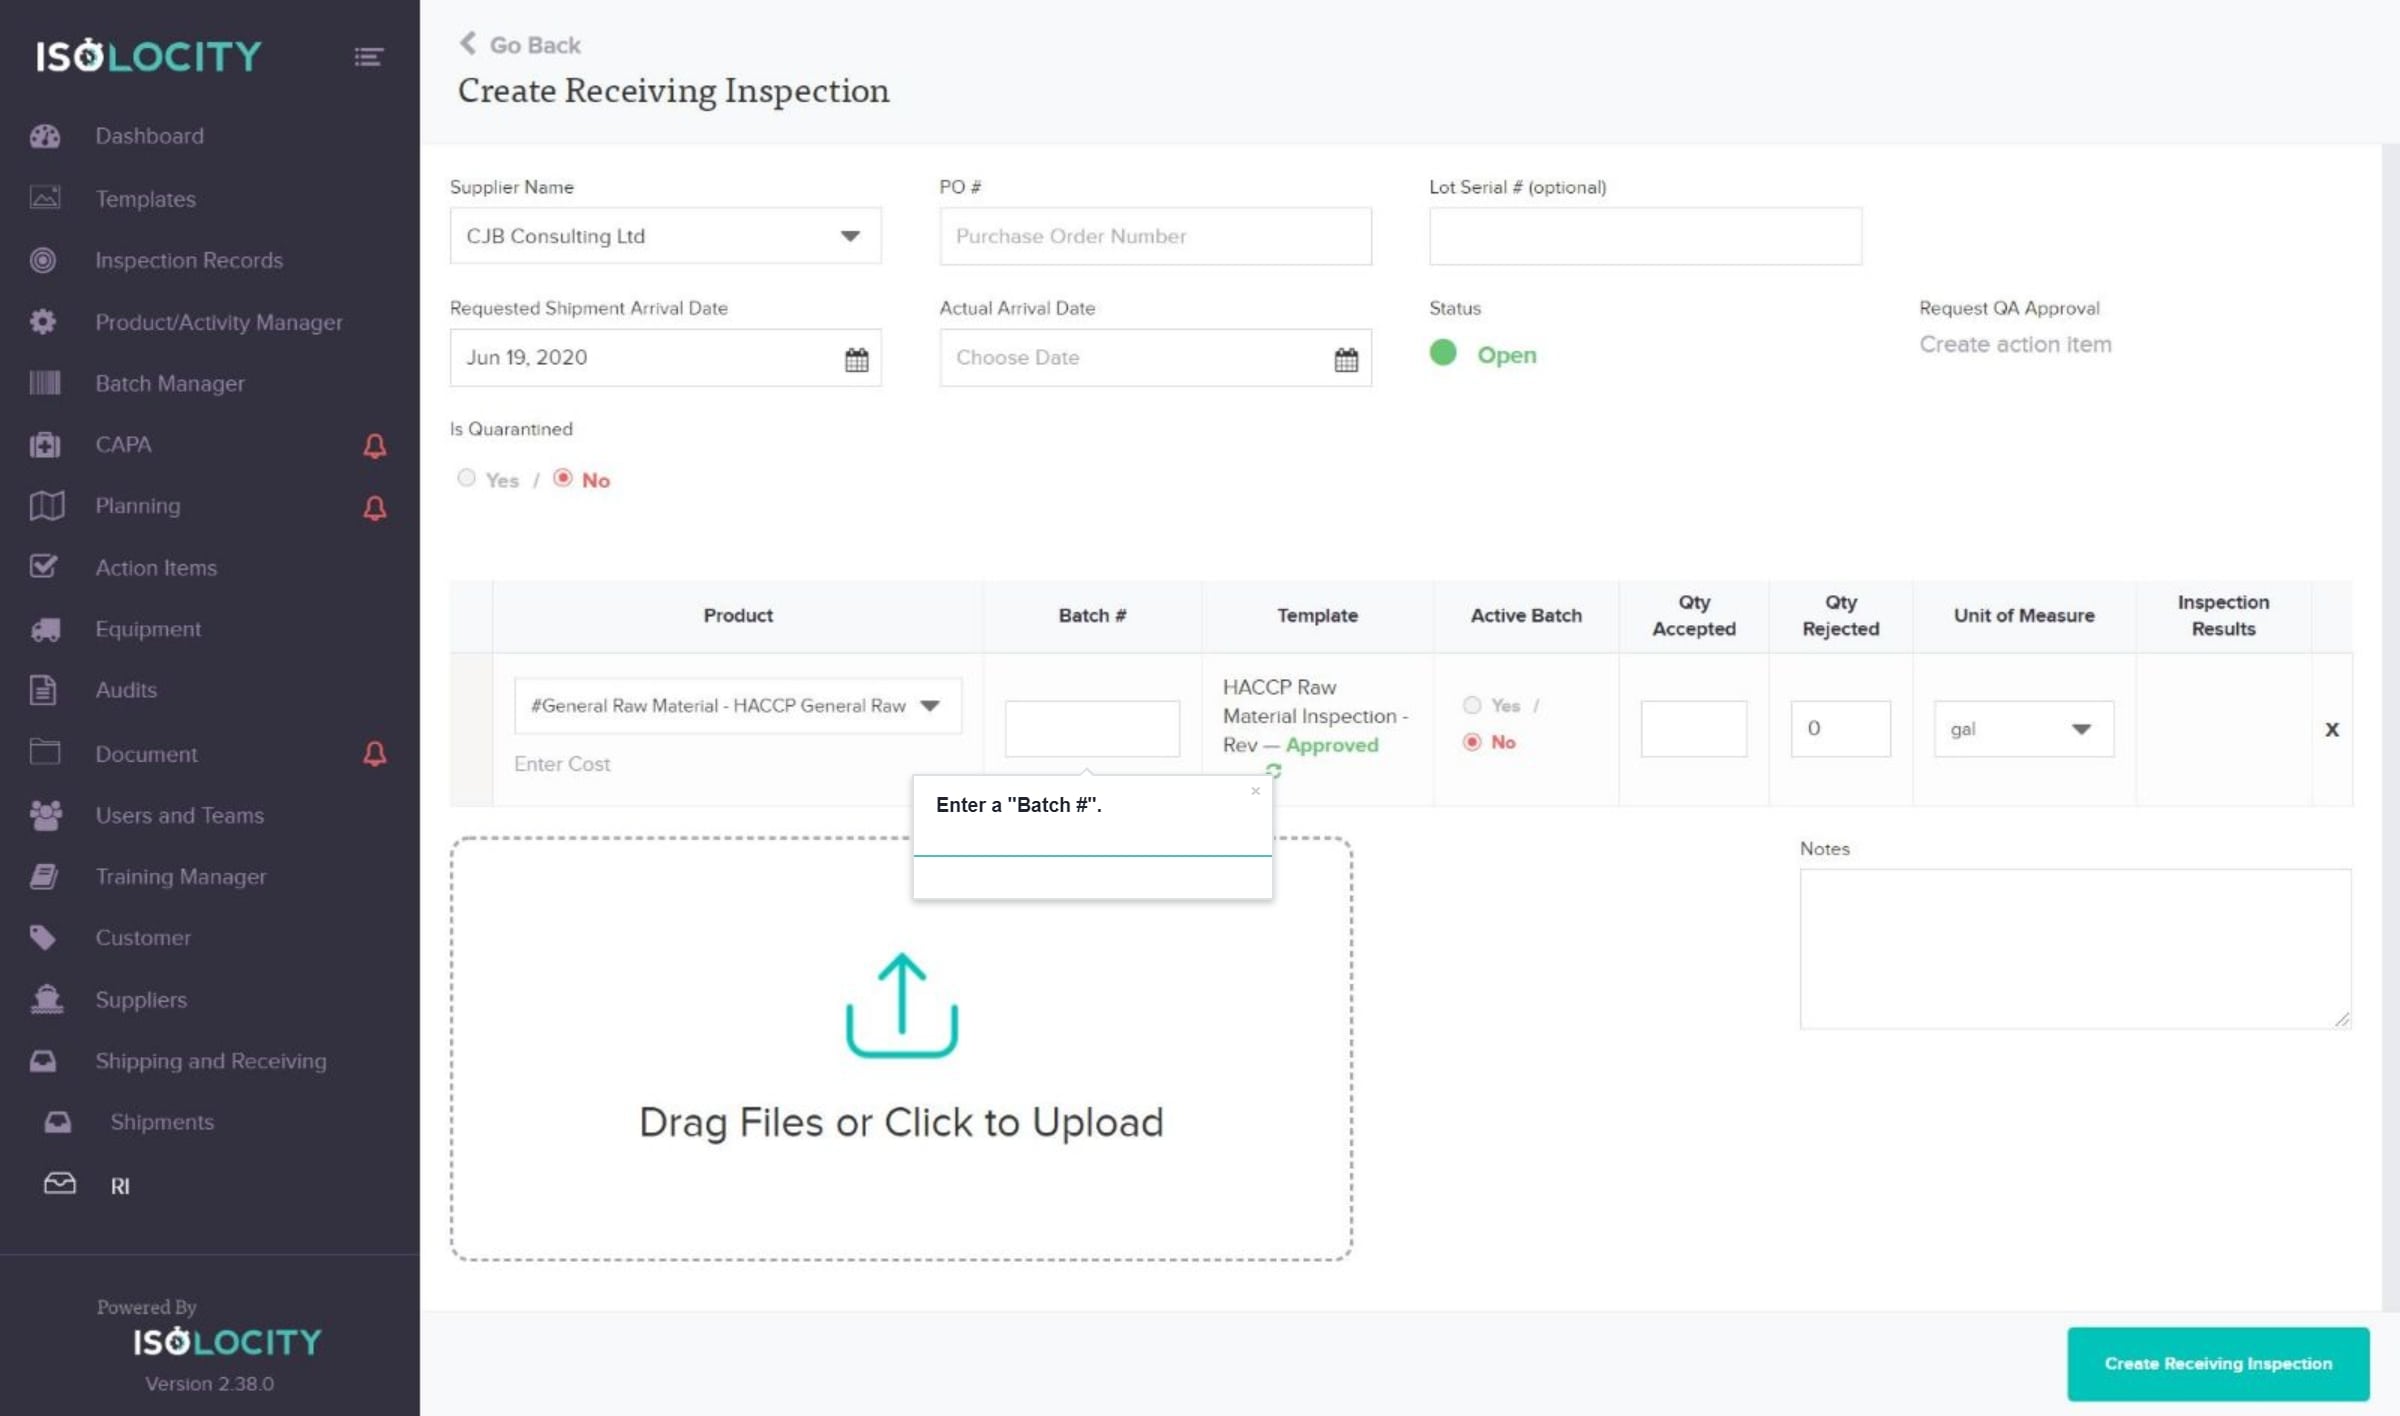
Enter a “Batch #”.
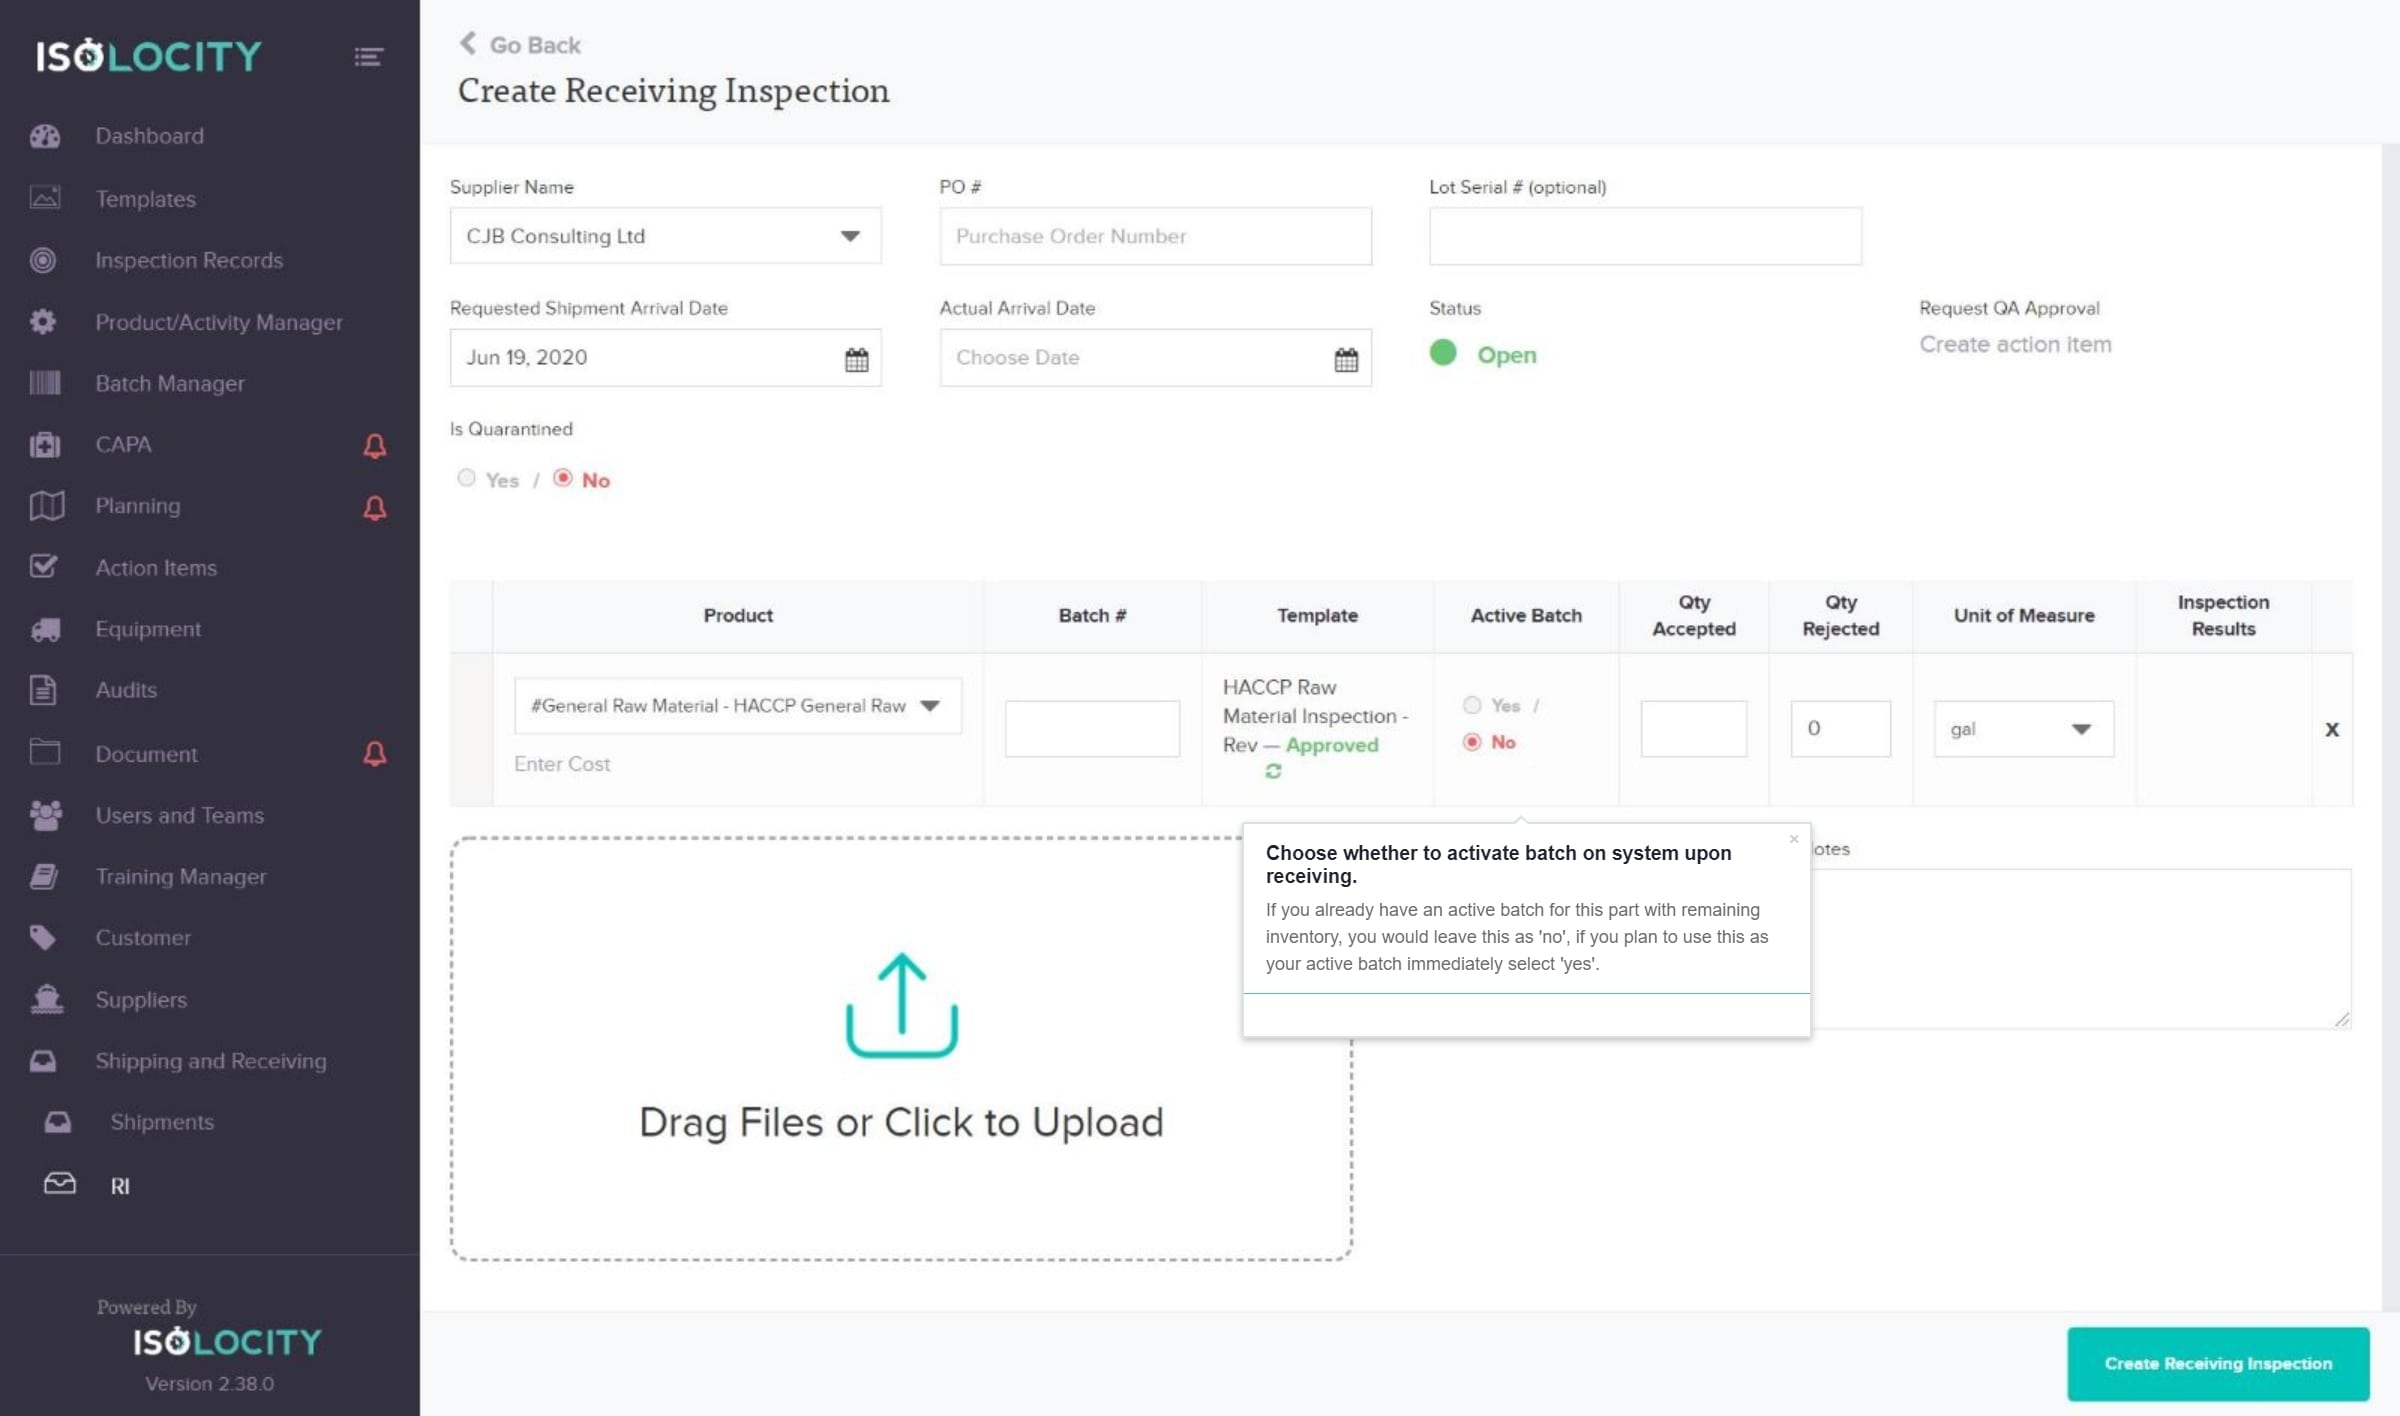
Step #12
Choose whether to activate batch on system upon receiving.
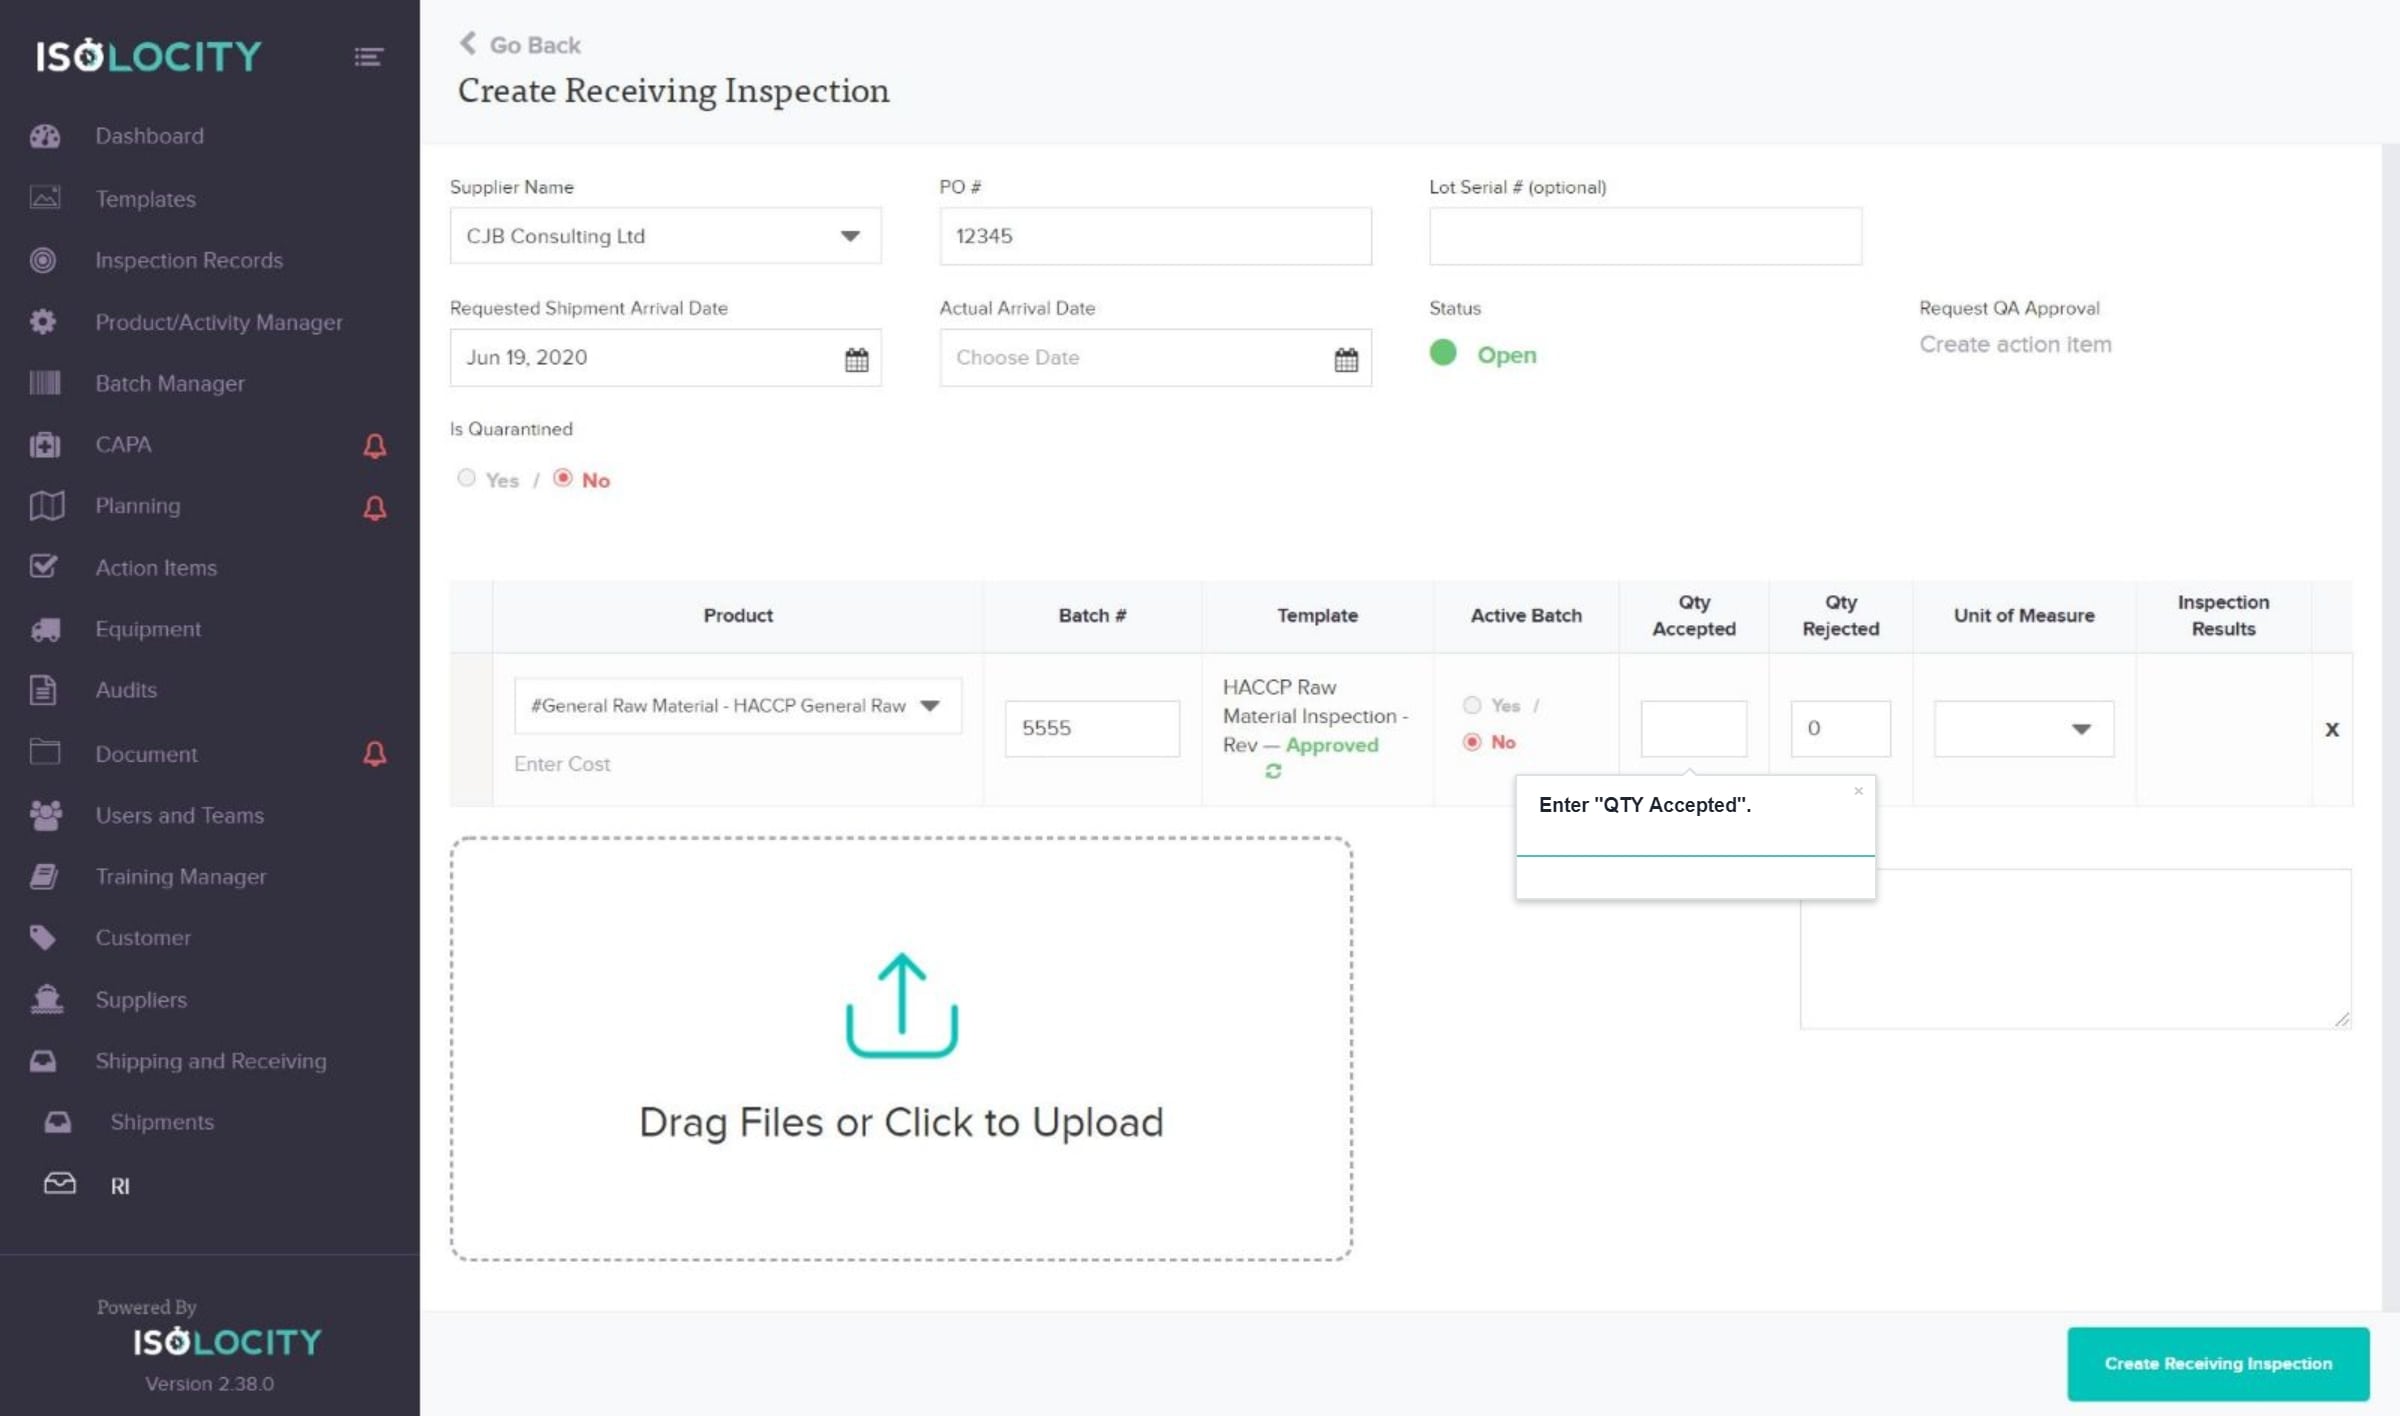
Step #13
Enter “QTY Accepted”.
Step #14
Enter “QTY Rejected” (Optional).

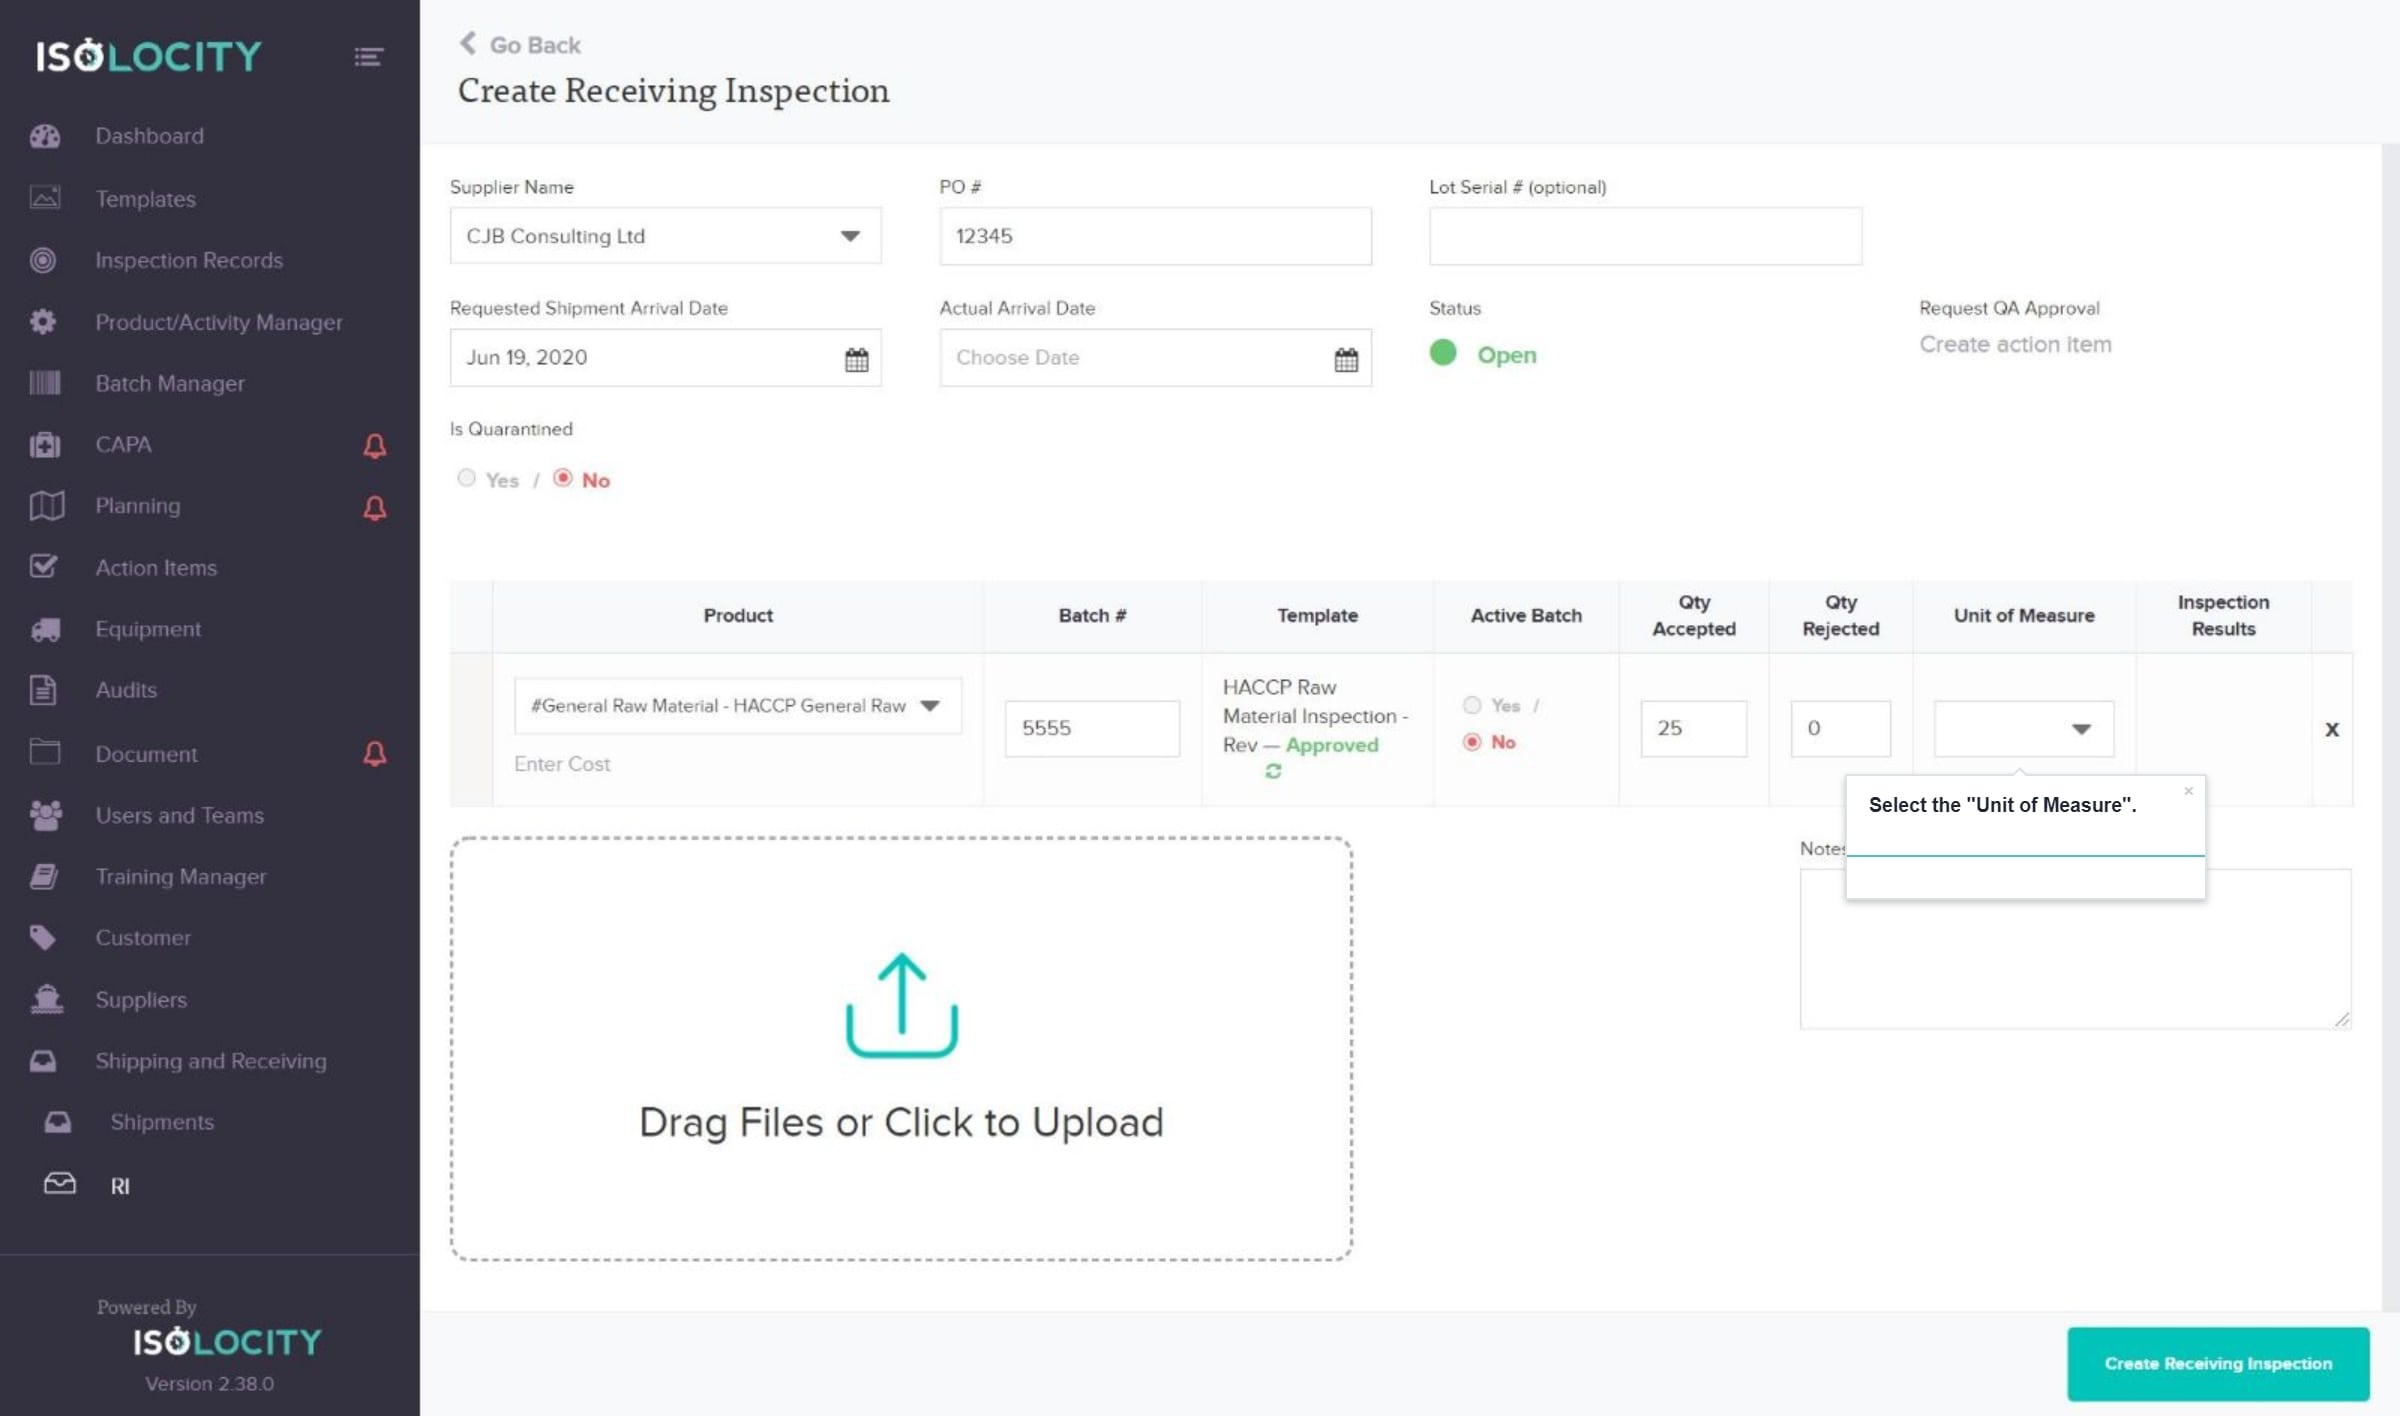
Step #15
Select the “Unit of Measure”.
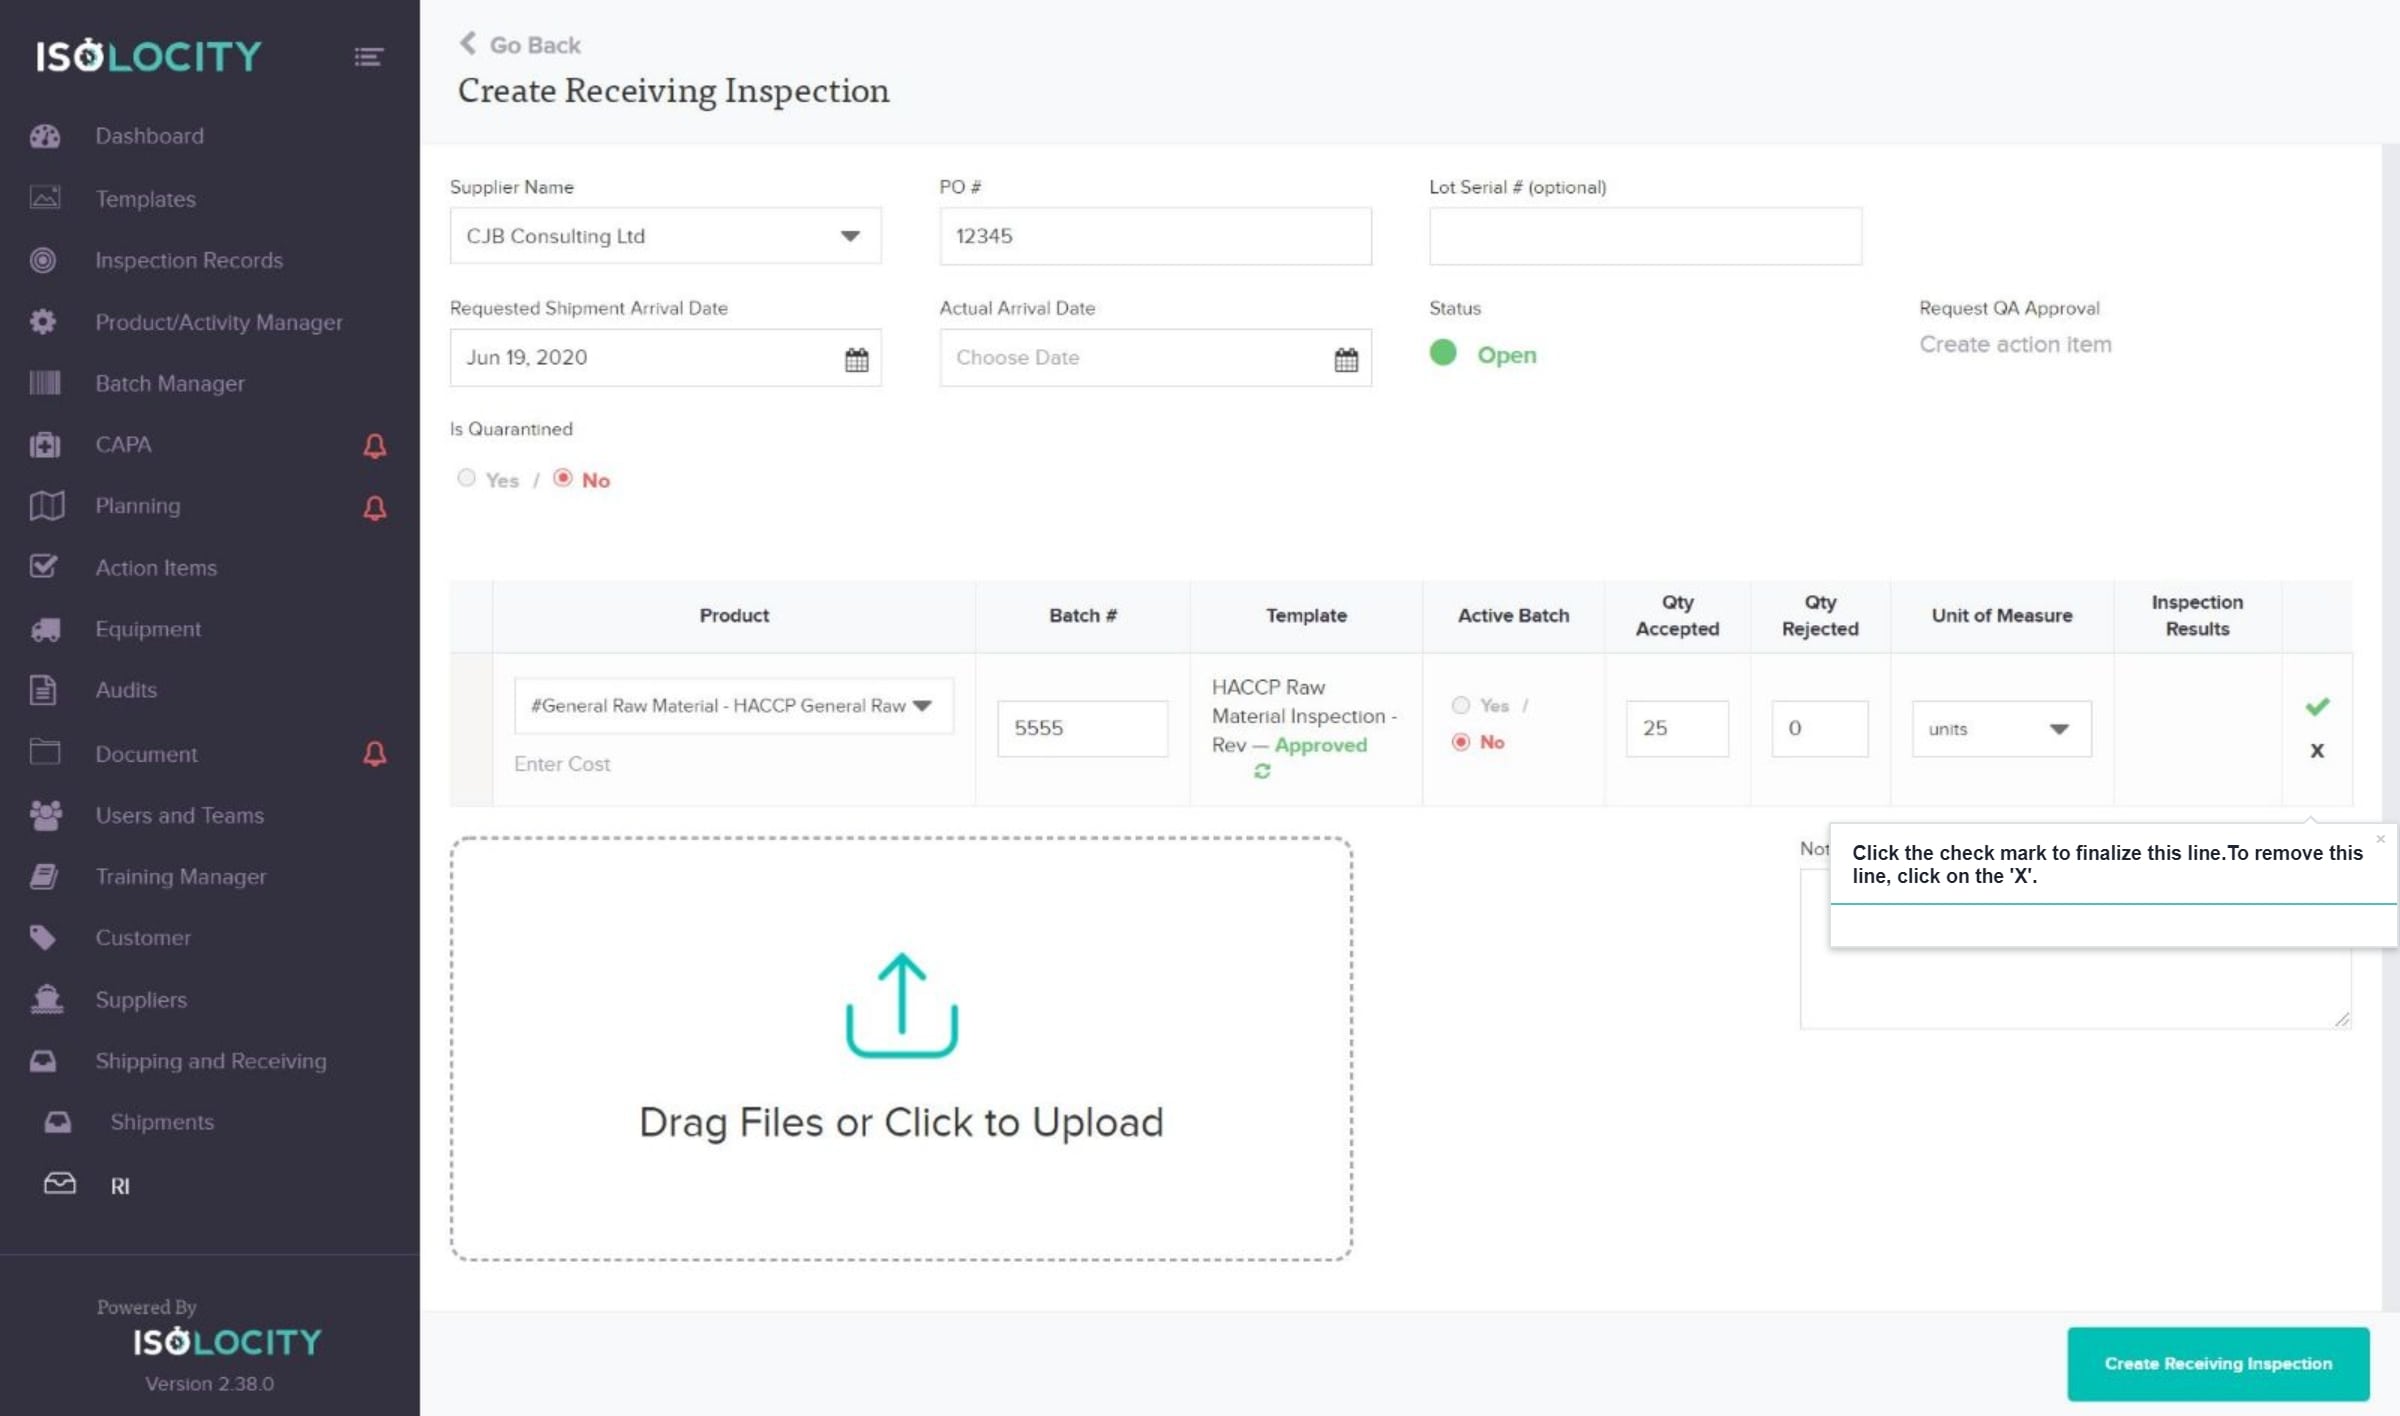
Step #16
Click the check mark to finalize this line.To remove this line, click on the ‘X’.
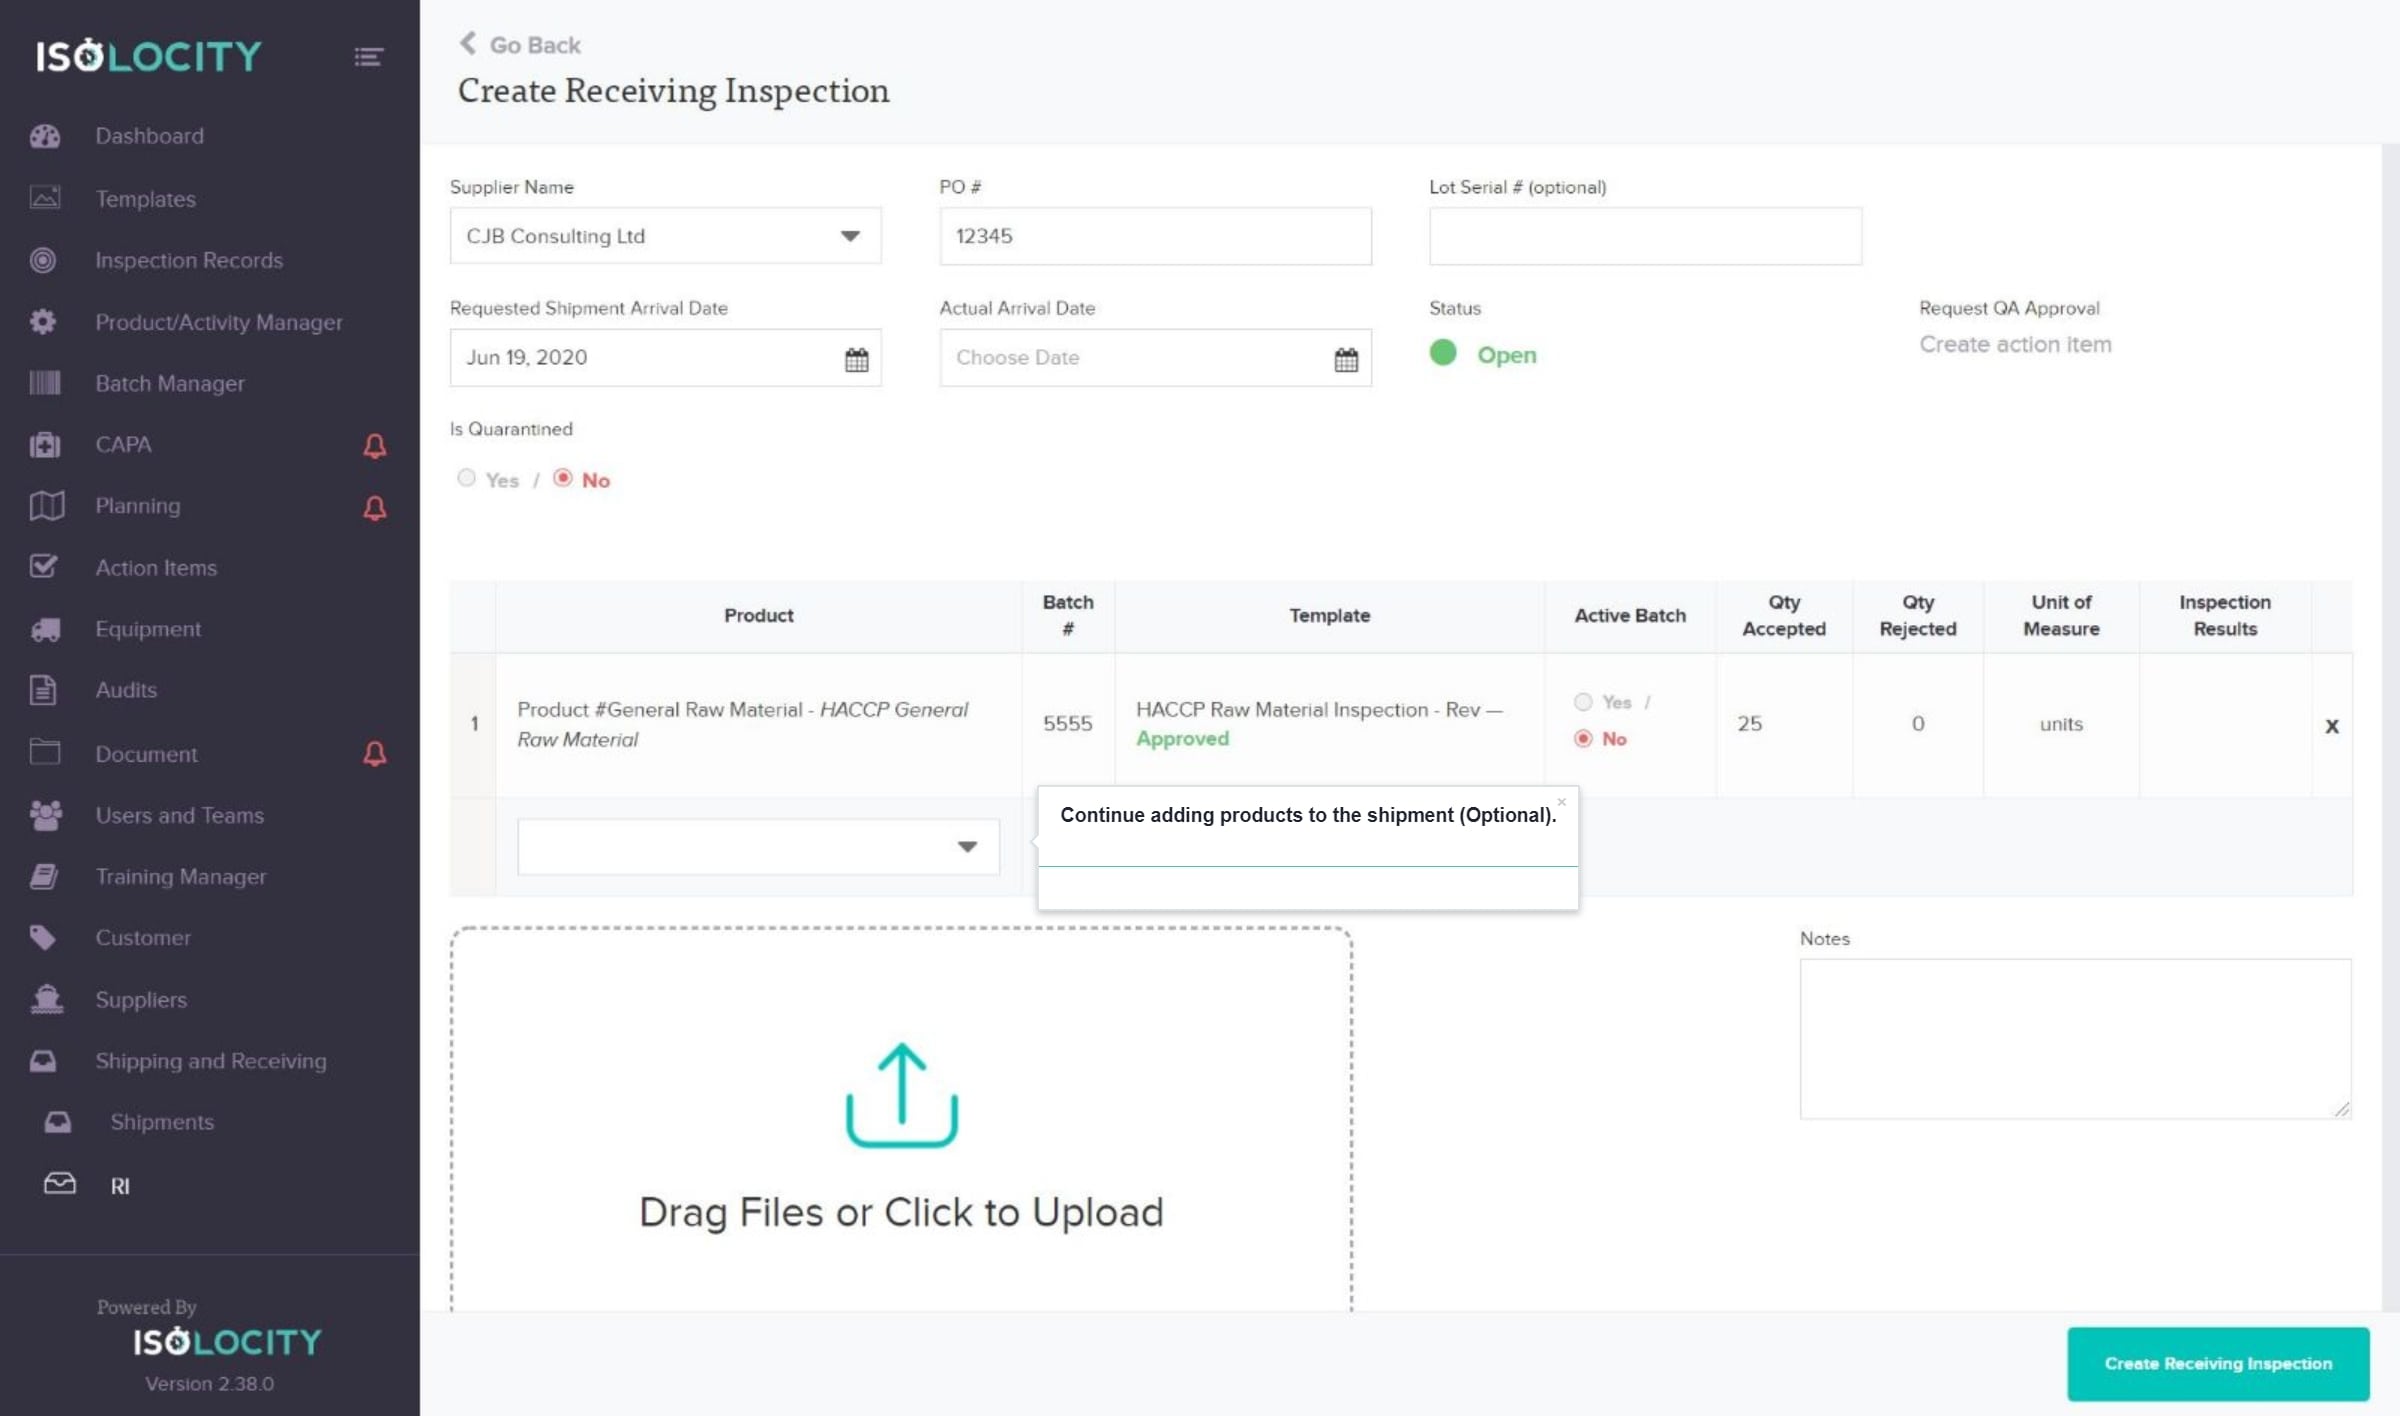
Step #17
Continue adding products to the shipment (Optional).
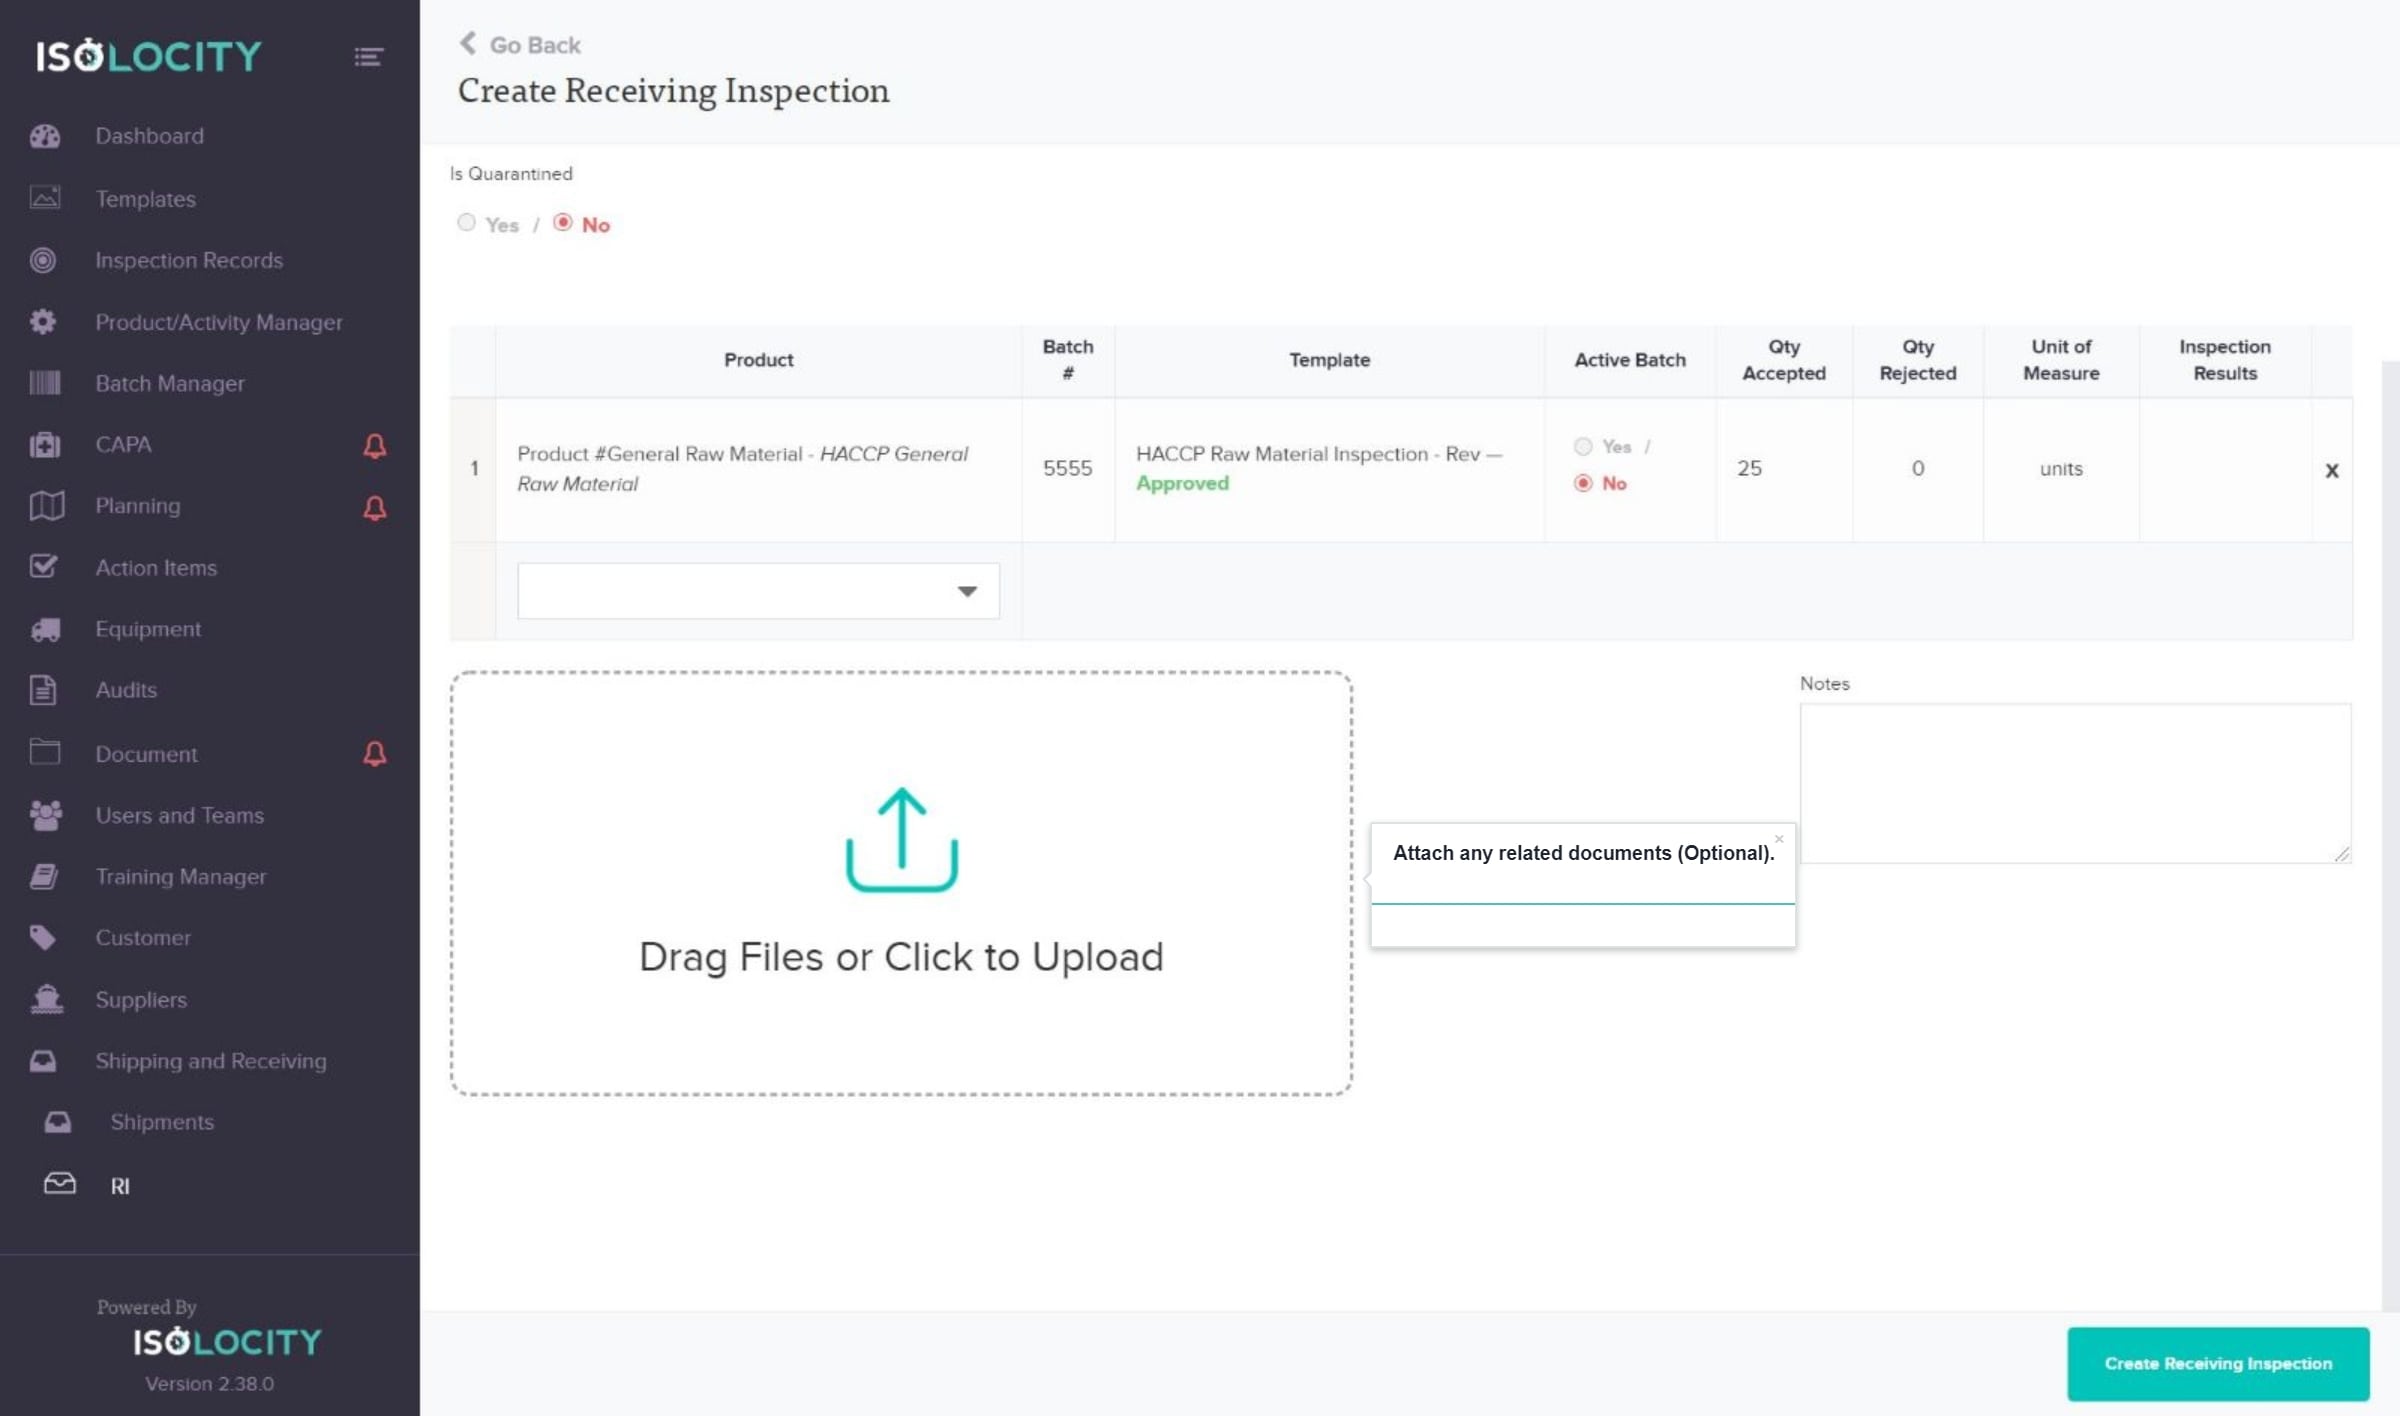
Step #18
Attach any related documents (Optional).
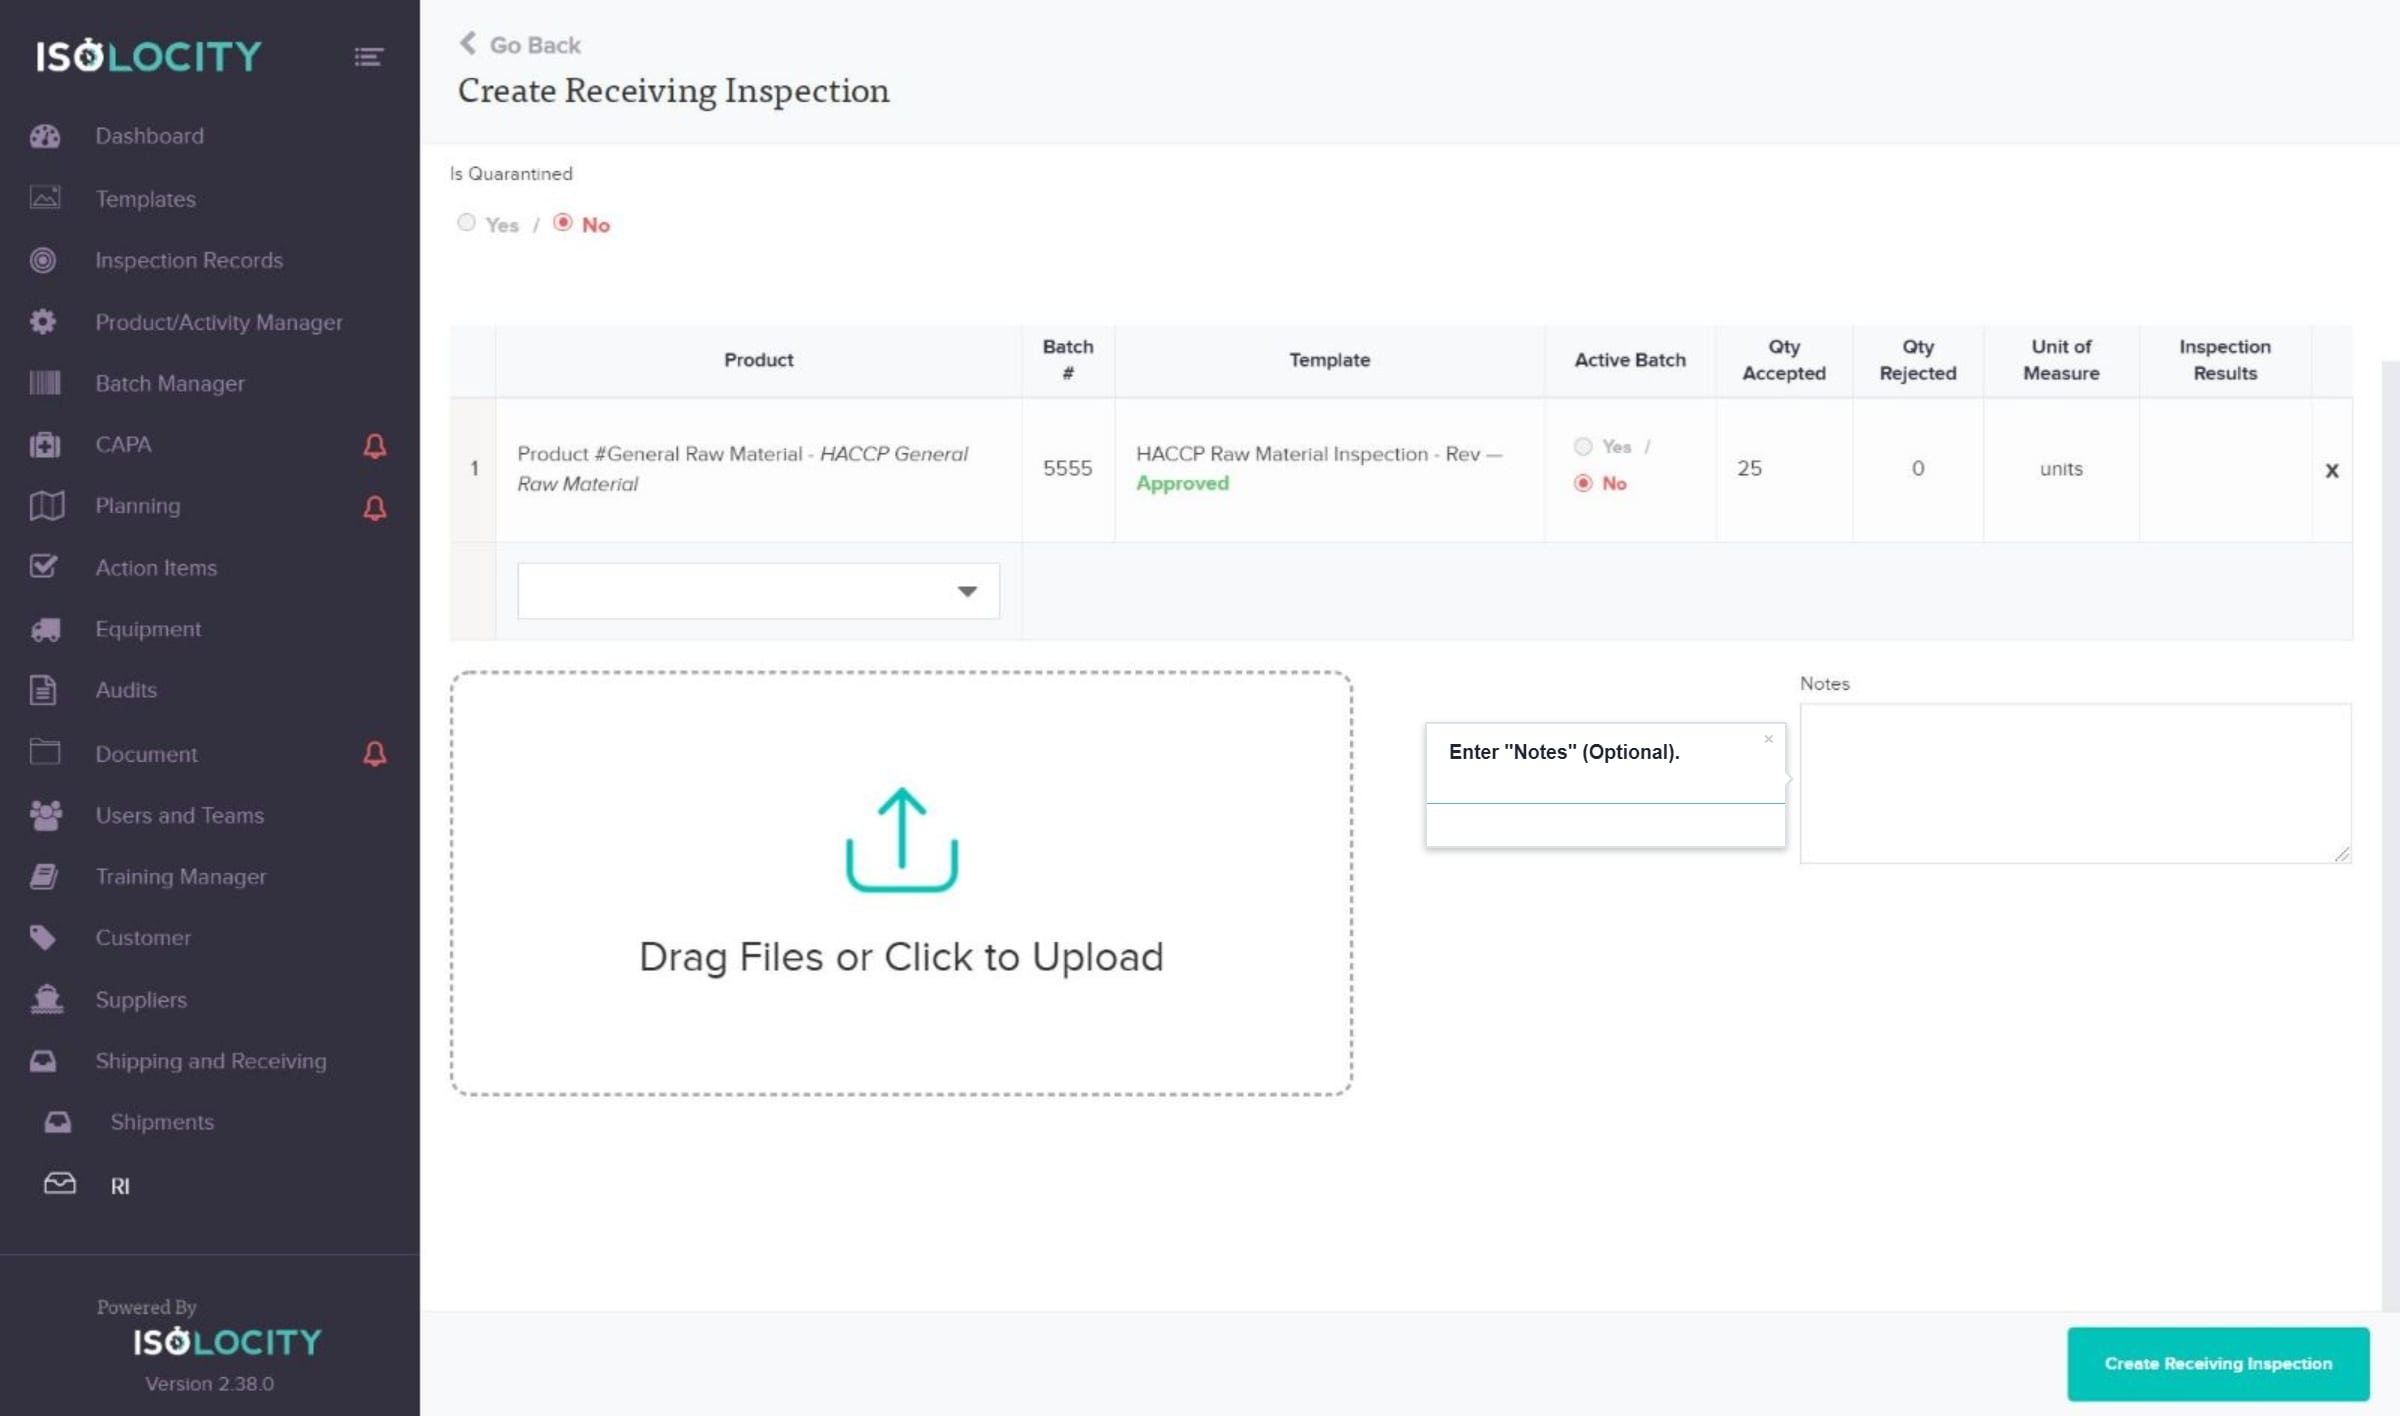
Step #19
Enter “Notes” (Optional).
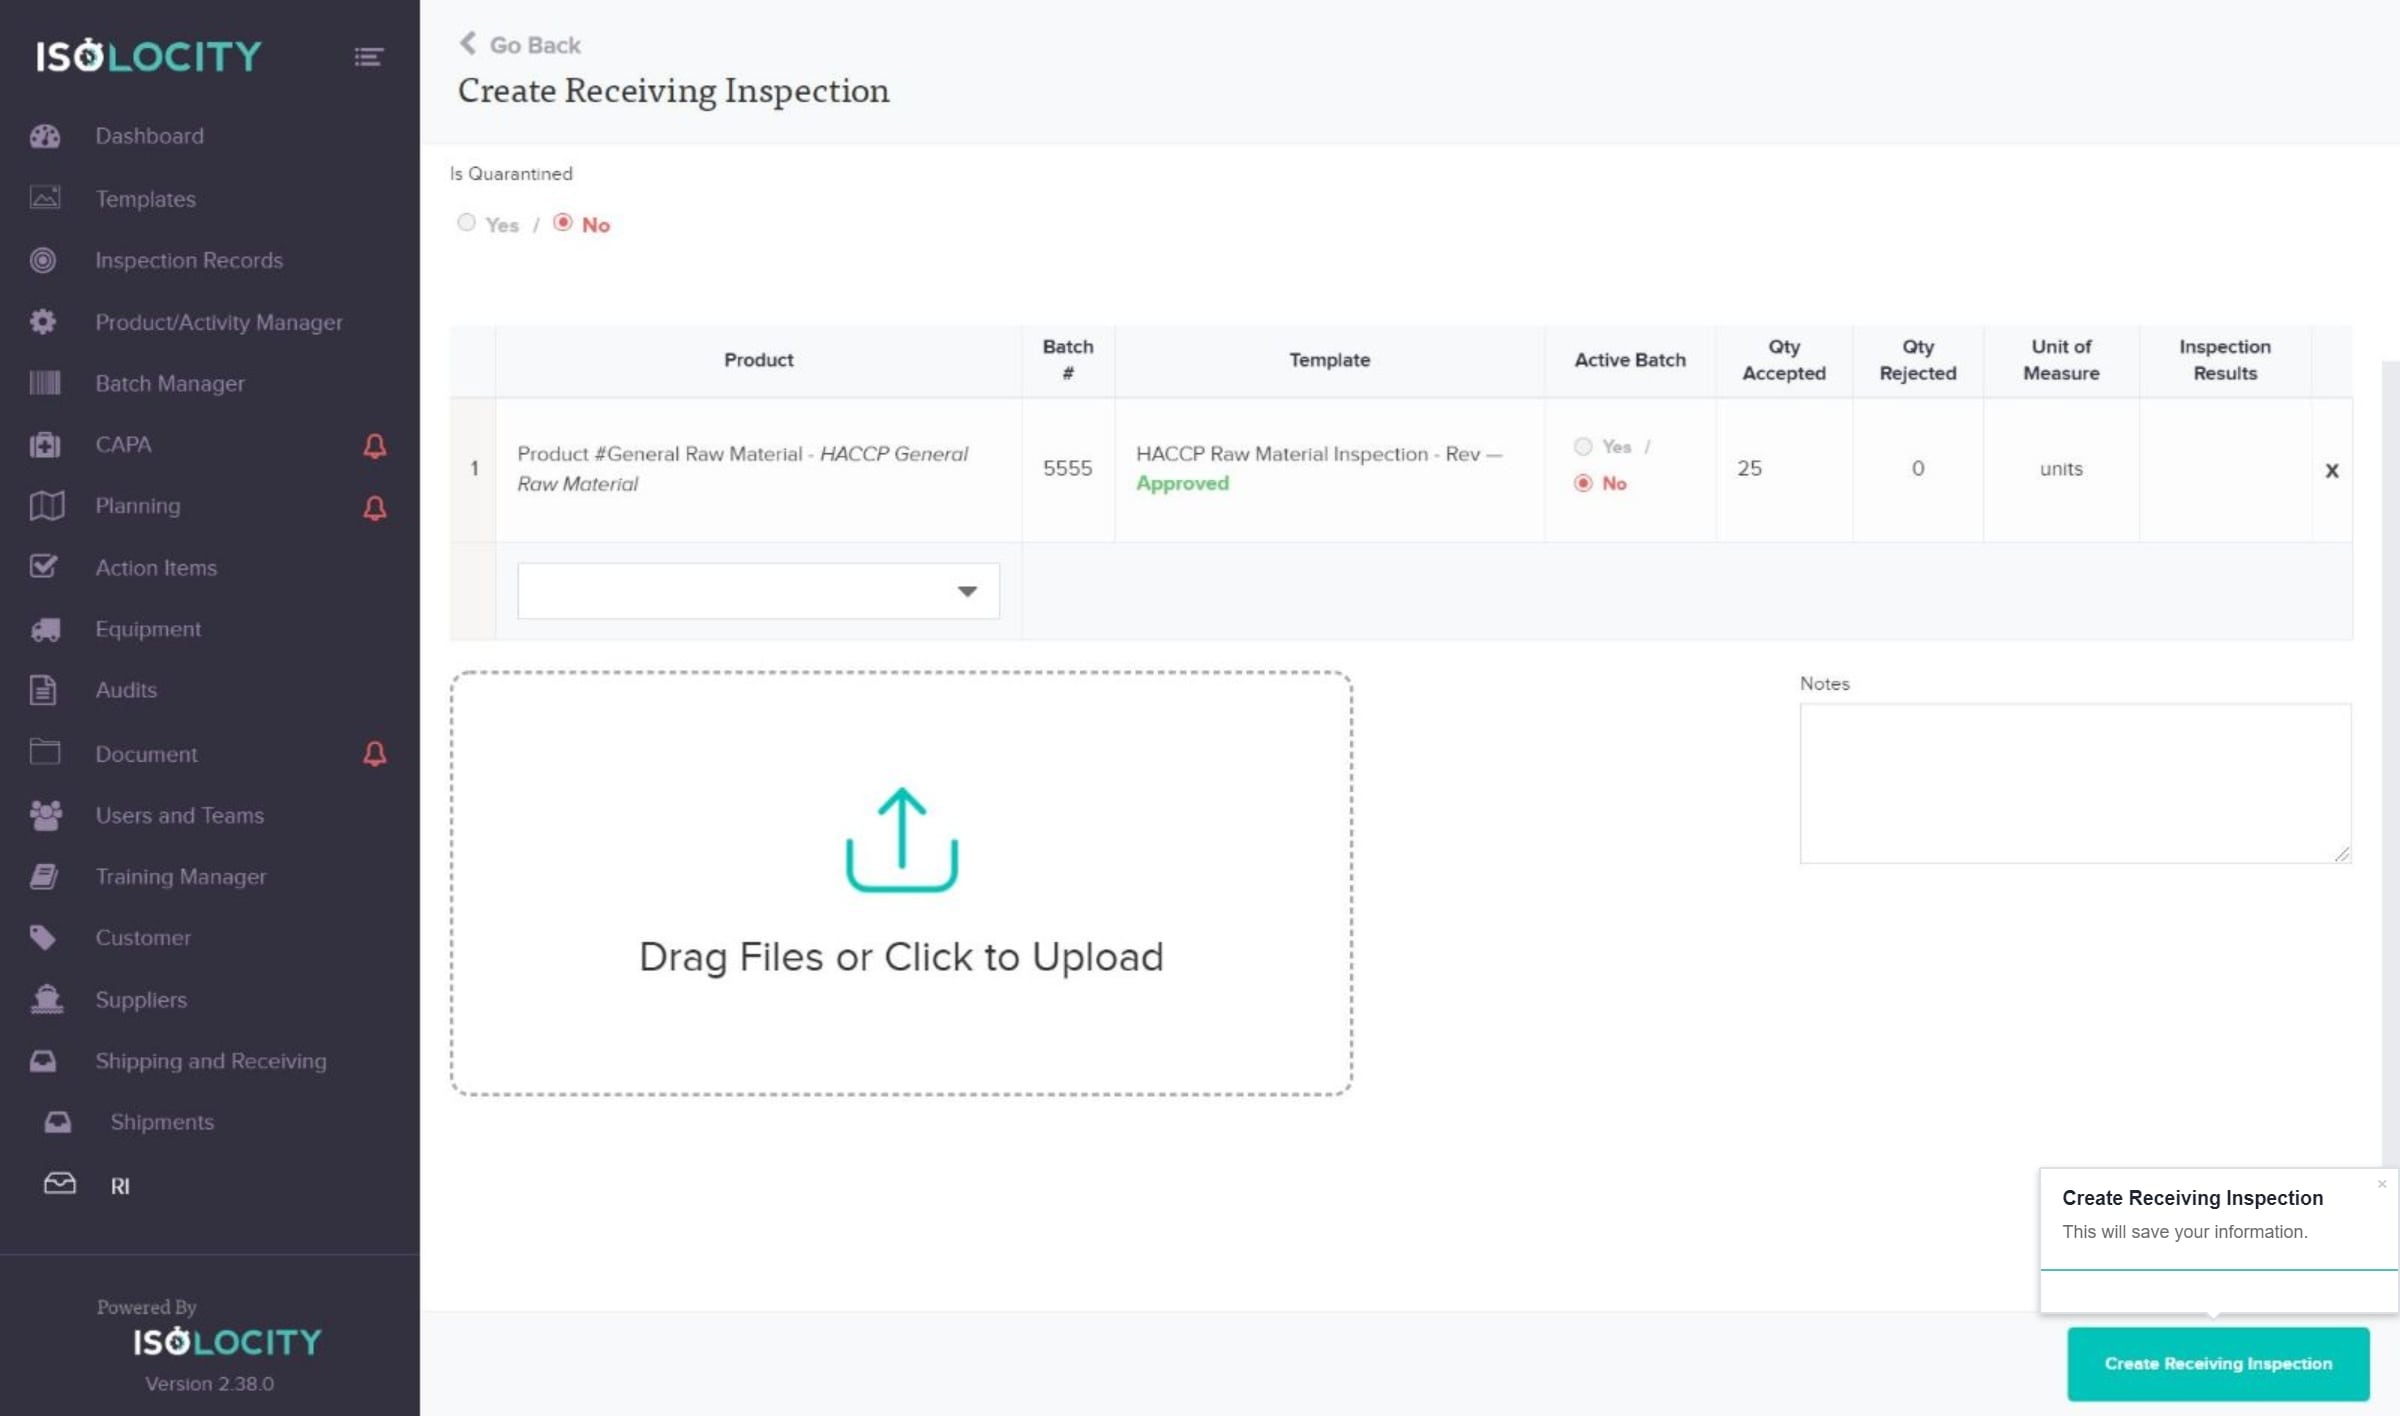
Step #20
Create Receiving Inspection
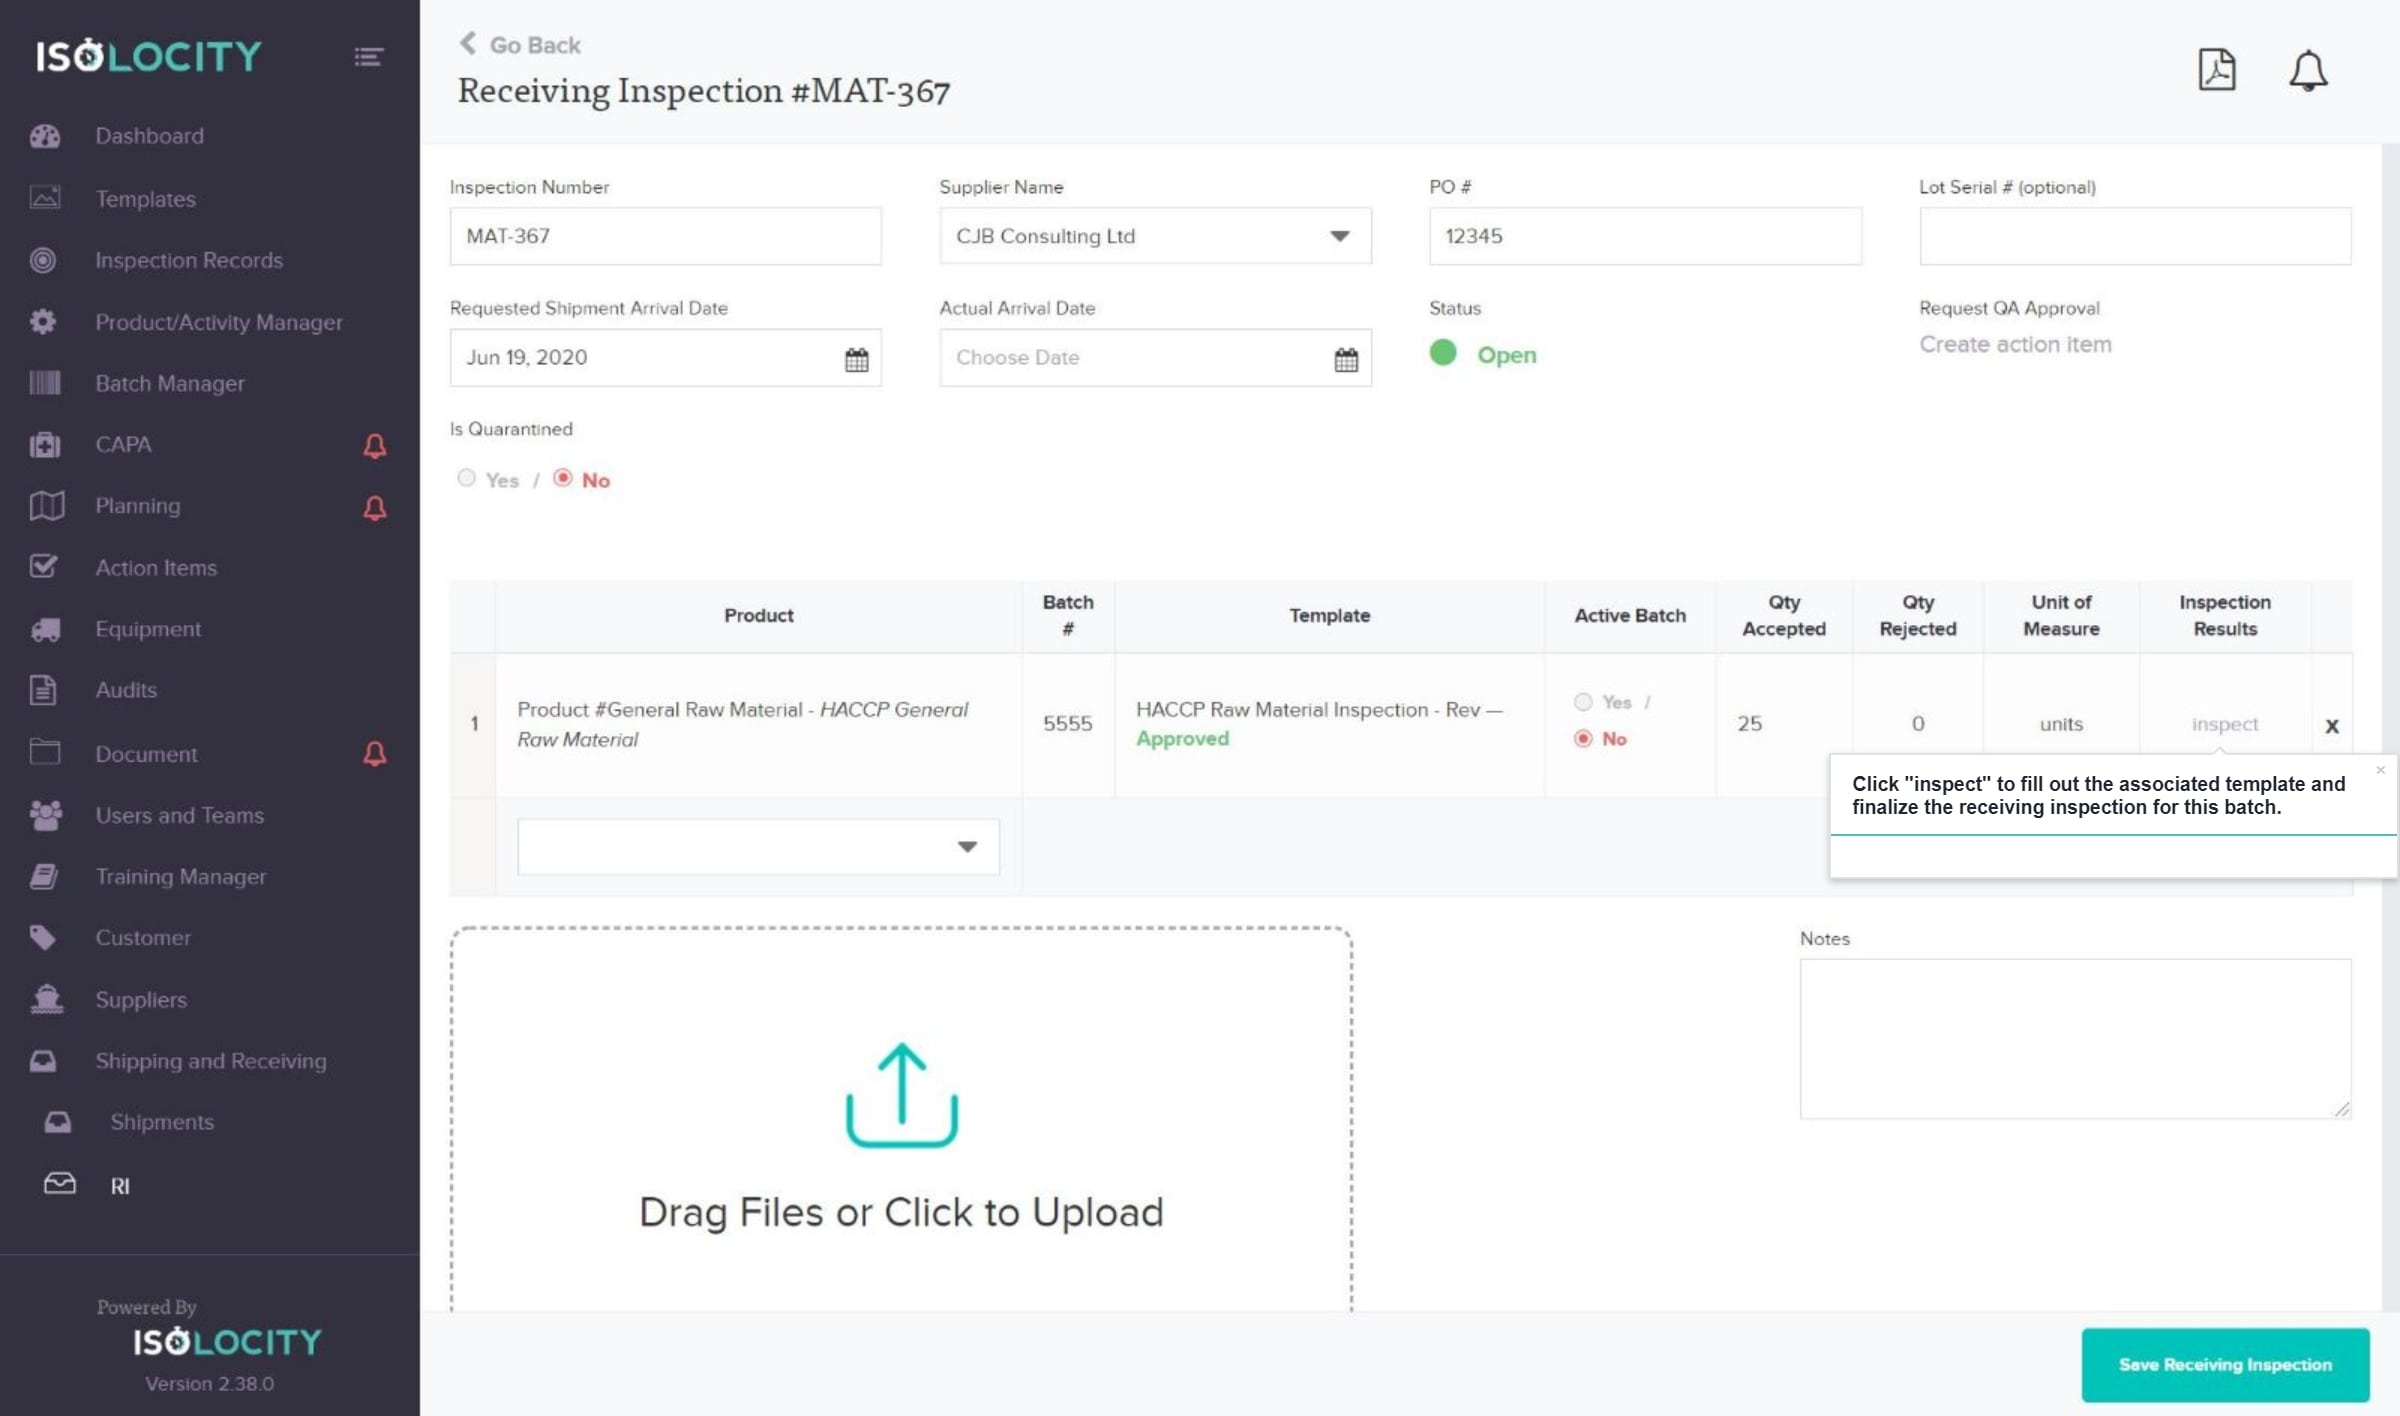
Step #21
Click “inspect” to fill out the associated template and finalize the receiving inspection for this batch.
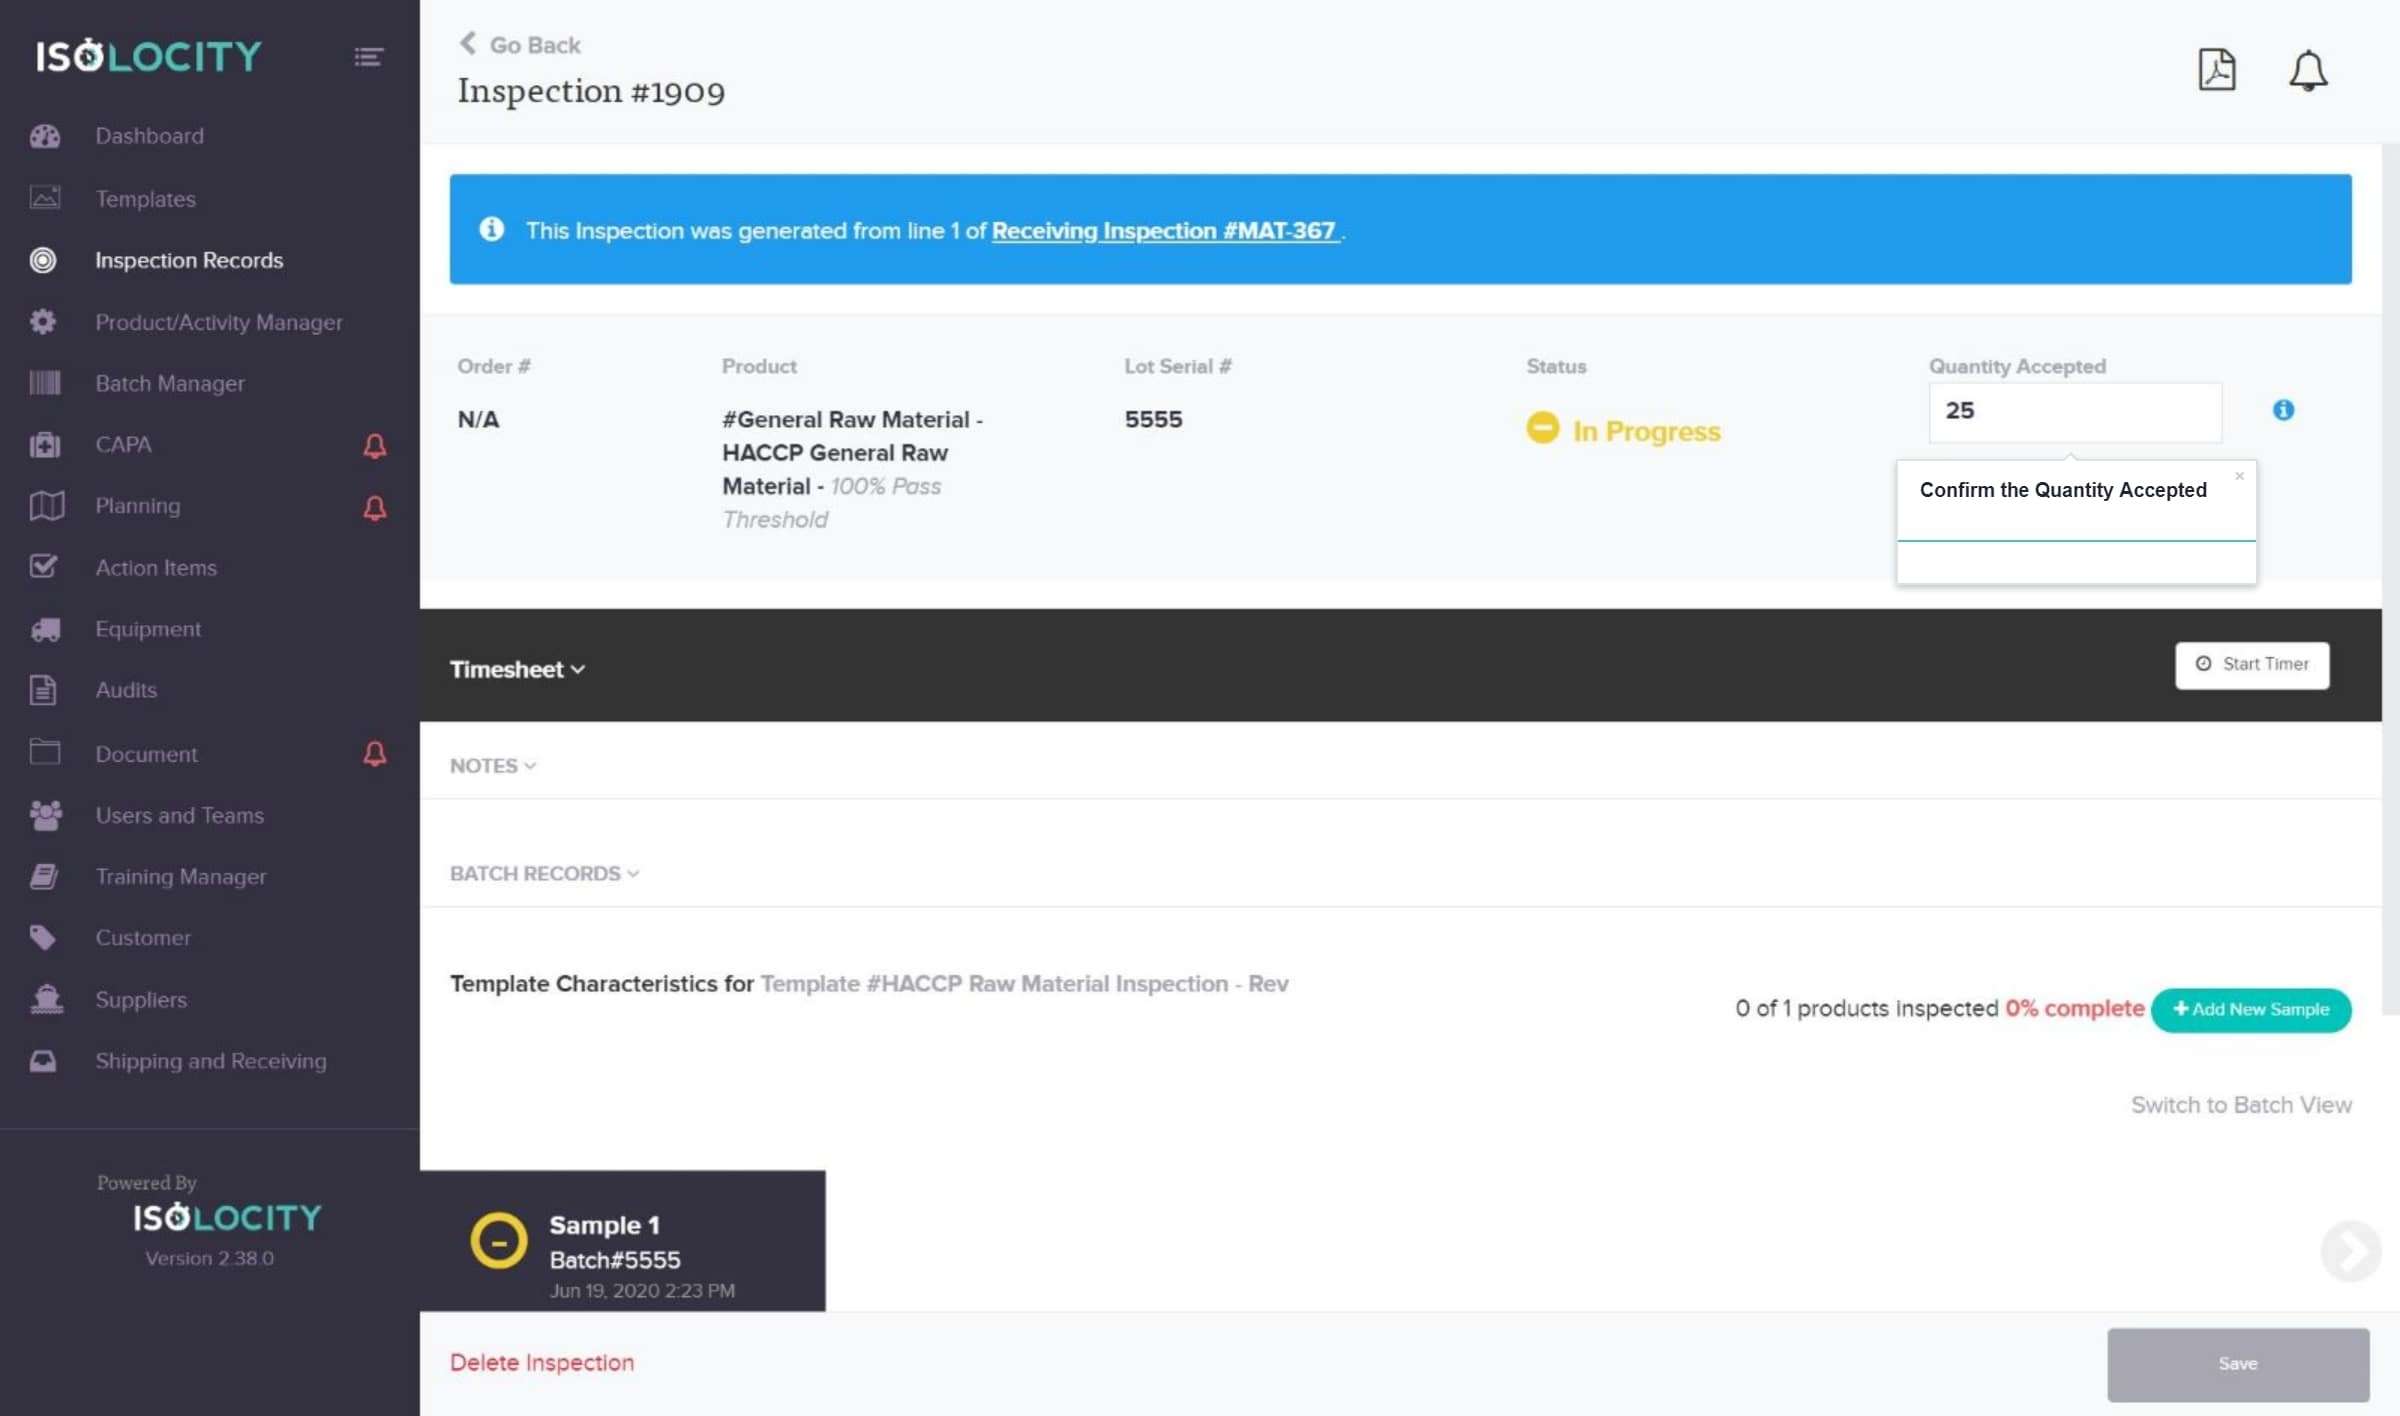
Step #22
Confirm the Quantity Accepted
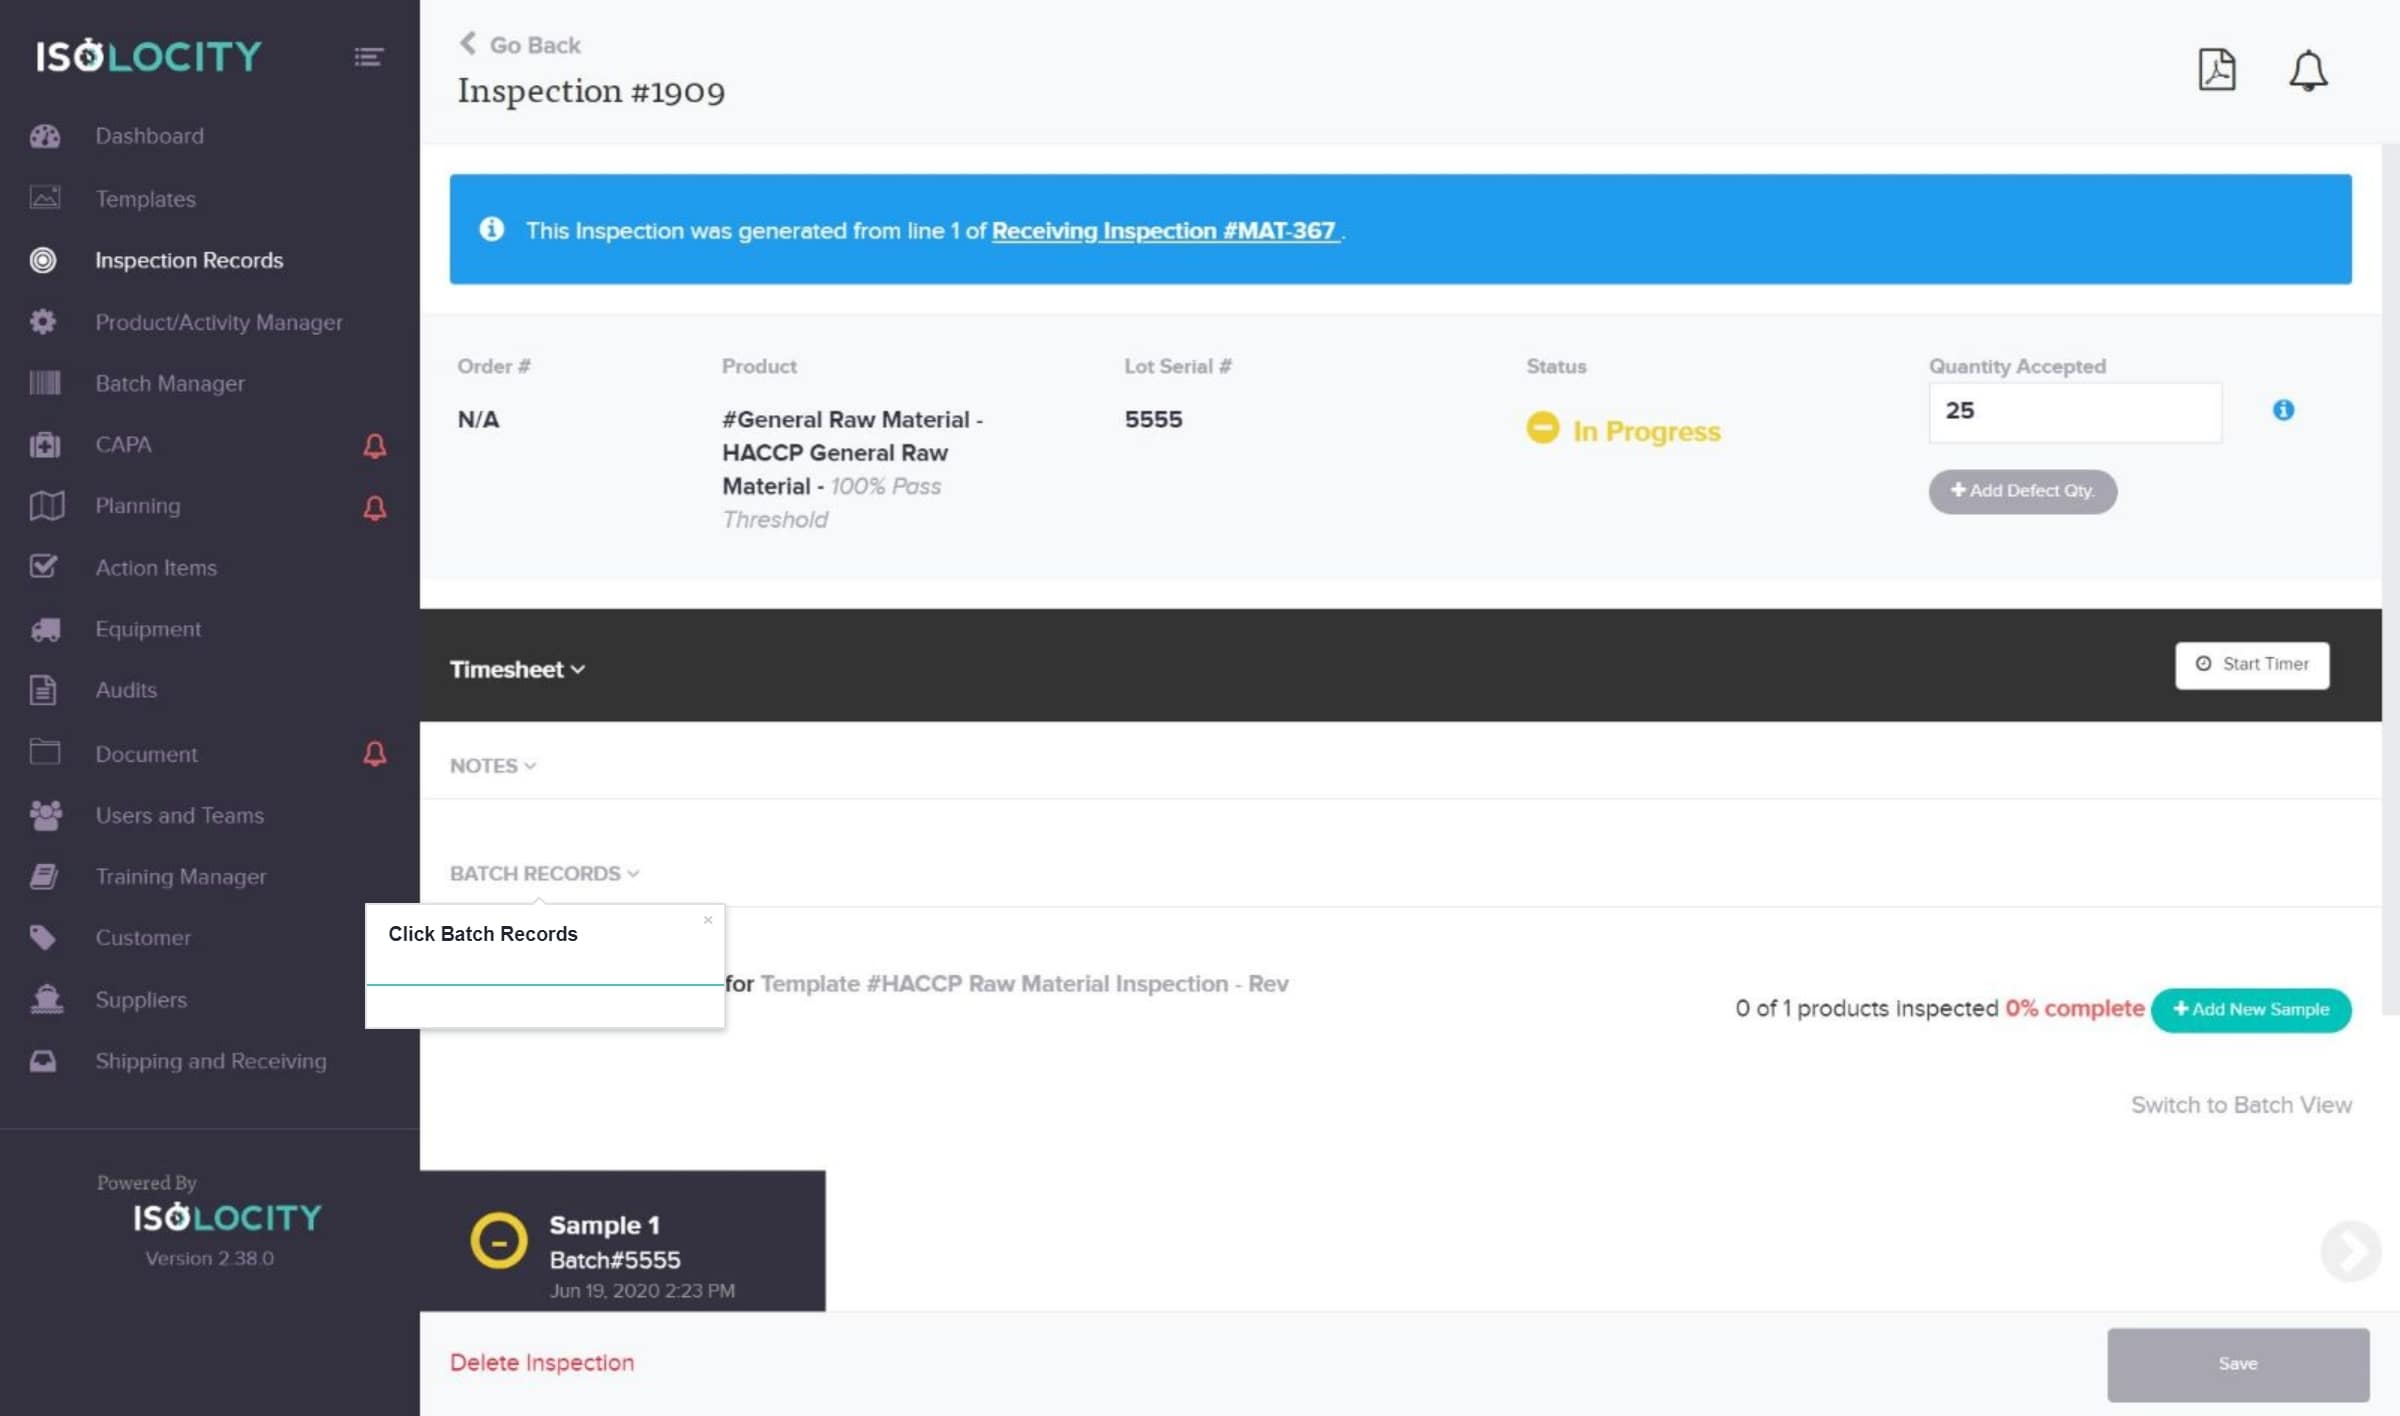
Step #23
Click Batch Records
Step #24
This batch can also be activated from here.

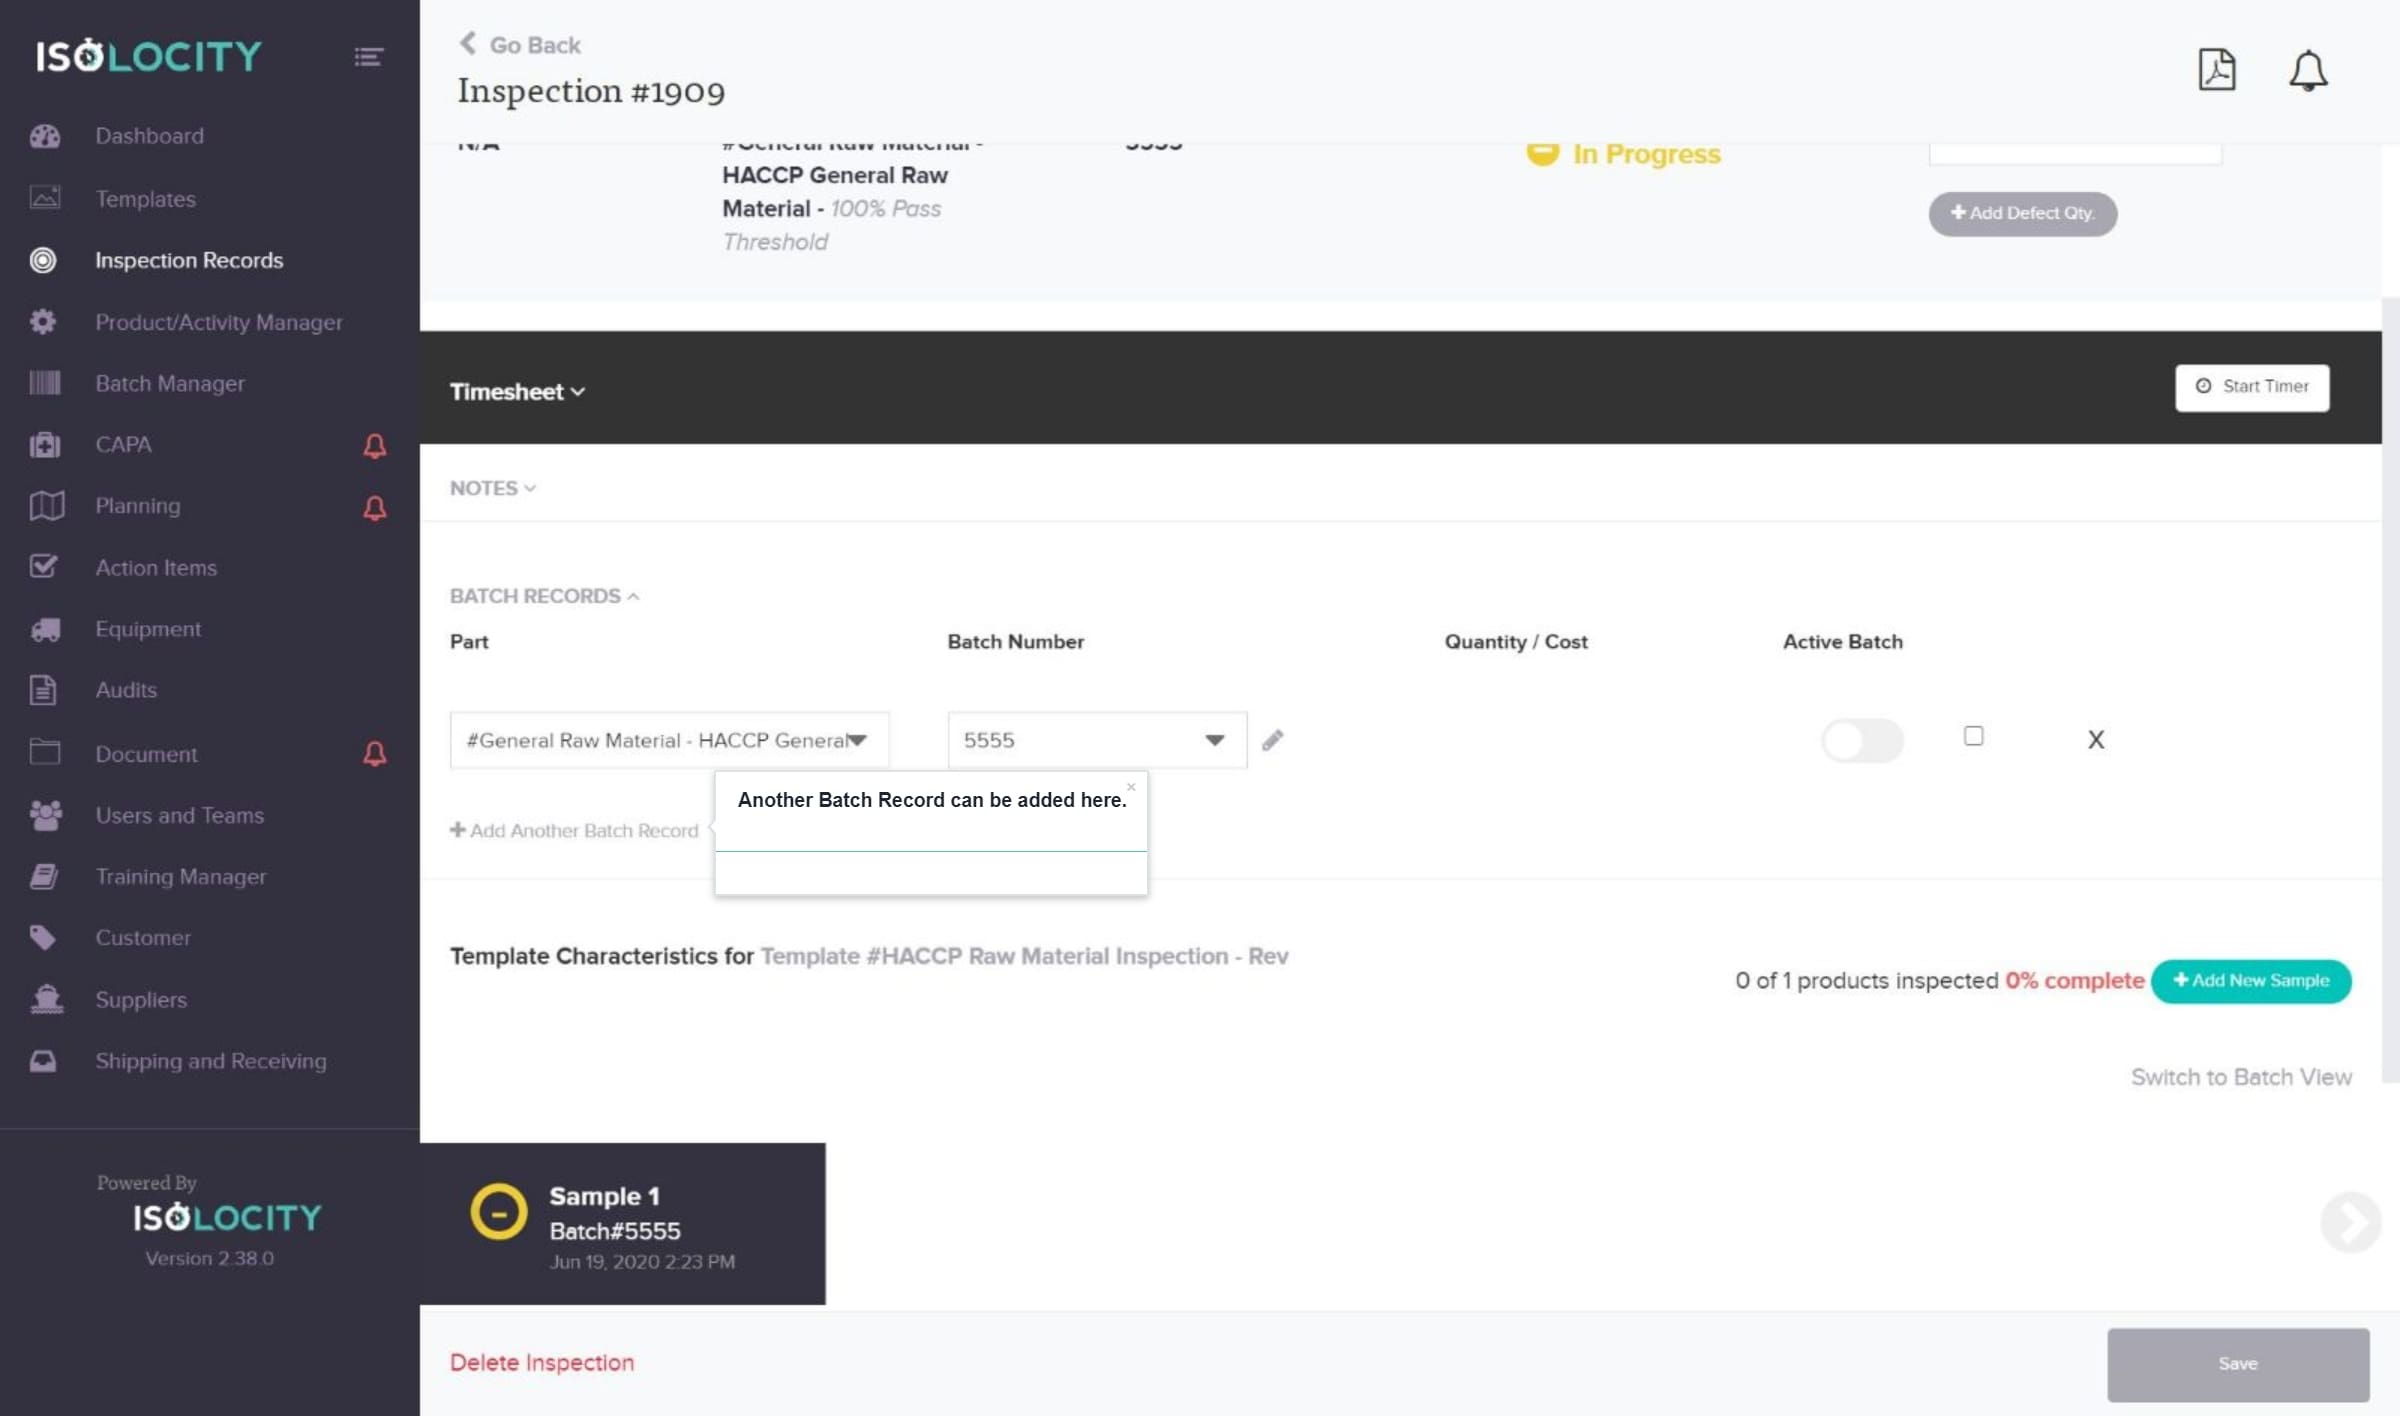
Step #25
Another Batch Record can be added here.
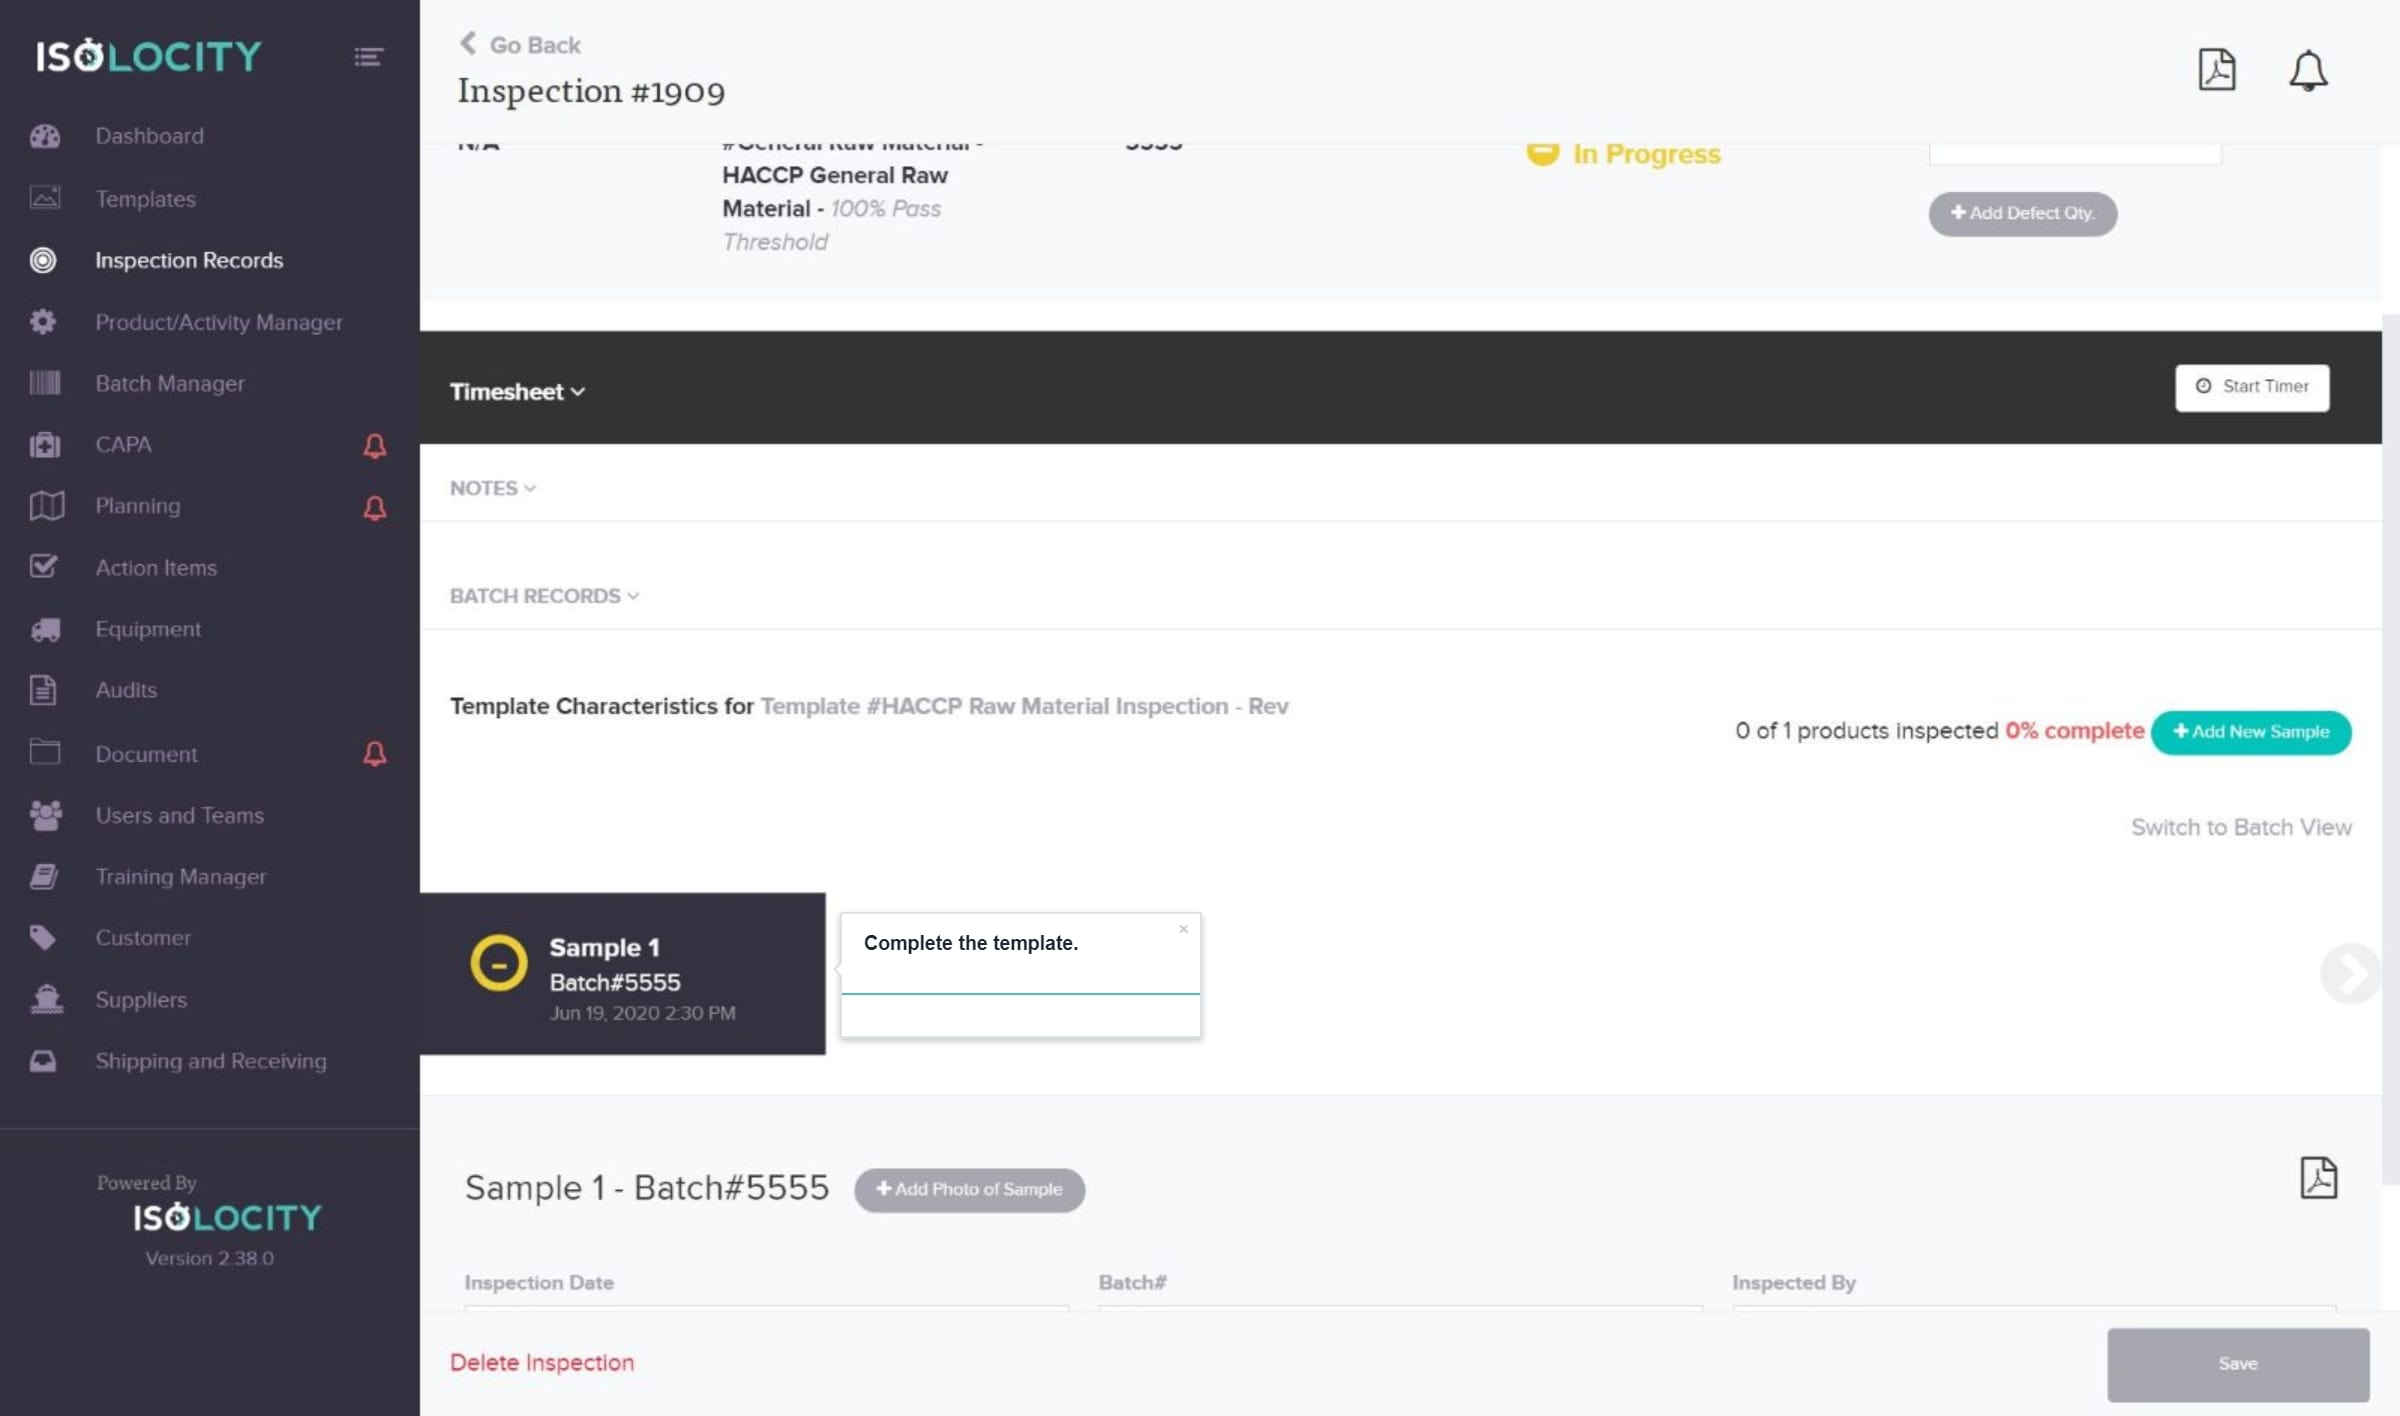
Step #26
Complete the template.
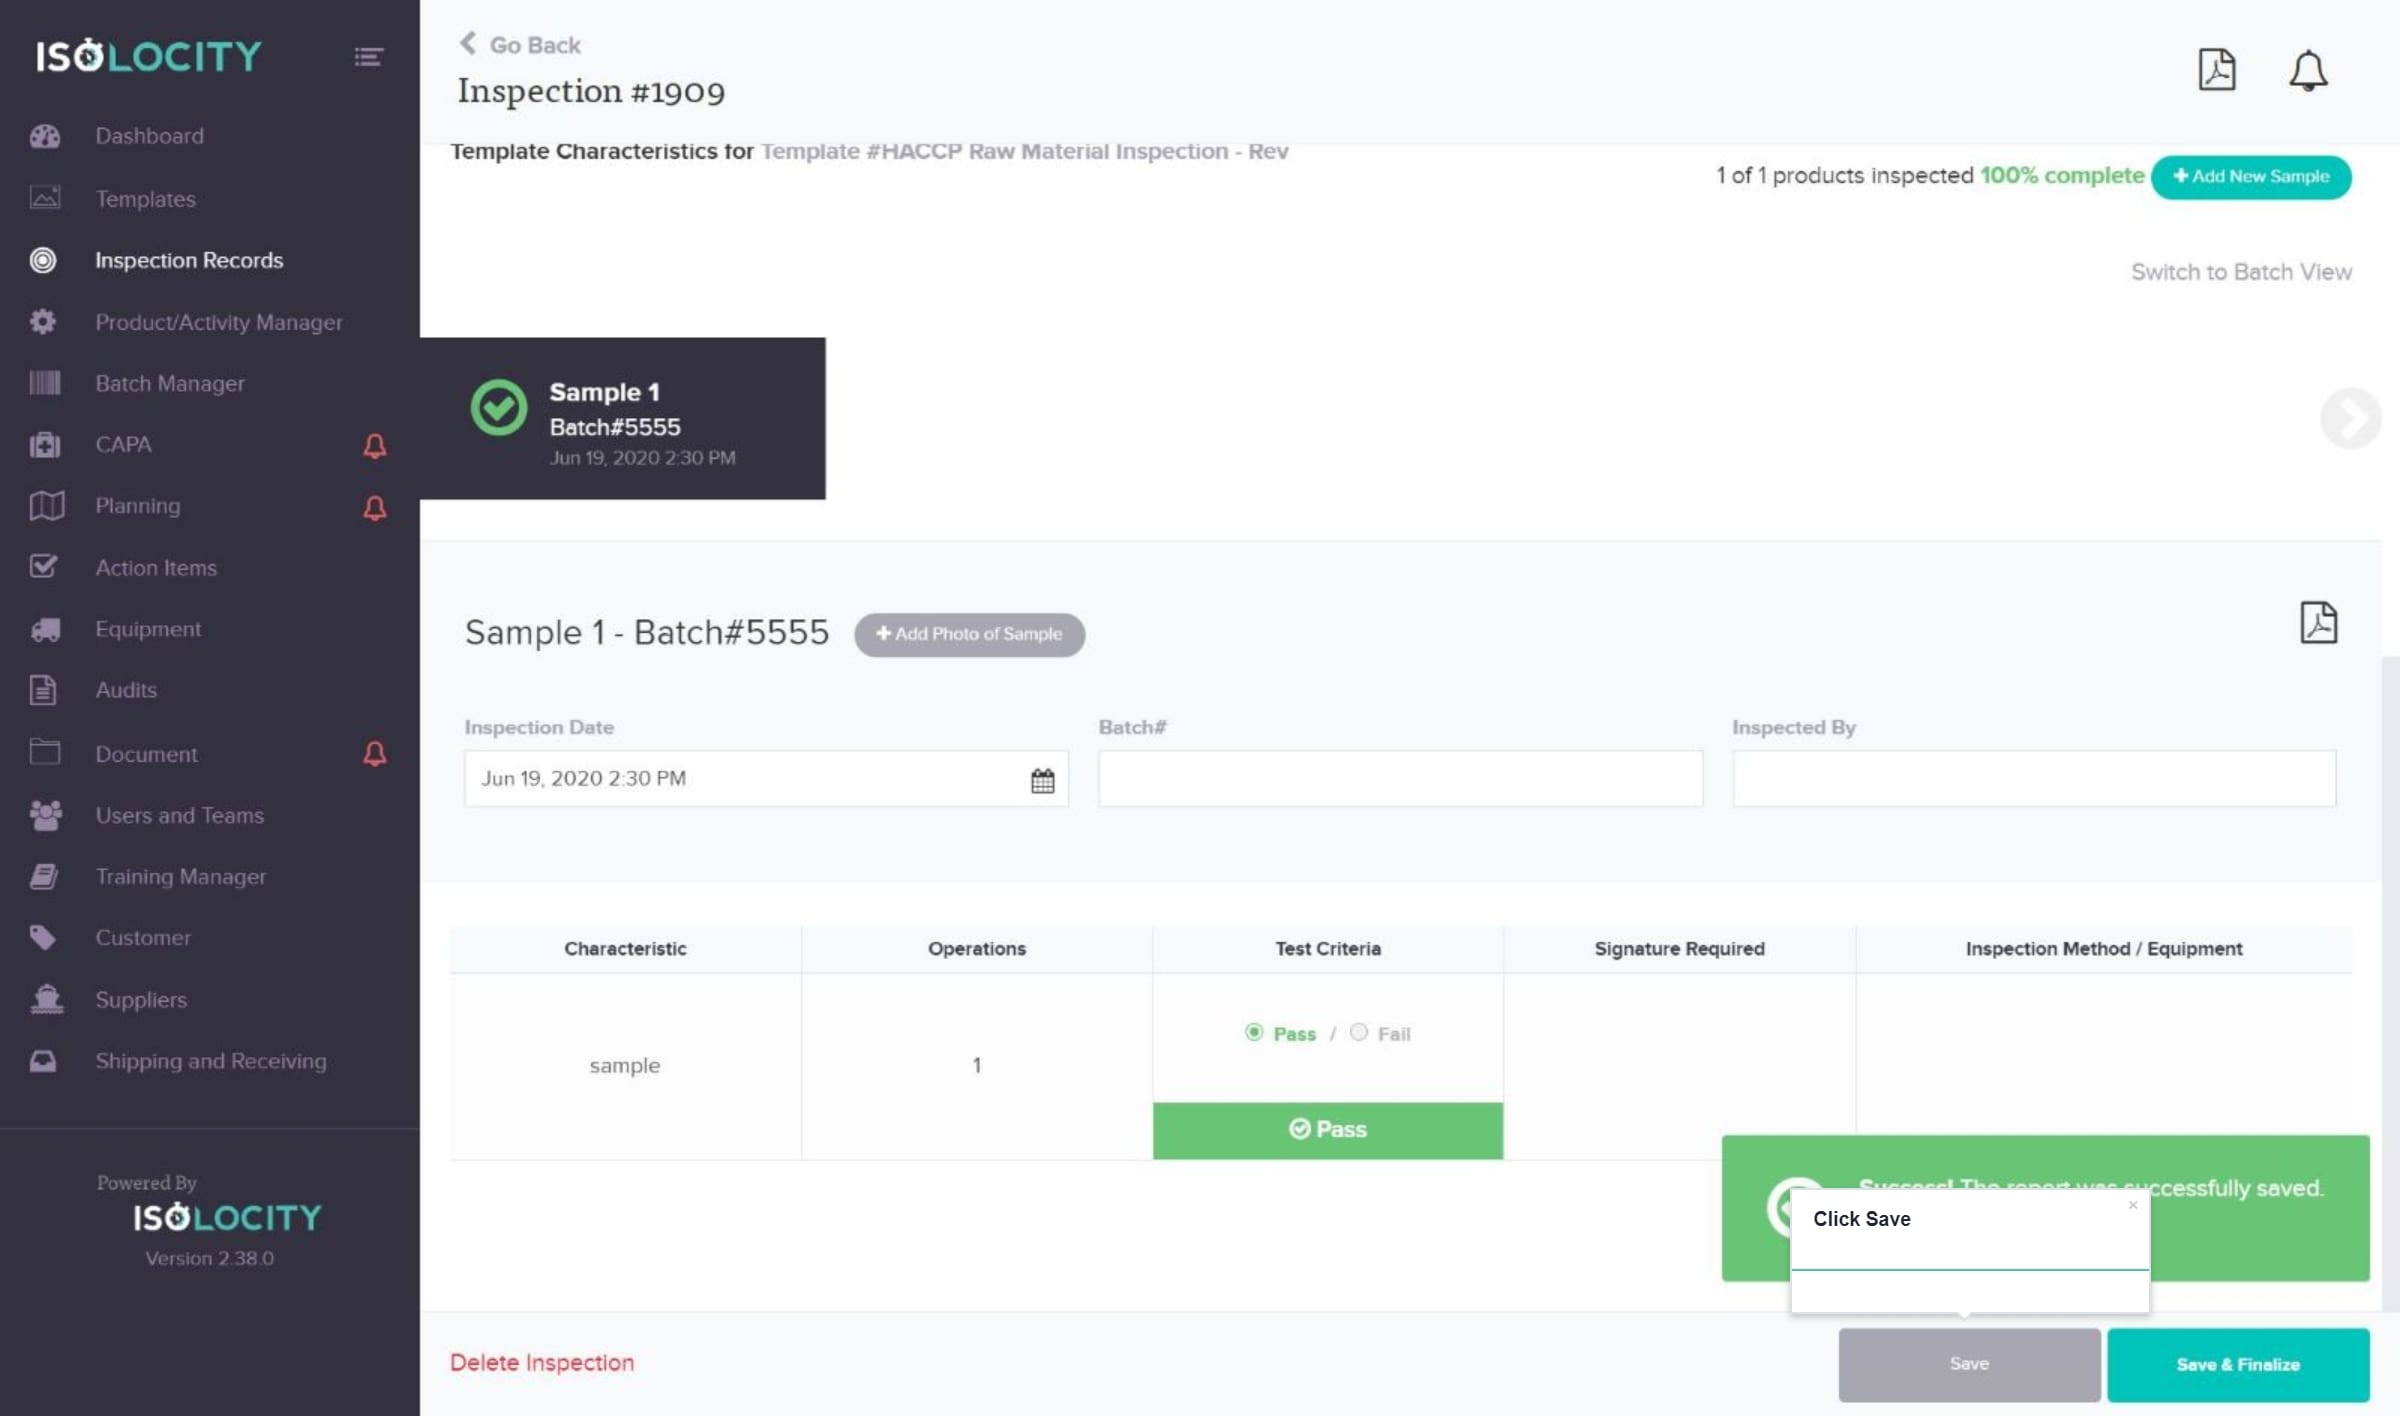
Step #27
Click Save
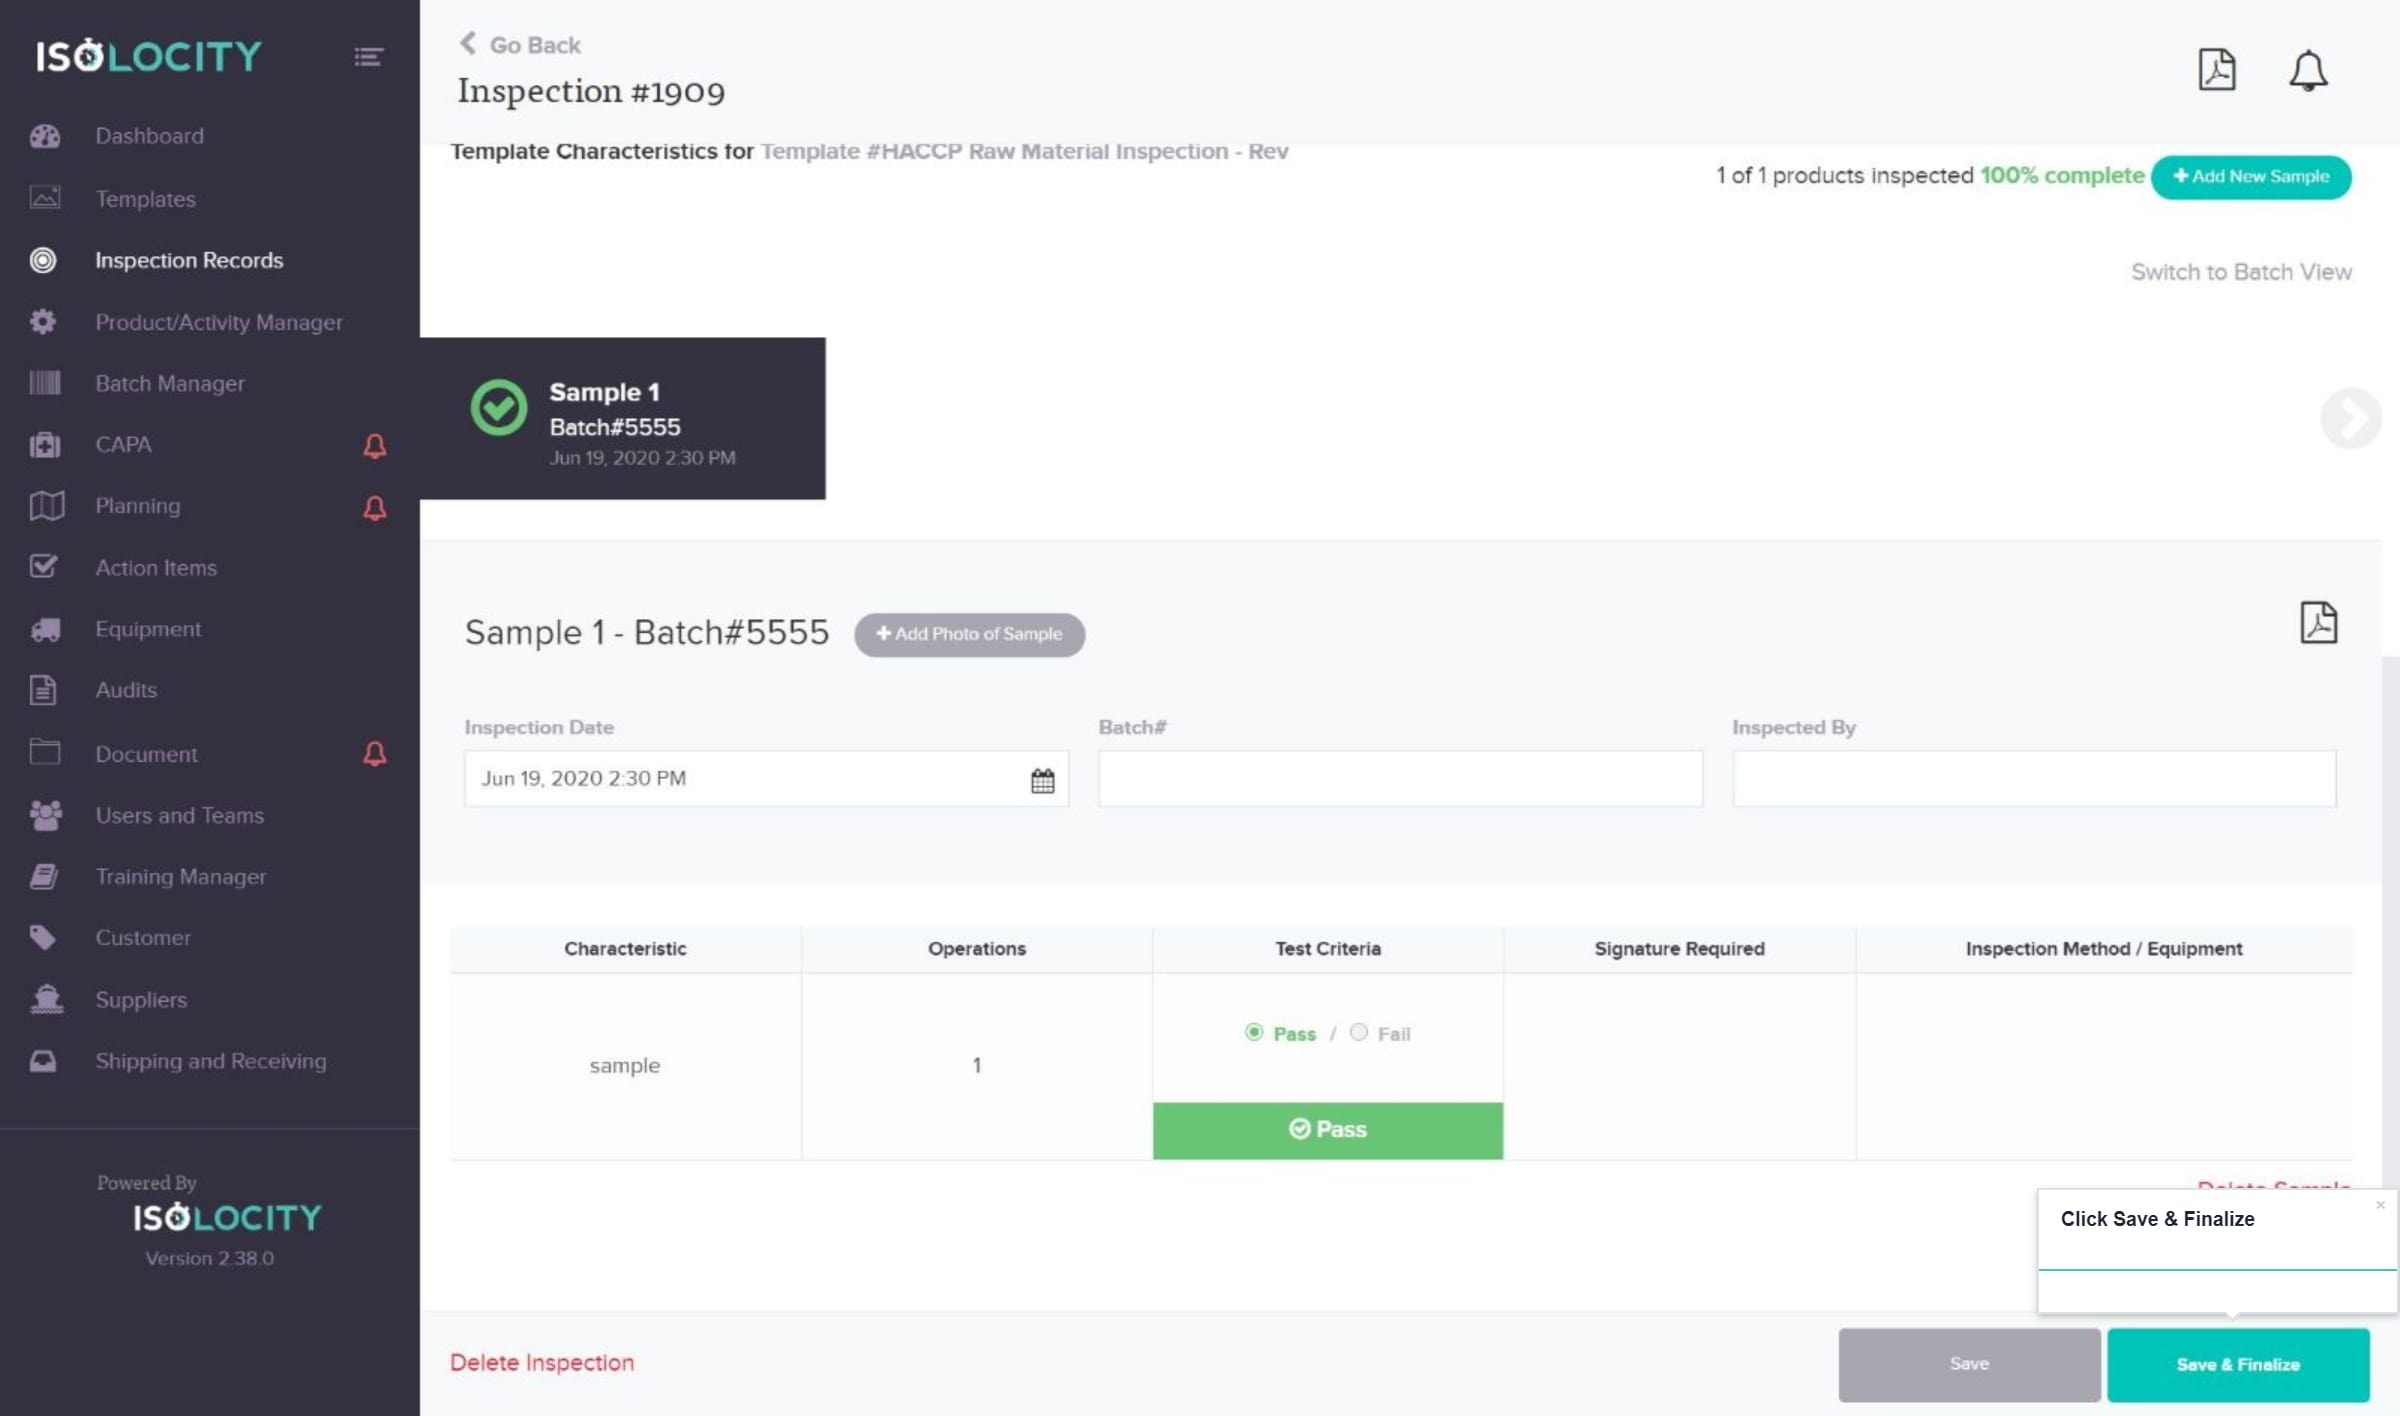
Step #28
Click Save & Finalize
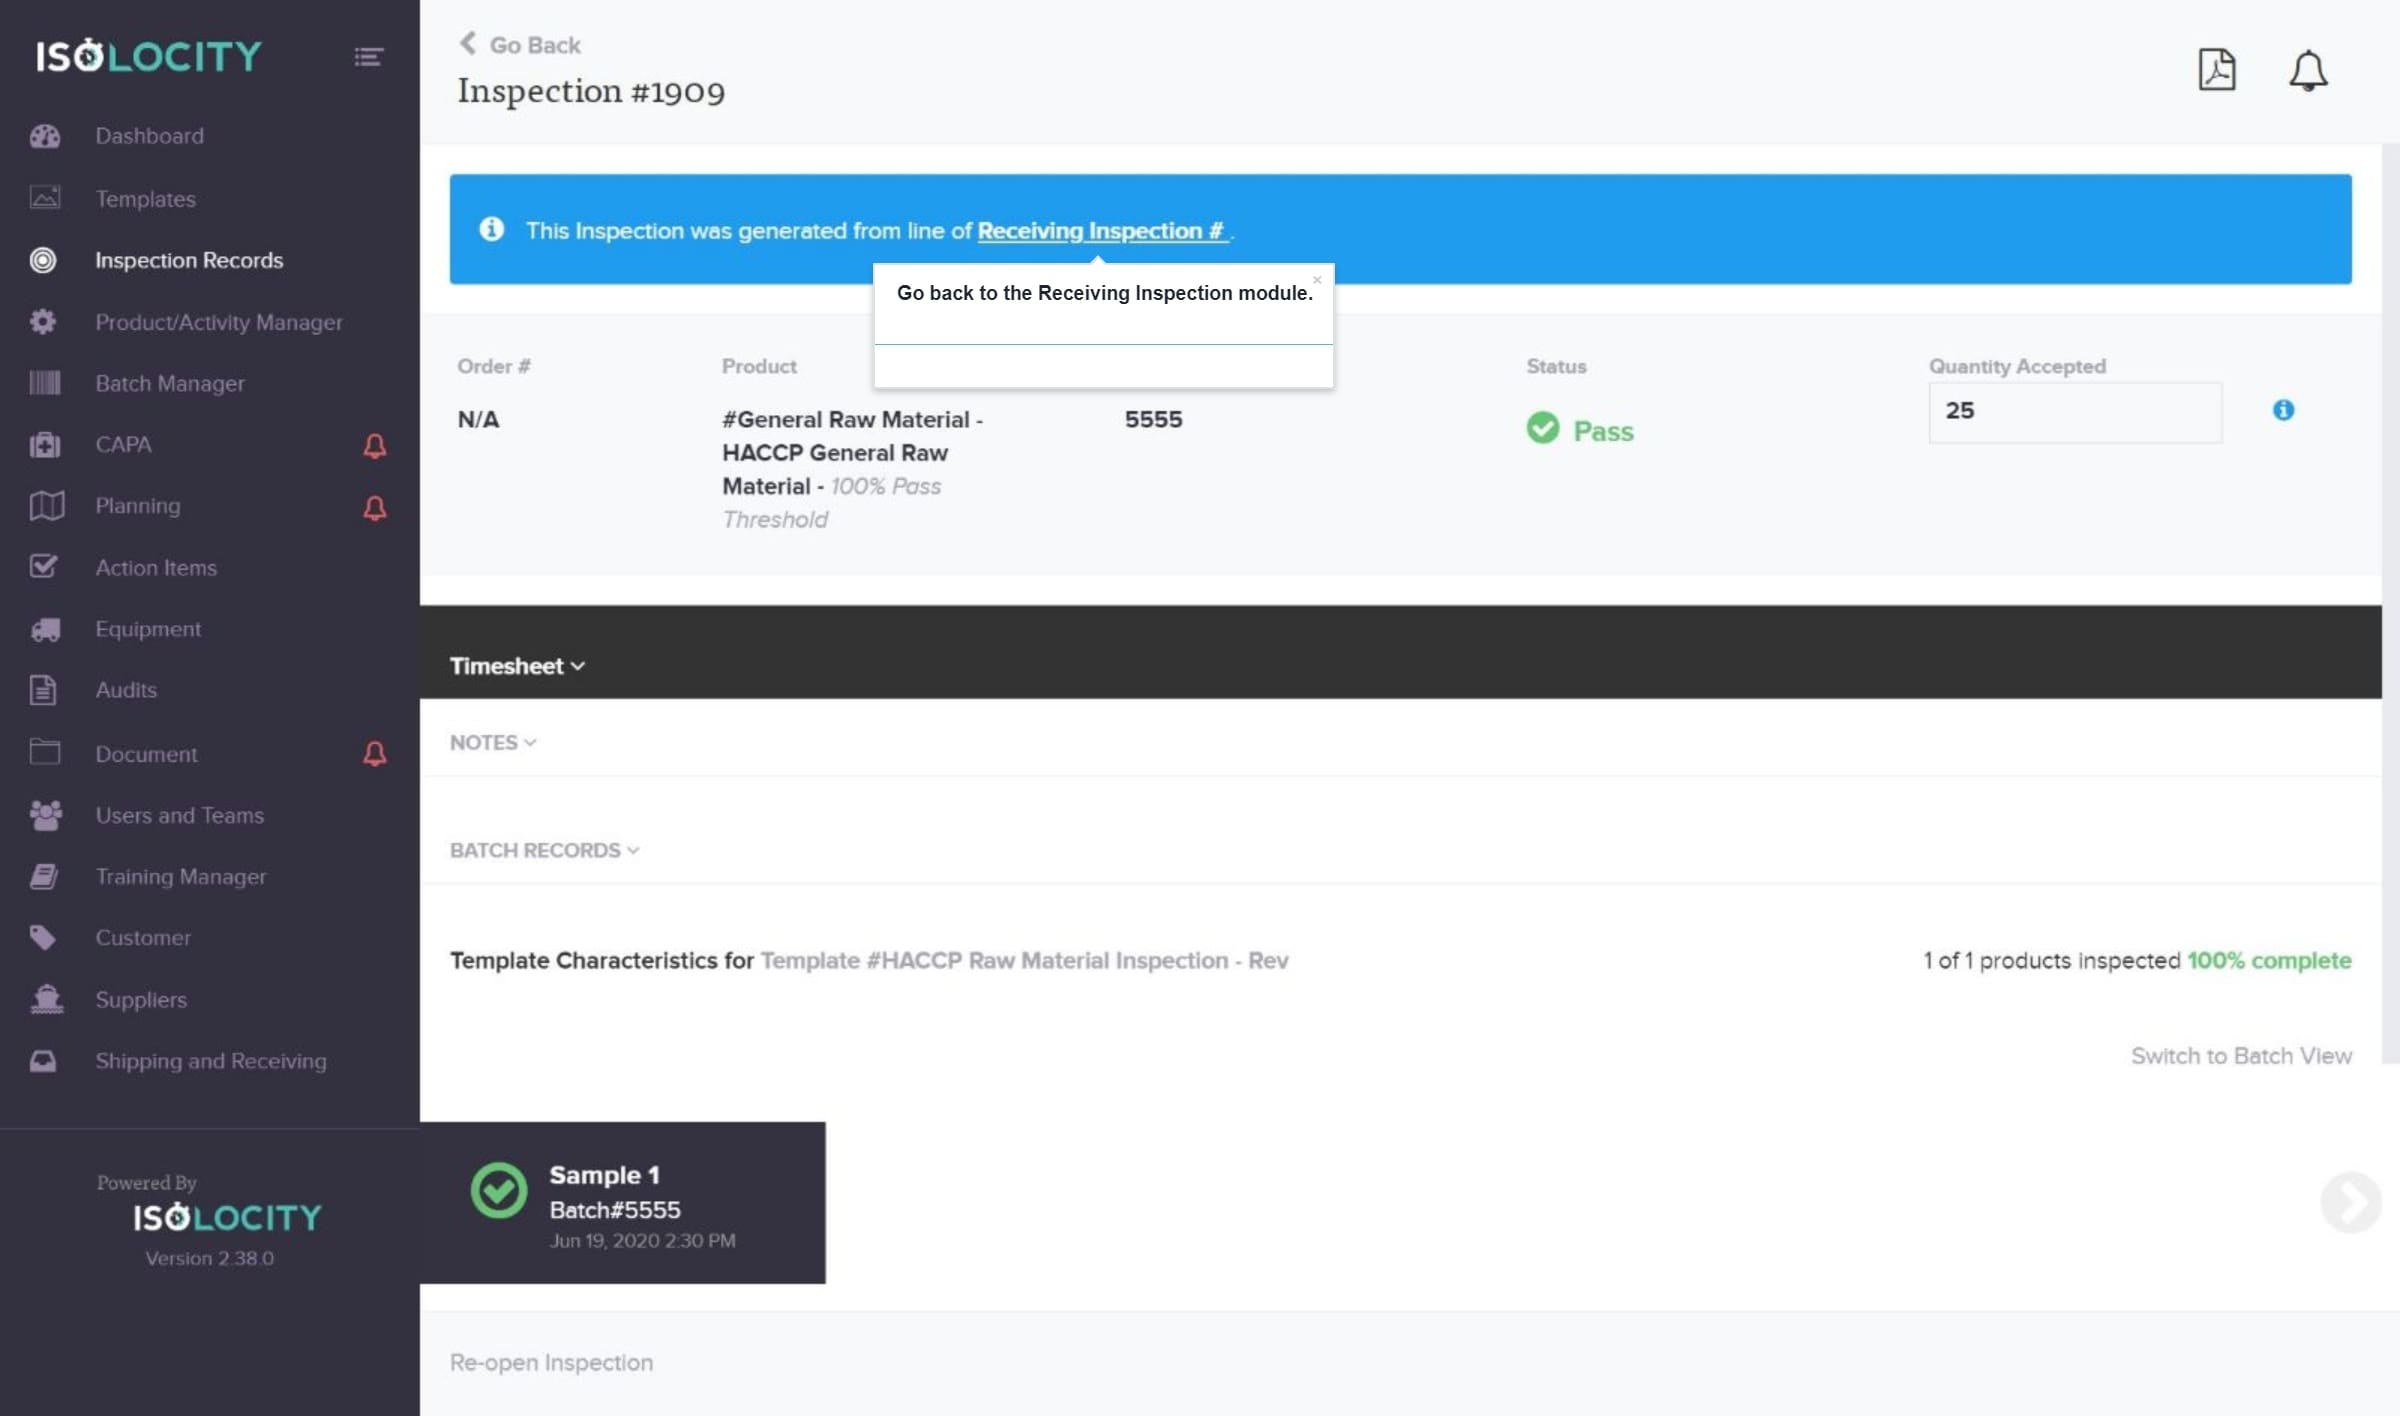
Step #29
Go back to the Receiving Inspection module.
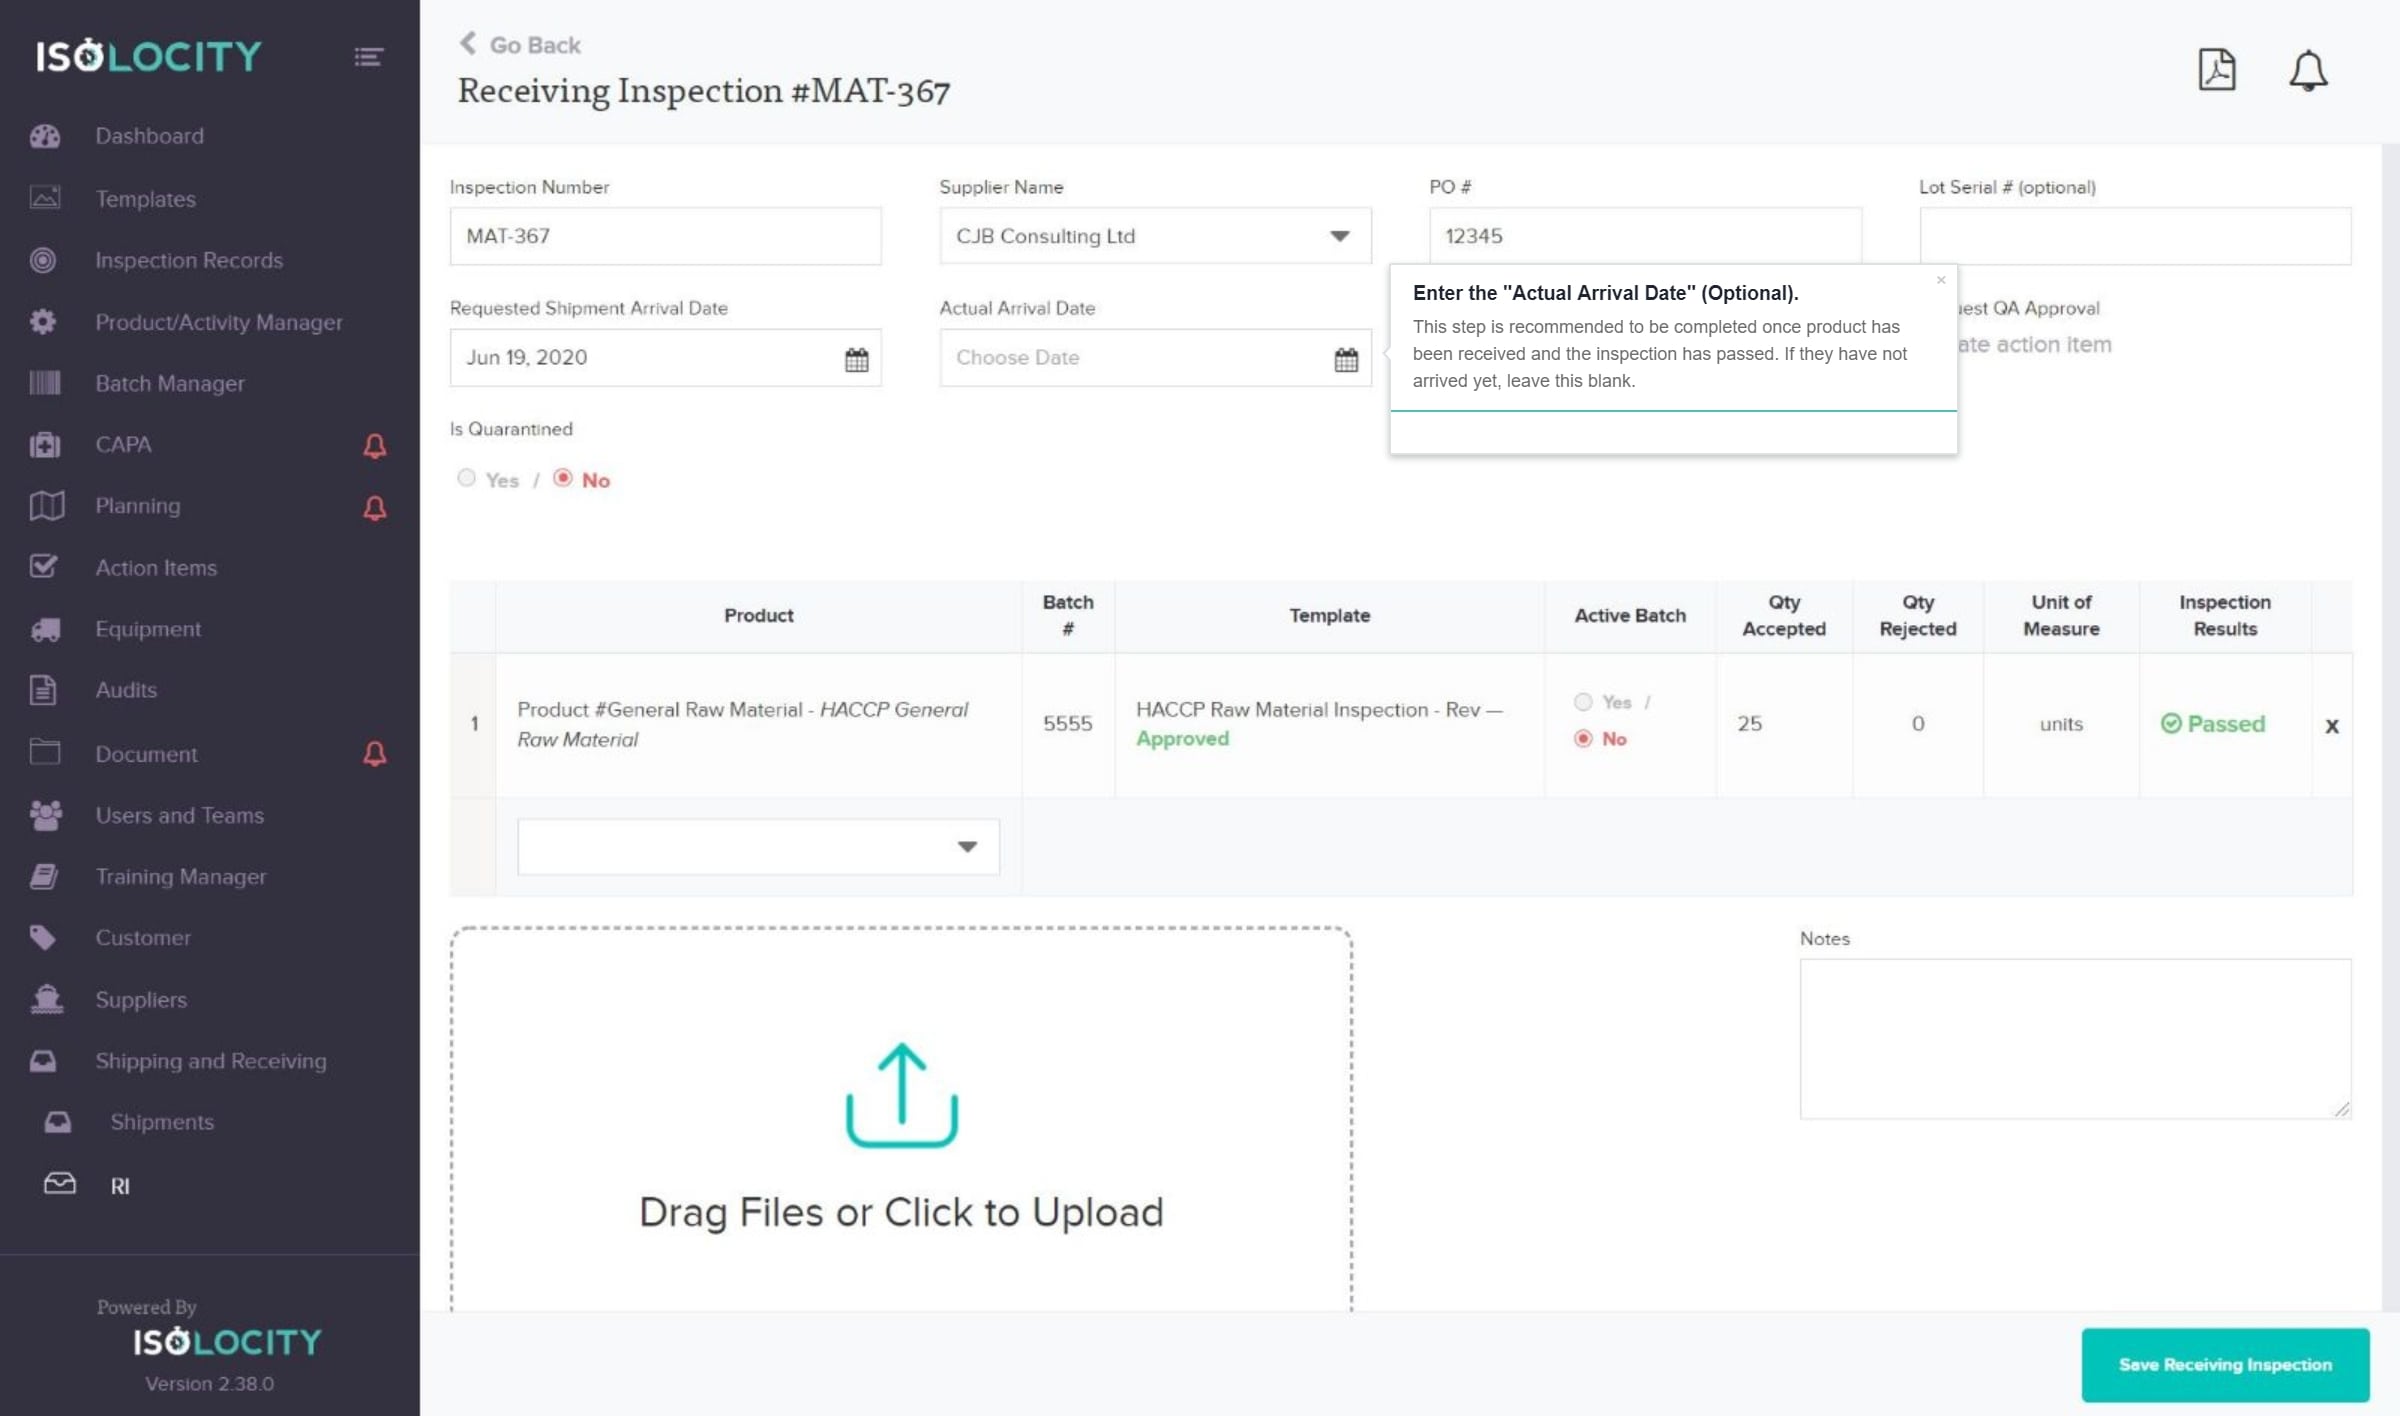
Step #30
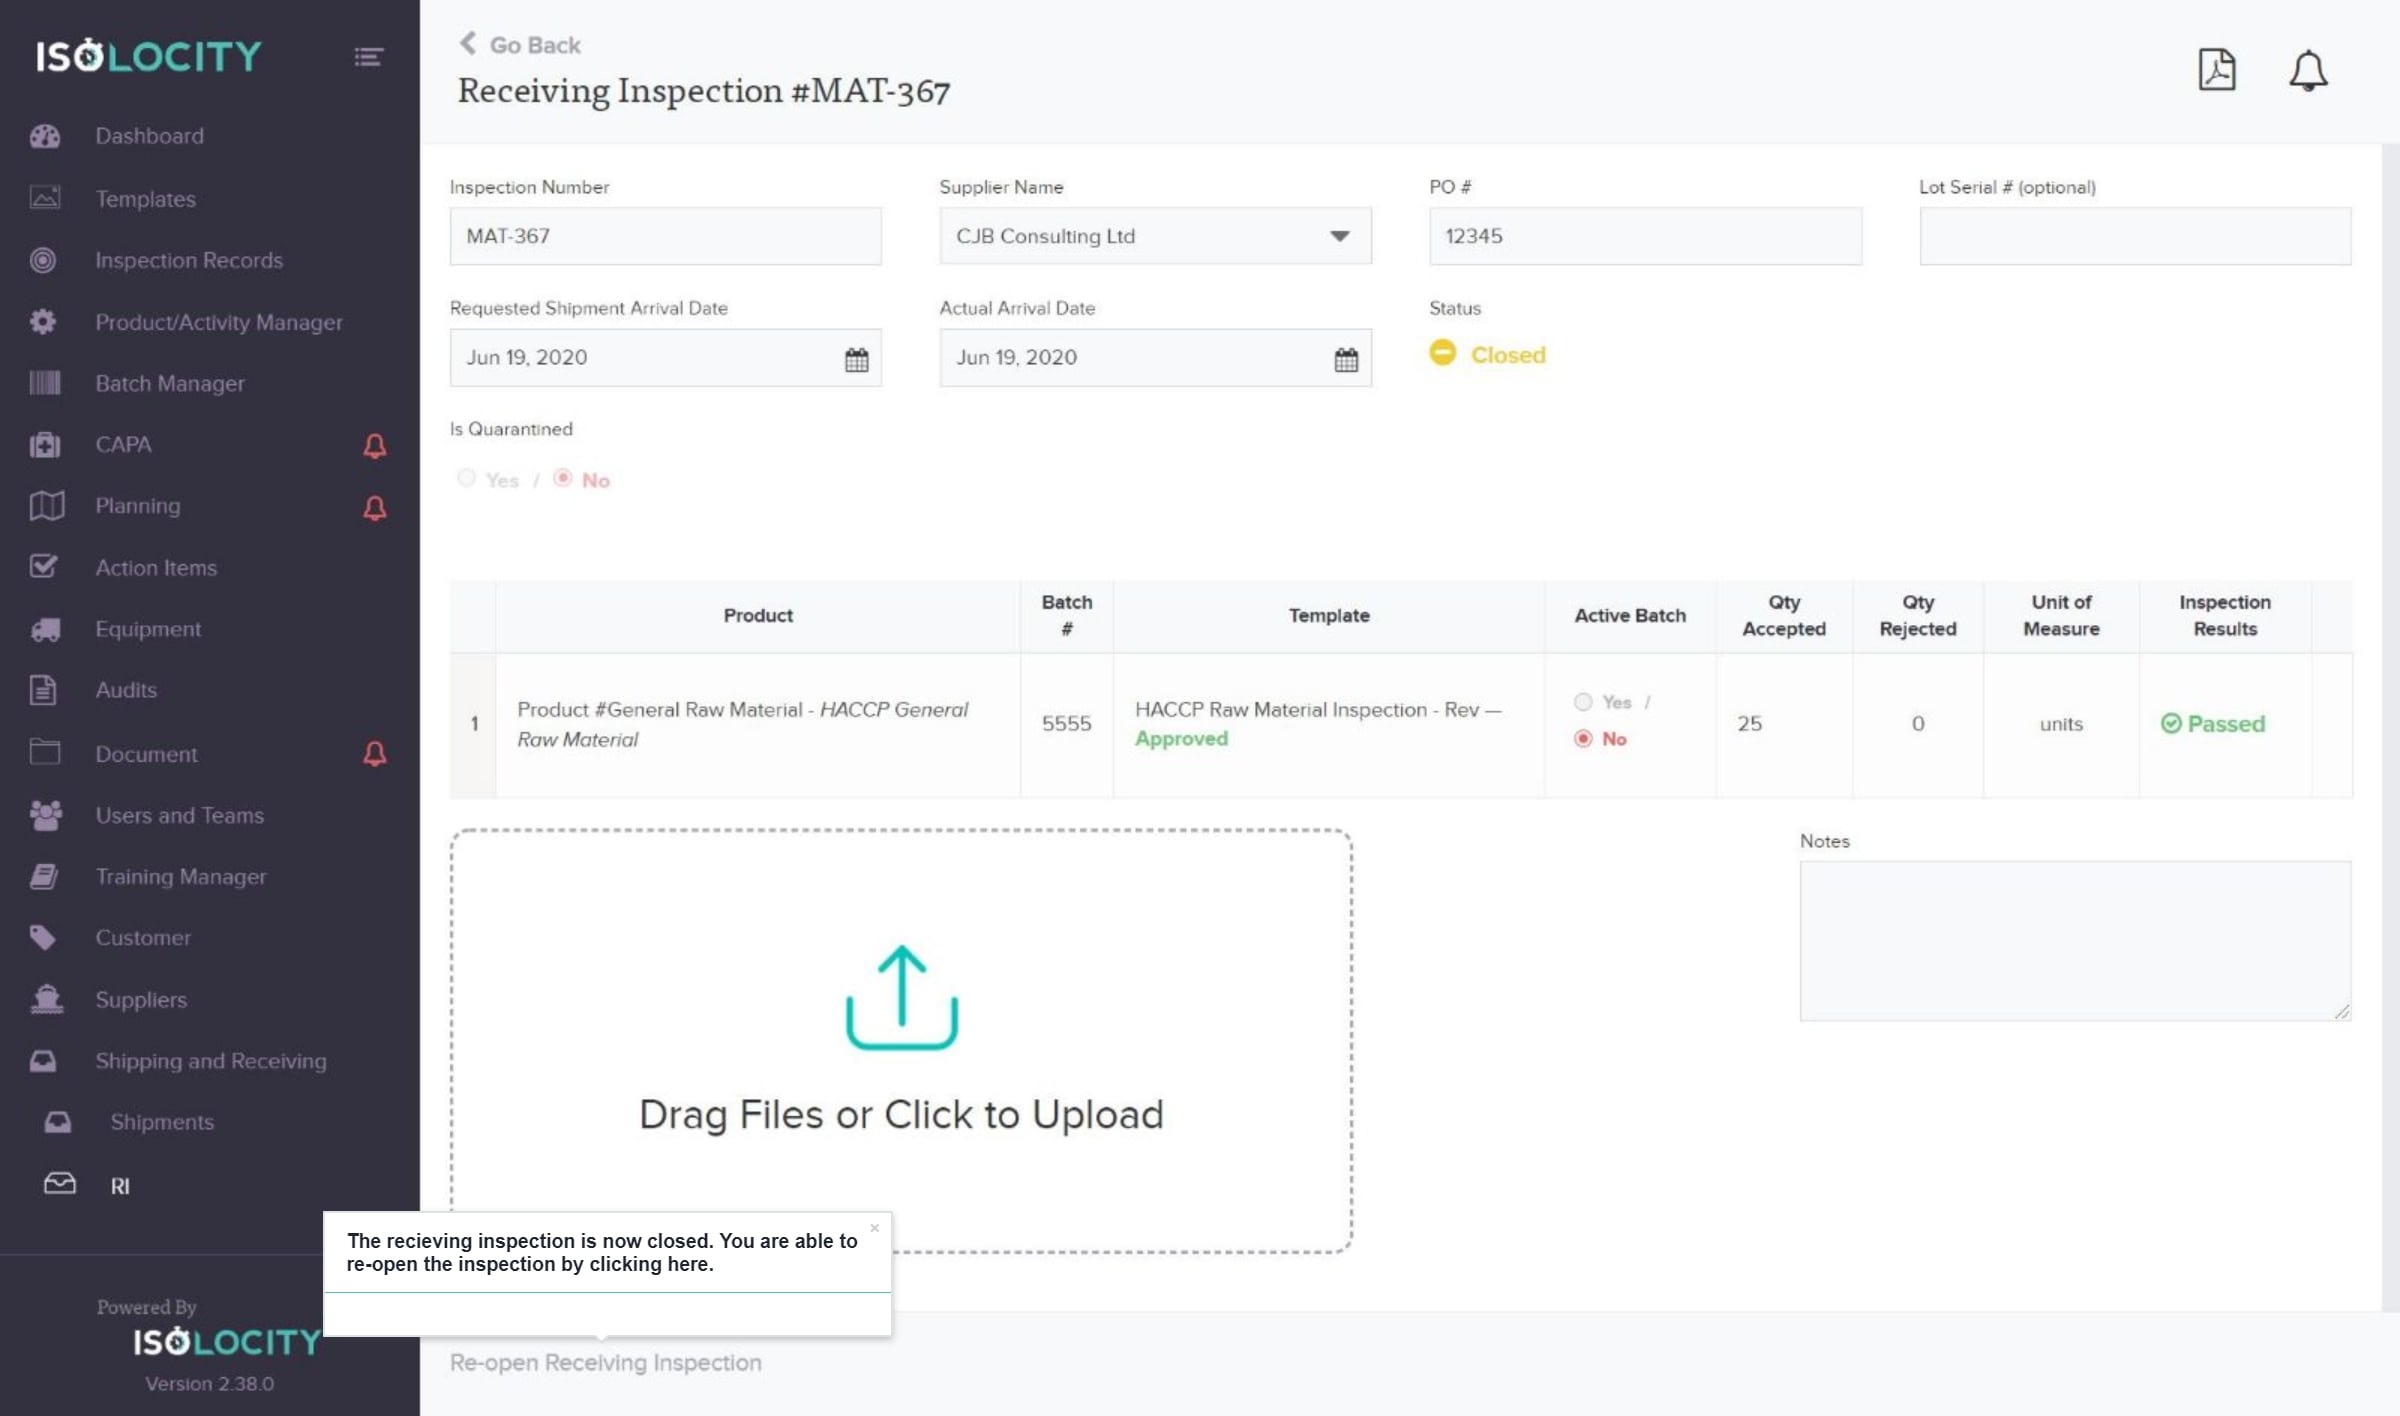
Enter the “Actual Arrival Date” (Optional).
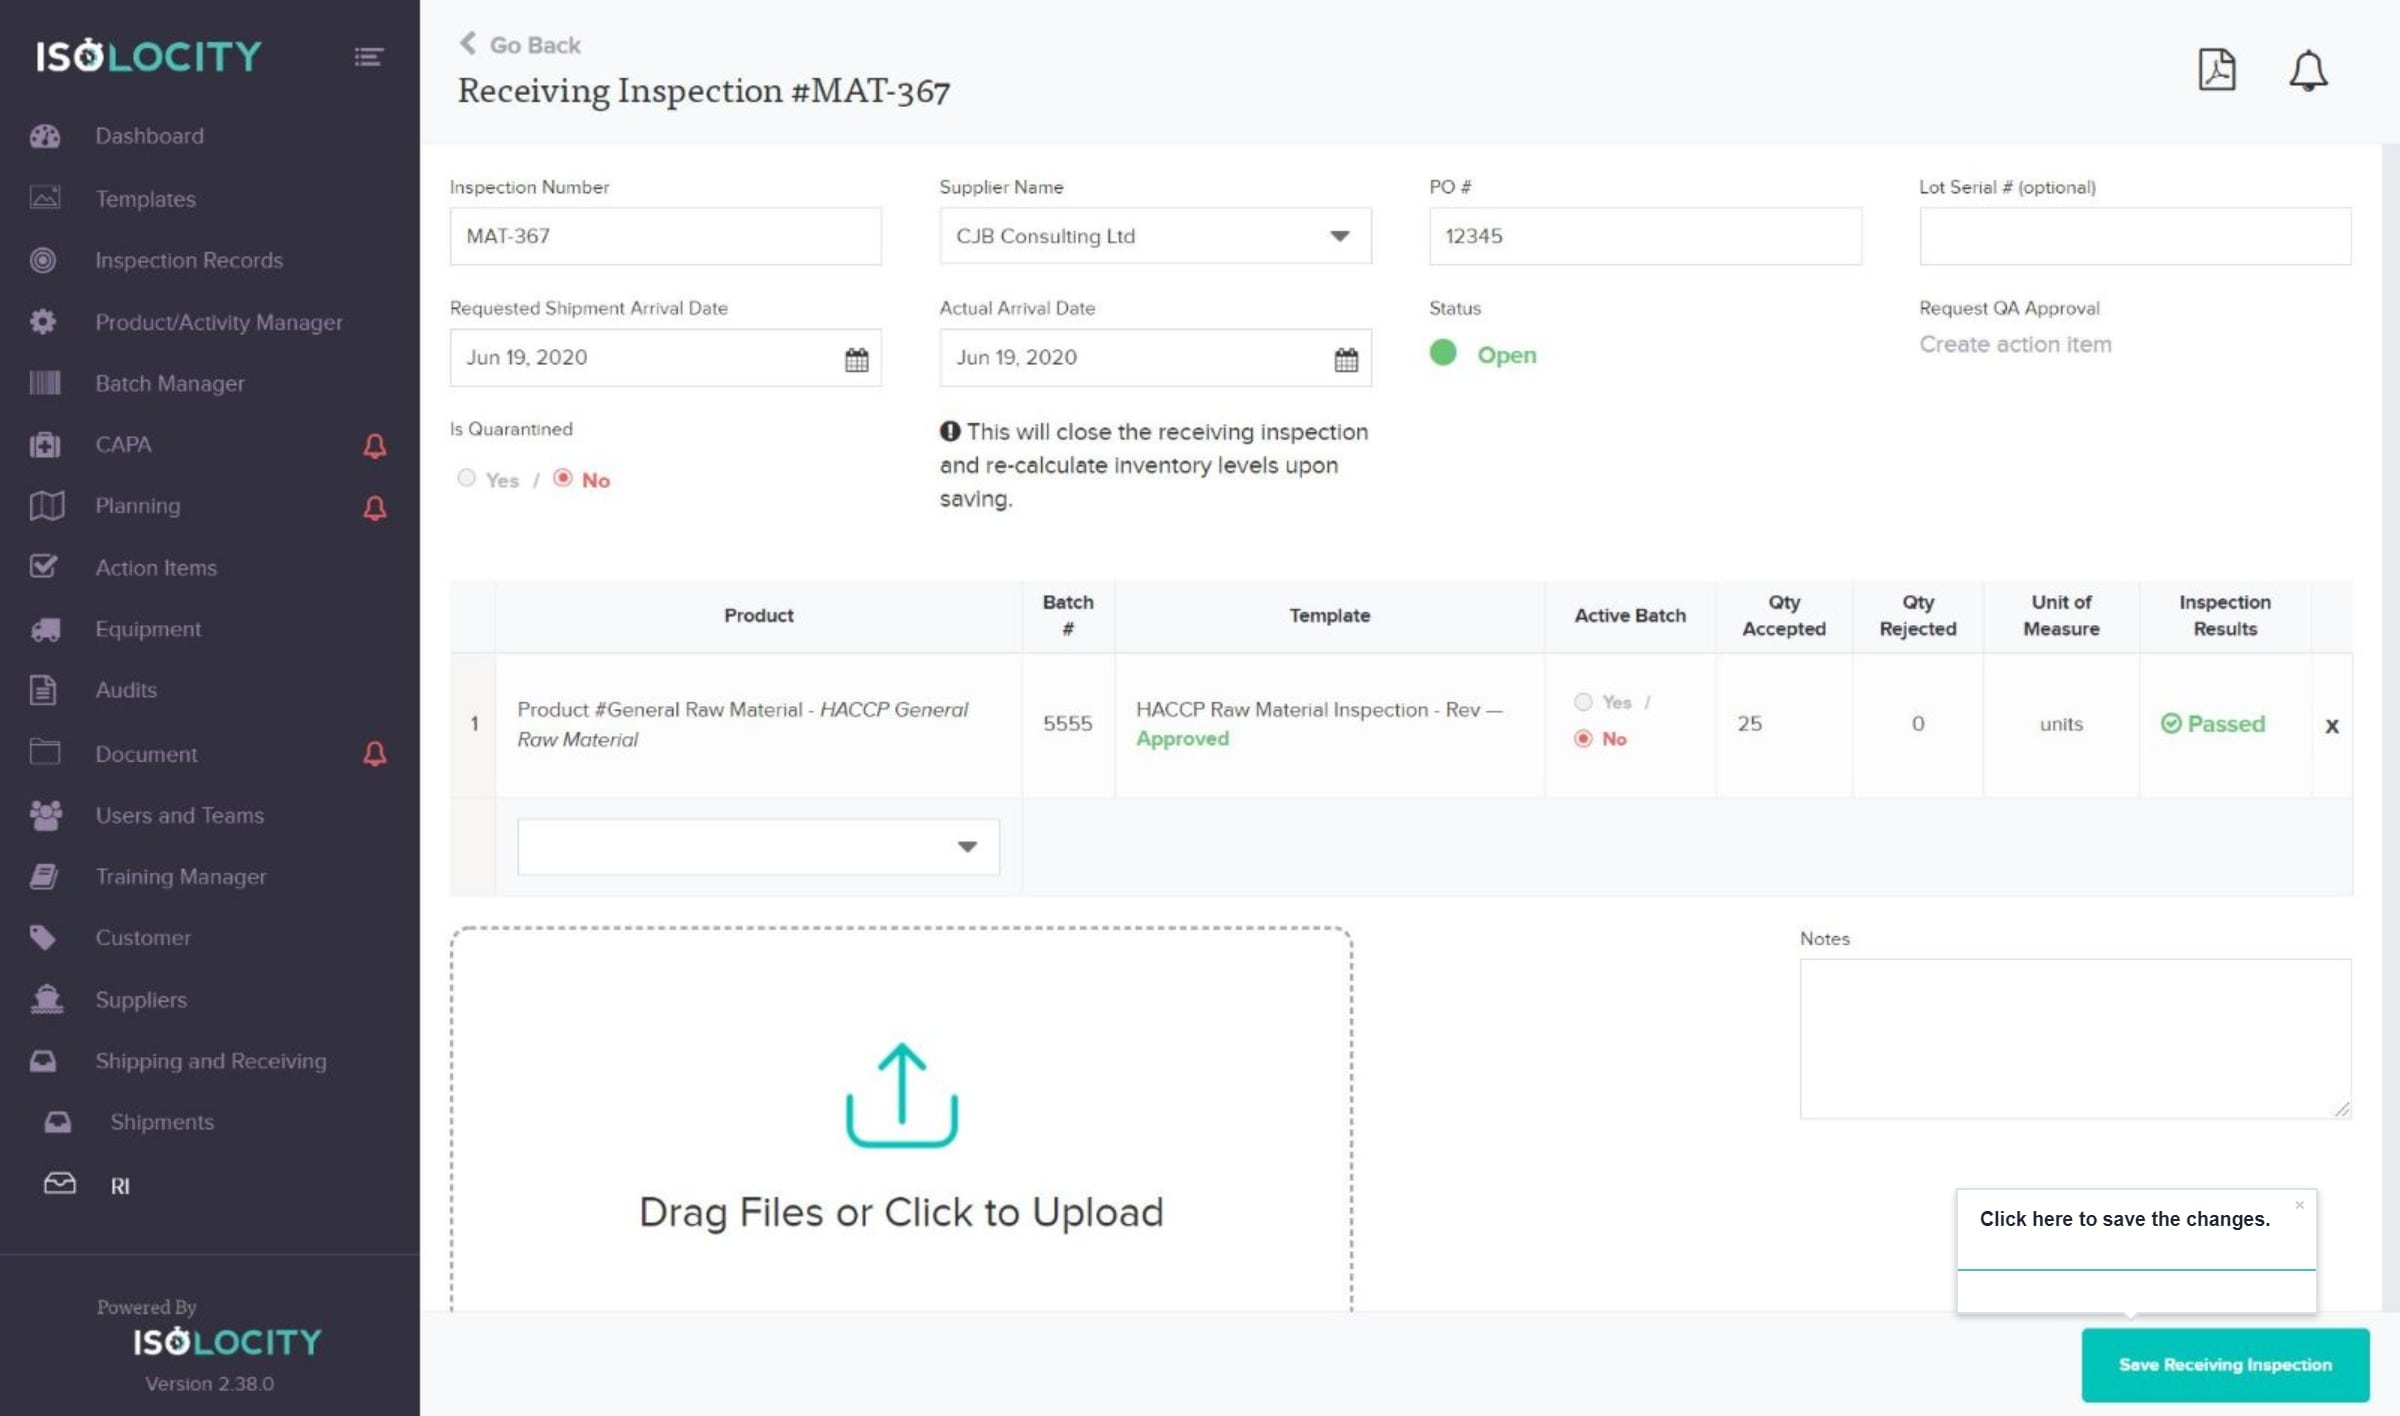
Step #31
Click here to save the changes.
Step #32
The recieving inspection is now closed. You are able to re-open the inspection by clicking here.