Organization Settings
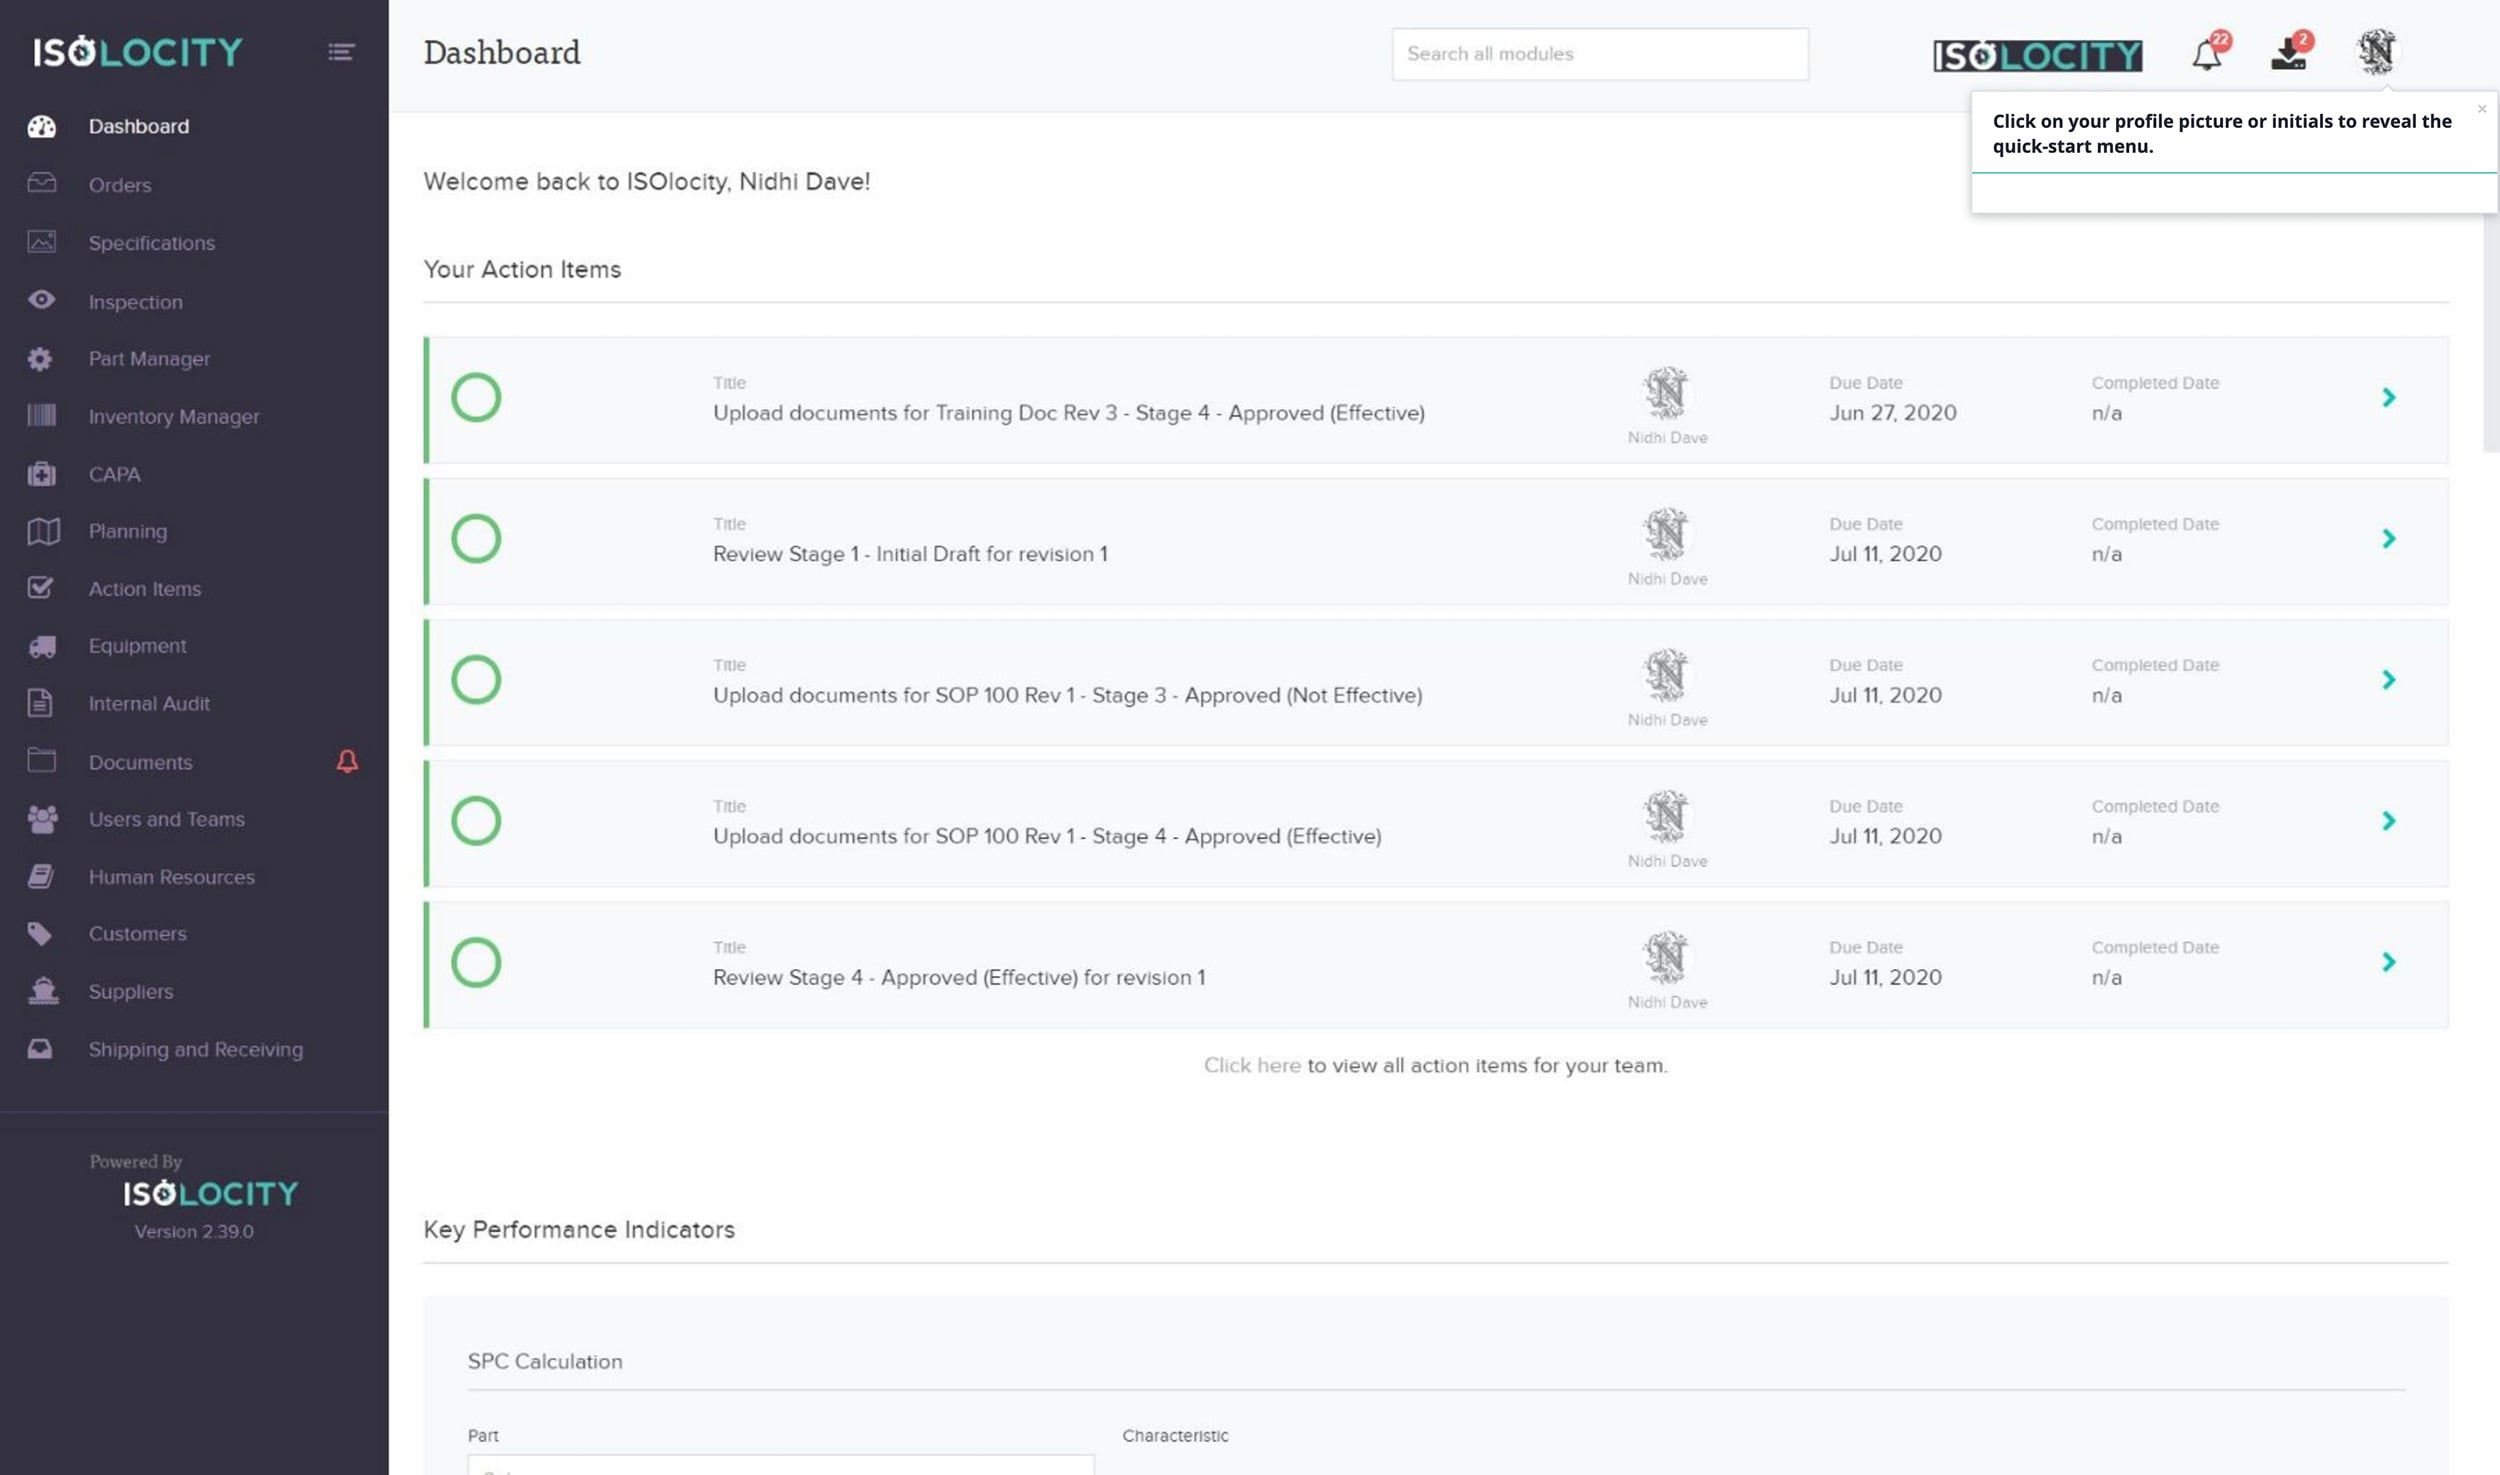
Step #1
Click on your profile picture or initials to reveal the quick-start menu.
Step #2
Click “Organization Settings”.

Step #3
Enter “Organization Name”.

Step #4
Click “Choose File” to upload an organization logo.

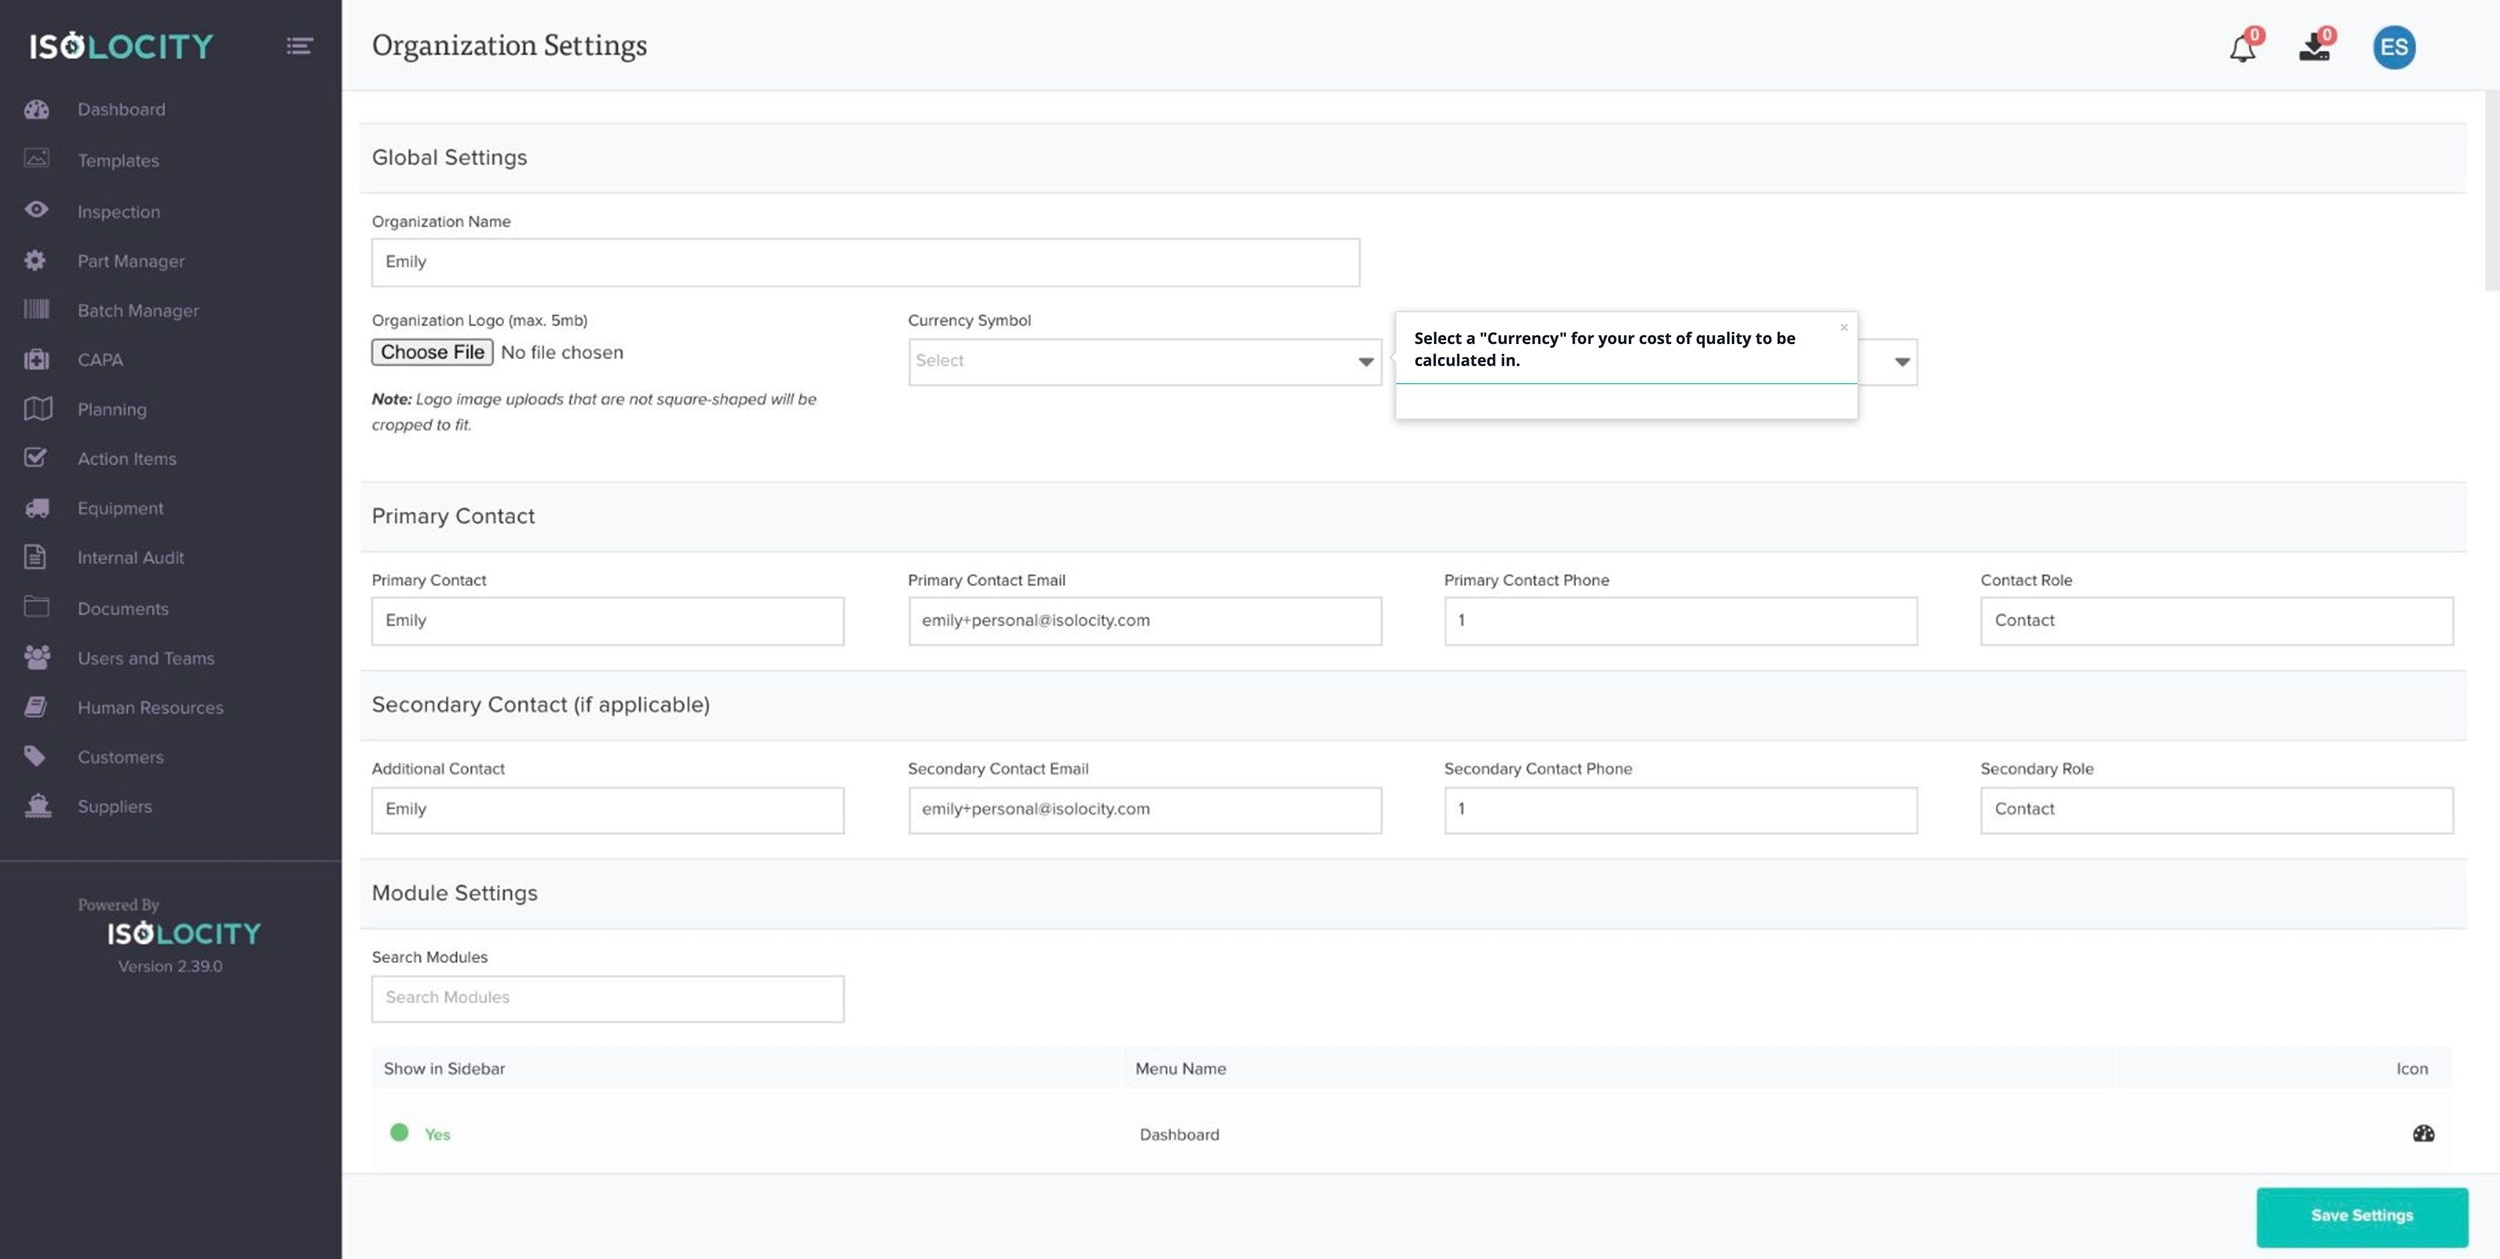
Step #5
Select a “Currency” for your cost of quality to be calculated in.
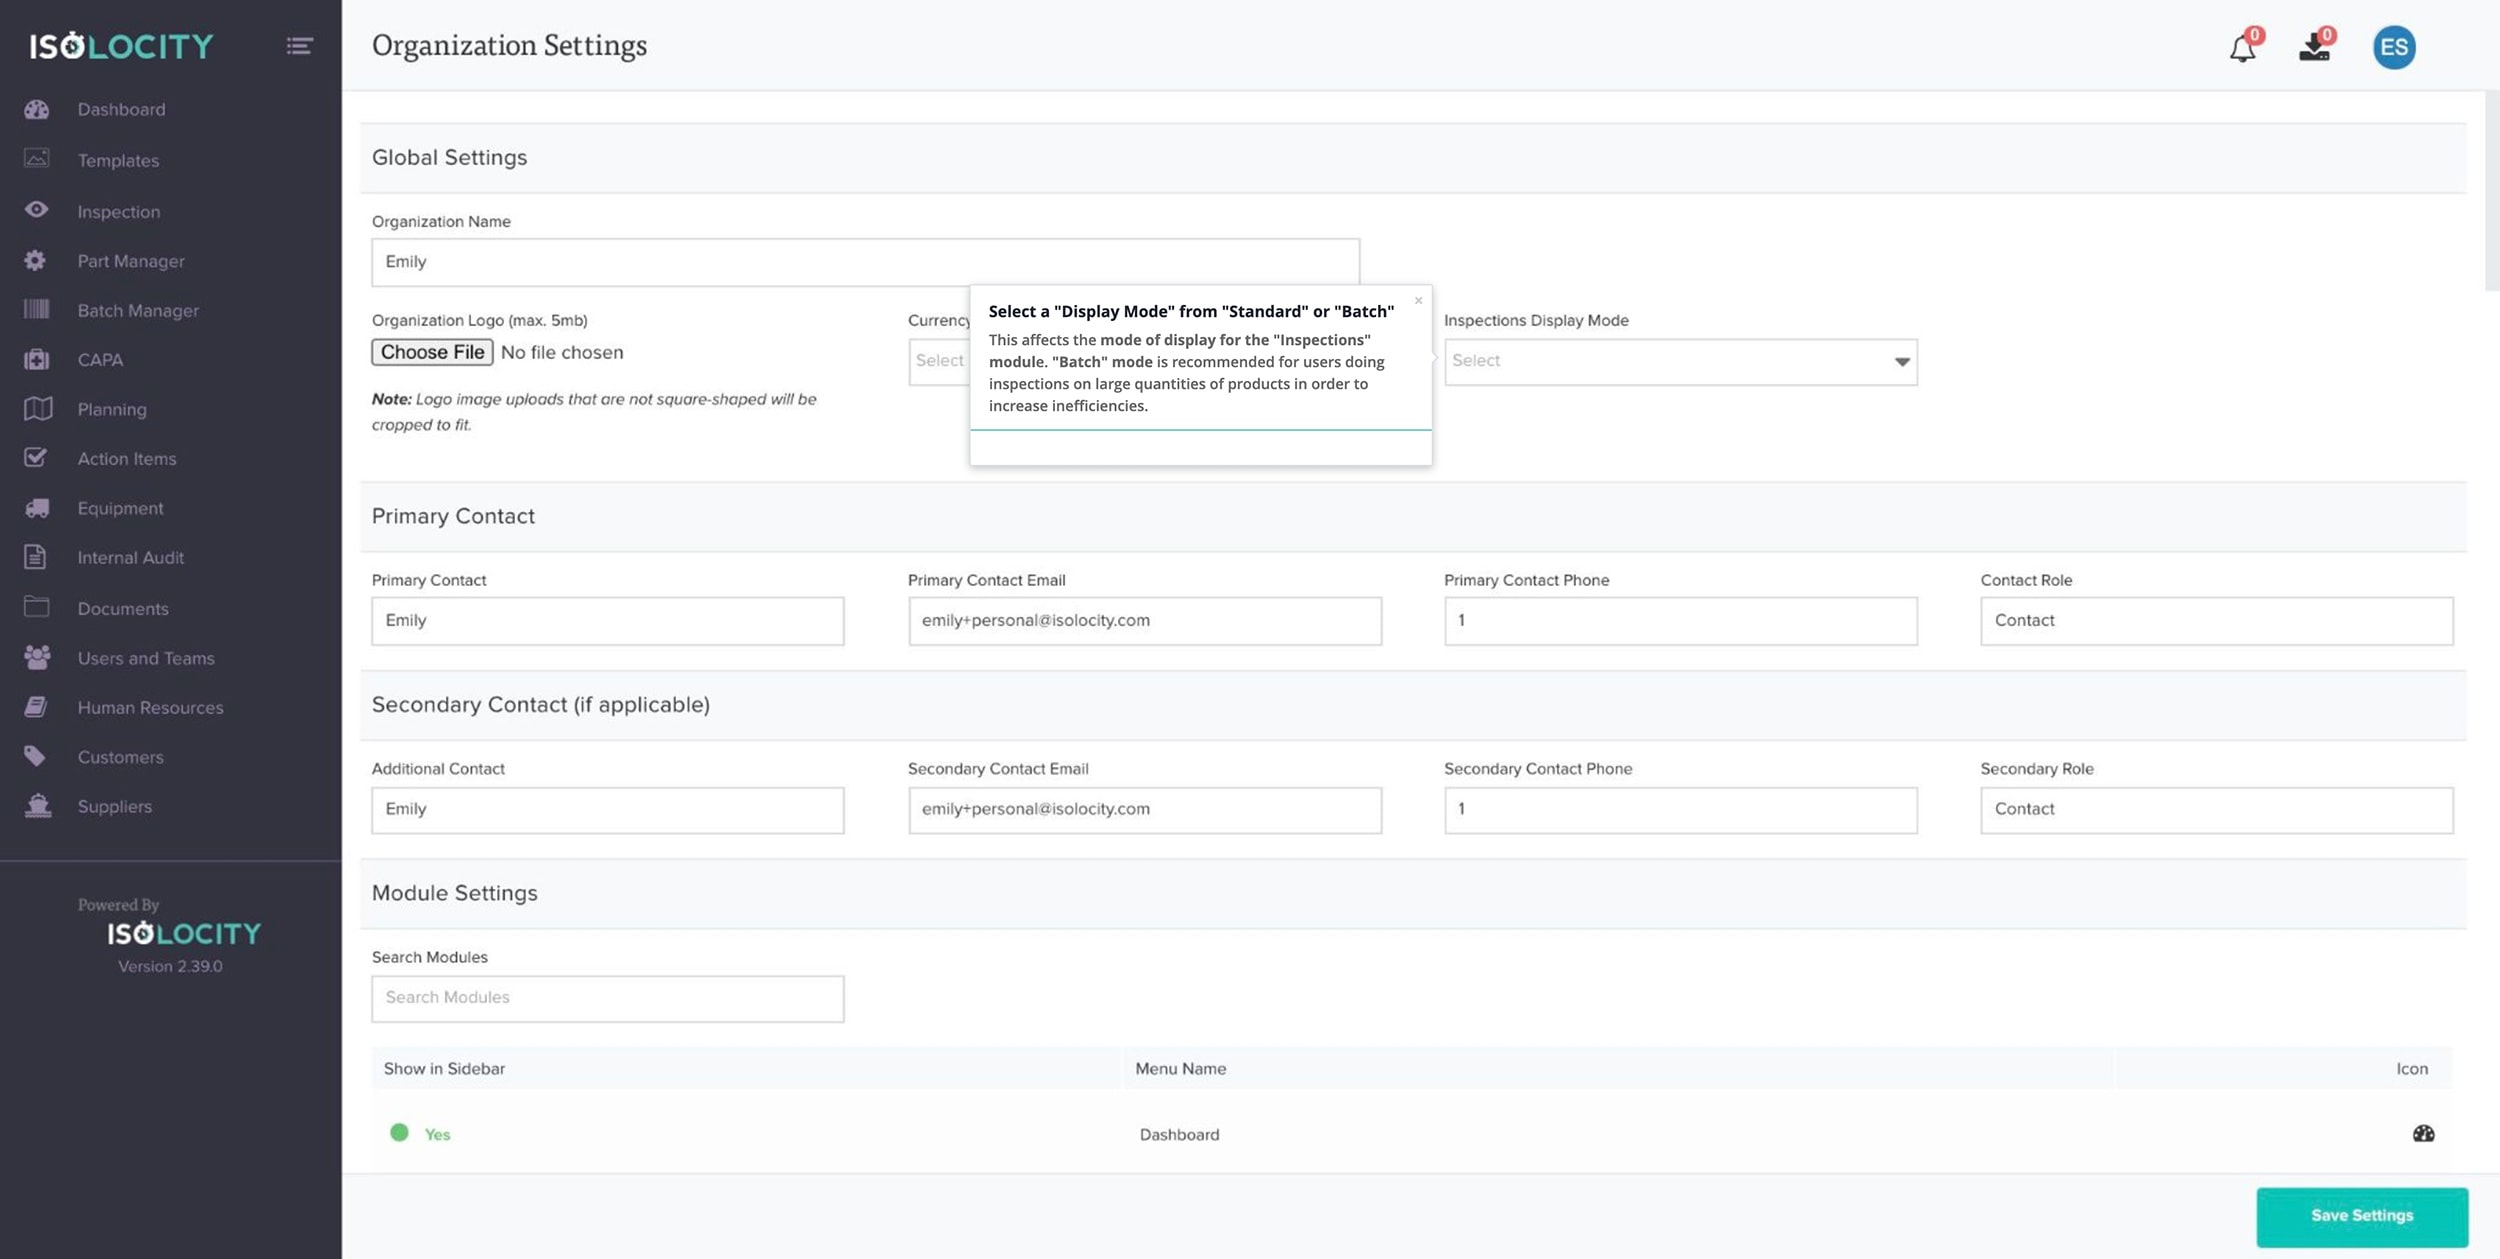
Step #6
Select a “Display Mode” from “Standard” or “Batch”
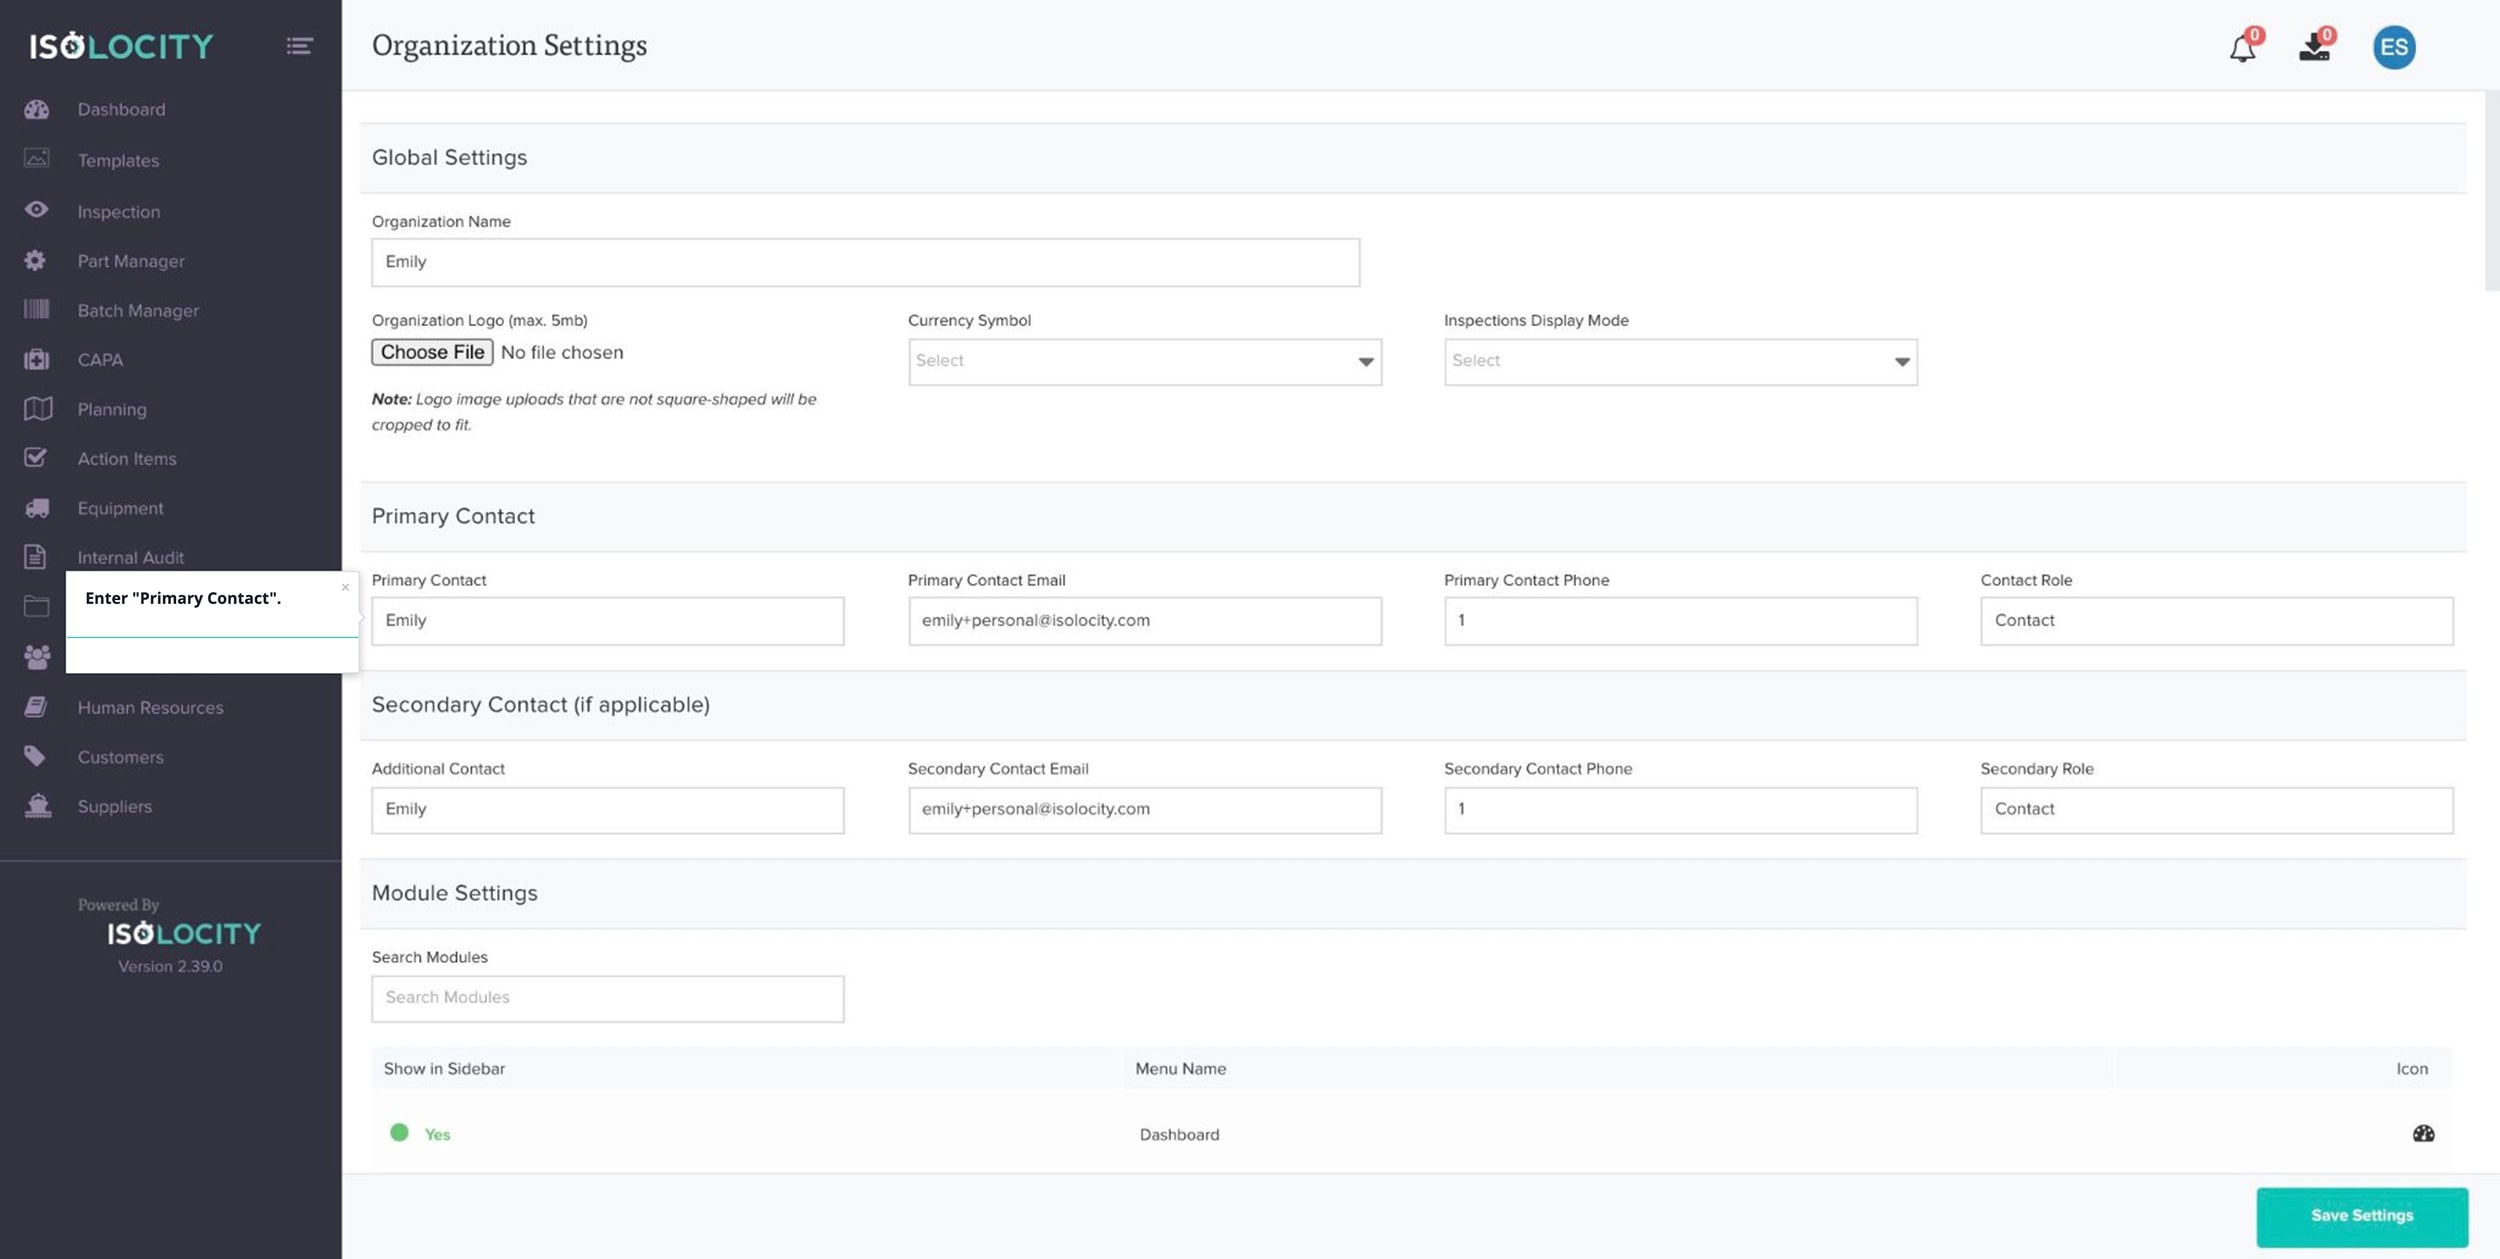
Step #7
Enter “Primary Contact”.
Step #8
Enter “Primary Contact Email”.
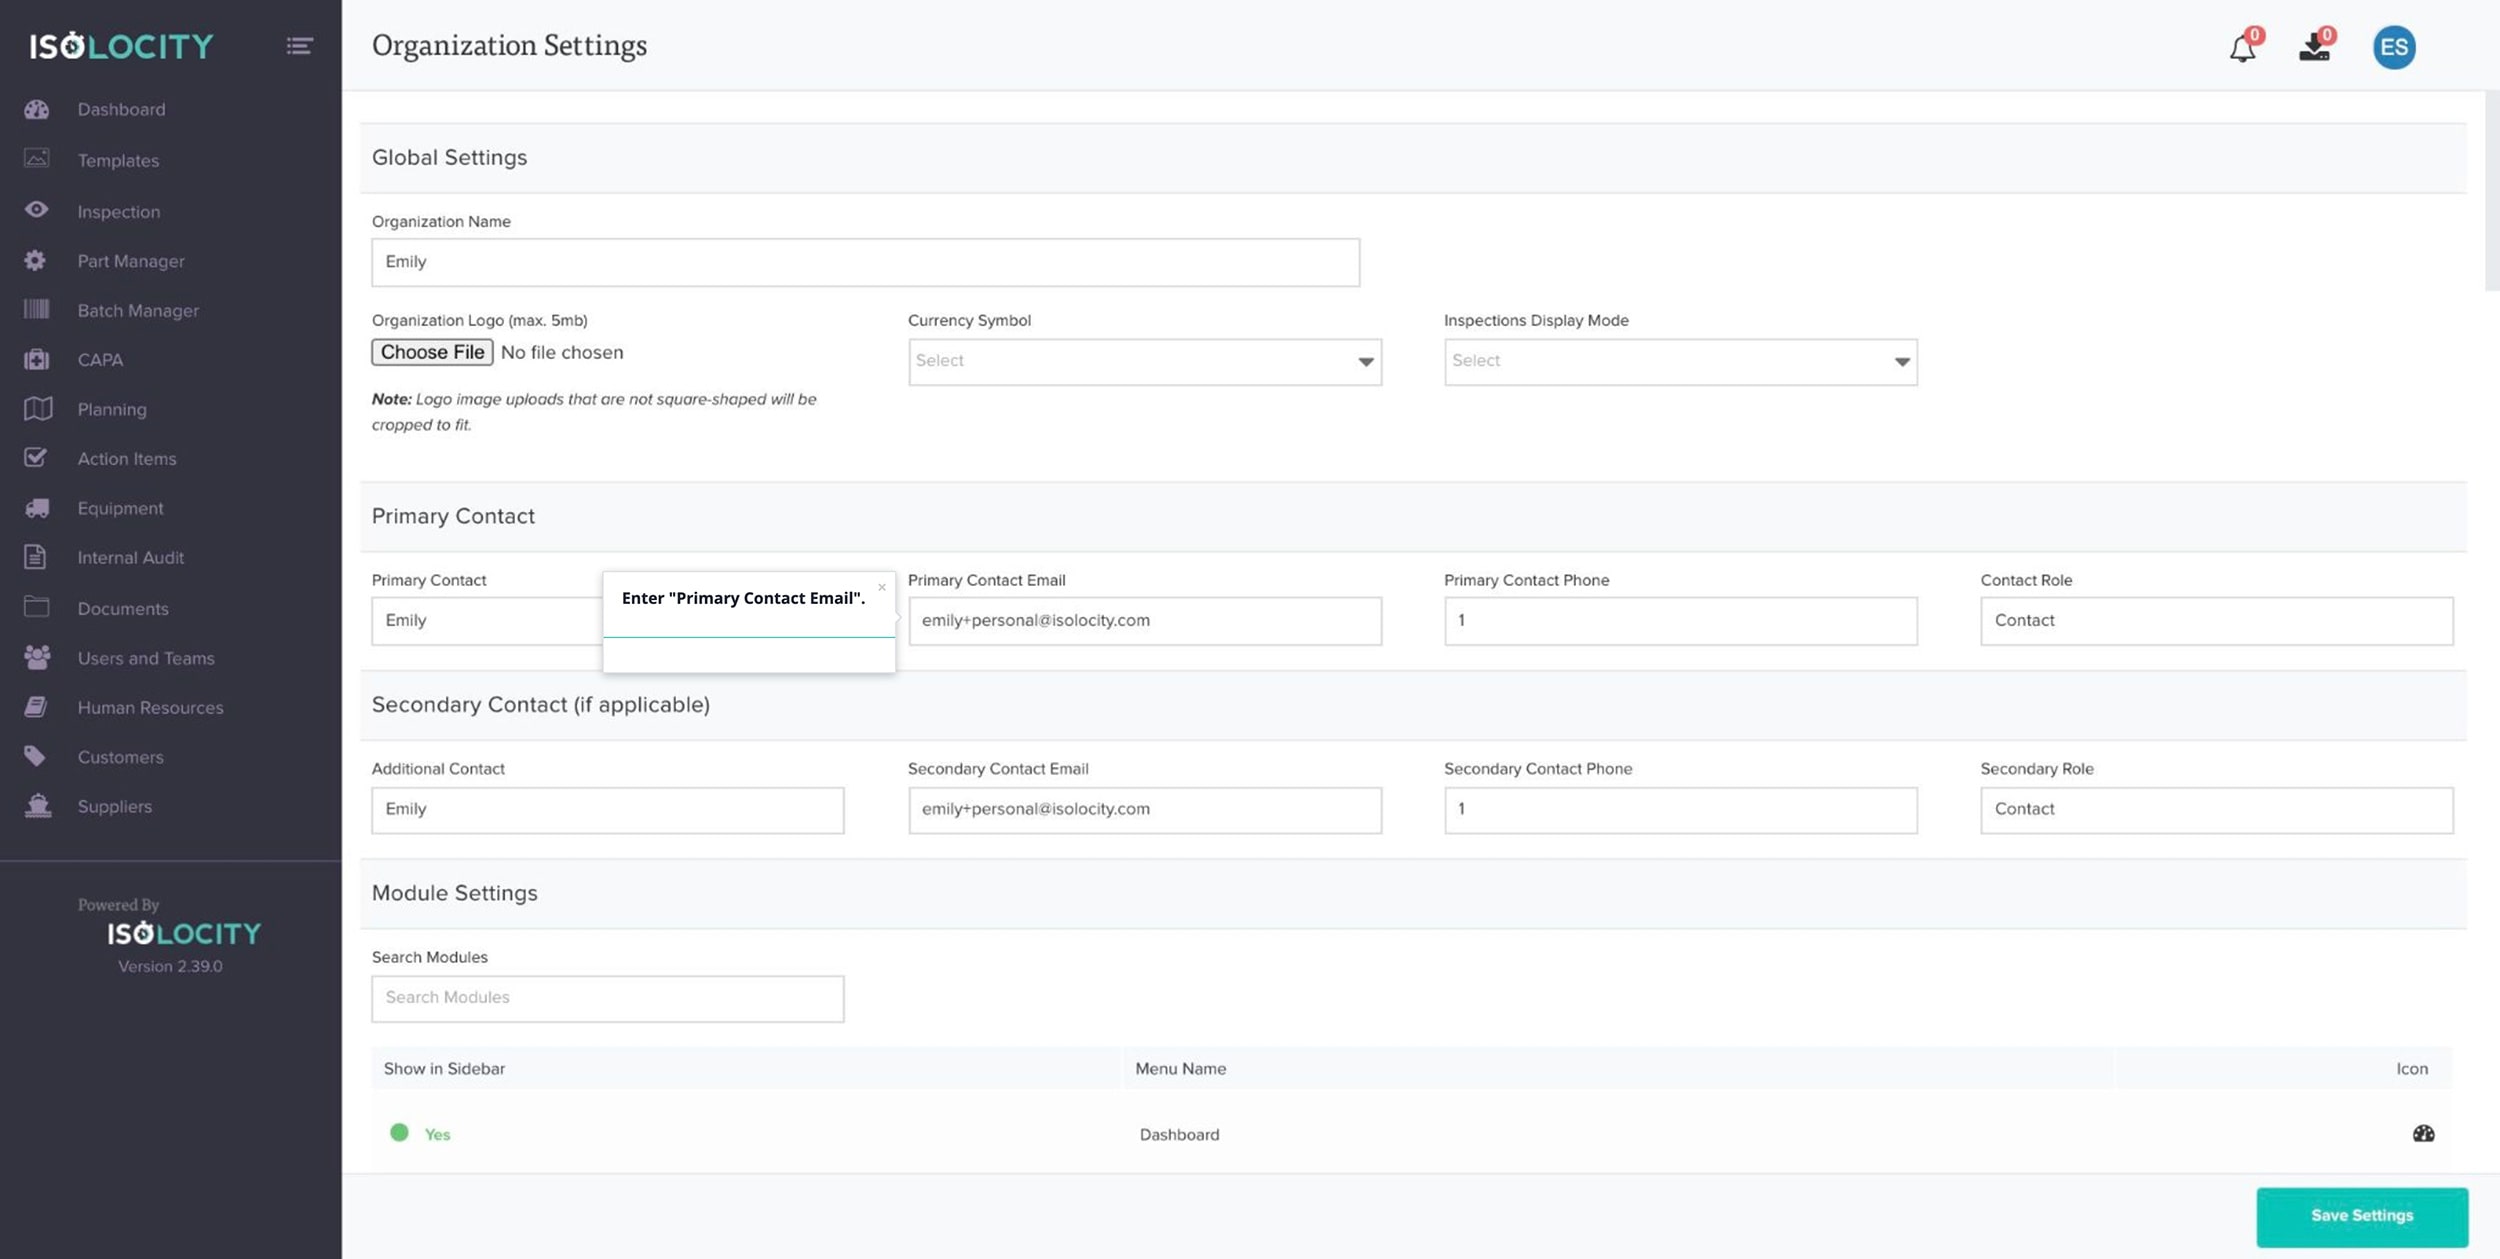
Step #9
Enter “Primary Contact Phone”.

Step #10
Enter “Contact Role”.

Step #11
Enter “Additional Contact” (Optional).

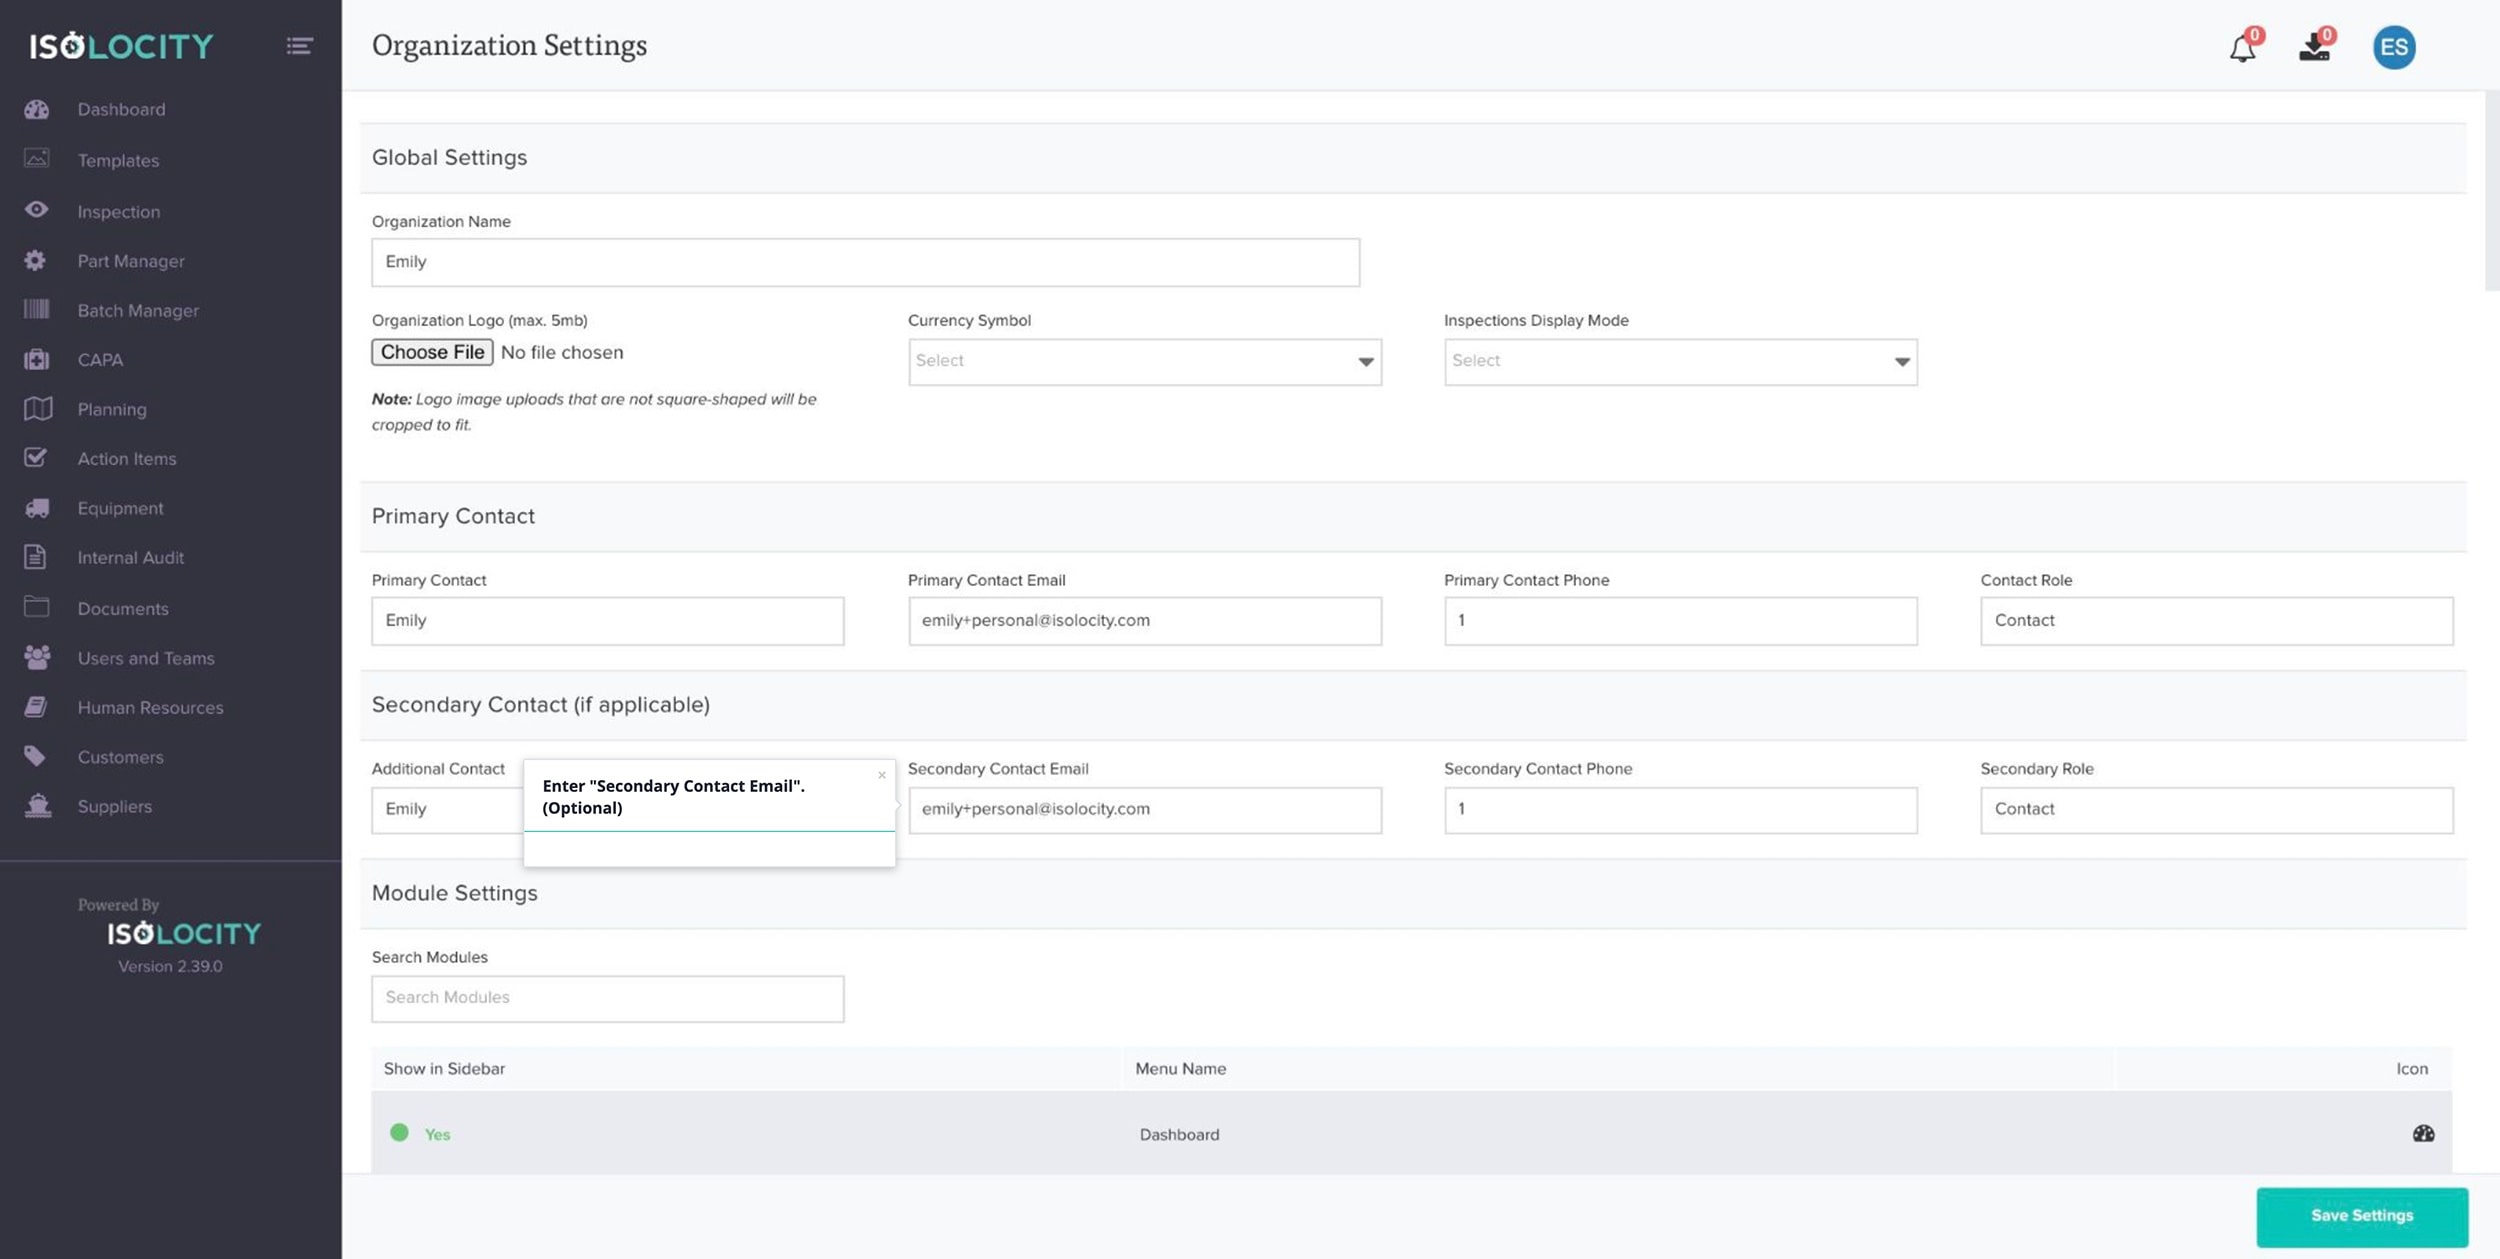
Step #12
Enter “Secondary Contact Email”. (Optional)
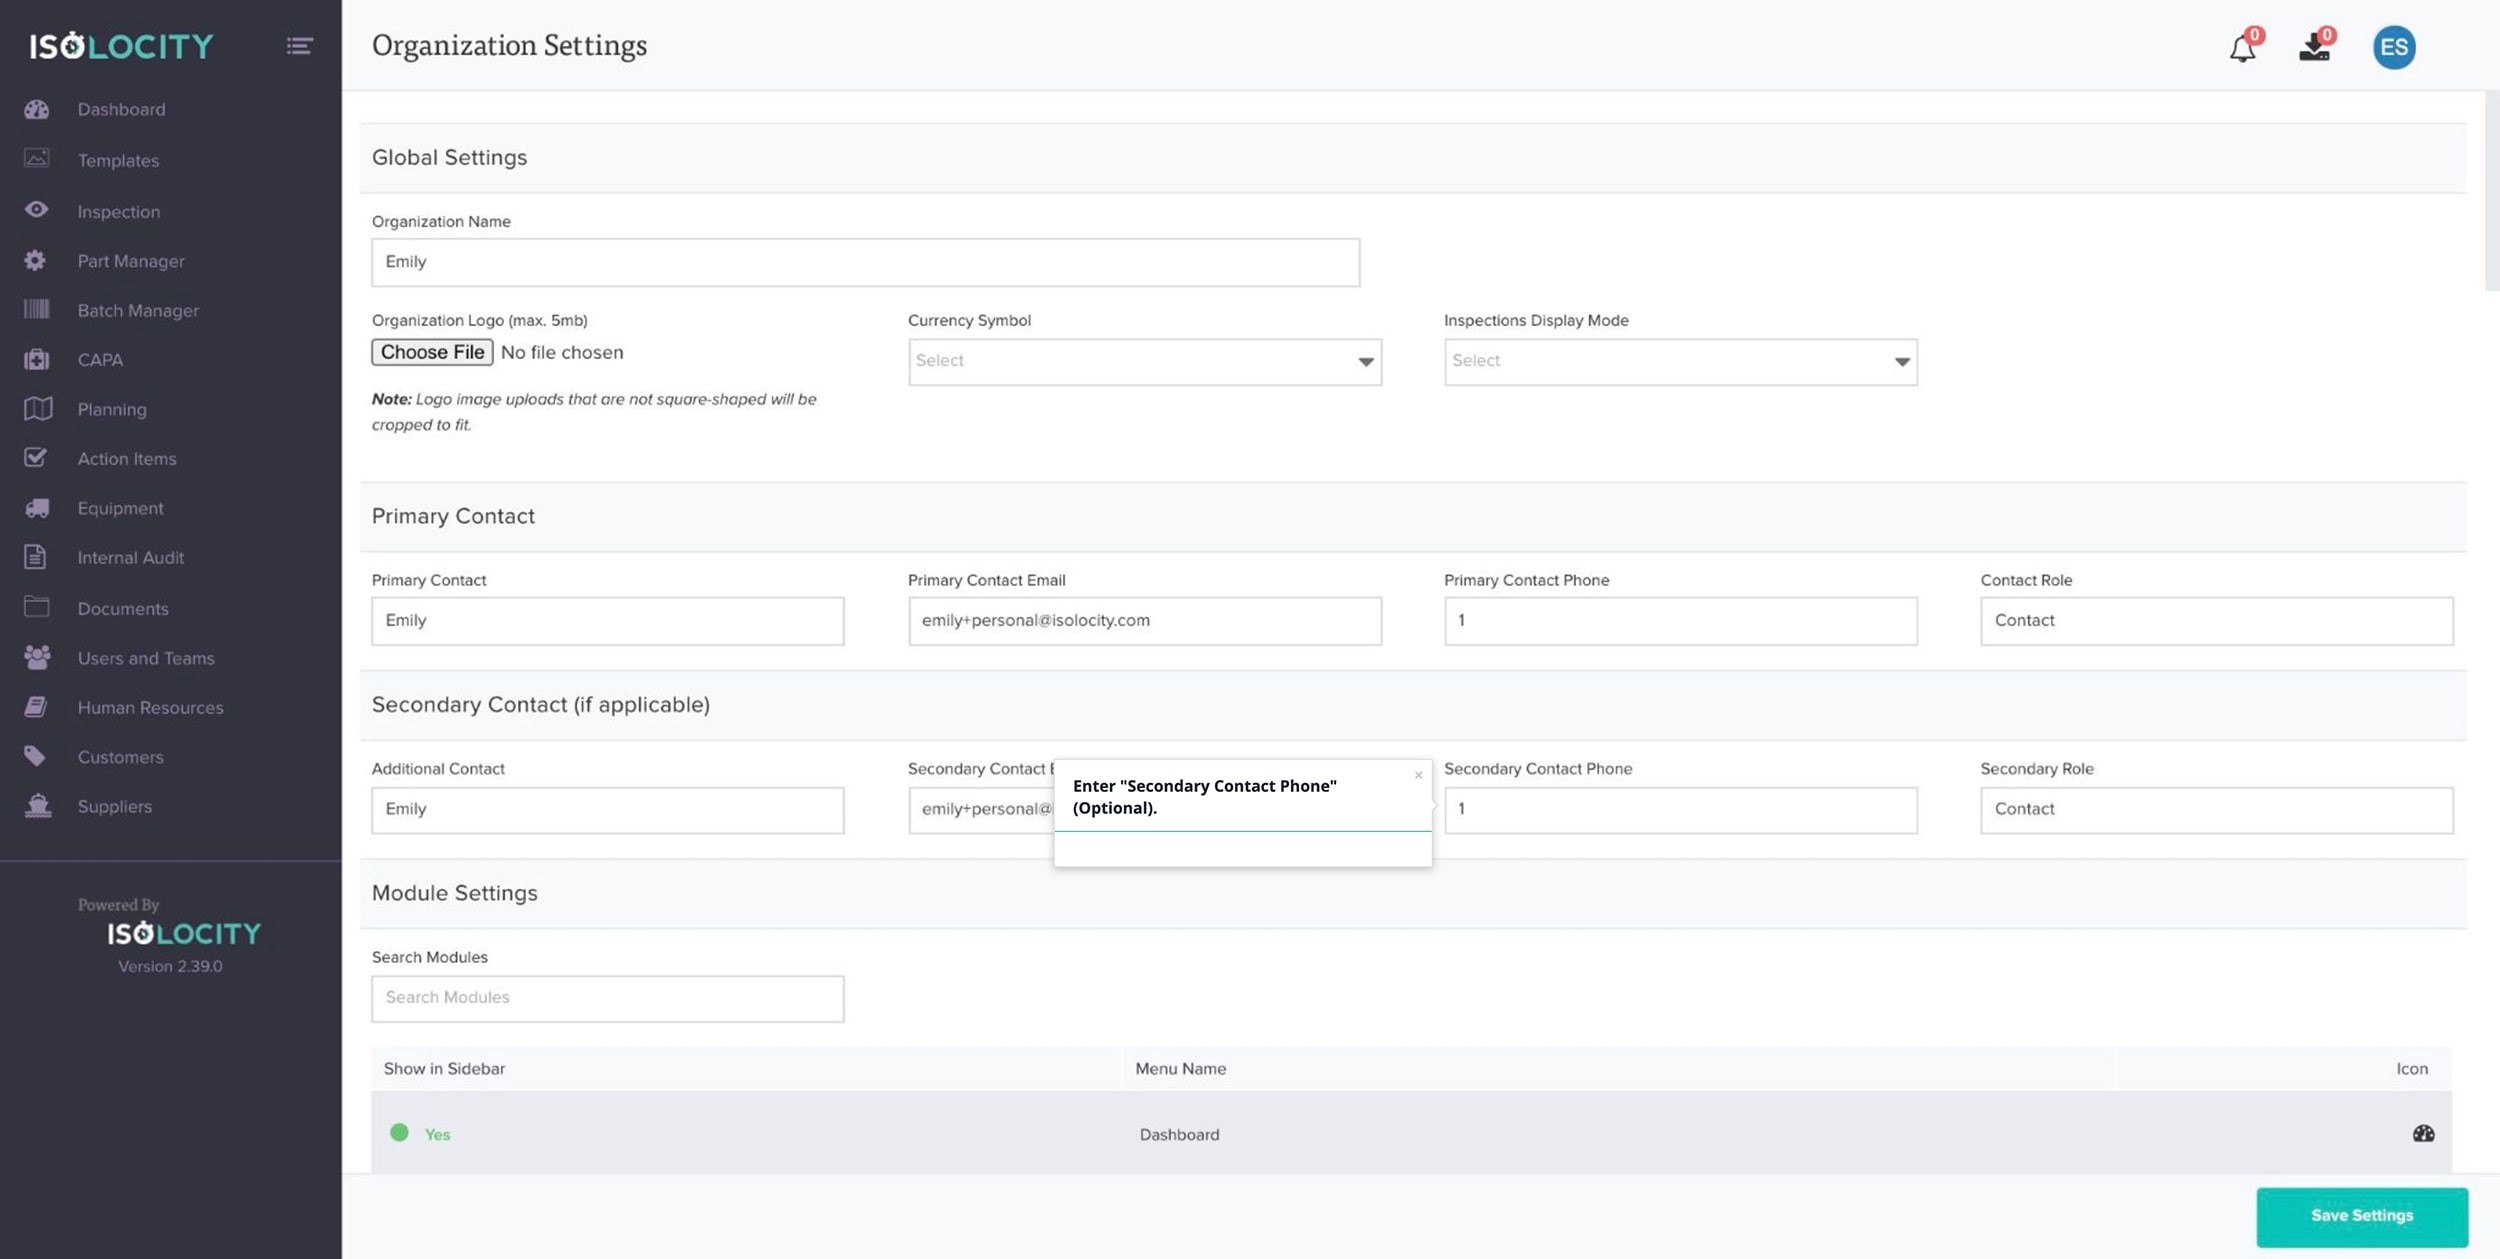
Step #13
Enter “Secondary Contact Phone” (Optional).
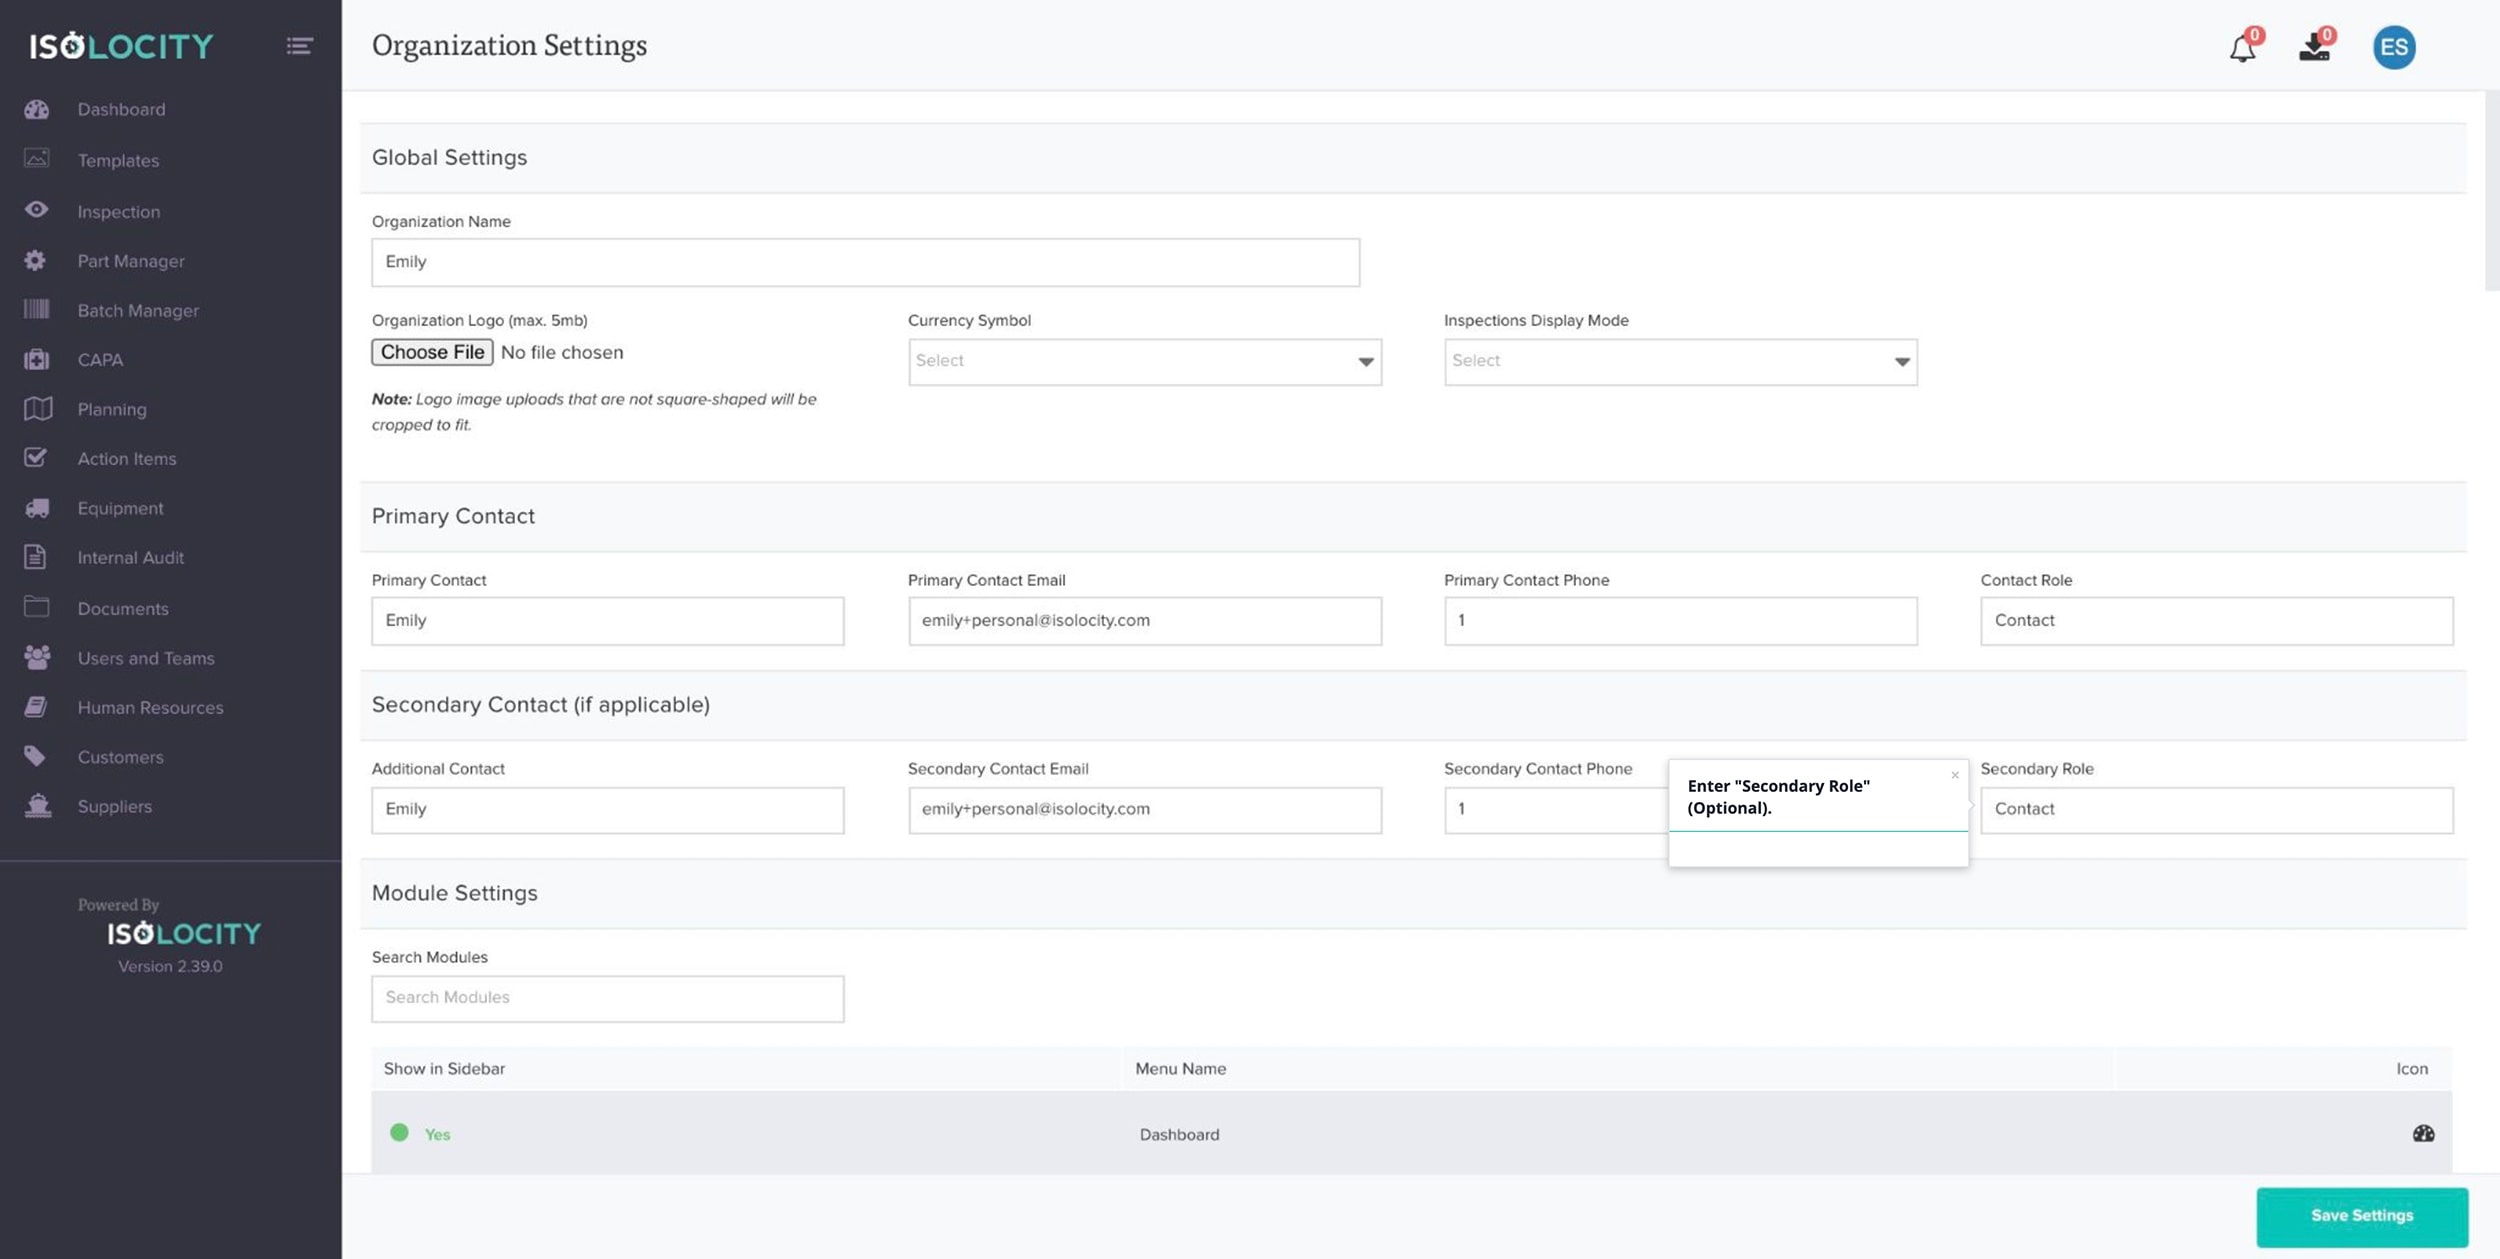
Step #14
Enter “Secondary Role” (Optional).
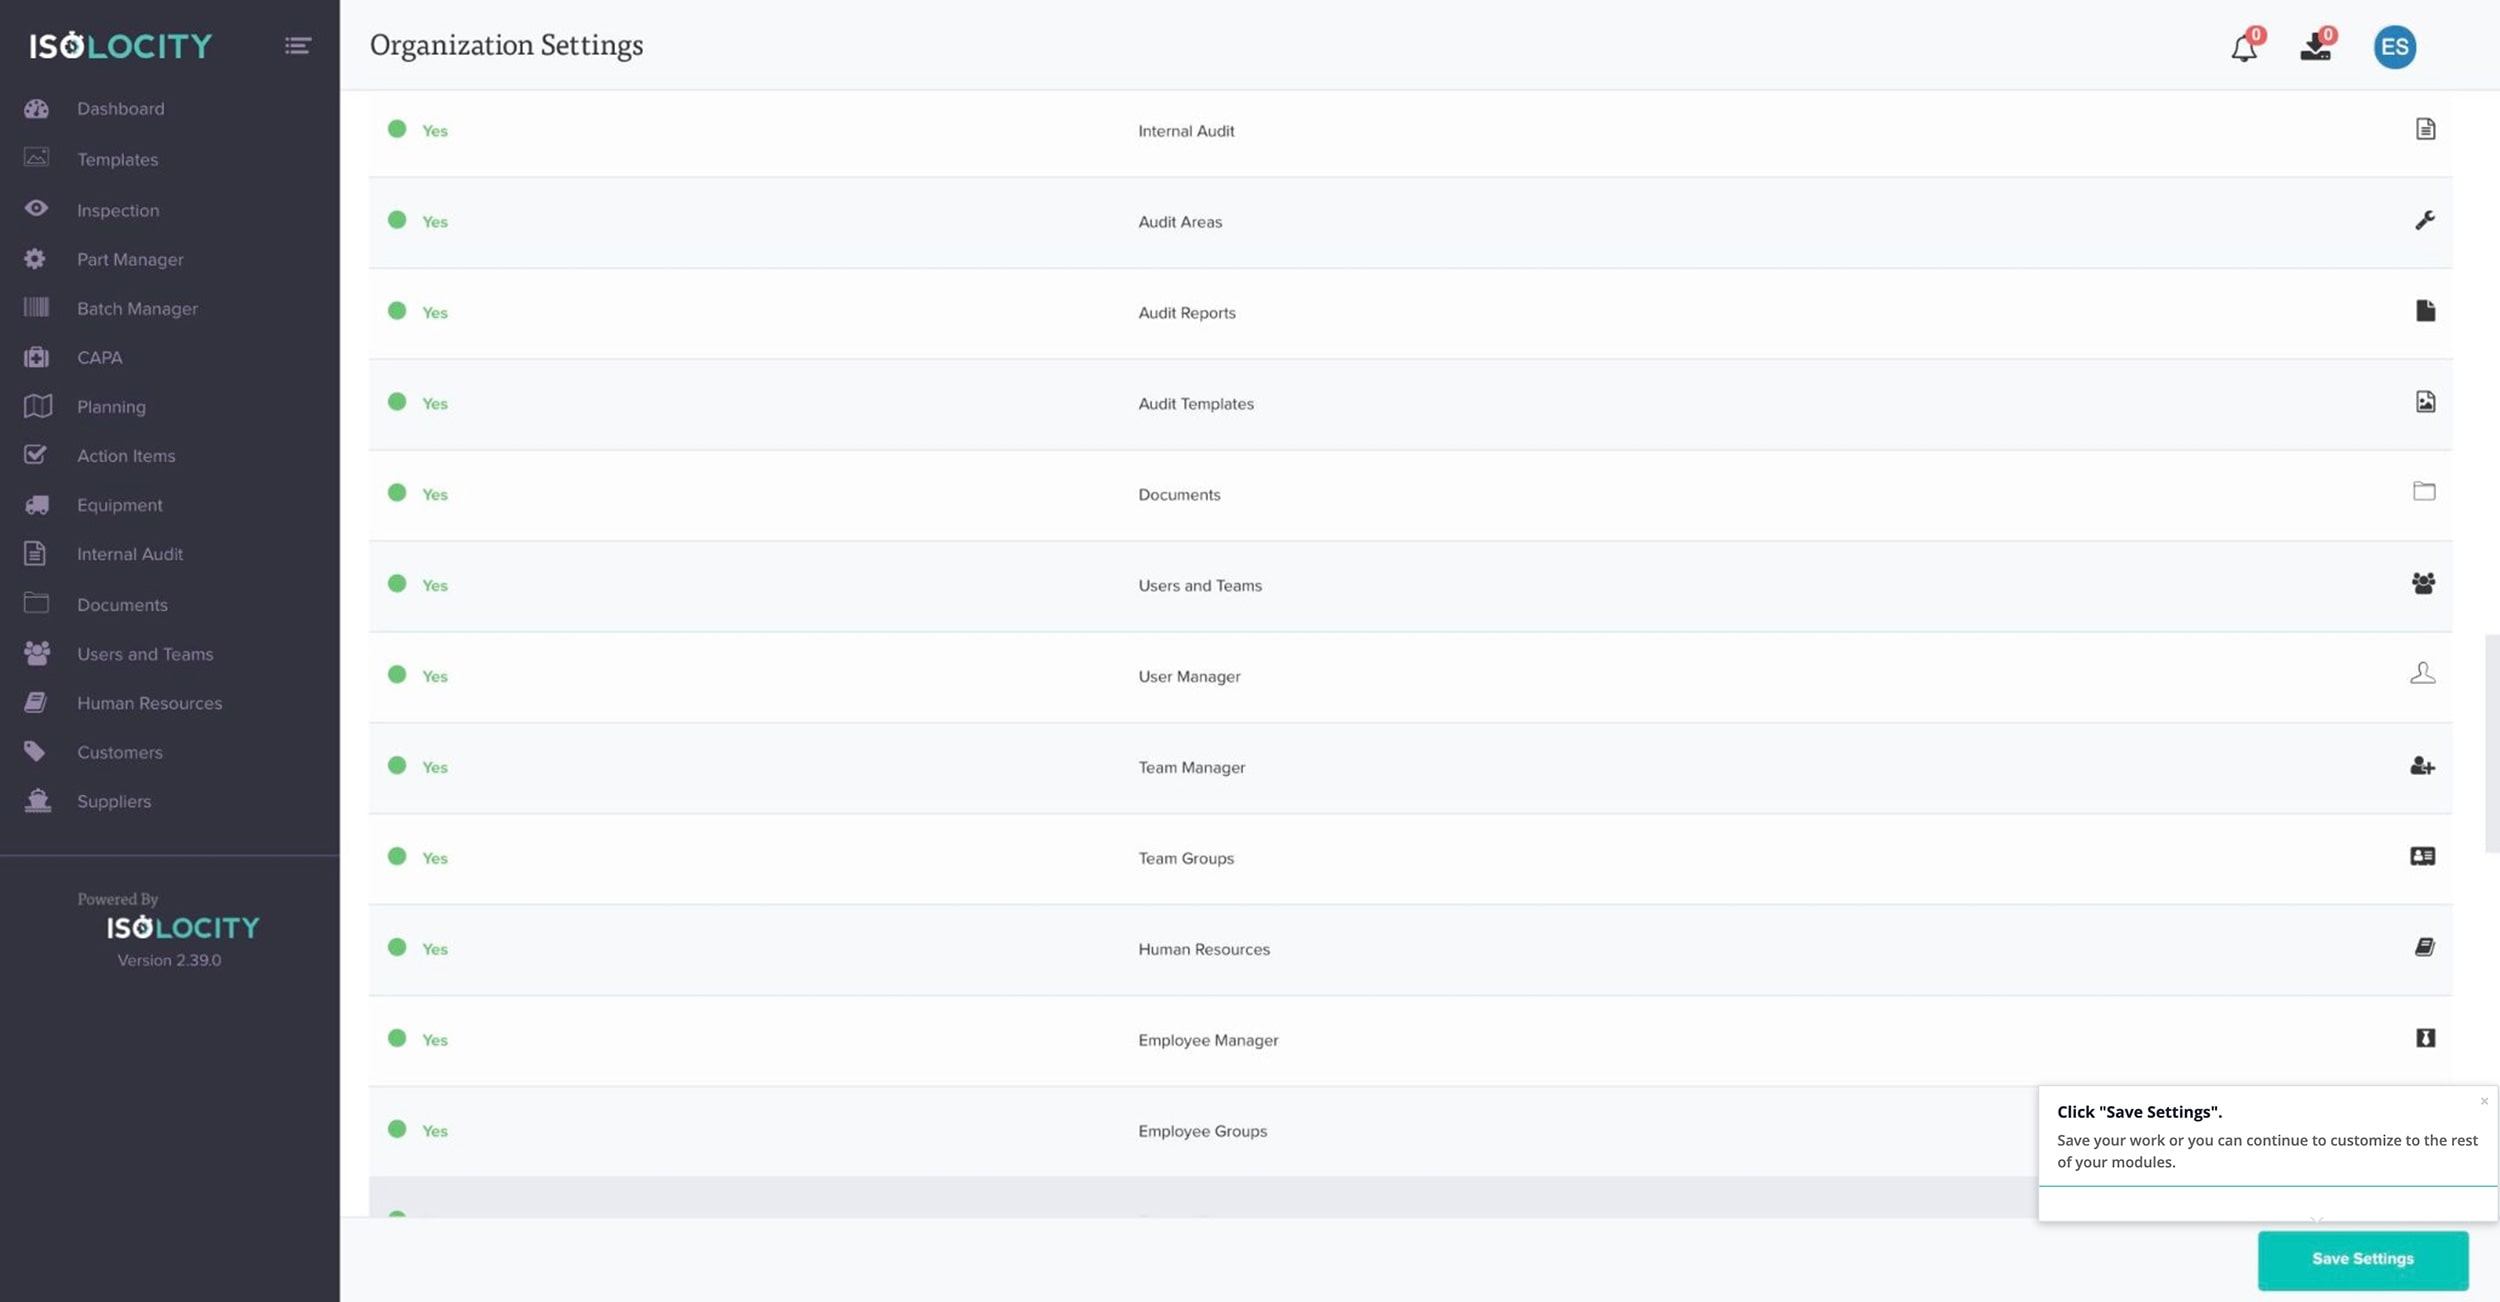
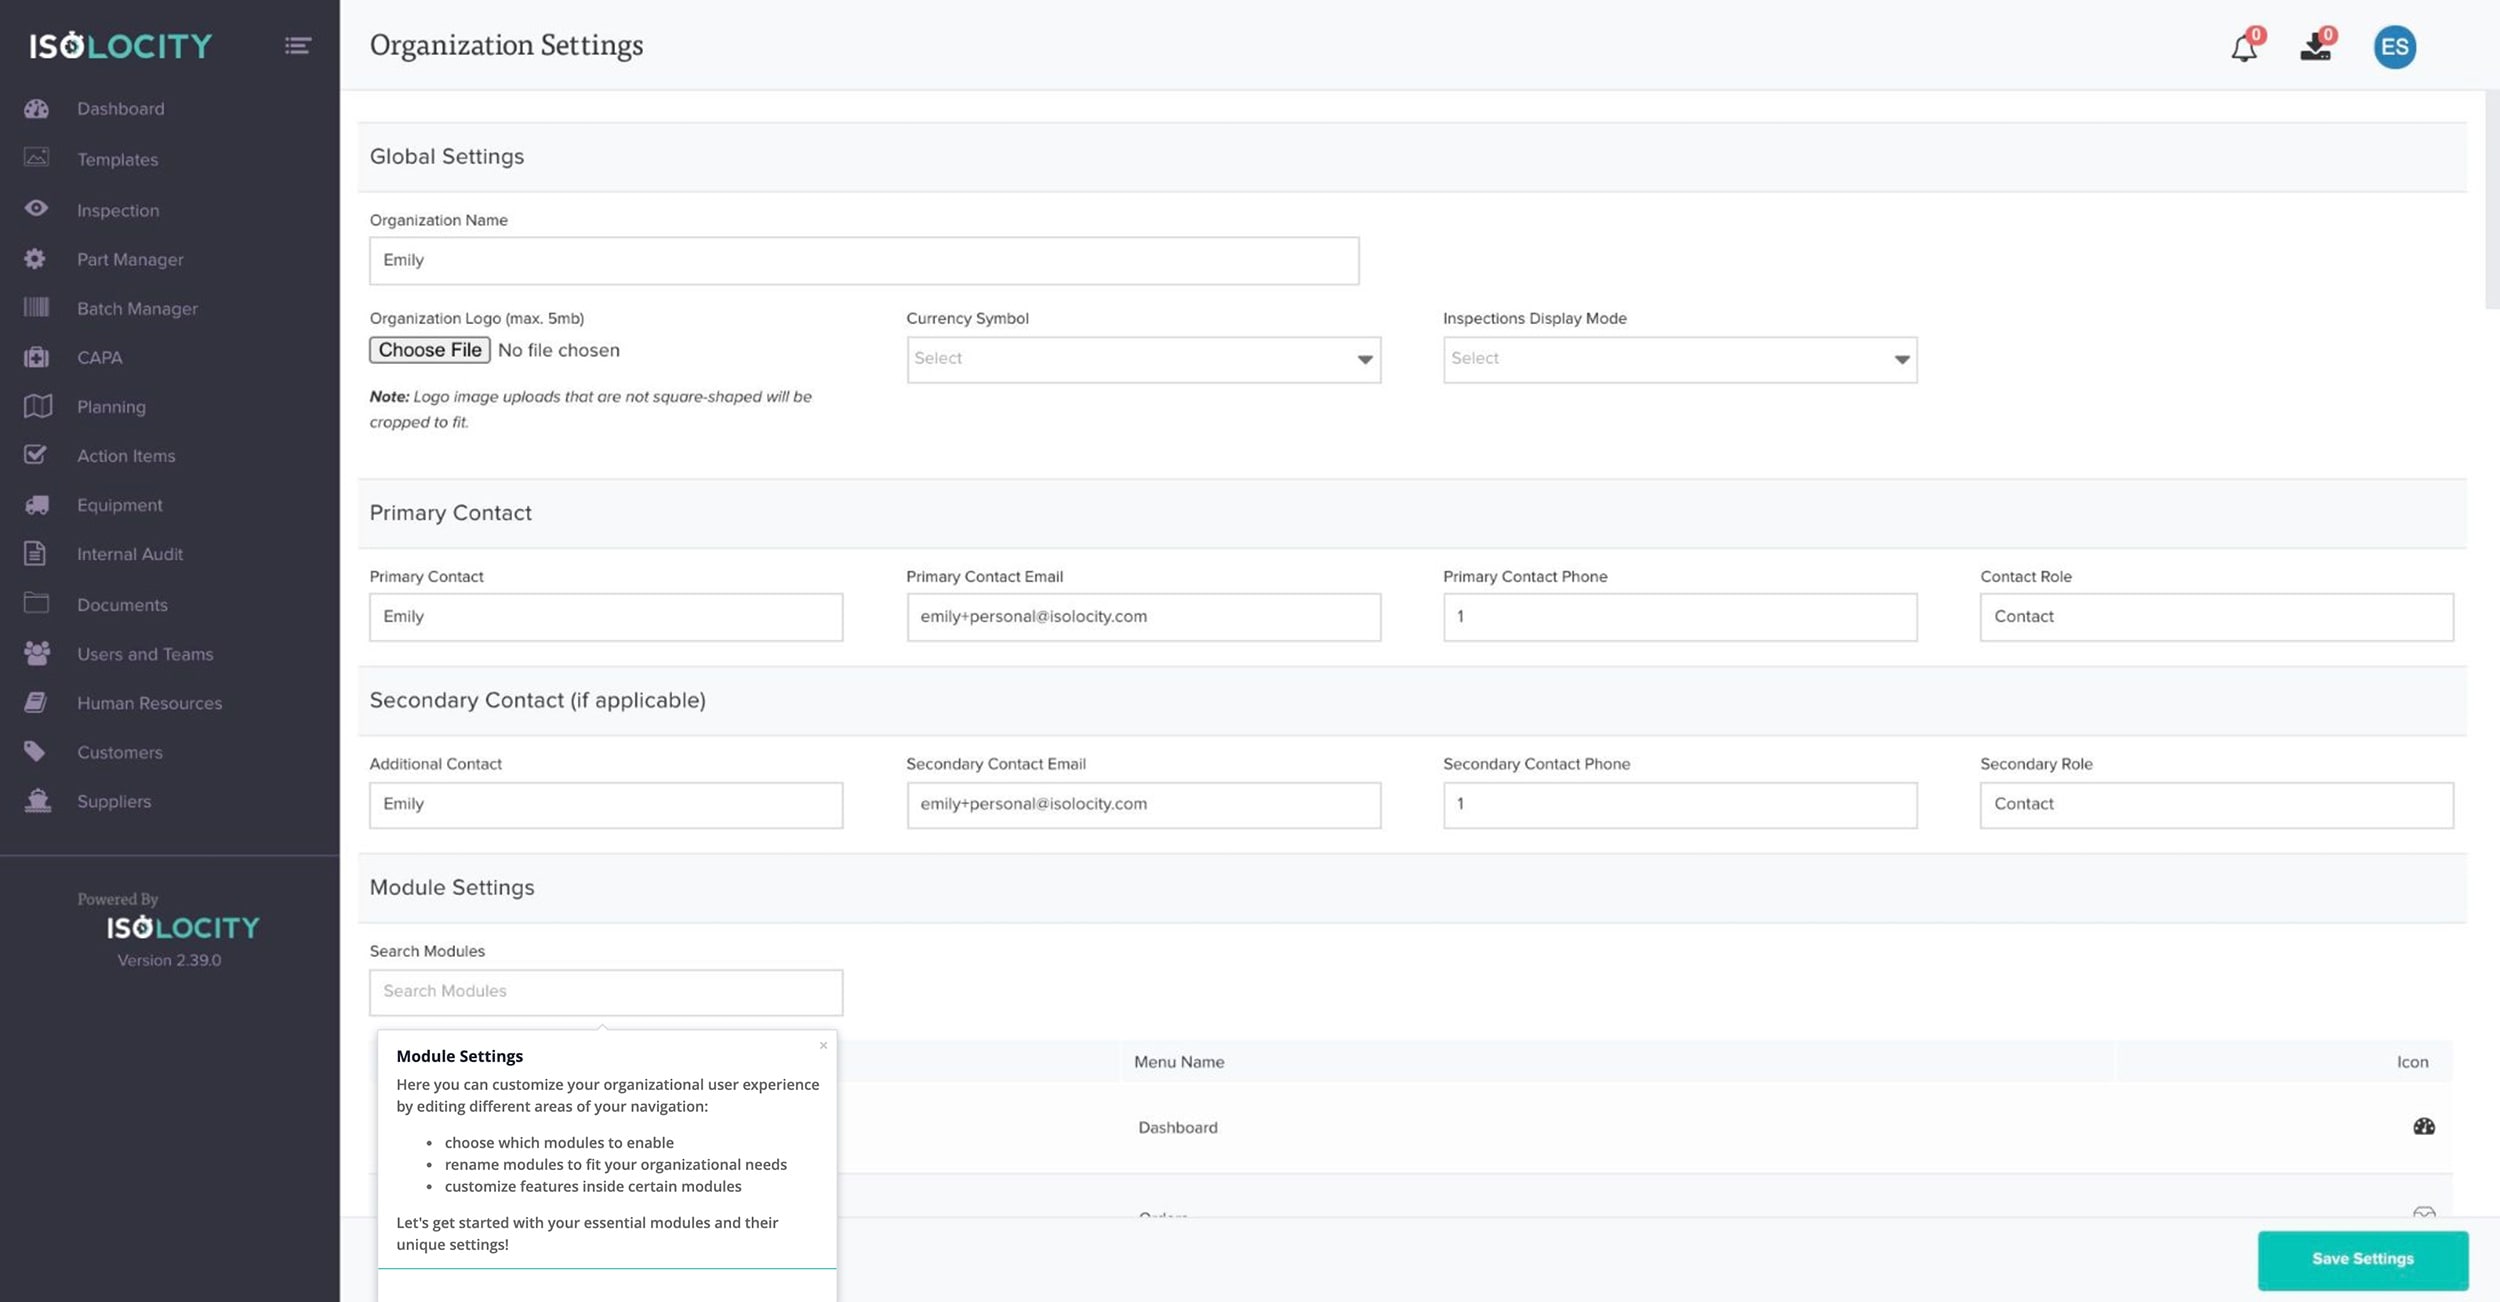
Step #15
Module Settings
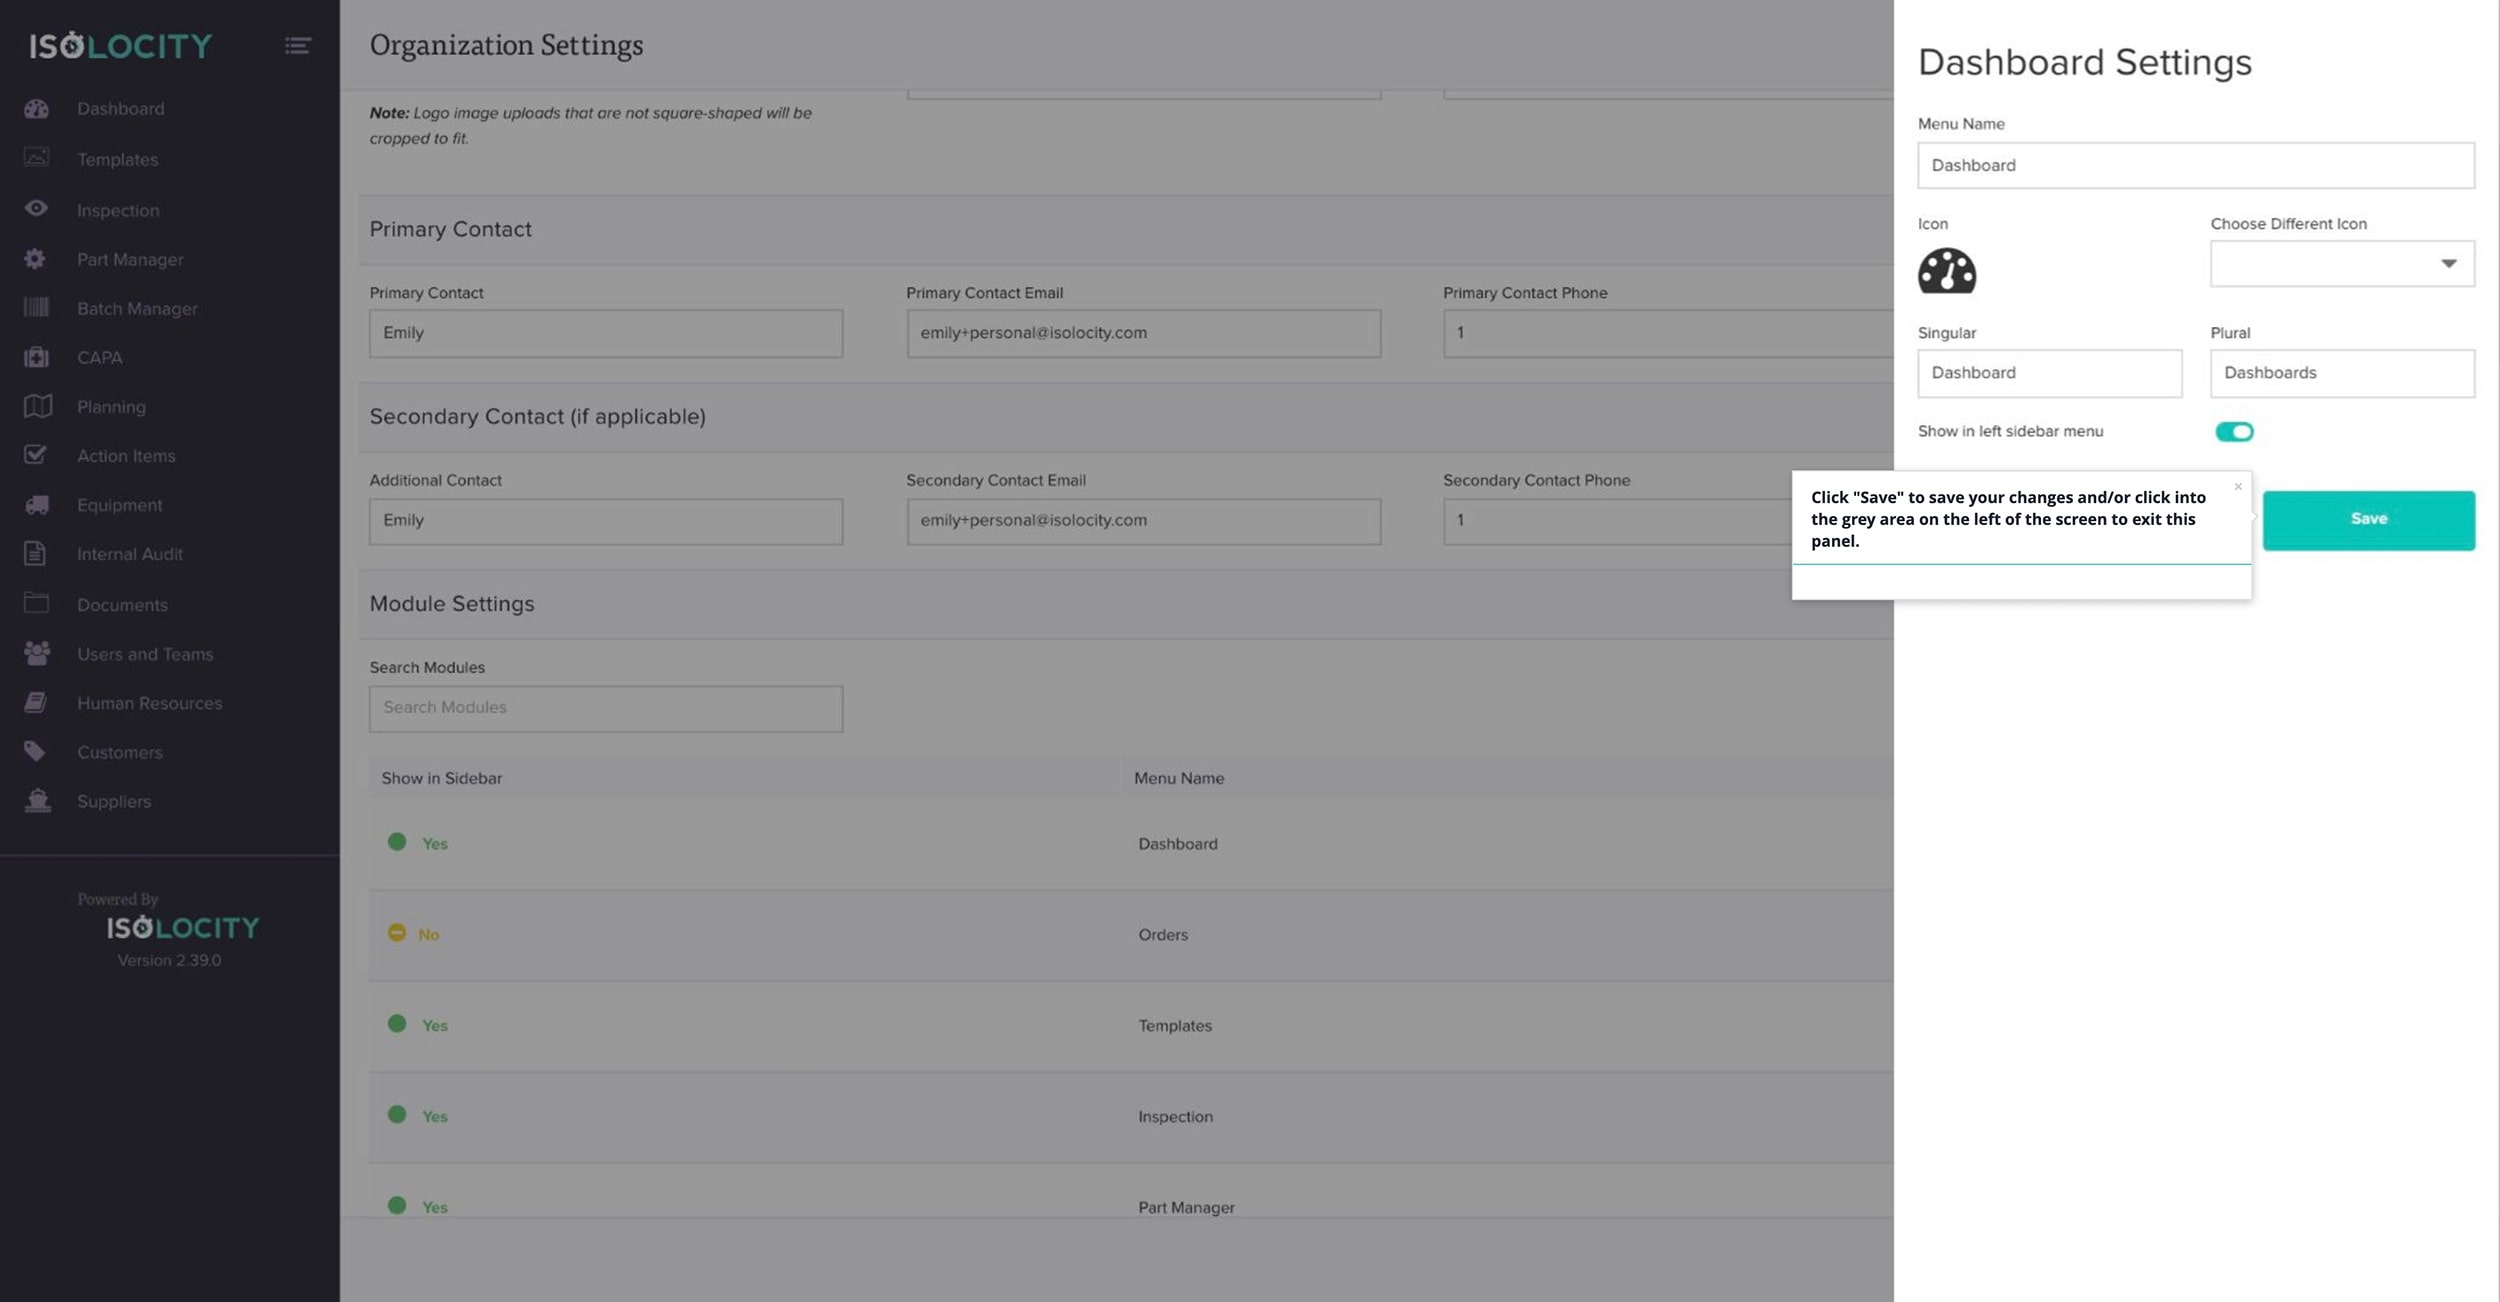
Step #16
Click on “Dashboard”.

Step #17
Enter a new “Menu Name” or leave it as default.
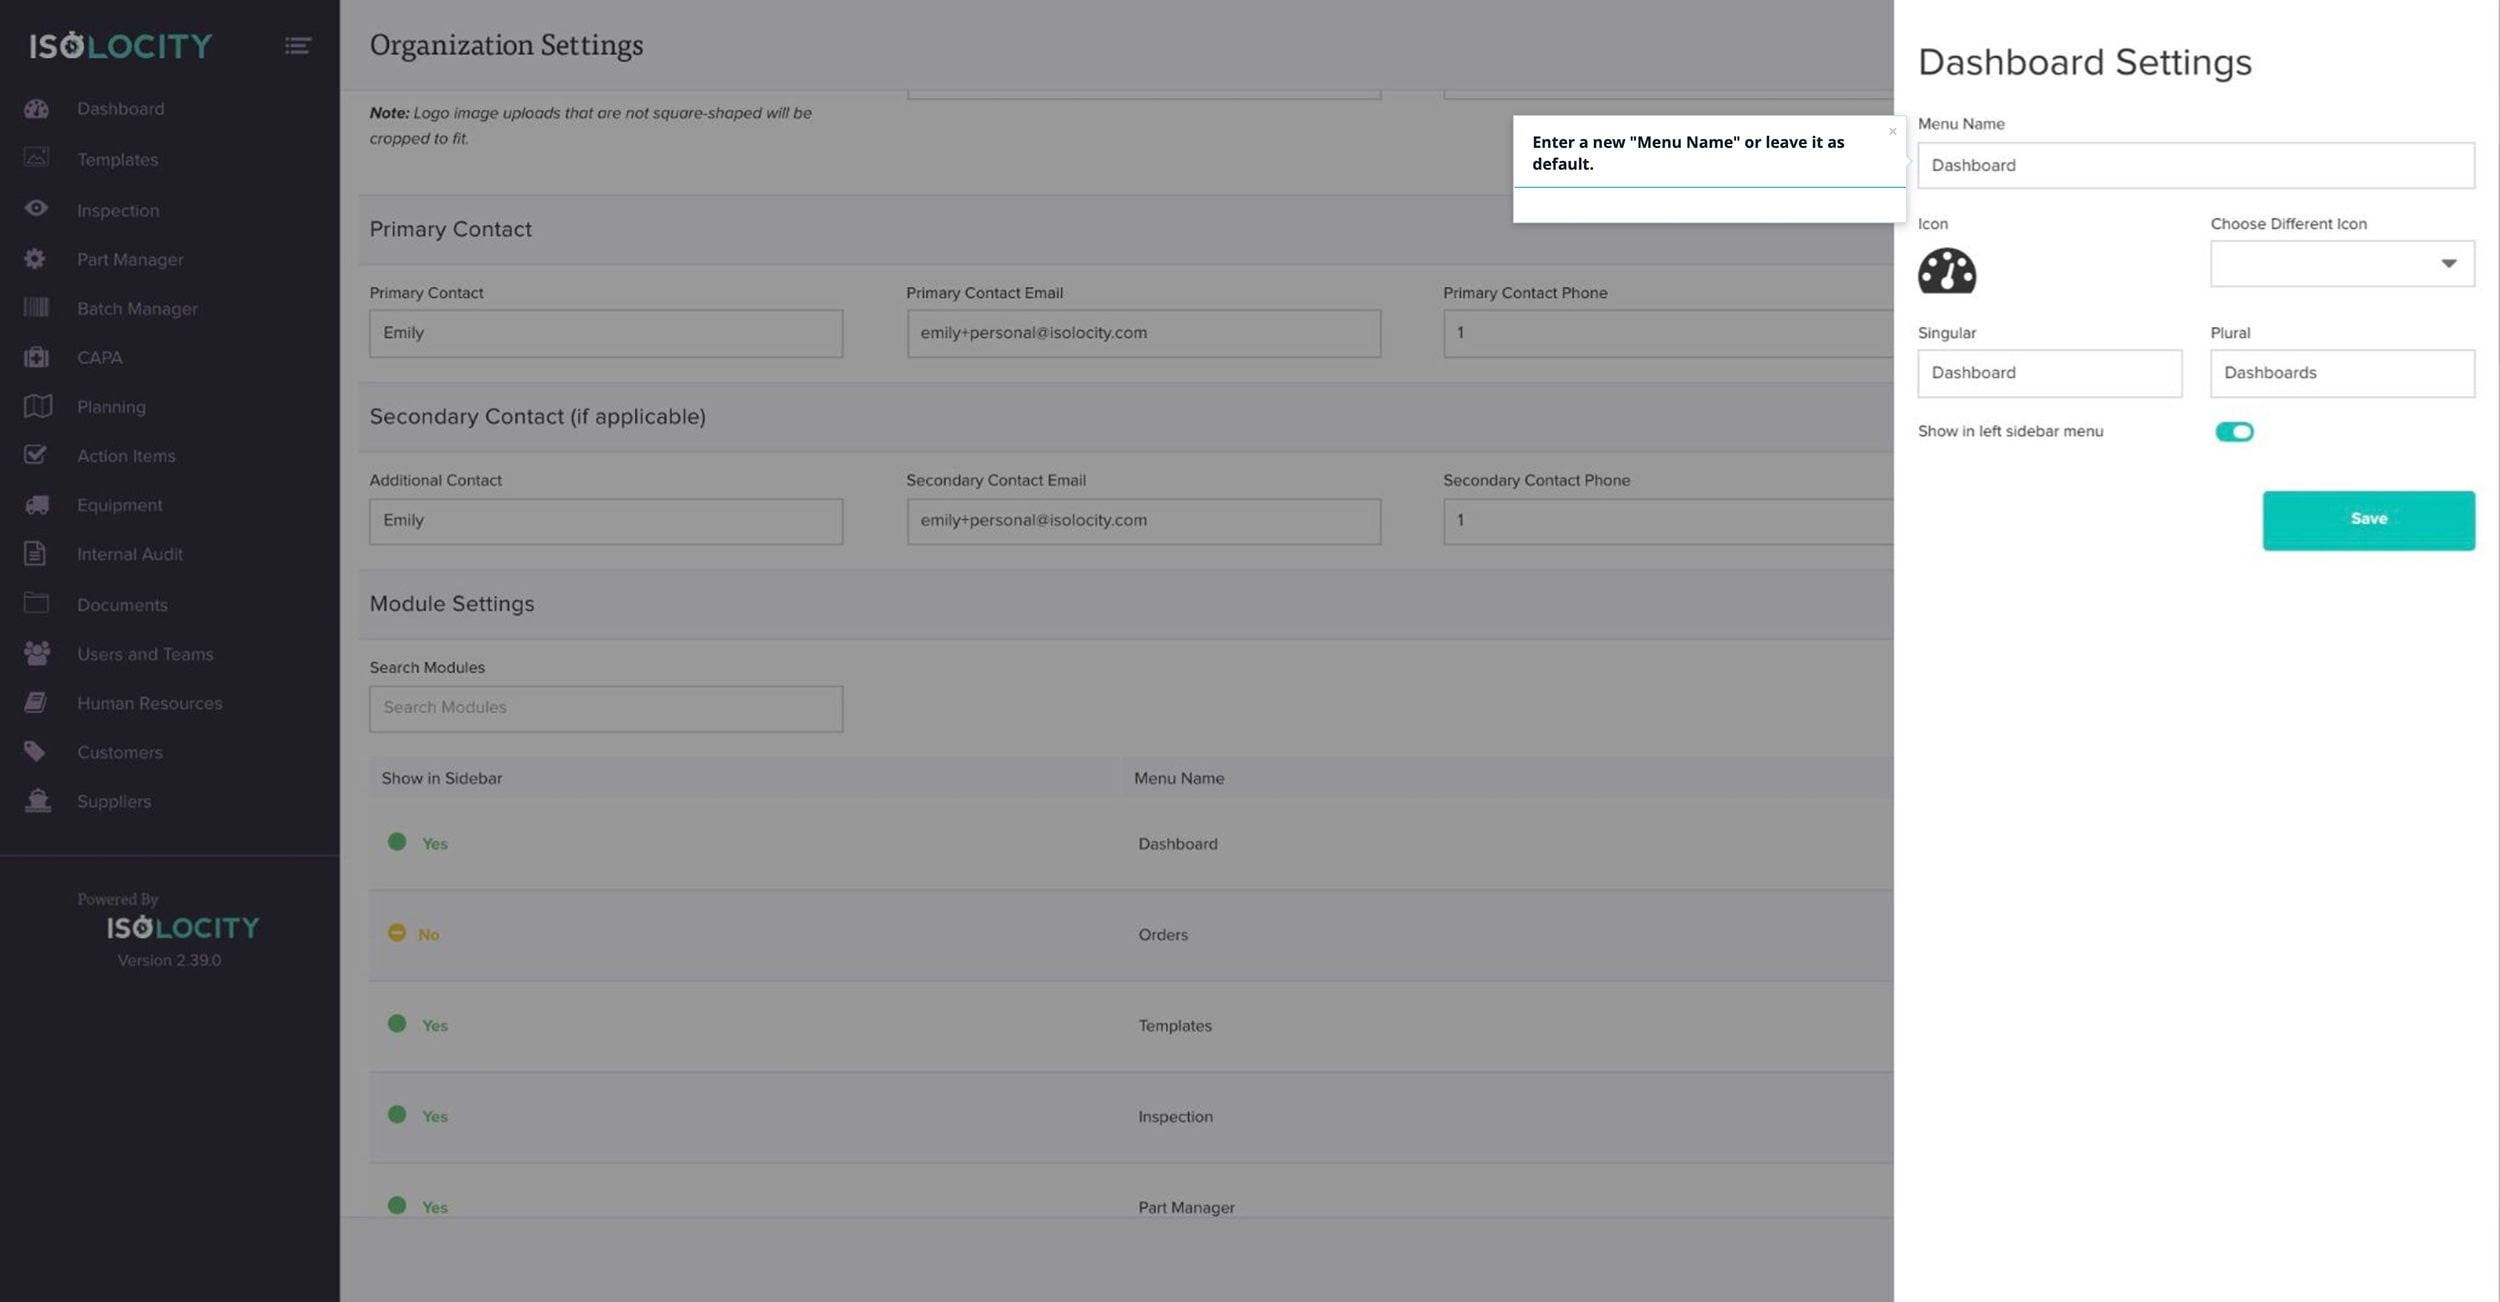
Step #18
Select a new “Icon” for your menu item or leave it as the default.
![]()
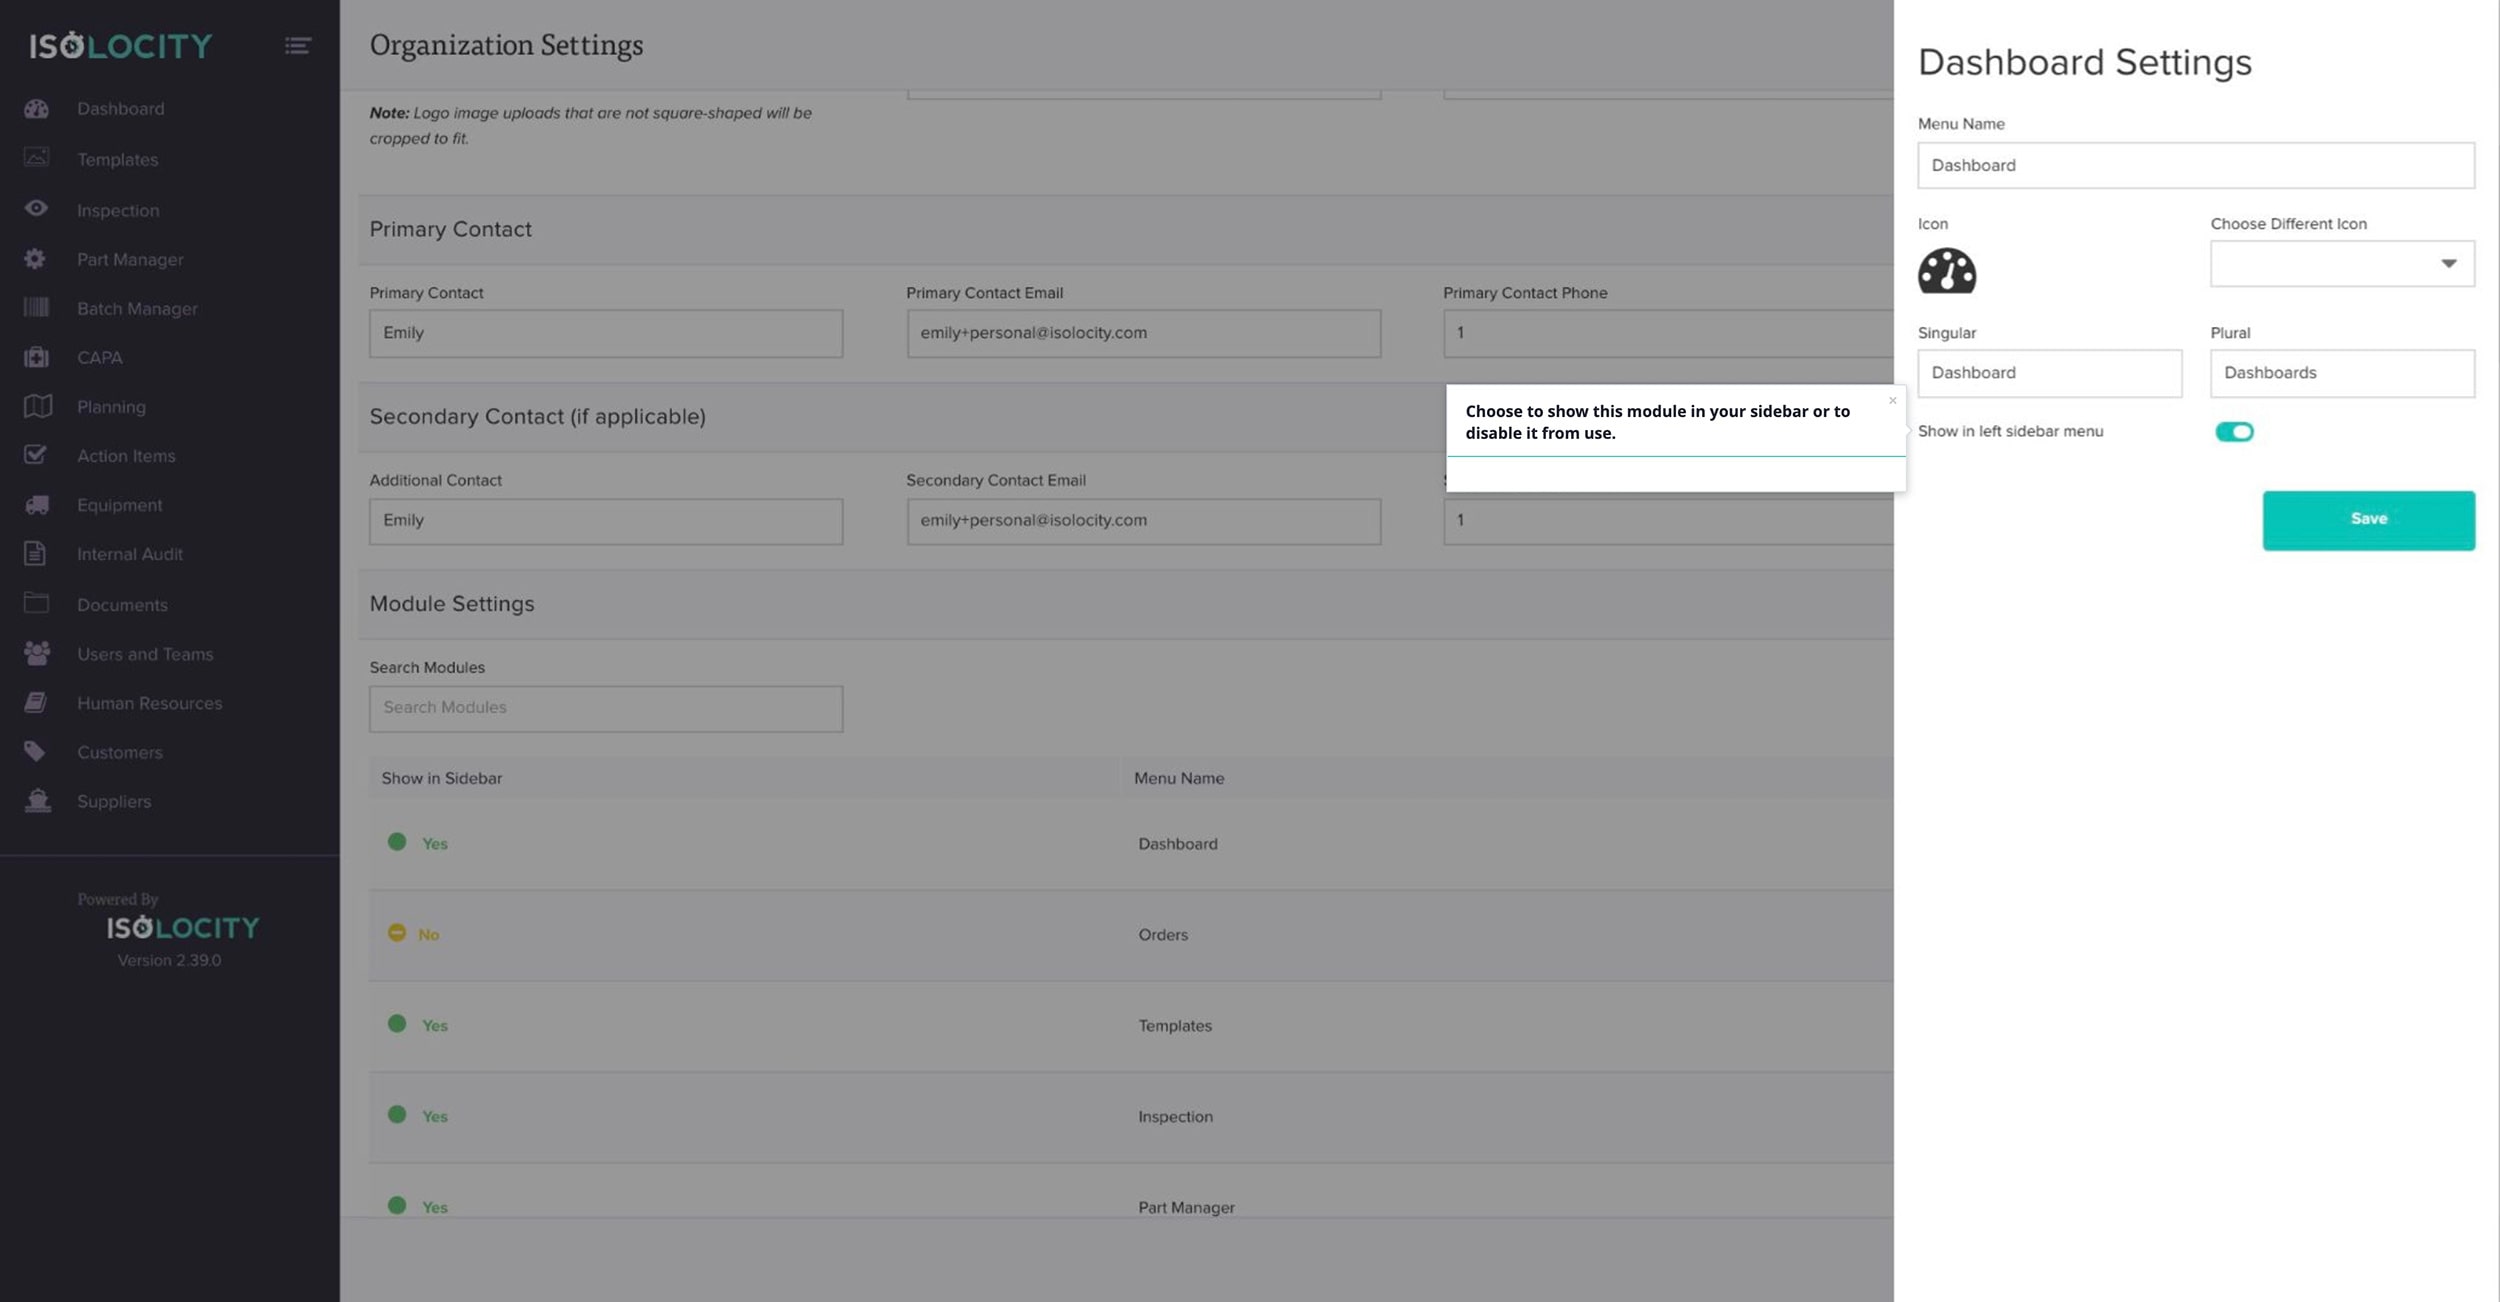
Step #19
Choose to show this module in your sidebar or to disable it from use.
Step #20
Click “Save” to save your changes and/or click into the grey area on the left of the screen to exit this panel.
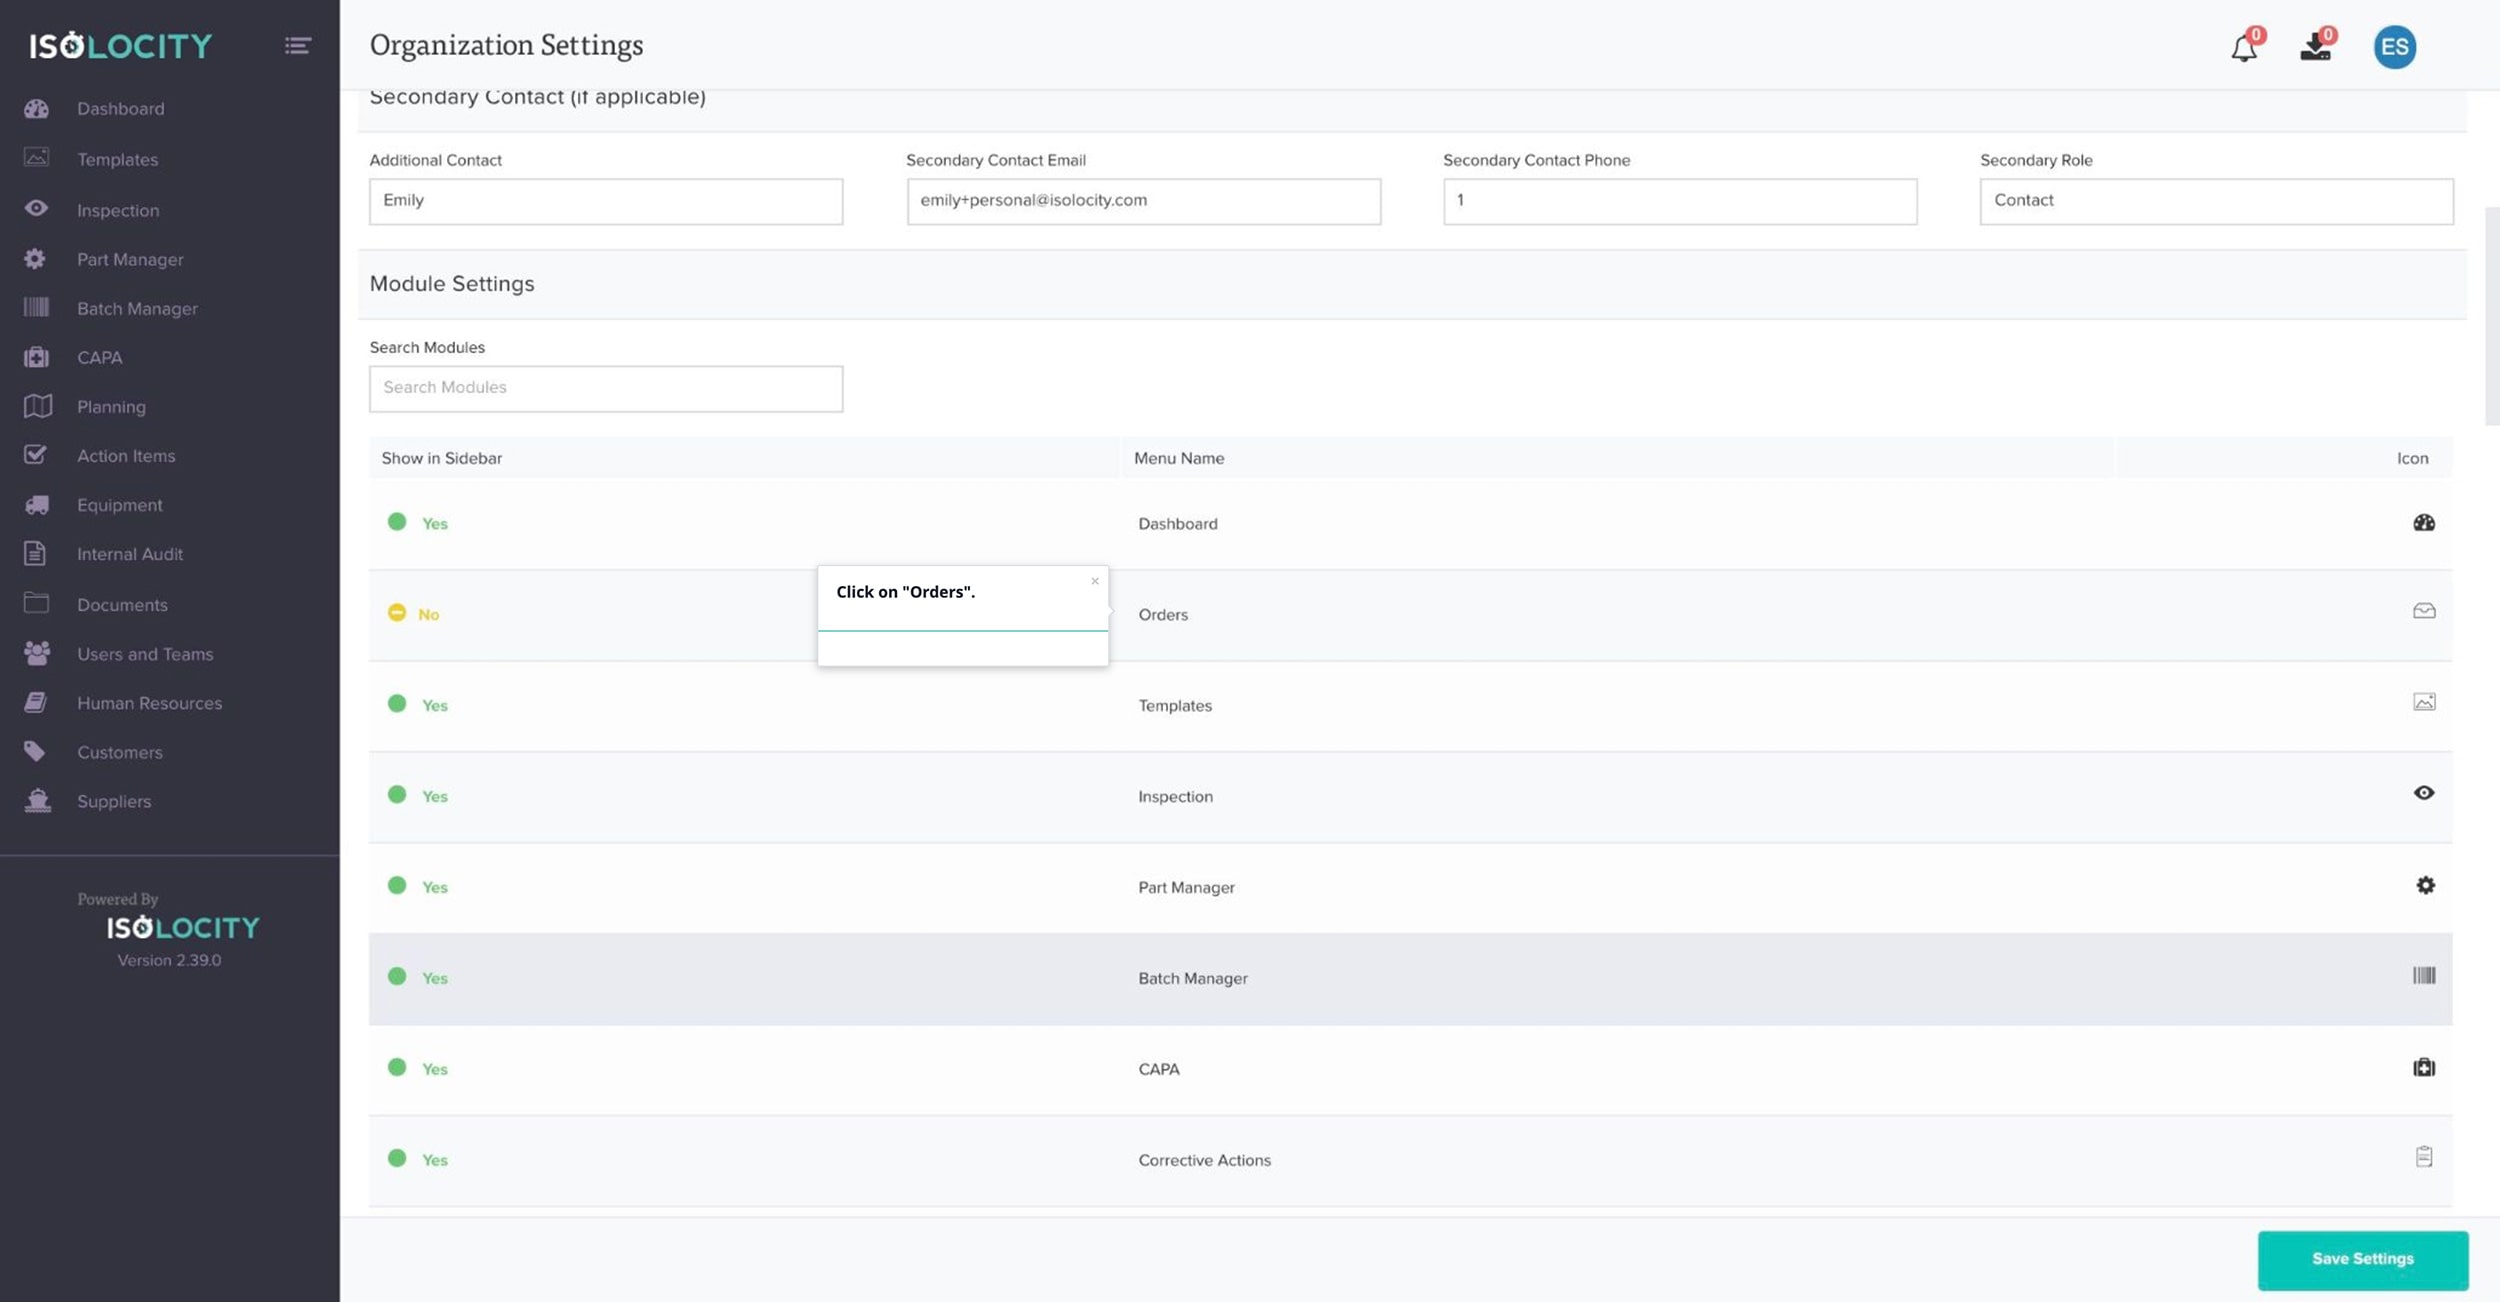
Step #21
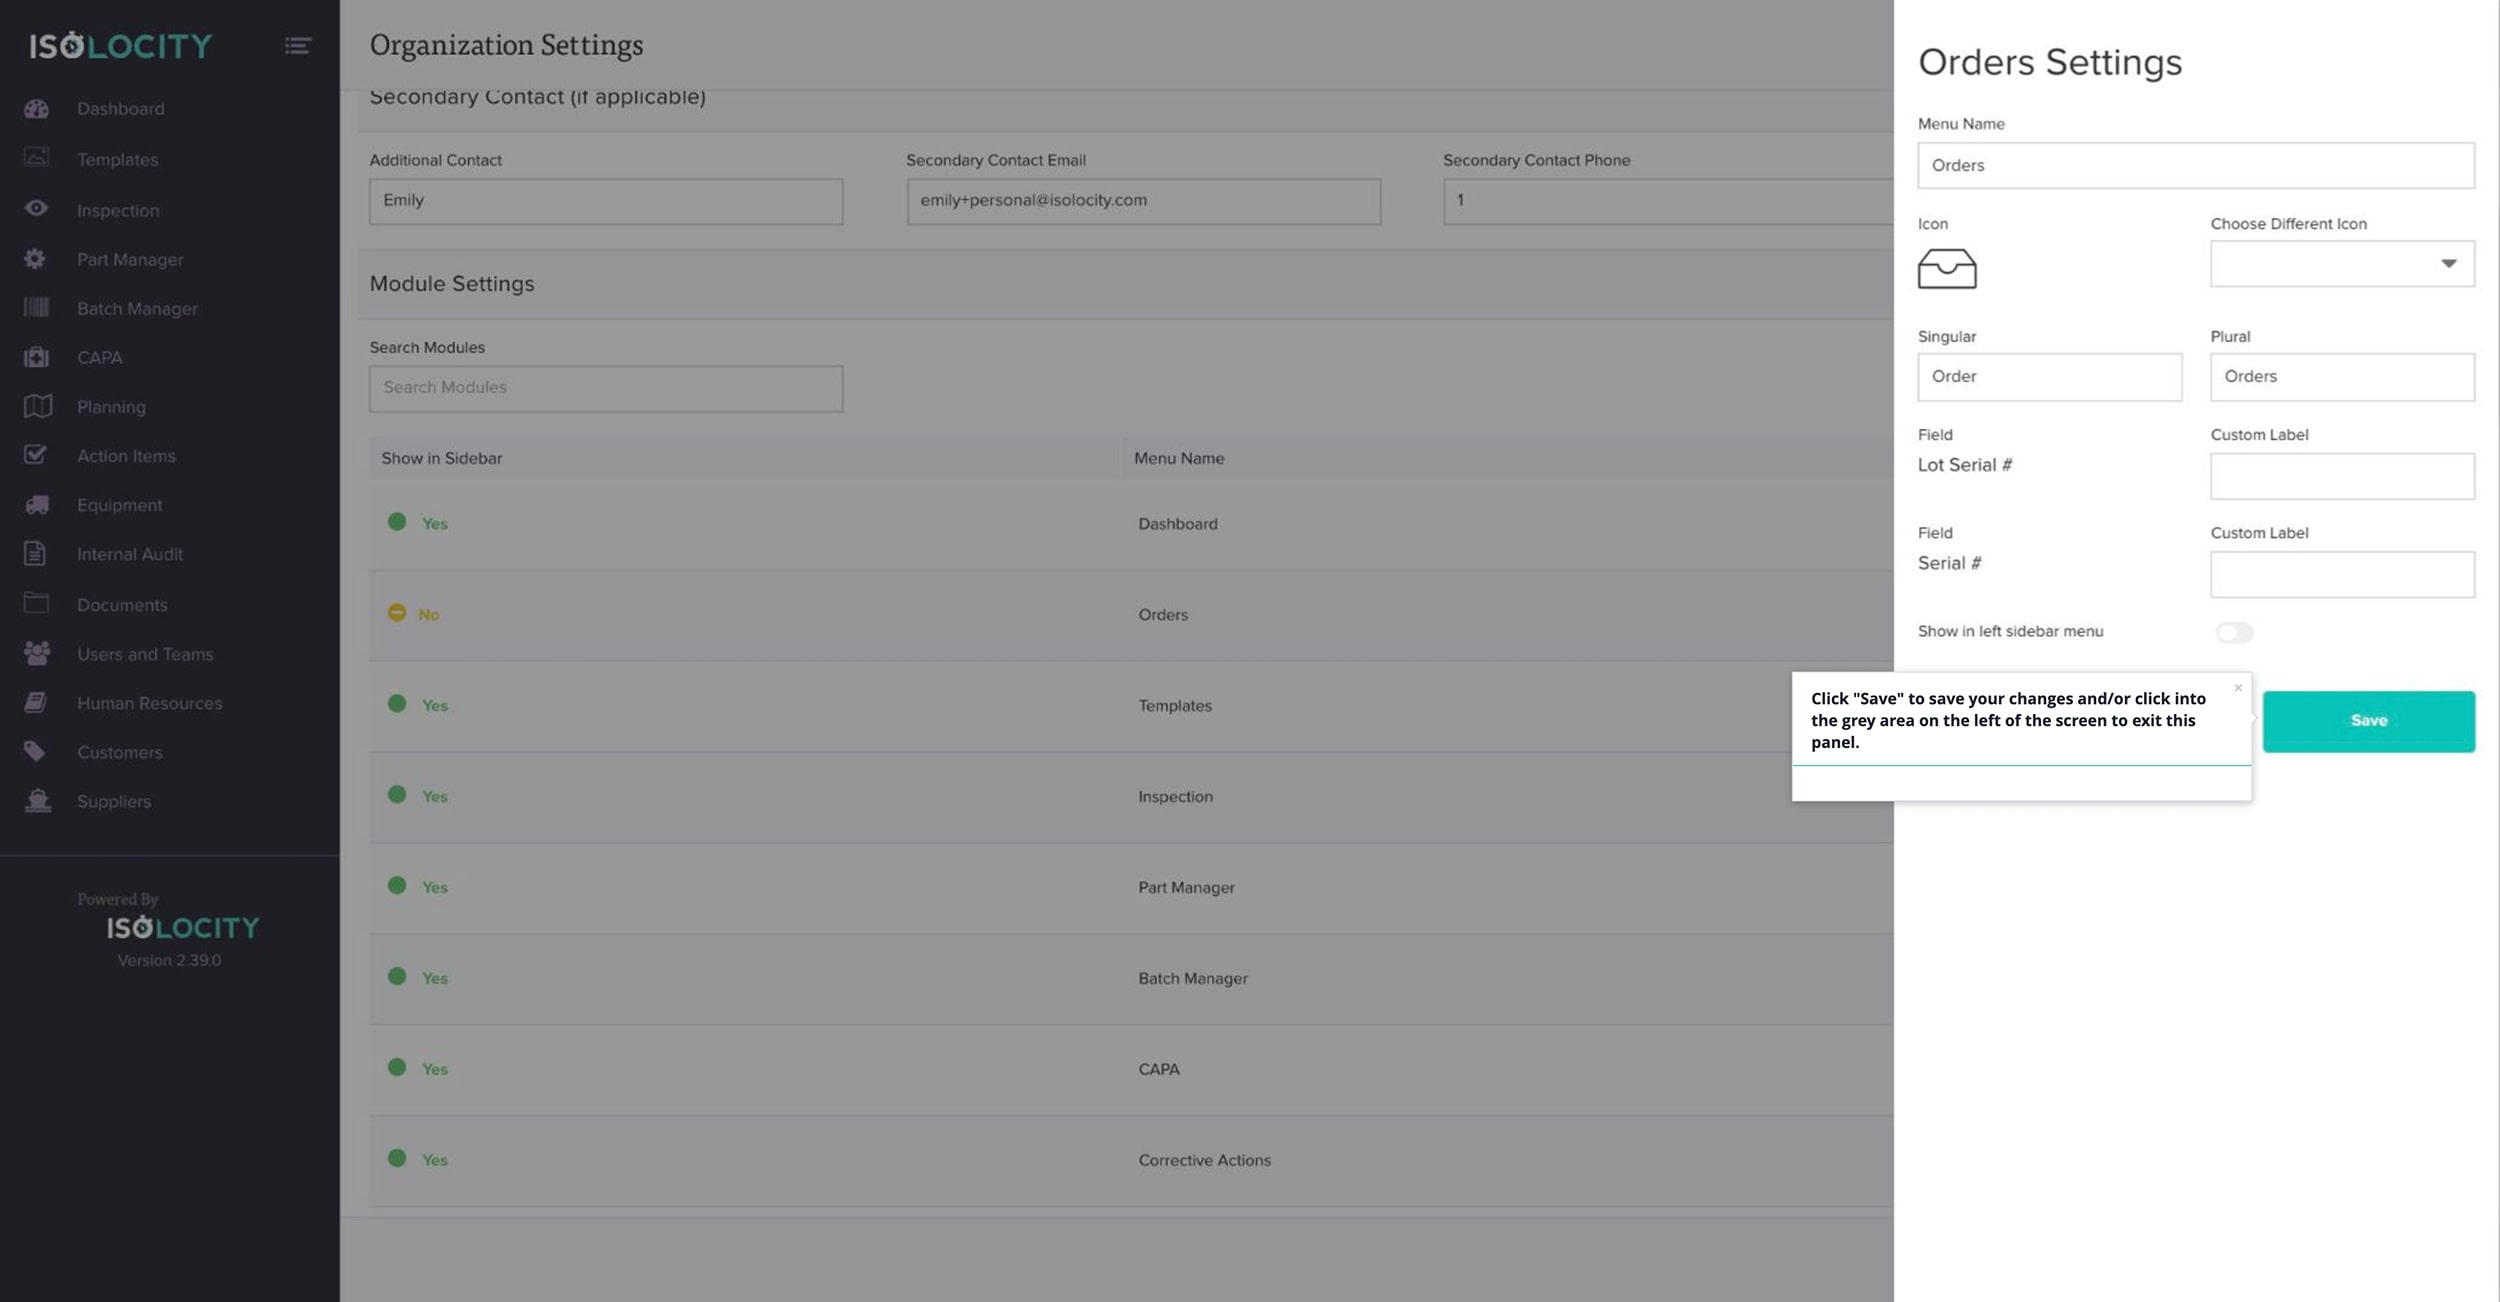
Click on “Orders”.
Step #22
Choose your settings for the “Orders” module. This module is optional so you can disable it here.
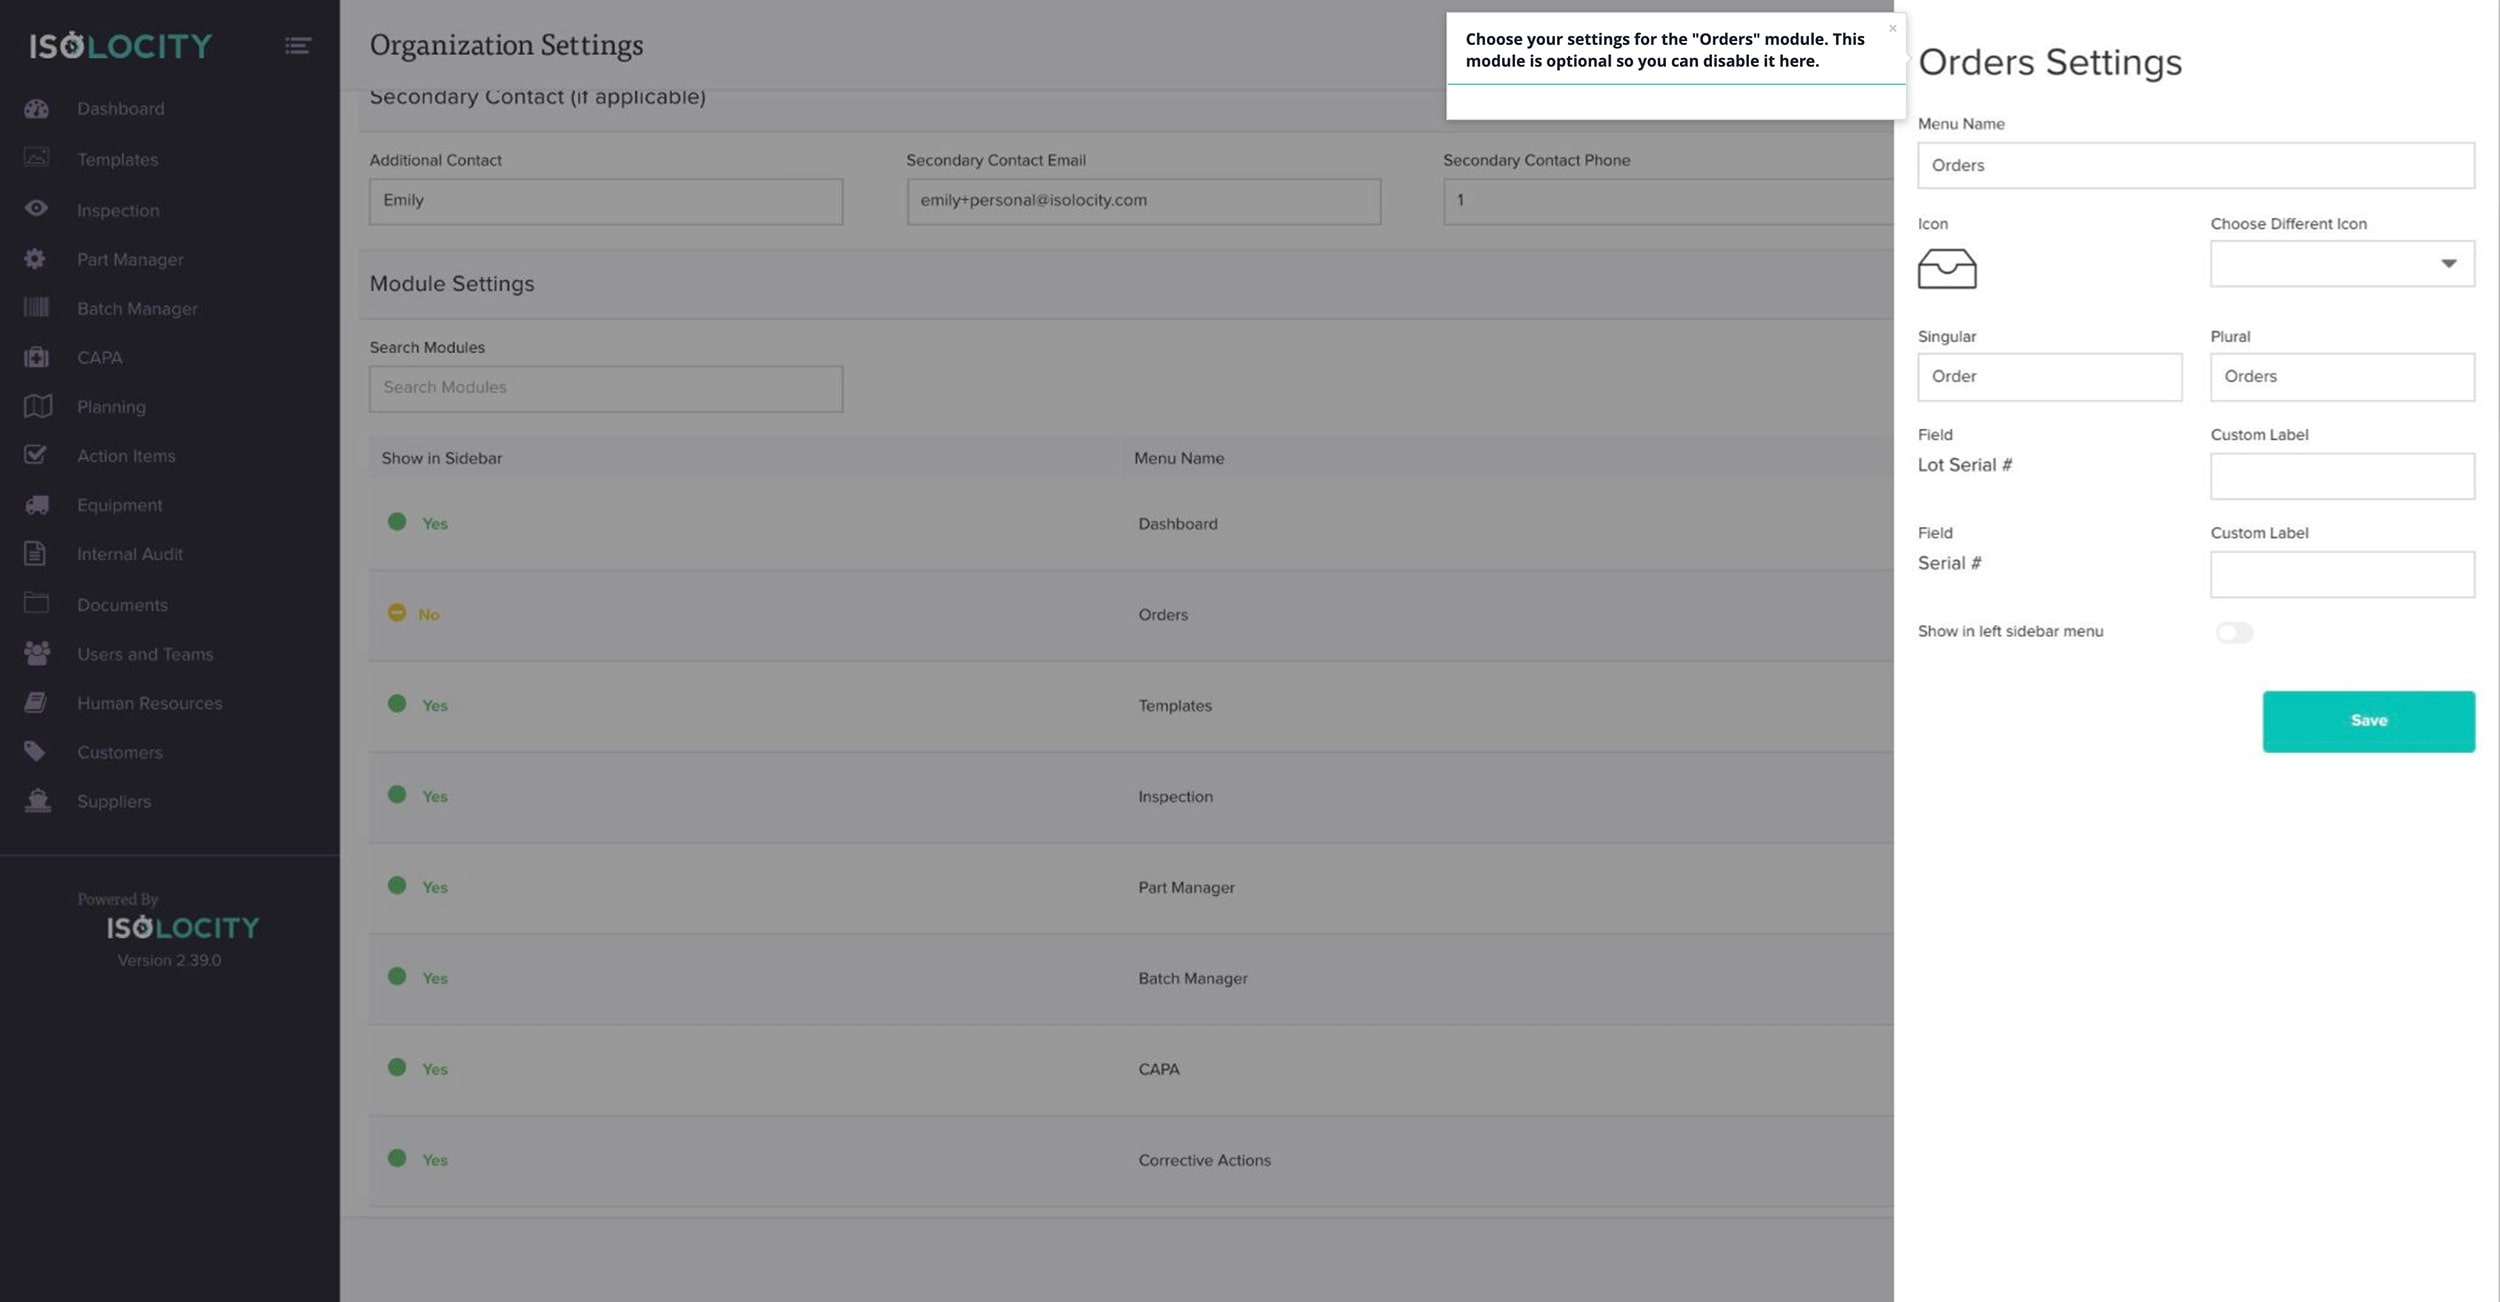
Step #23
Choose to enable or disable from the navigation sidebar.

Step #24
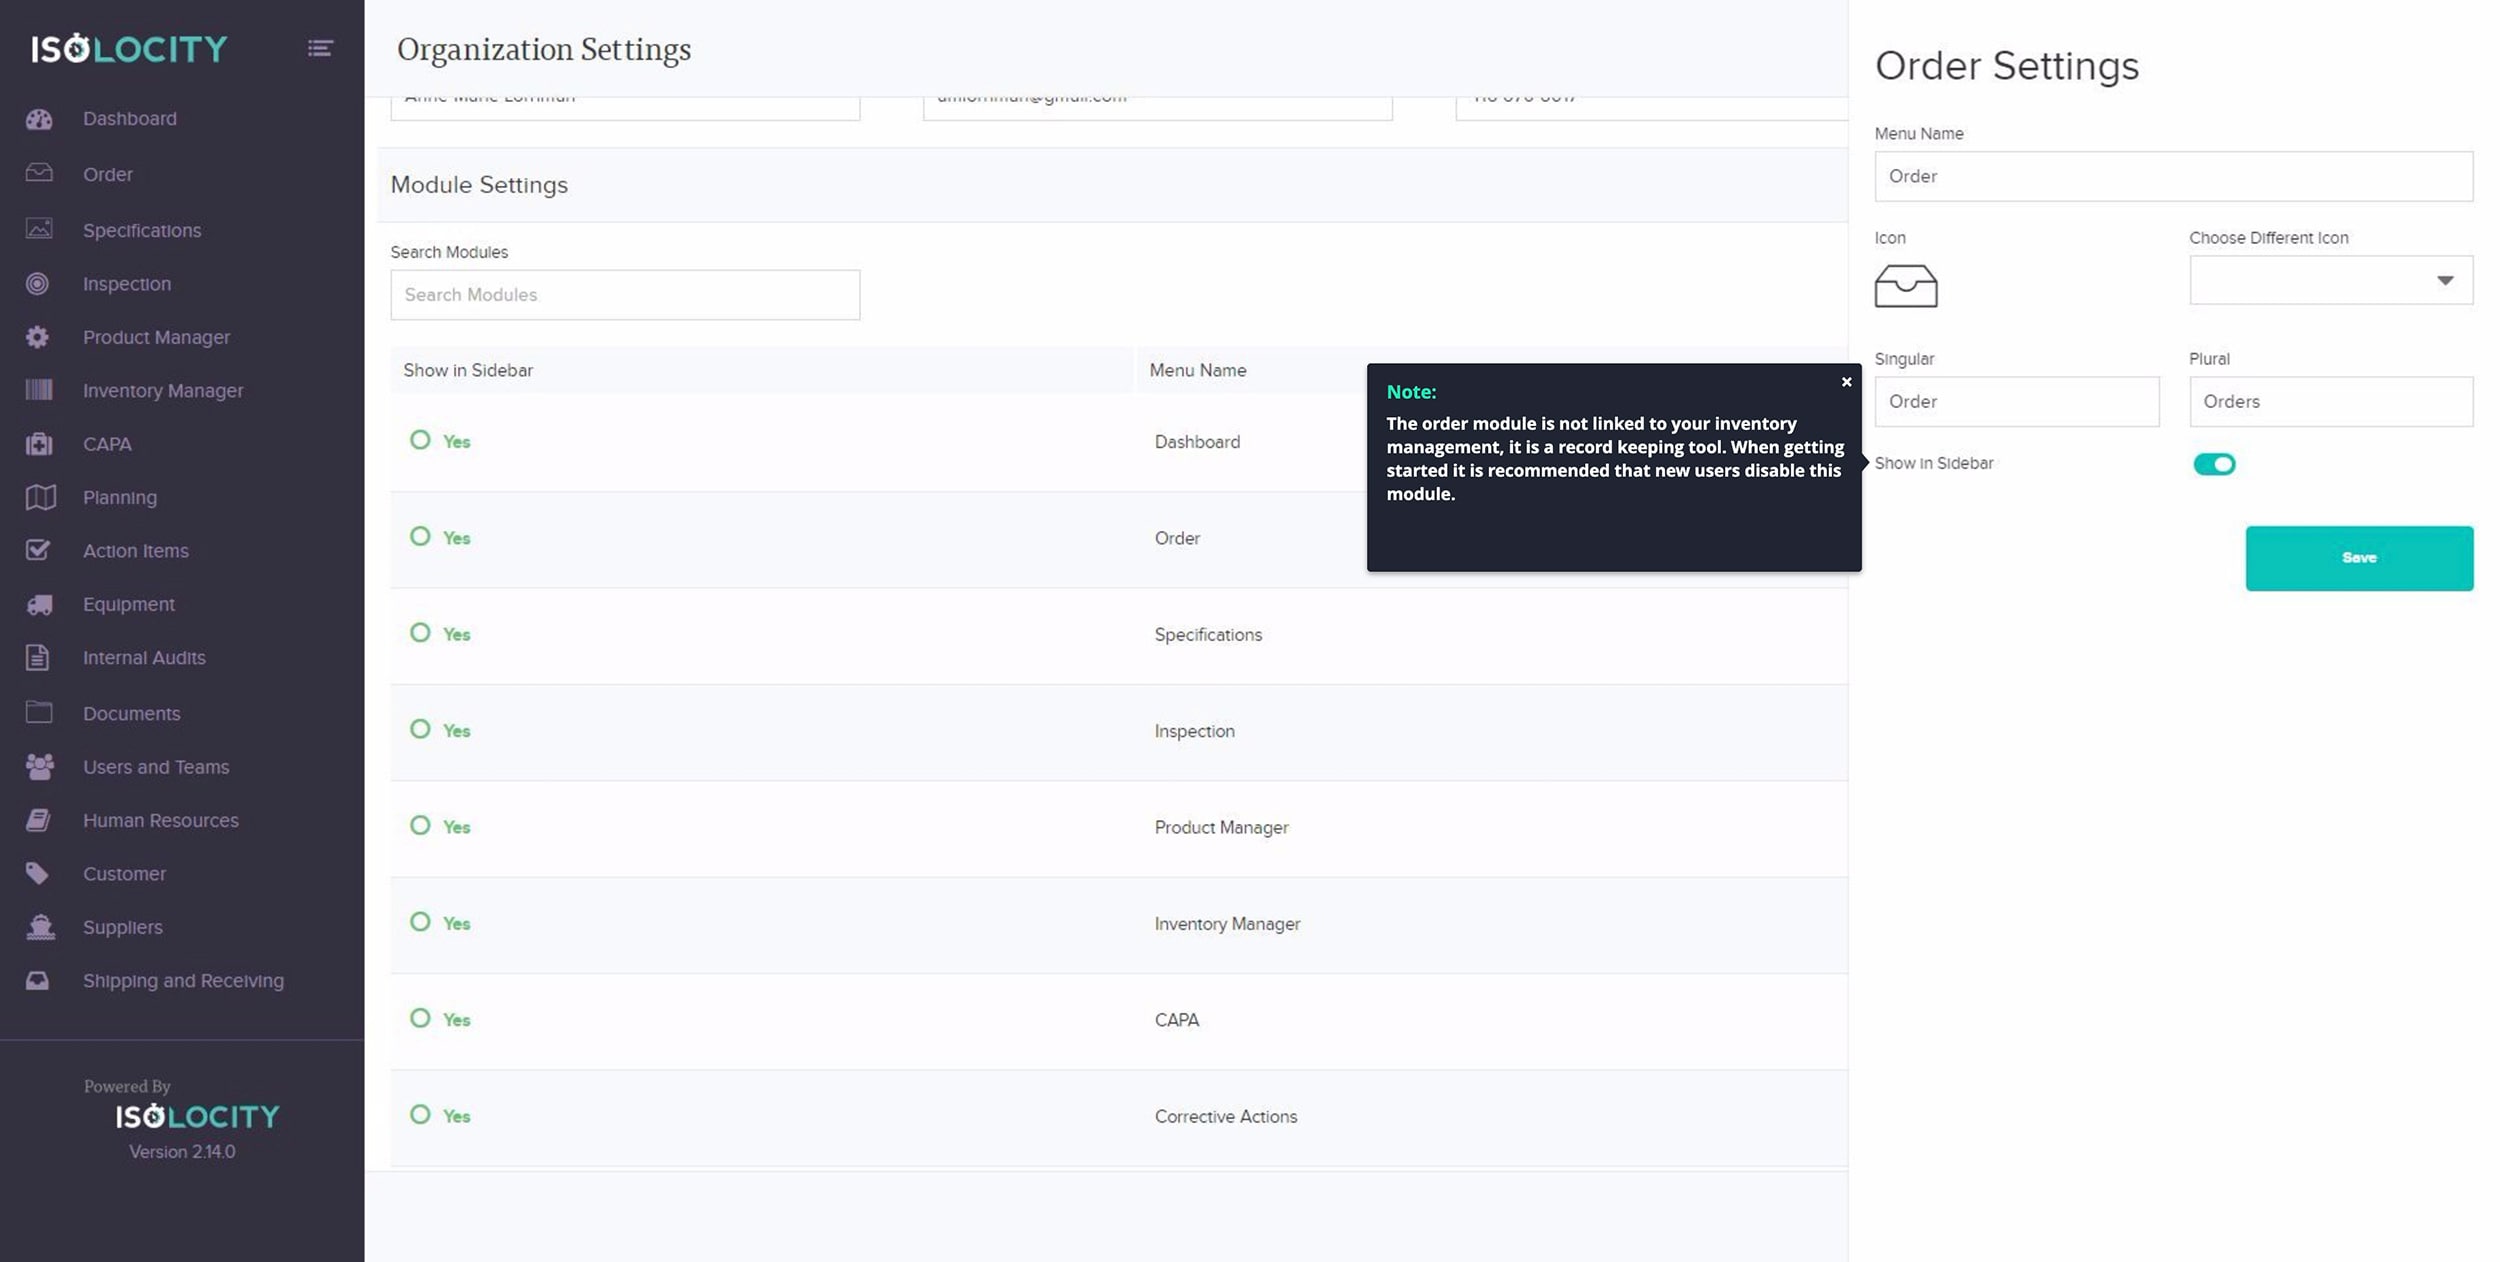
Note:
Step #25
Click “Save” to save your changes and/or click into the grey area on the left of the screen to exit this panel.
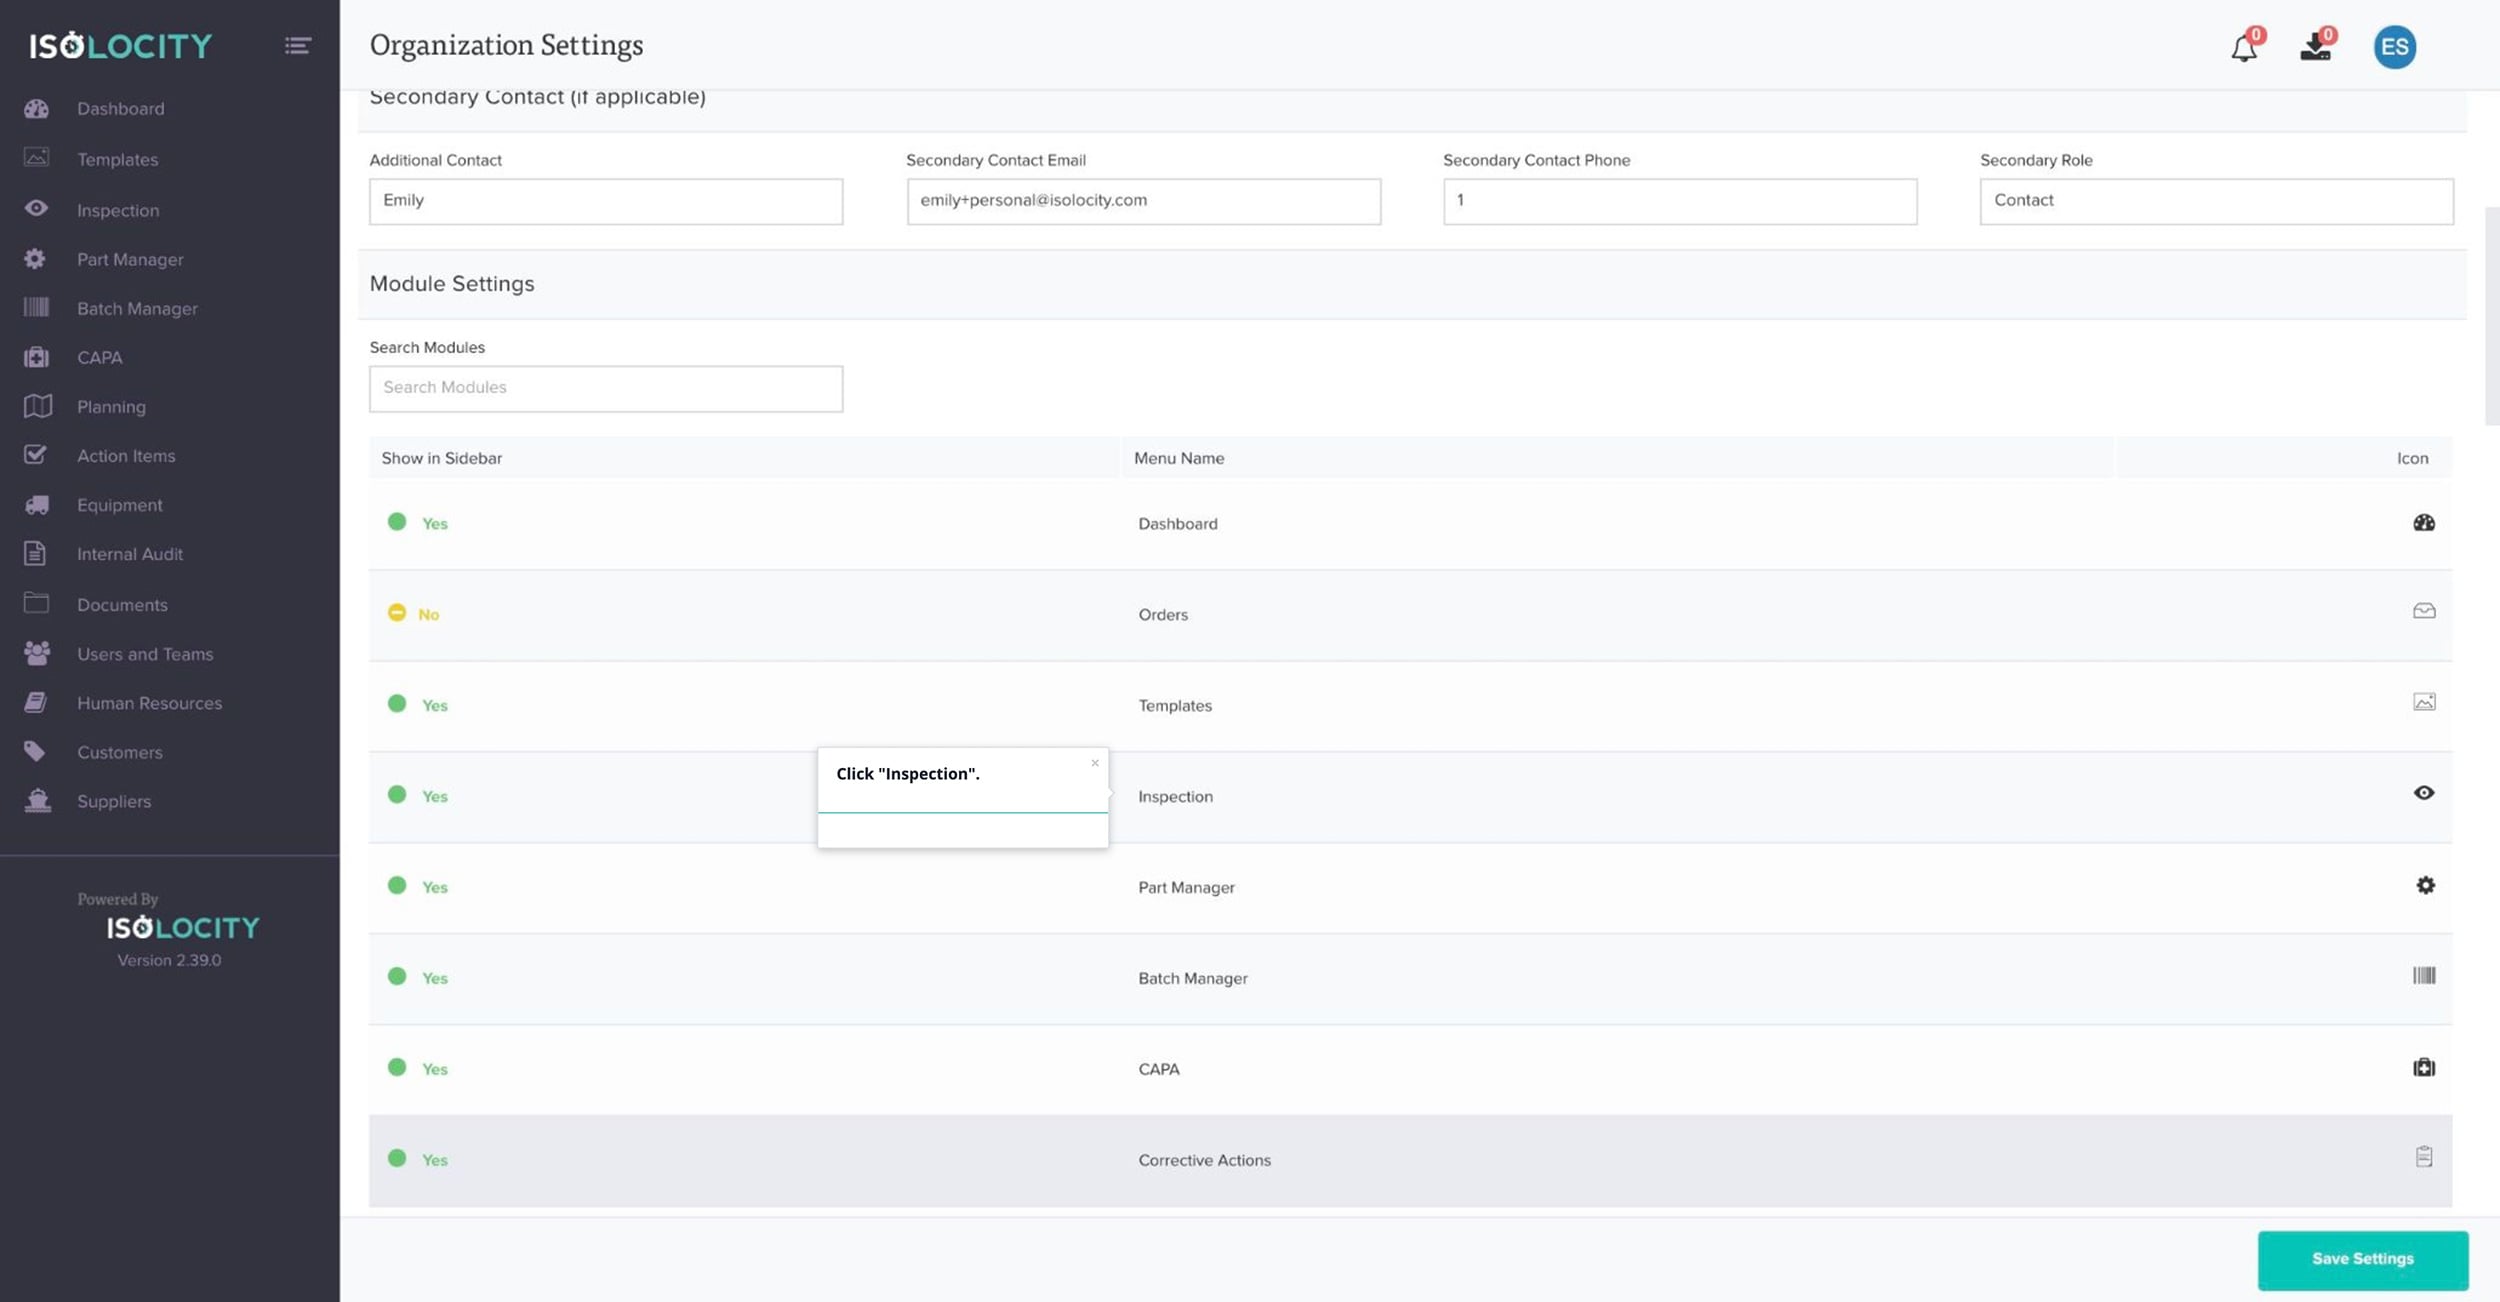
Step #26
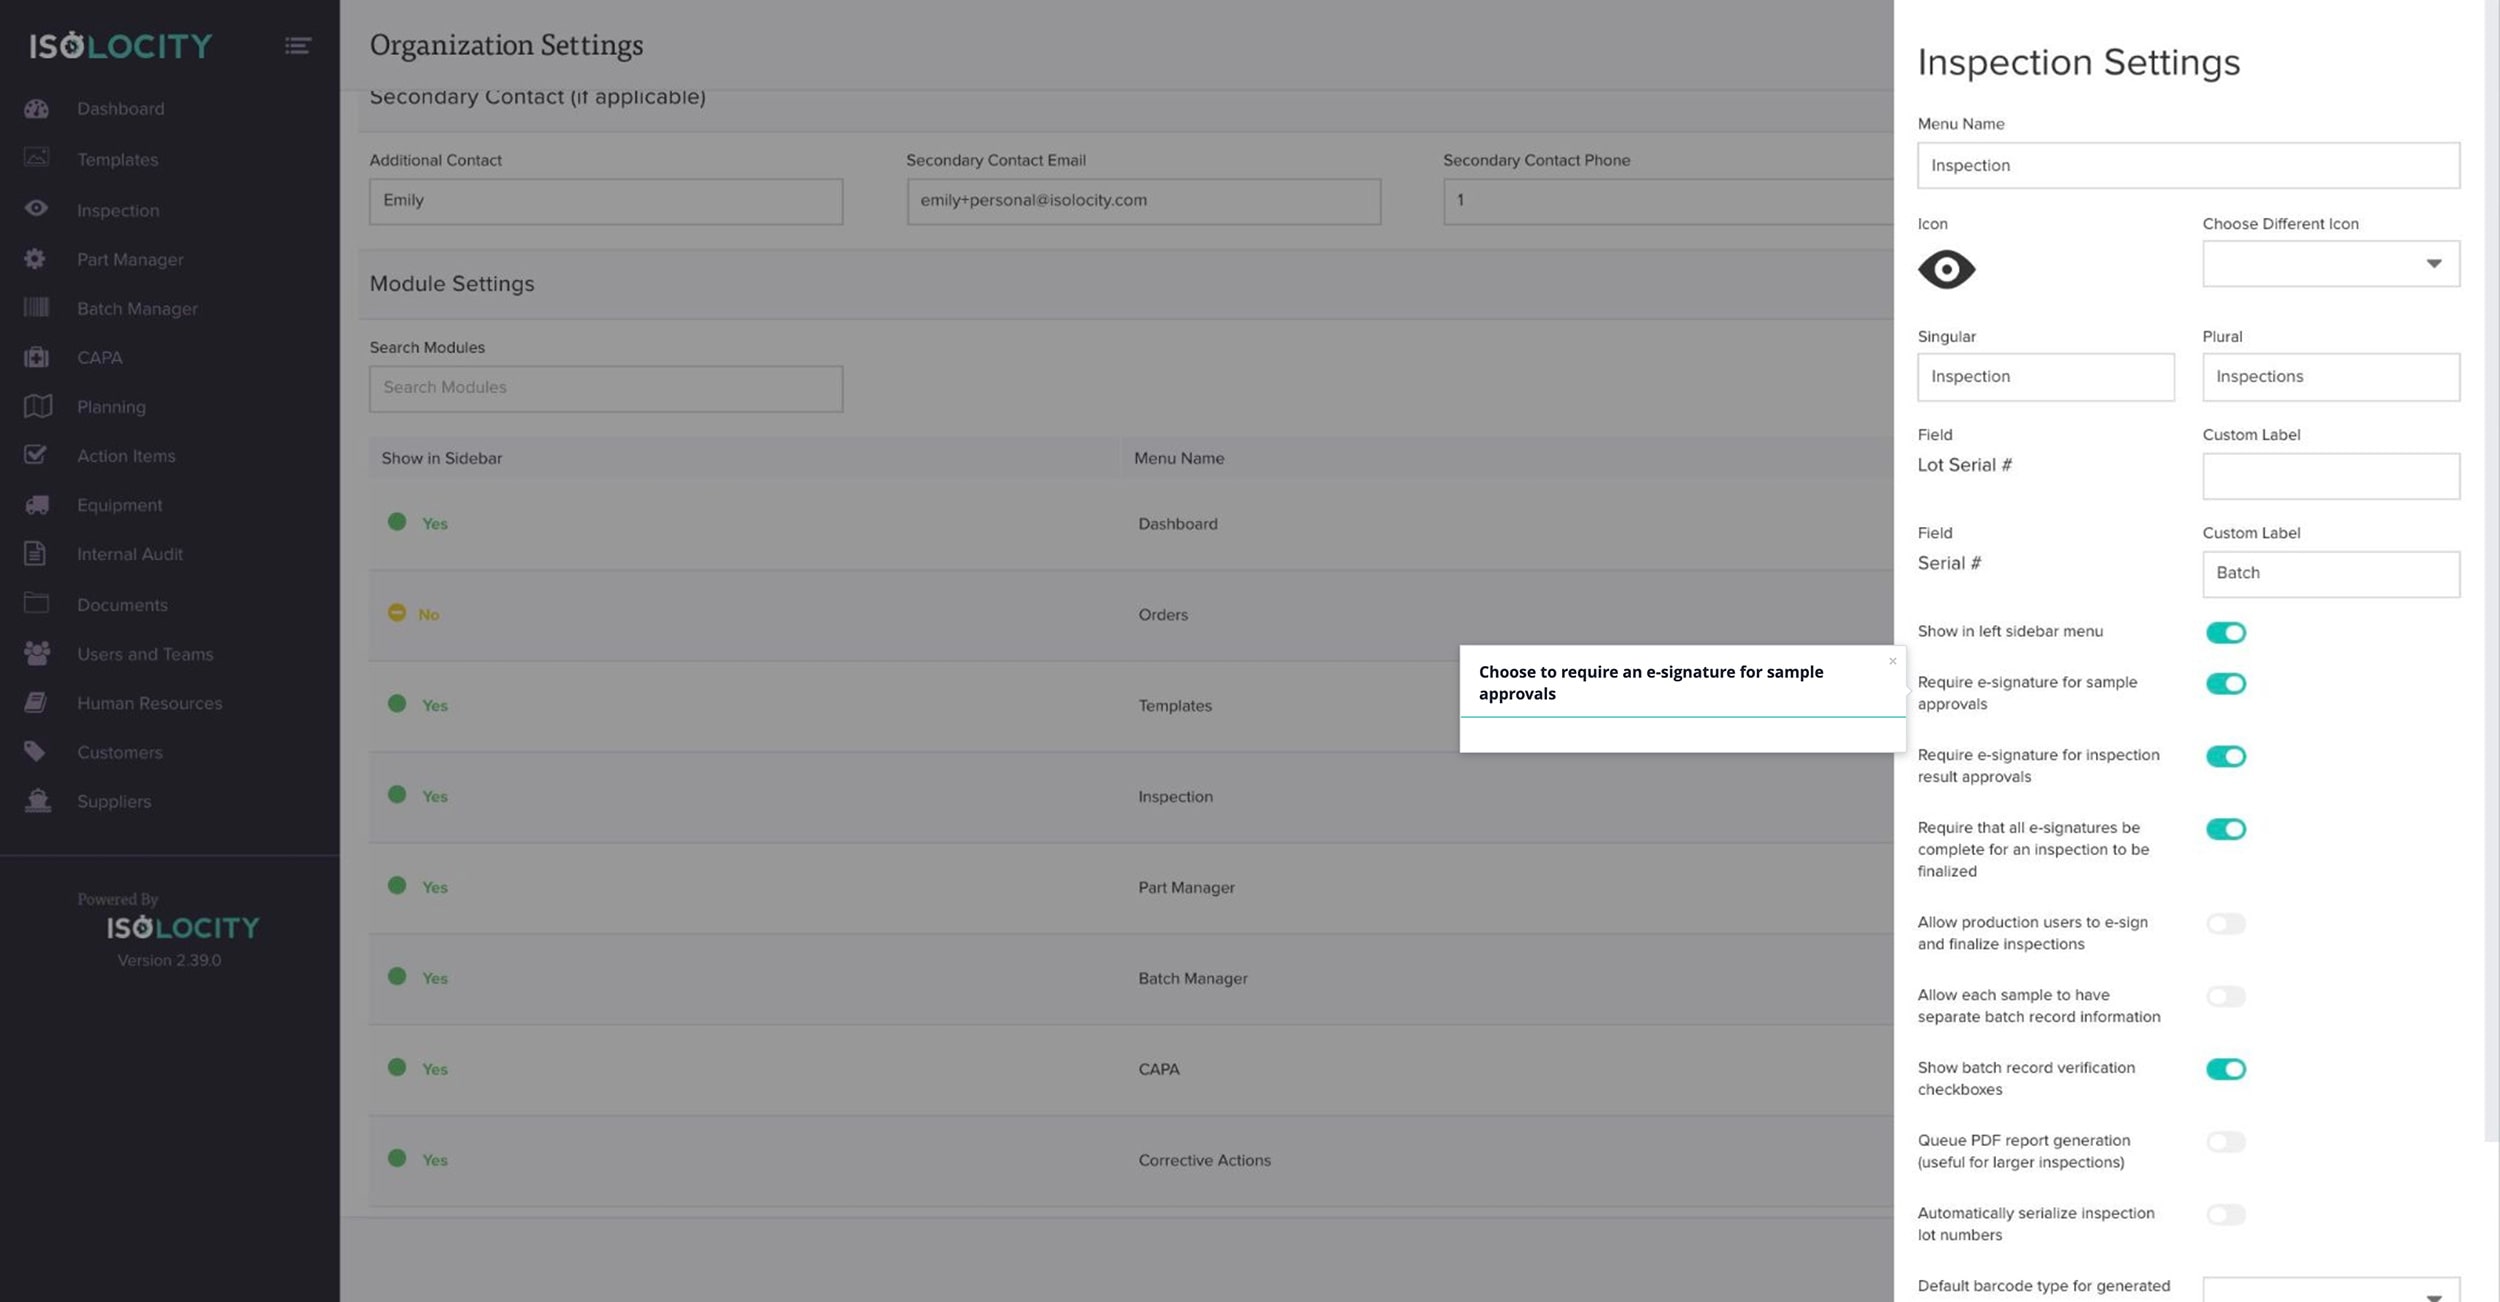
Click “Inspection”.
Step #27
Choose to require an e-signature for sample approvals
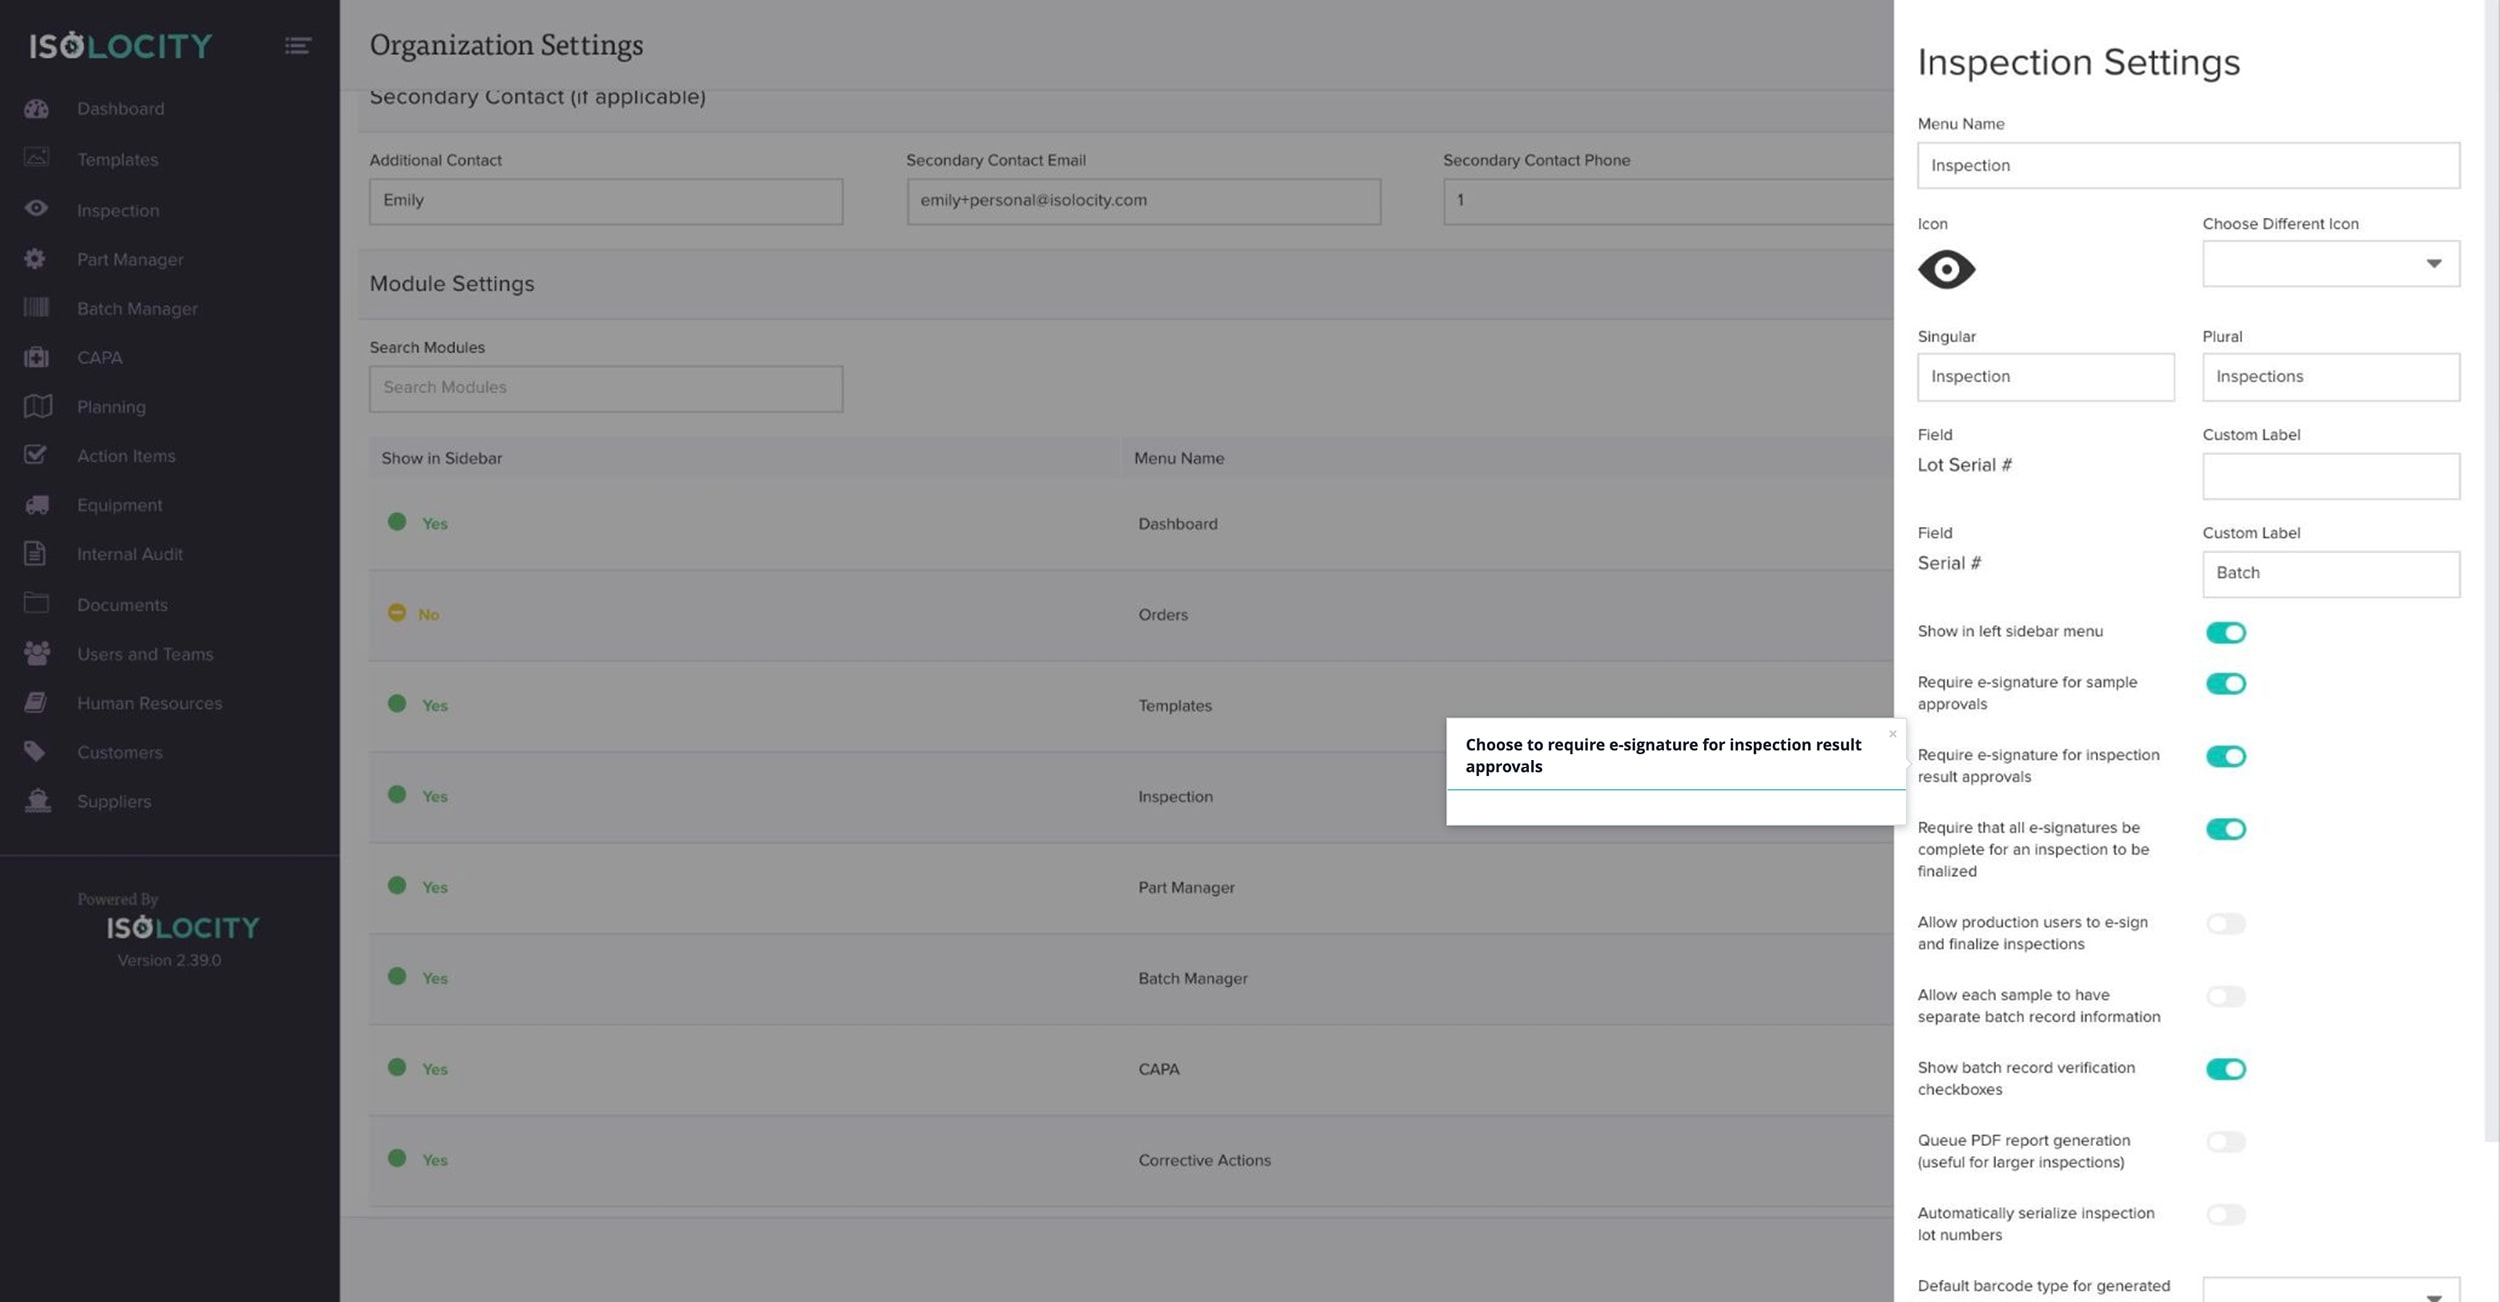
Step #28
Choose to require e-signature for inspection result approvals
Step #29
Choose to require that all e-signatures be complete for an inspection to be finalized
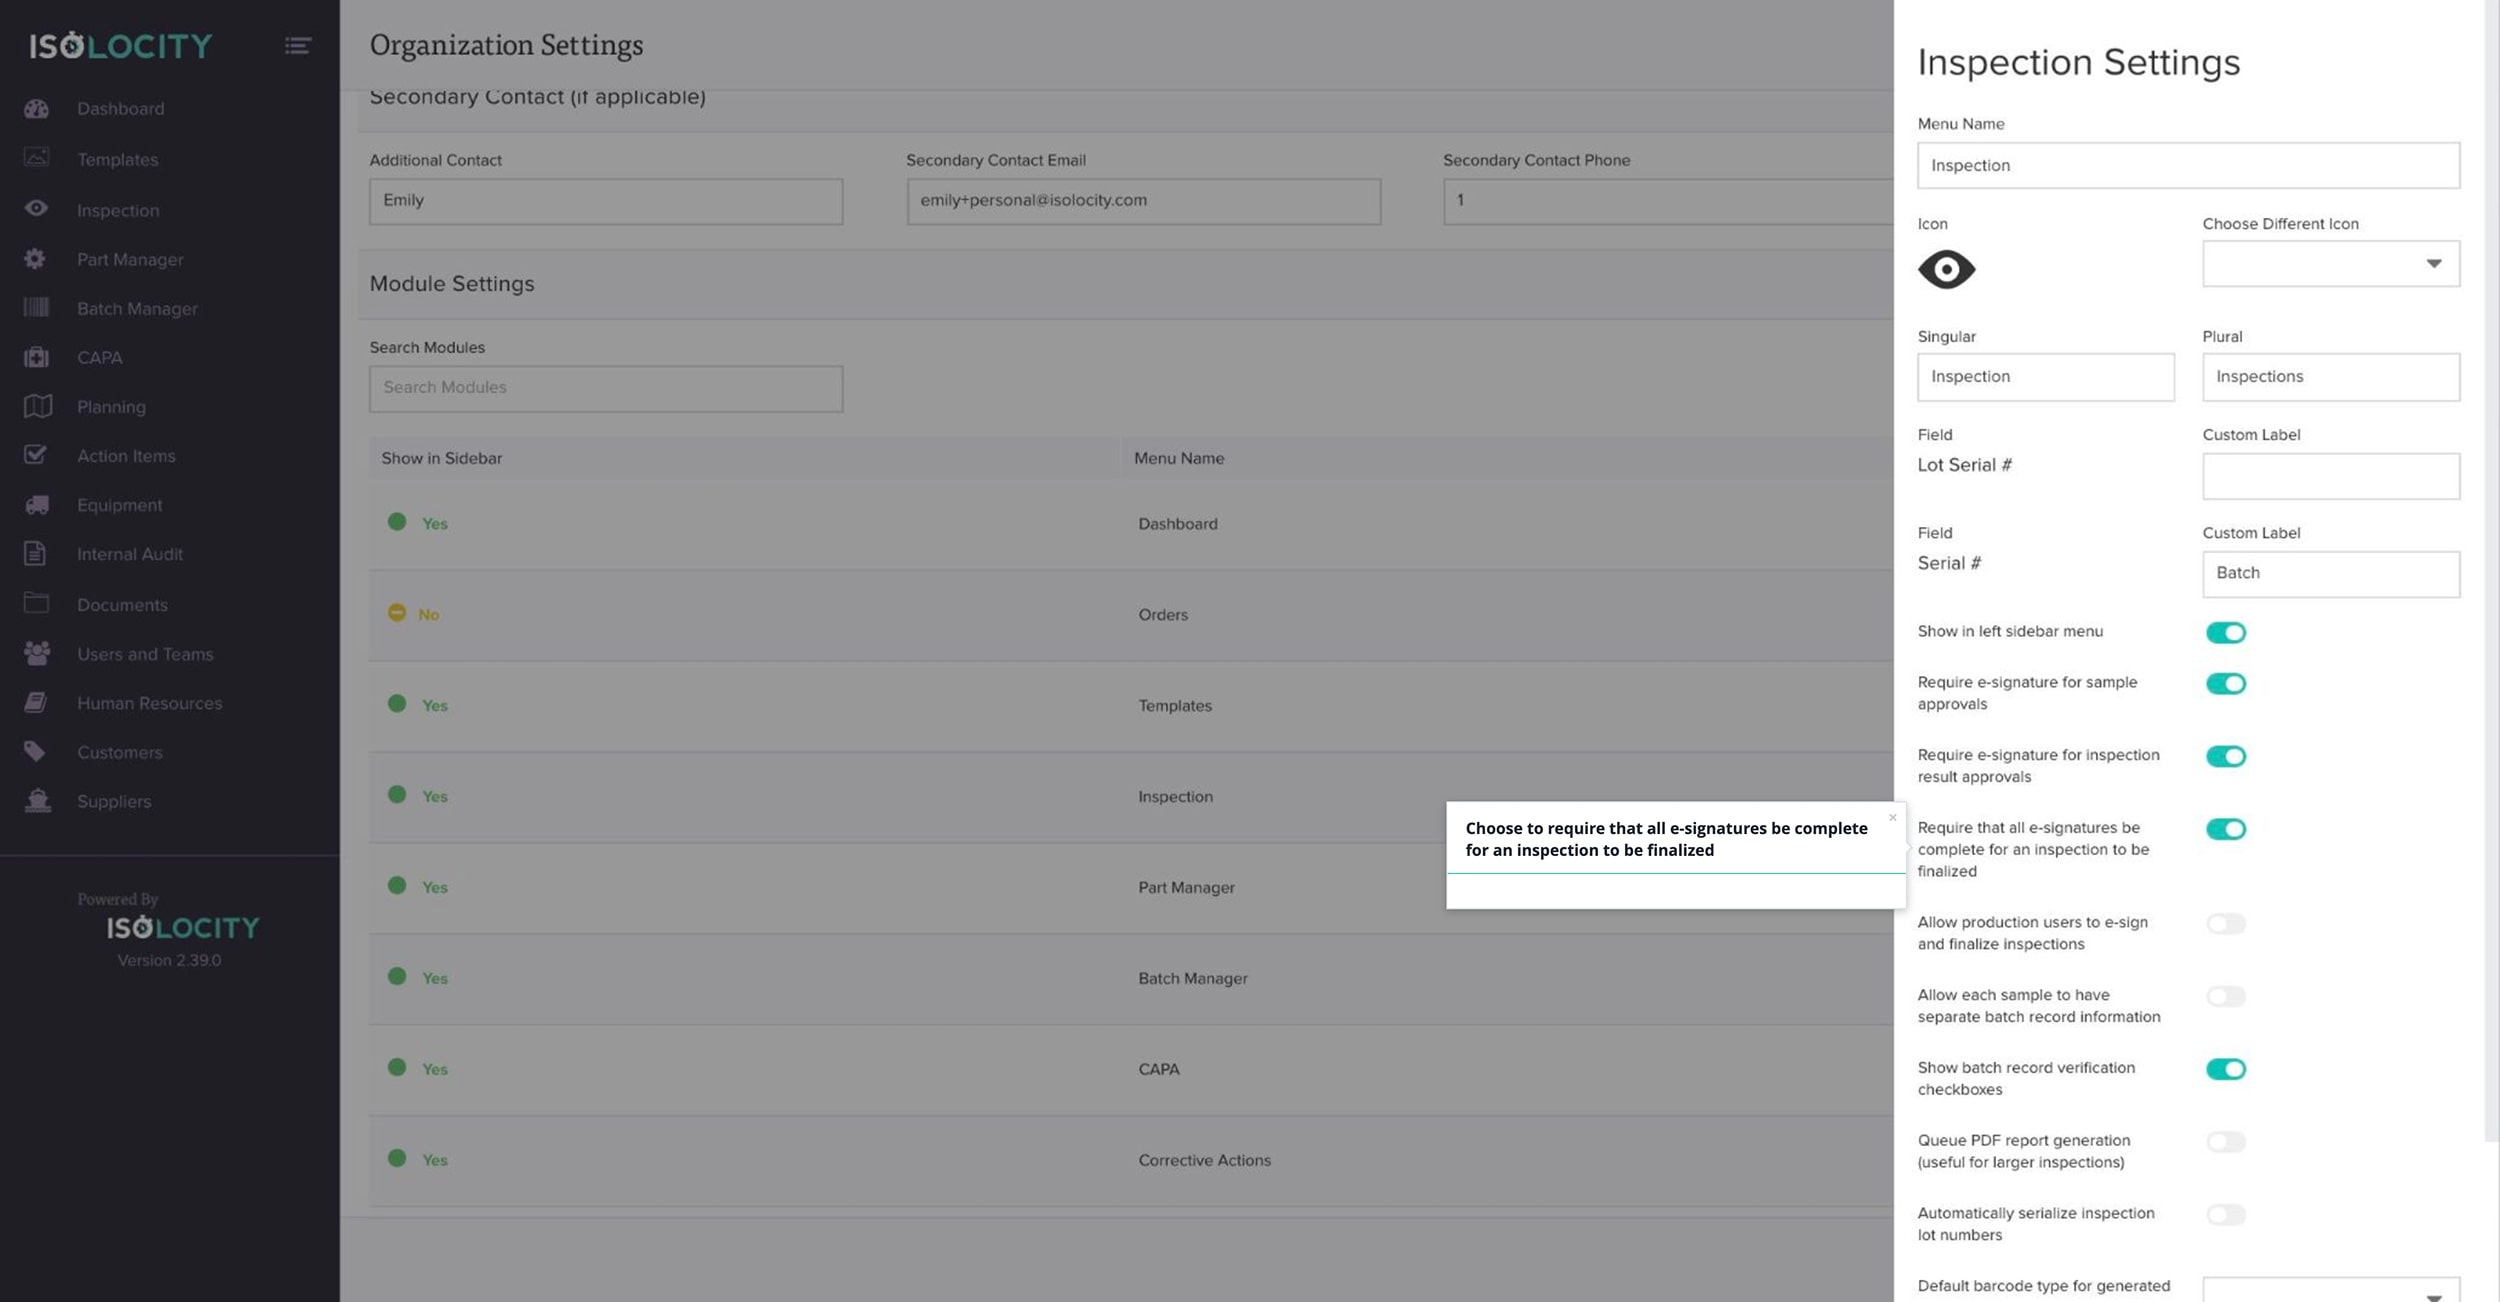
Step #30
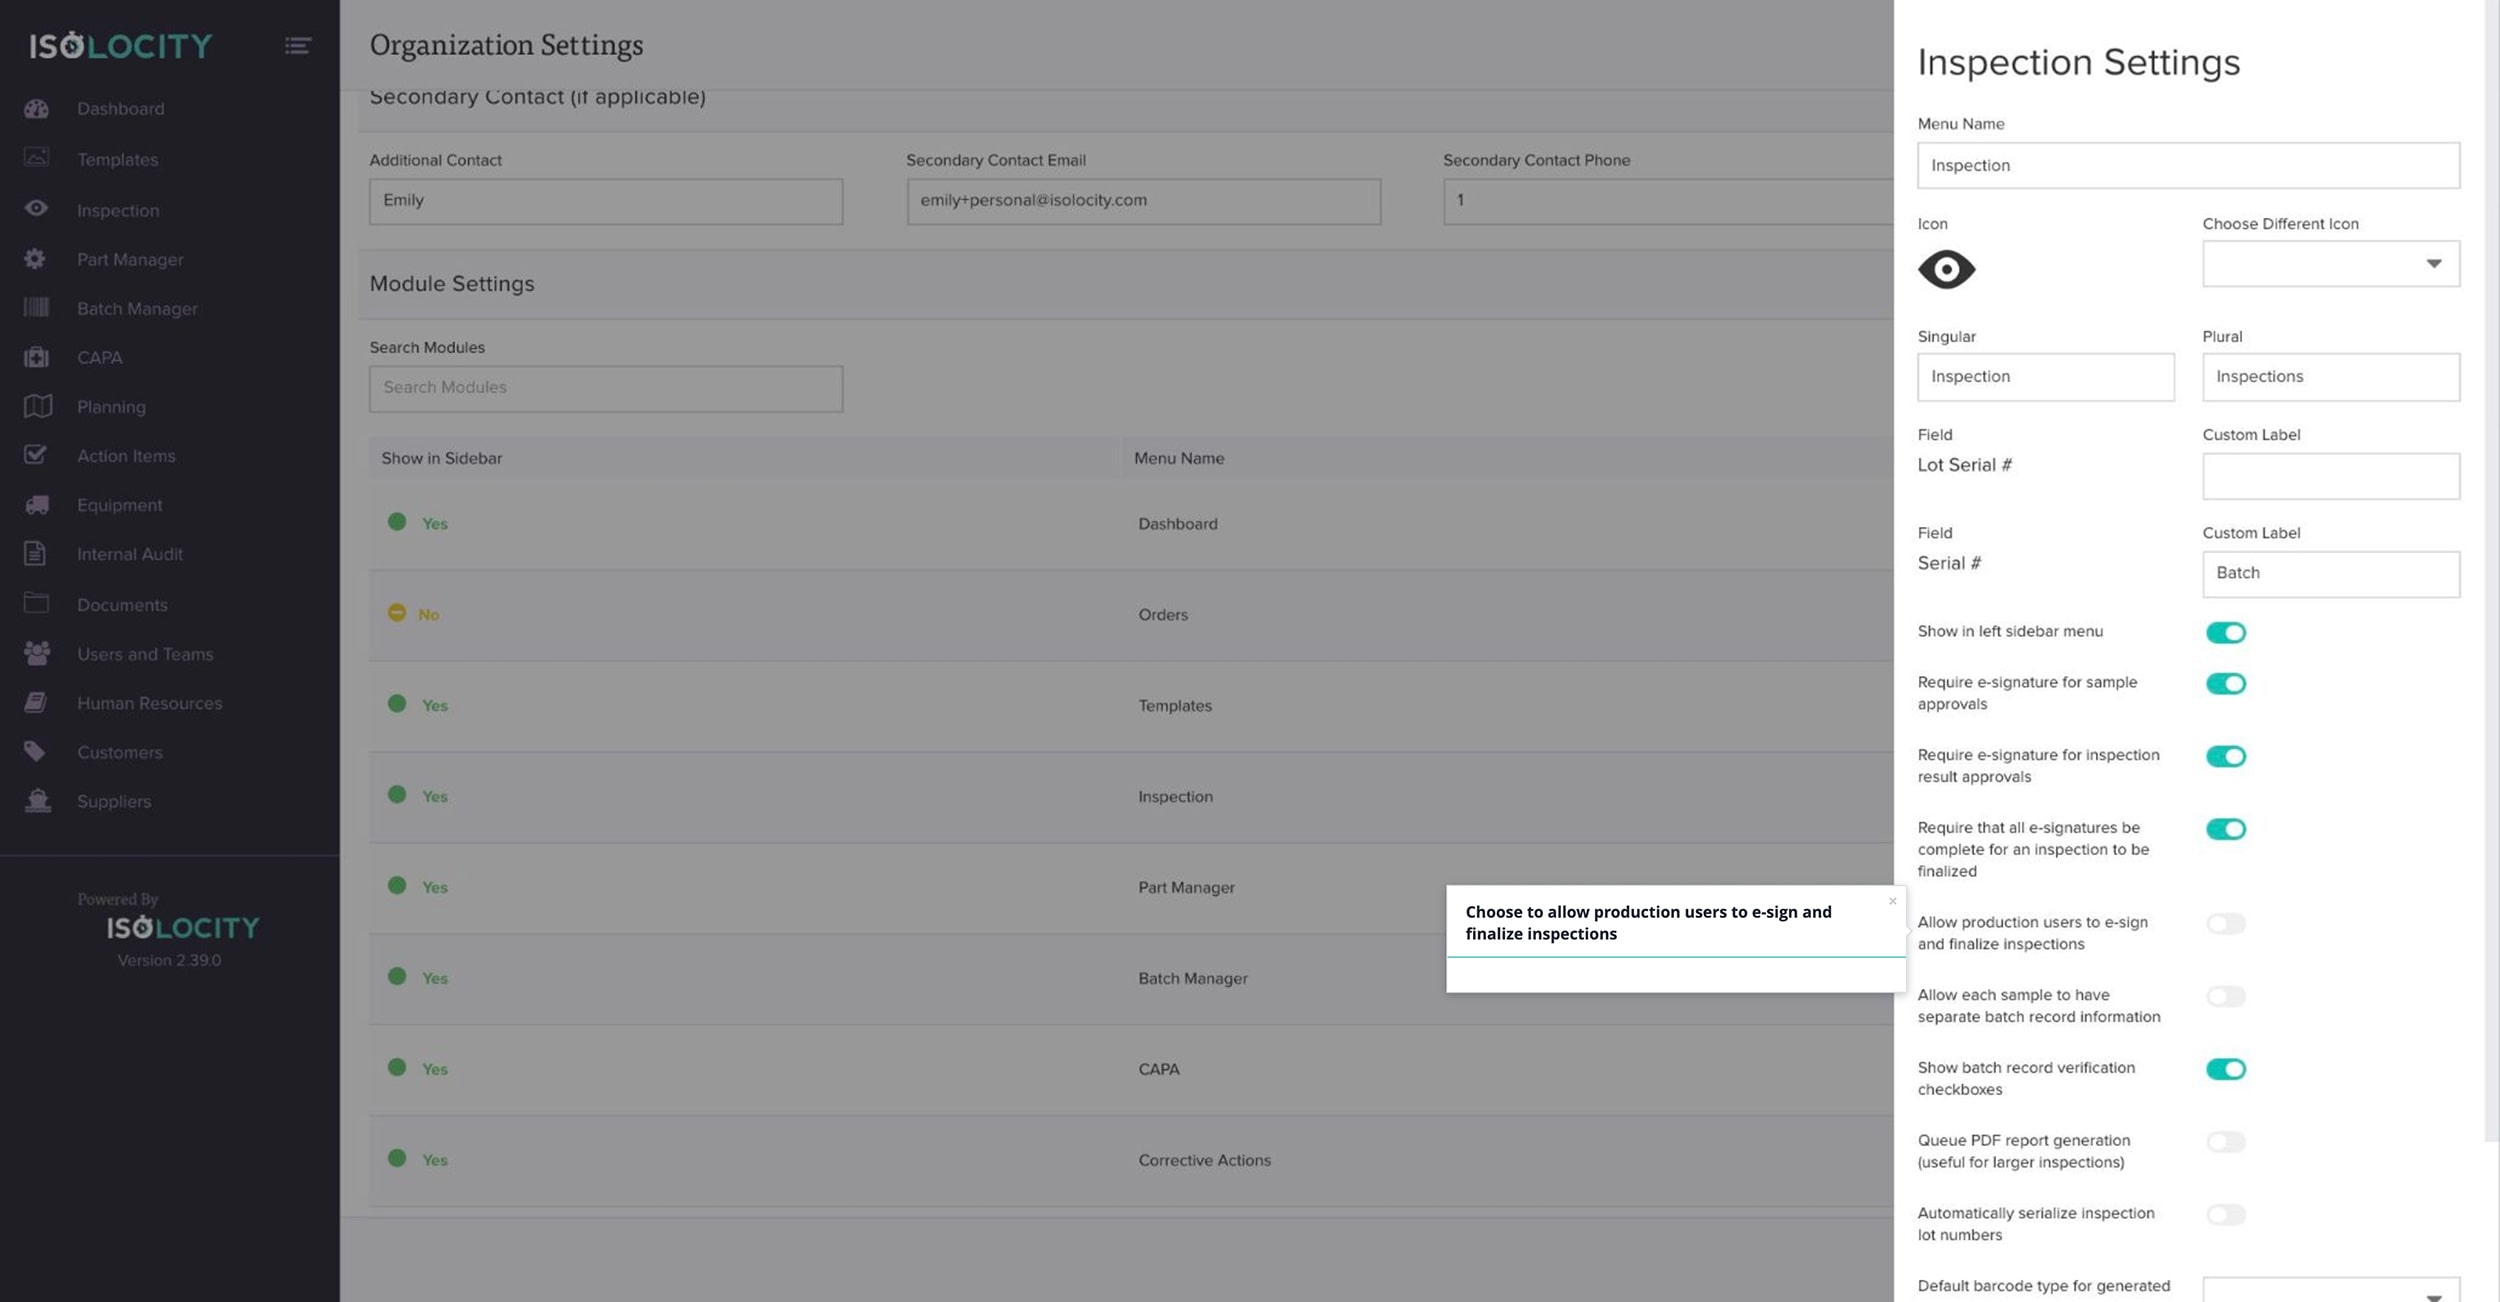
Choose to allow production users to e-sign and finalize inspections
Step #31
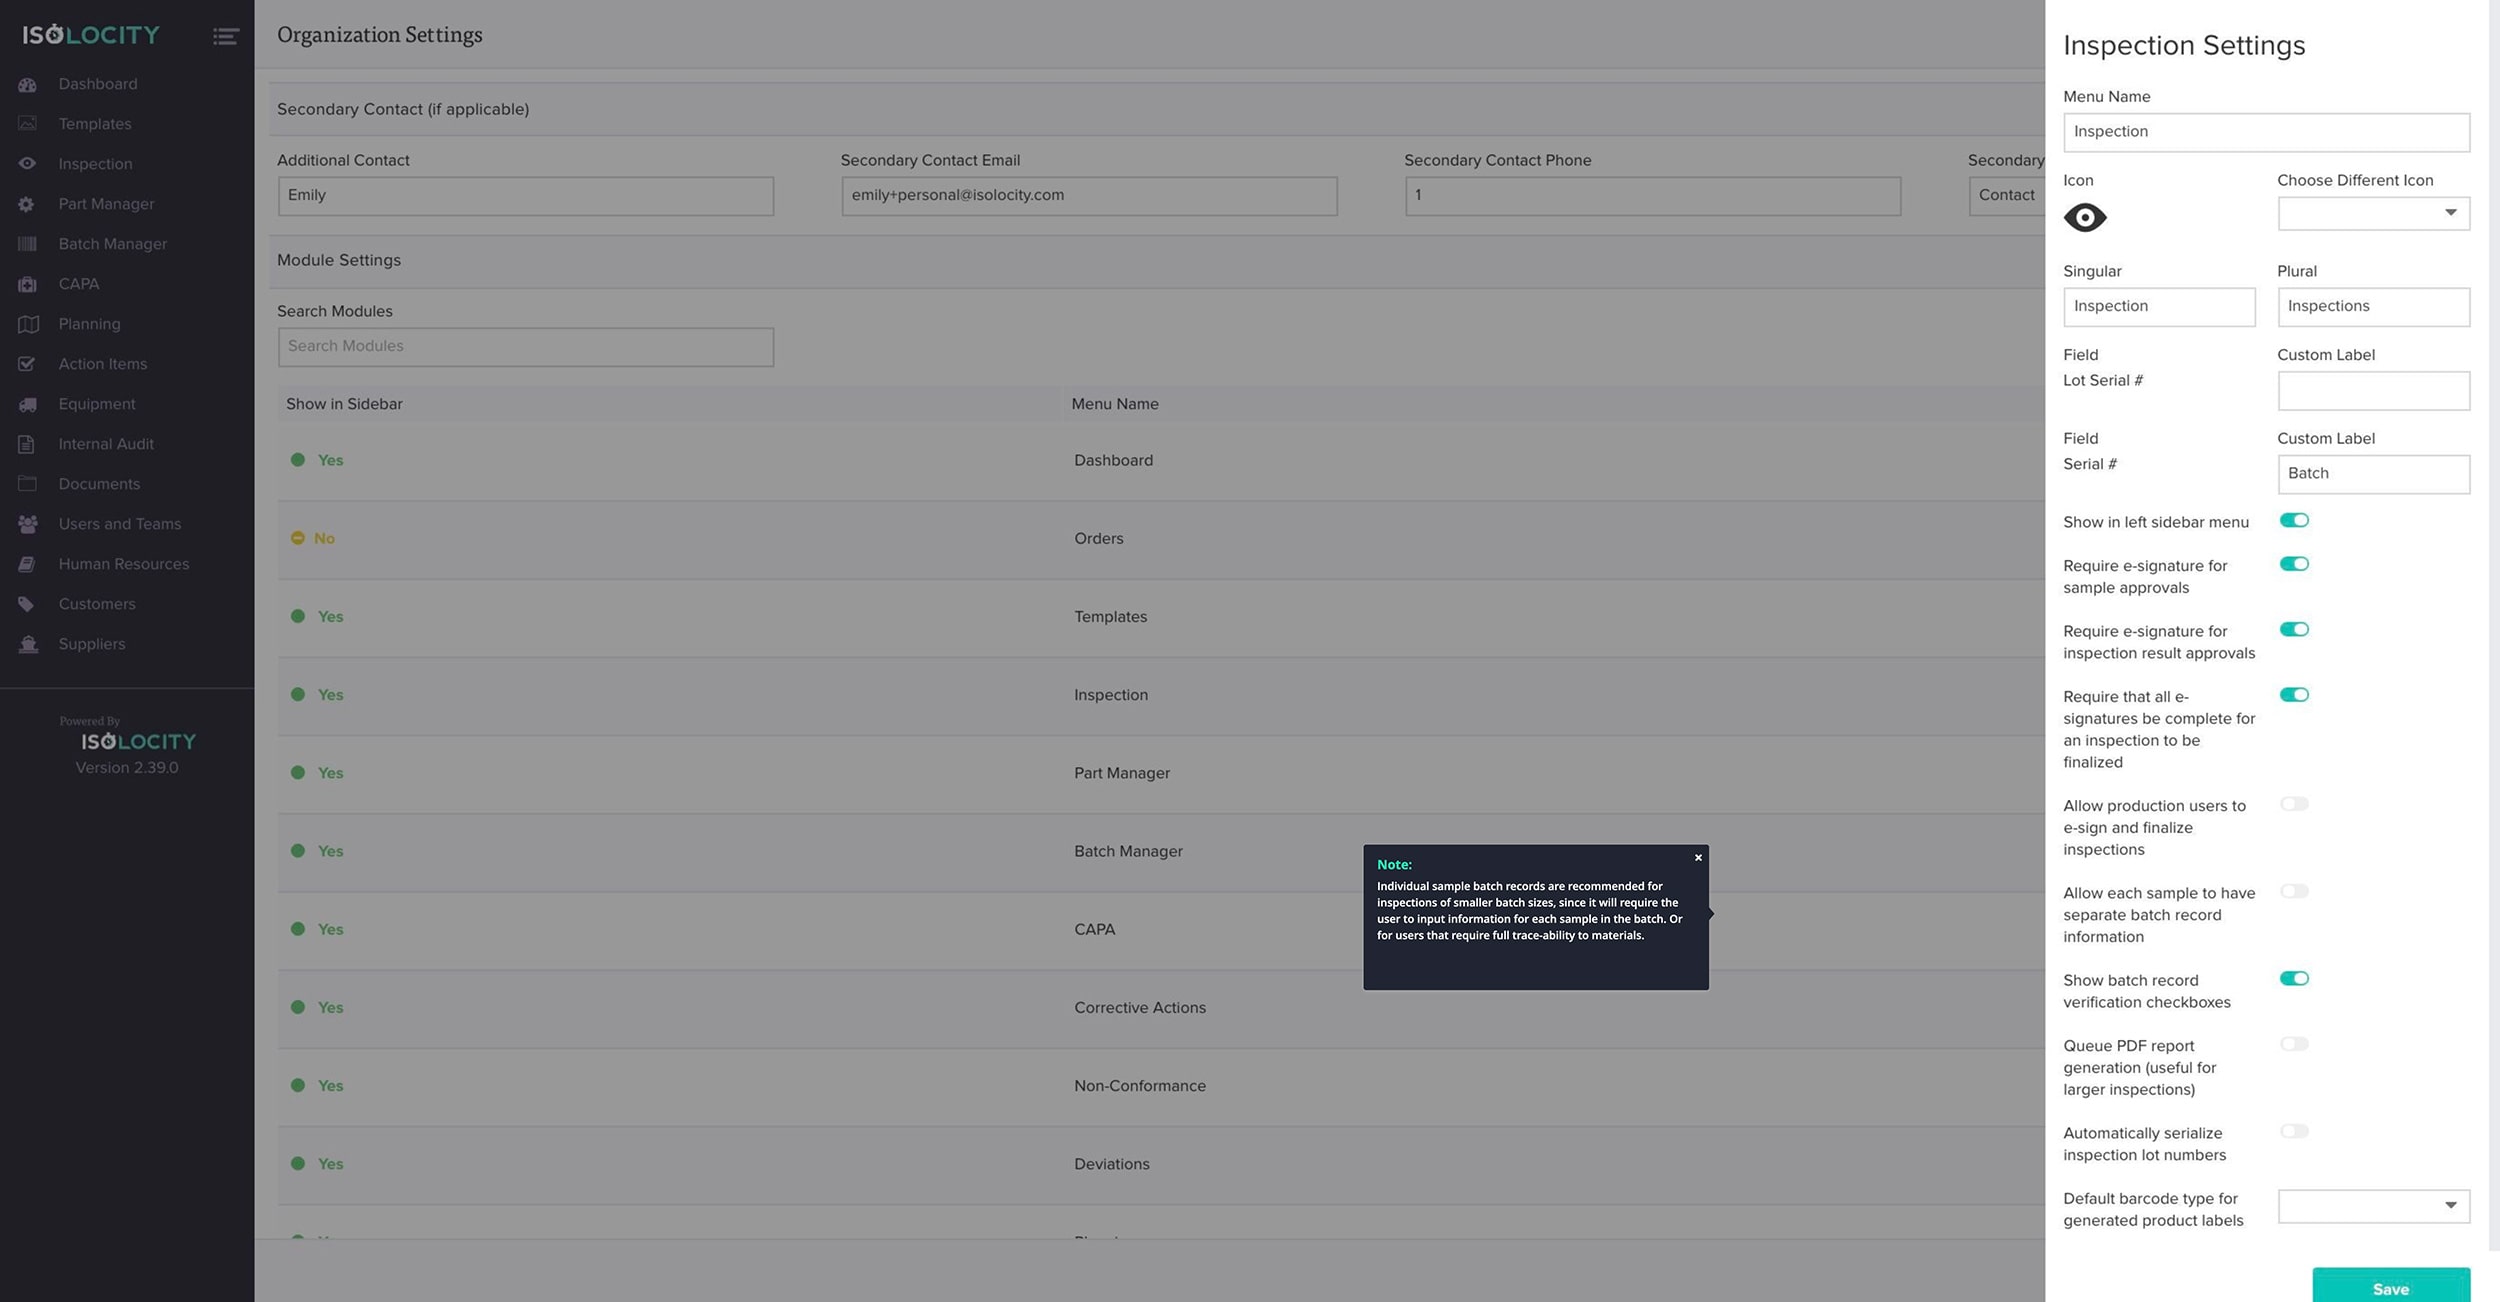
Choose whether to show individual sample batch records within your “Inspection” module (Optional).

Step #32
Note:
Step #33
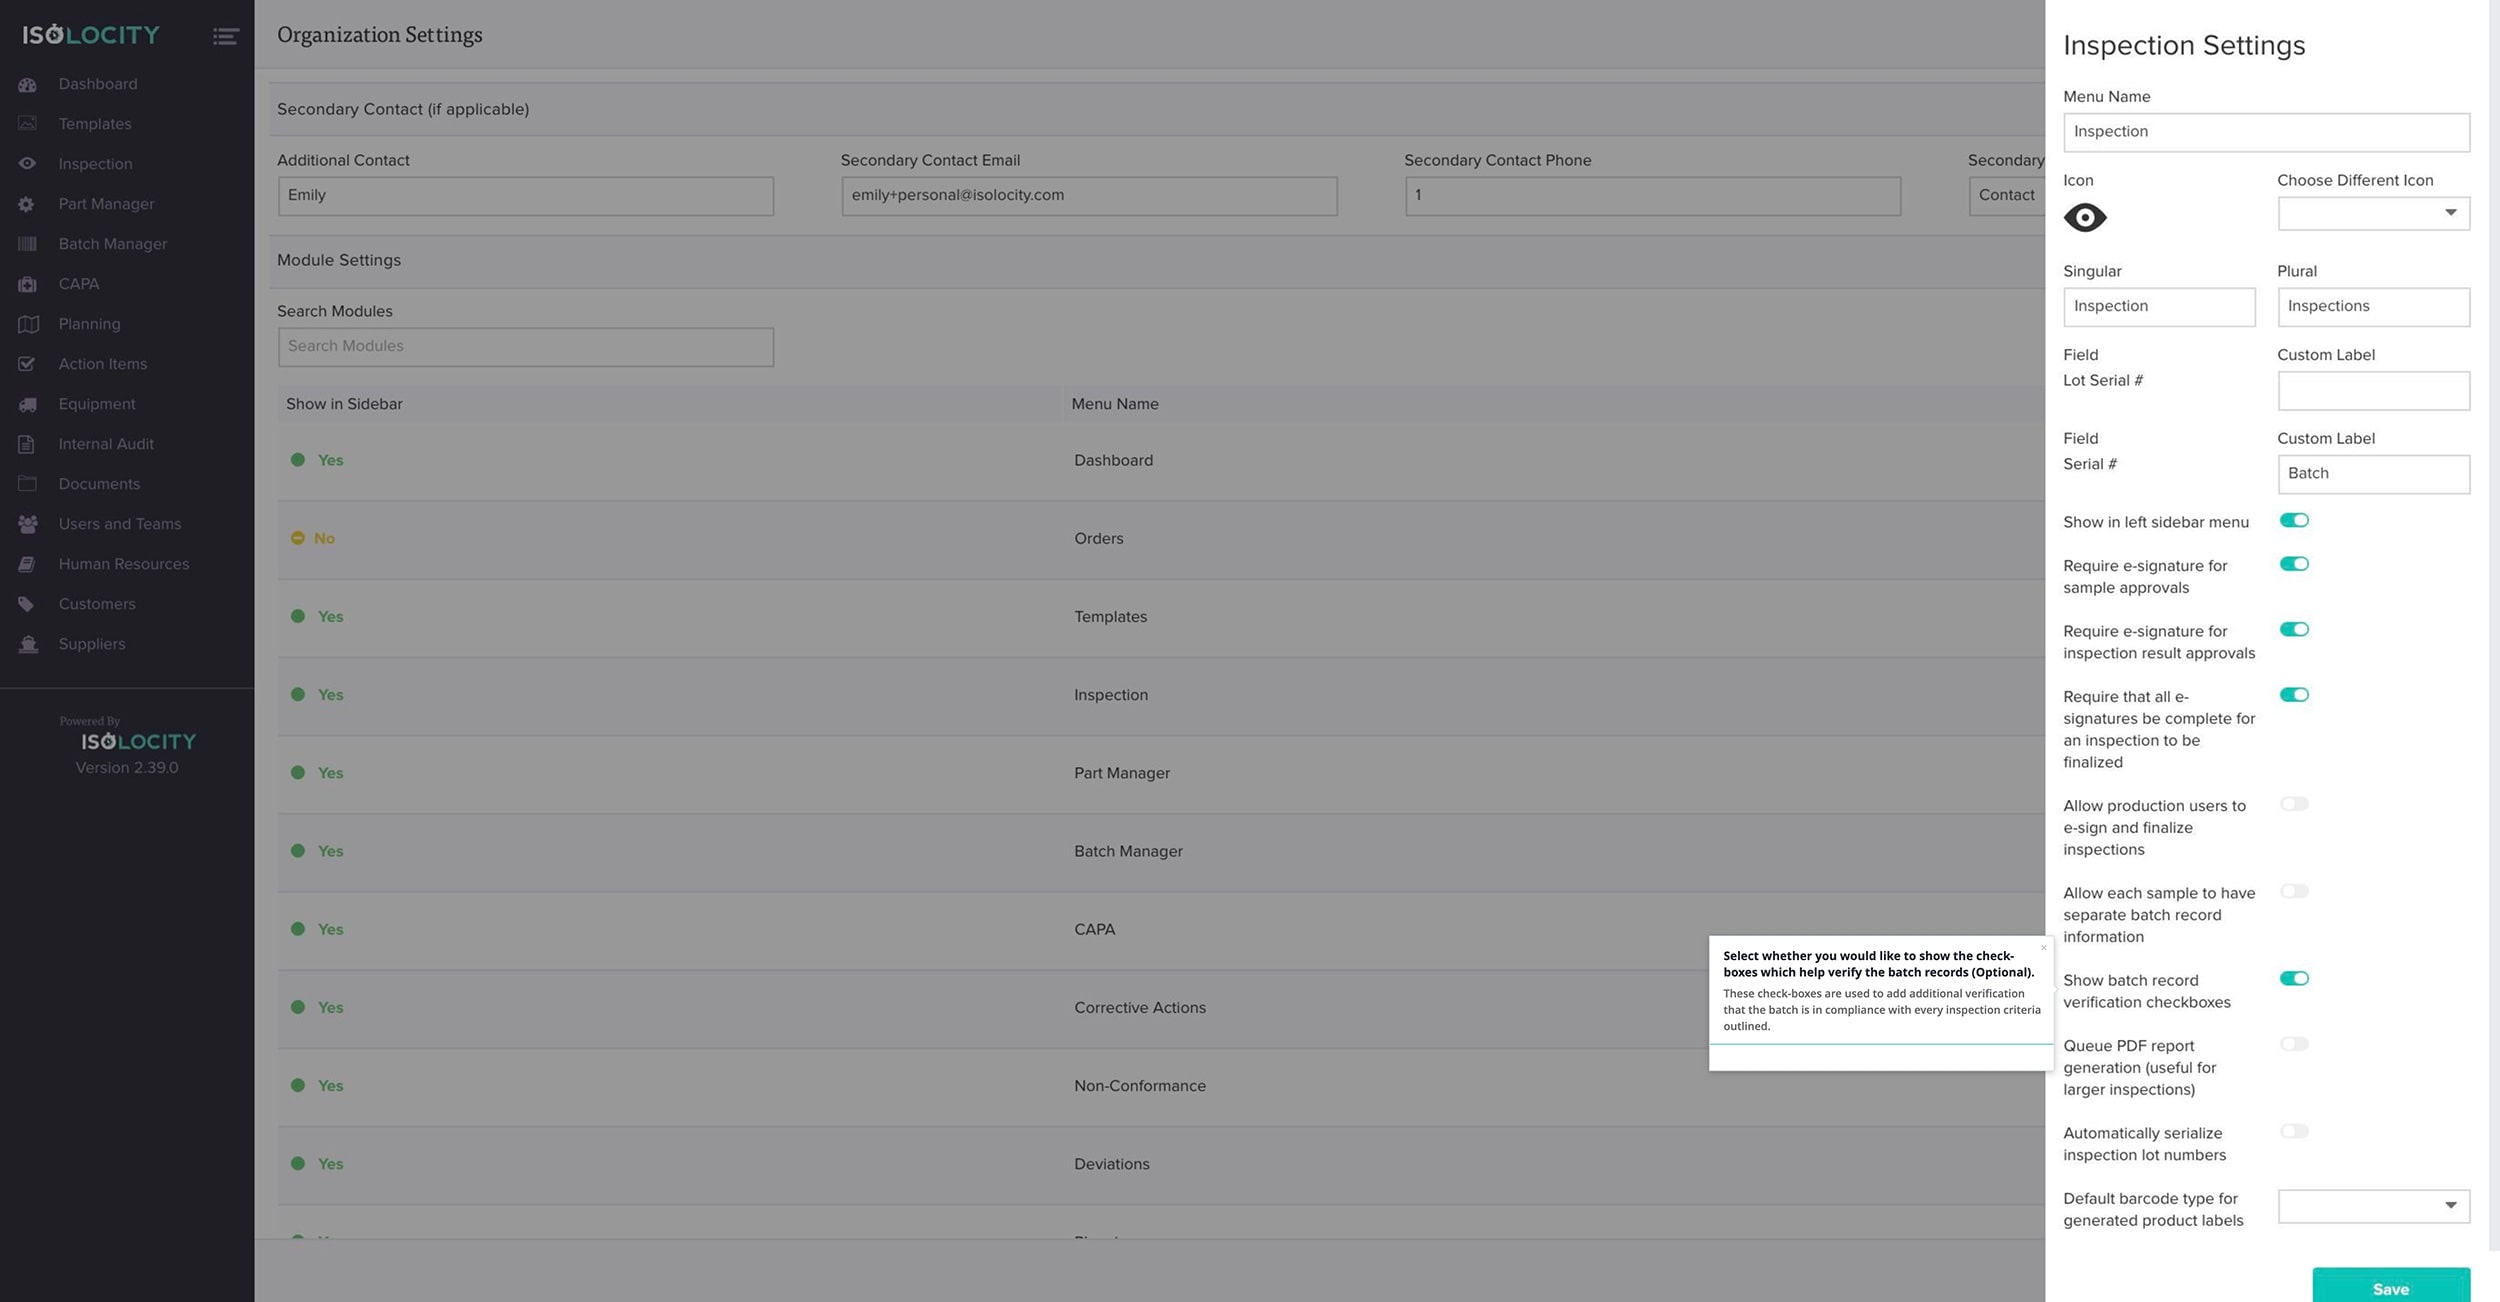
Select whether you would like to show the check-boxes which help verify the batch records (Optional).
Step #34
Select whether to allow “Custom Product Labels” (Optional).
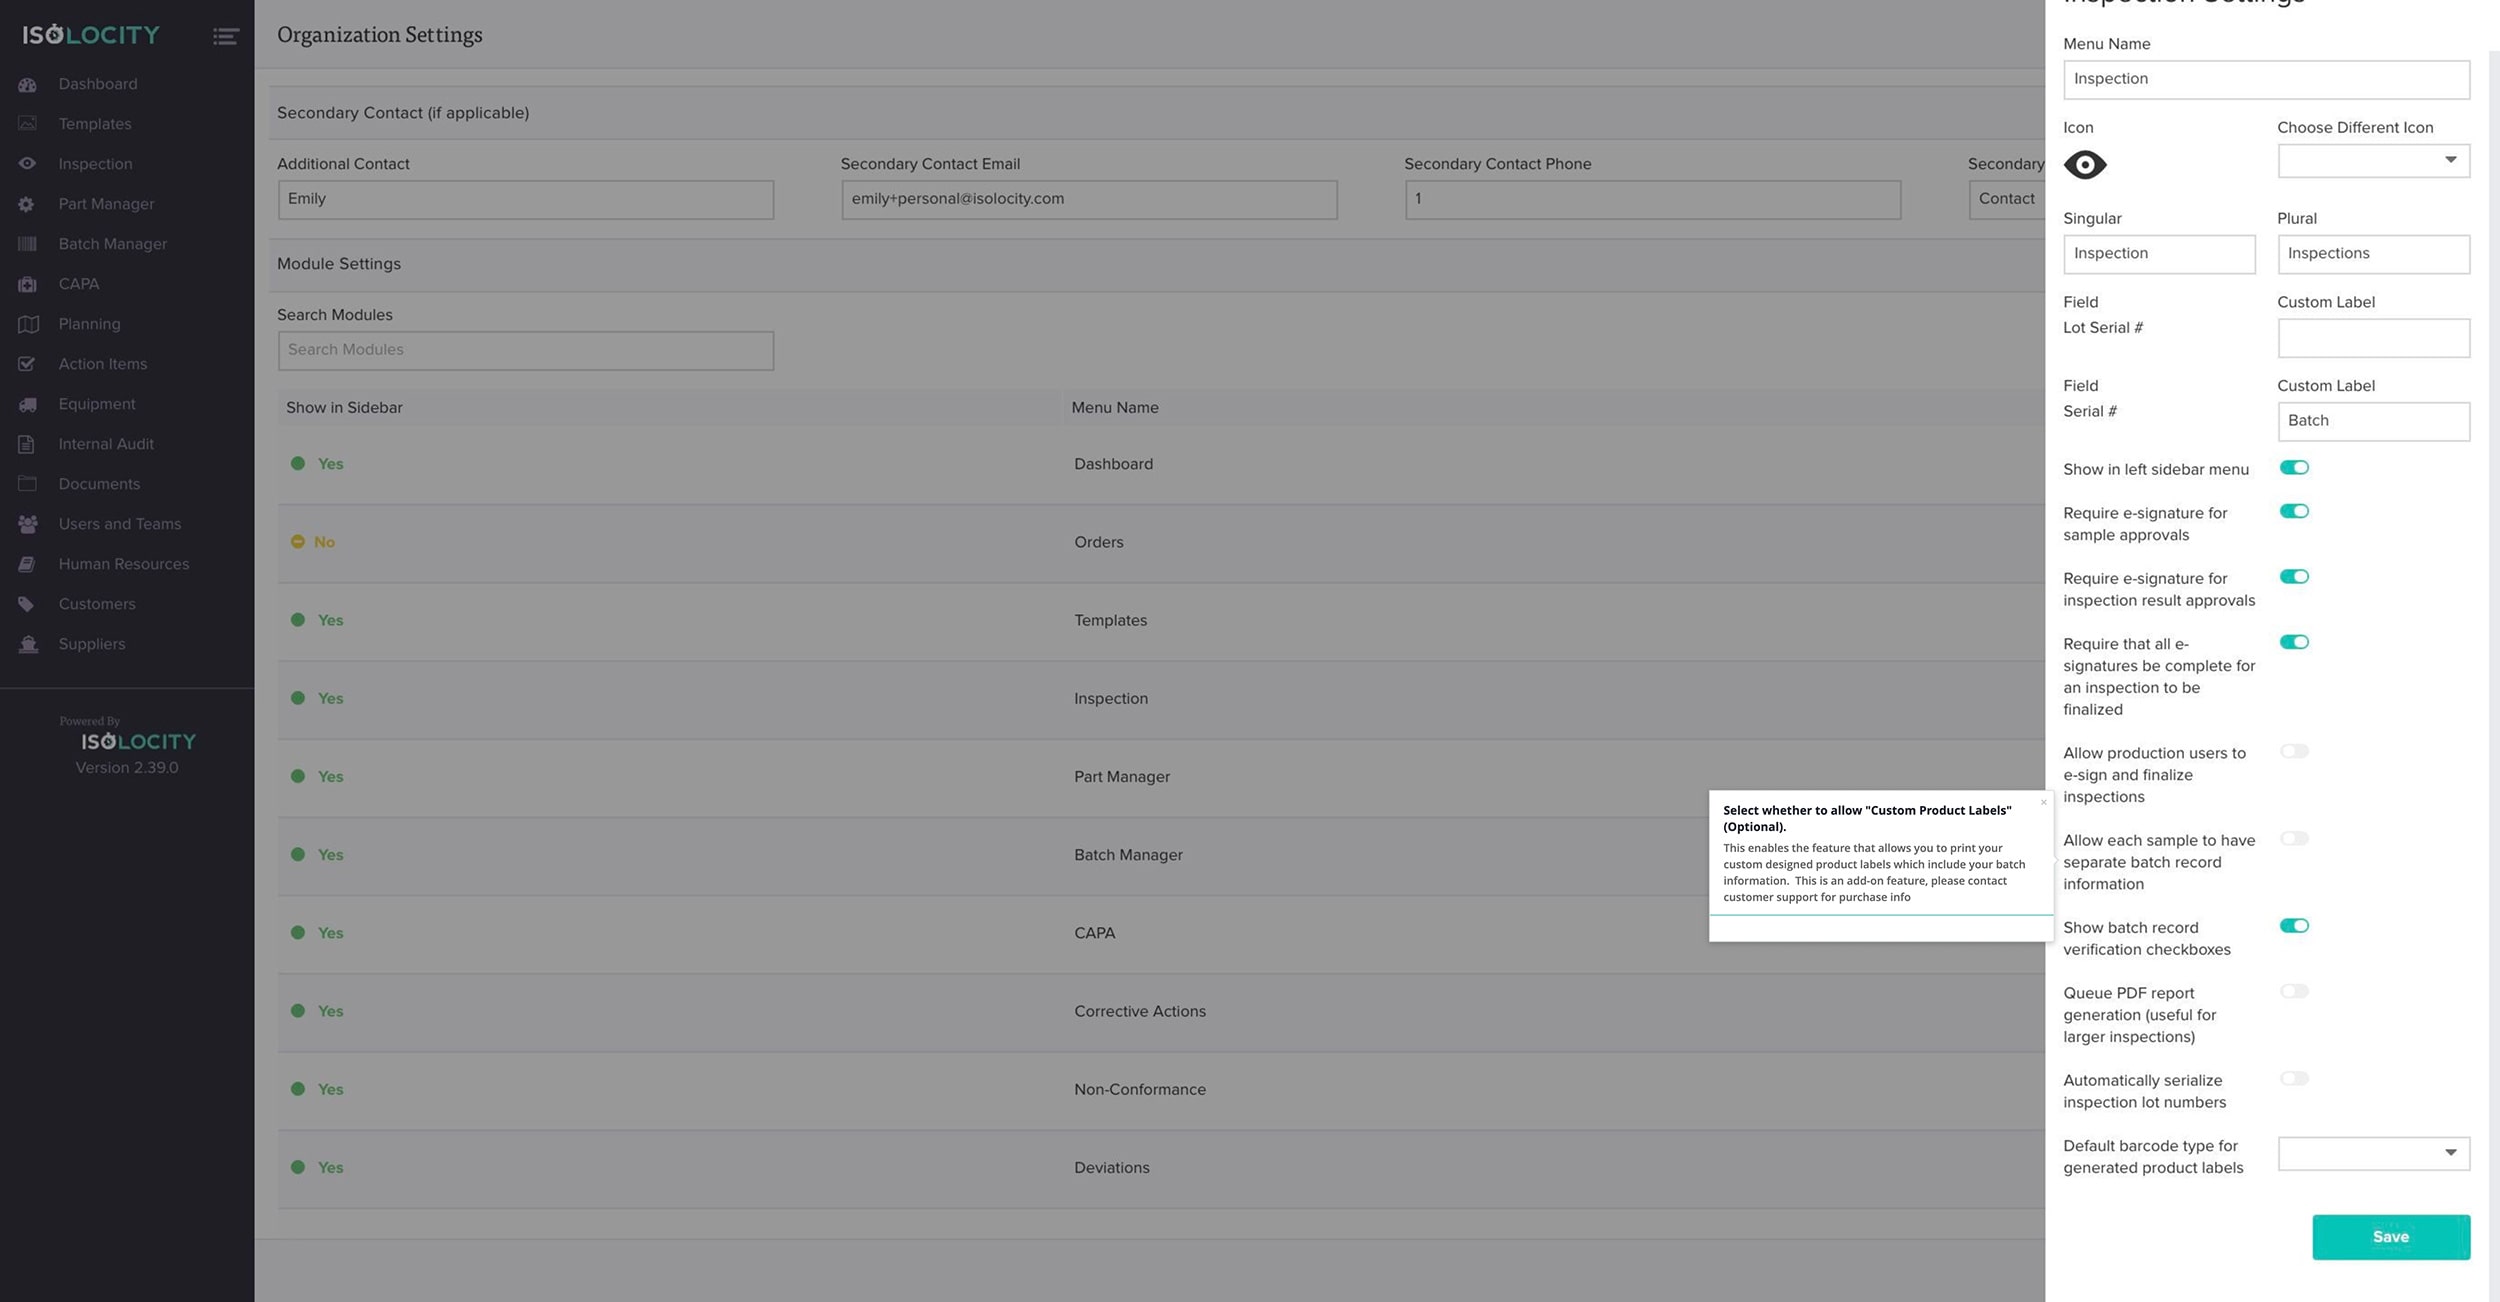
Step #35
Do you want to queue PDF report generation?

Step #36
Do you want to serialize your lot numbers? (Optional).
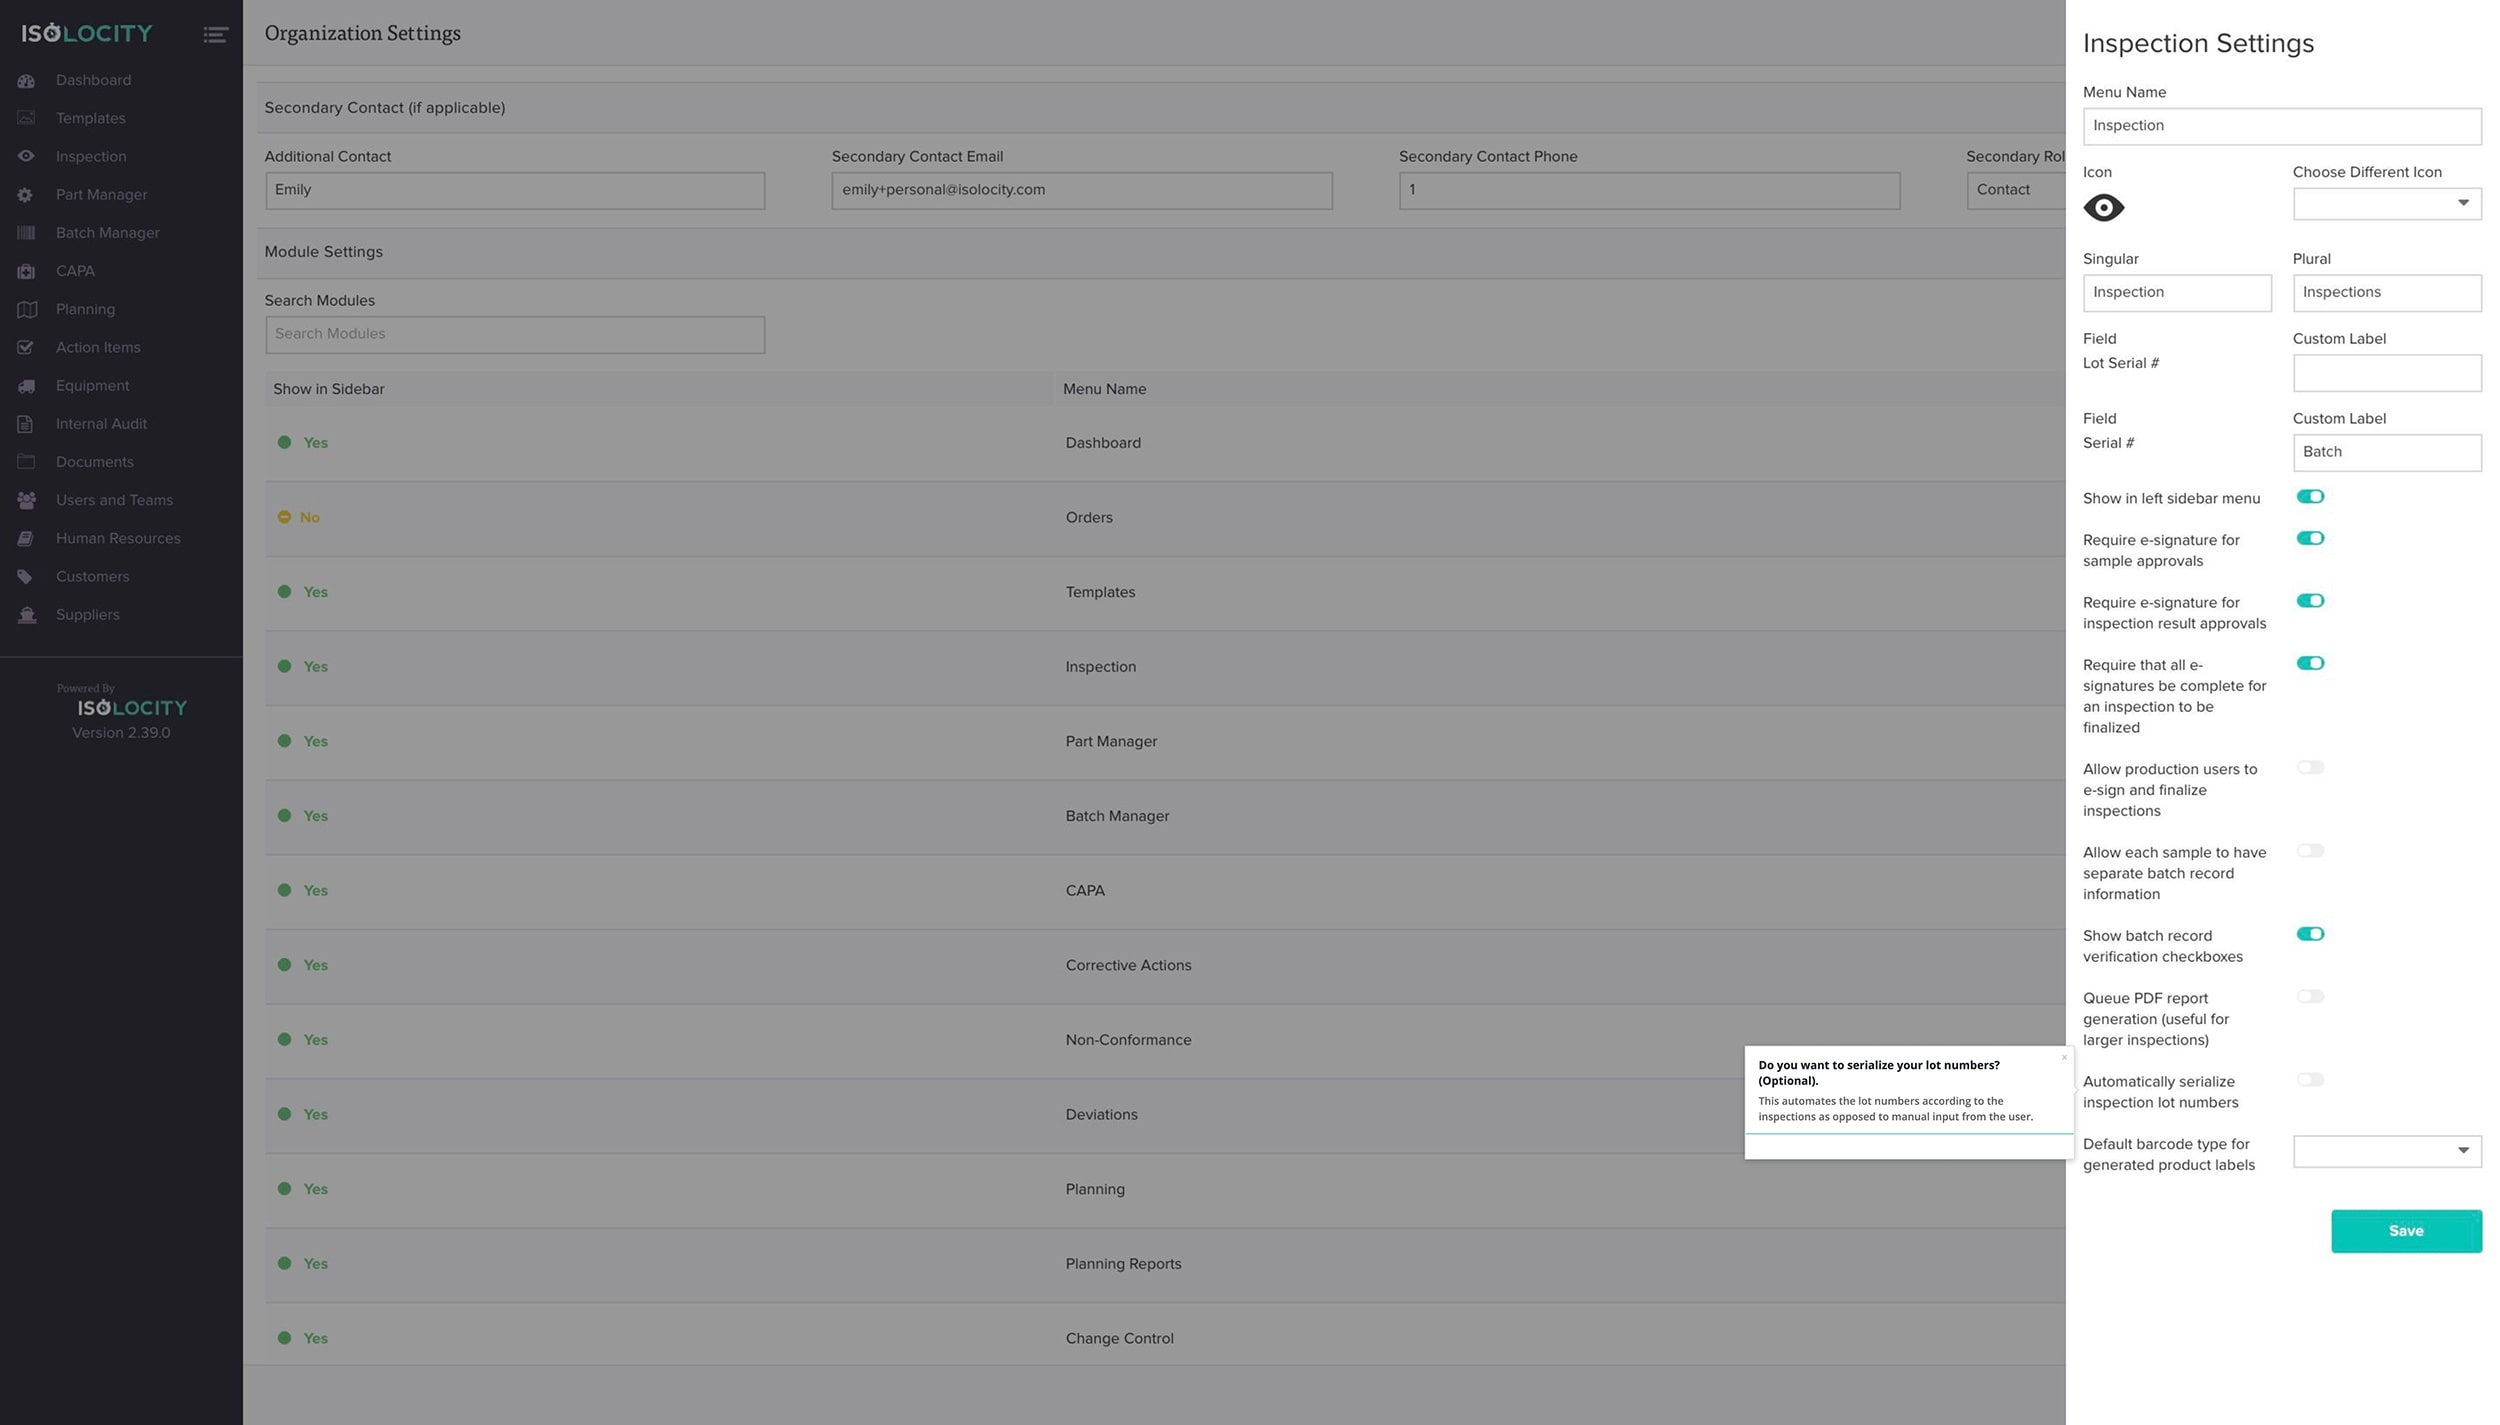
Step #37
Choose the “Label Barcode Type” (Optional).
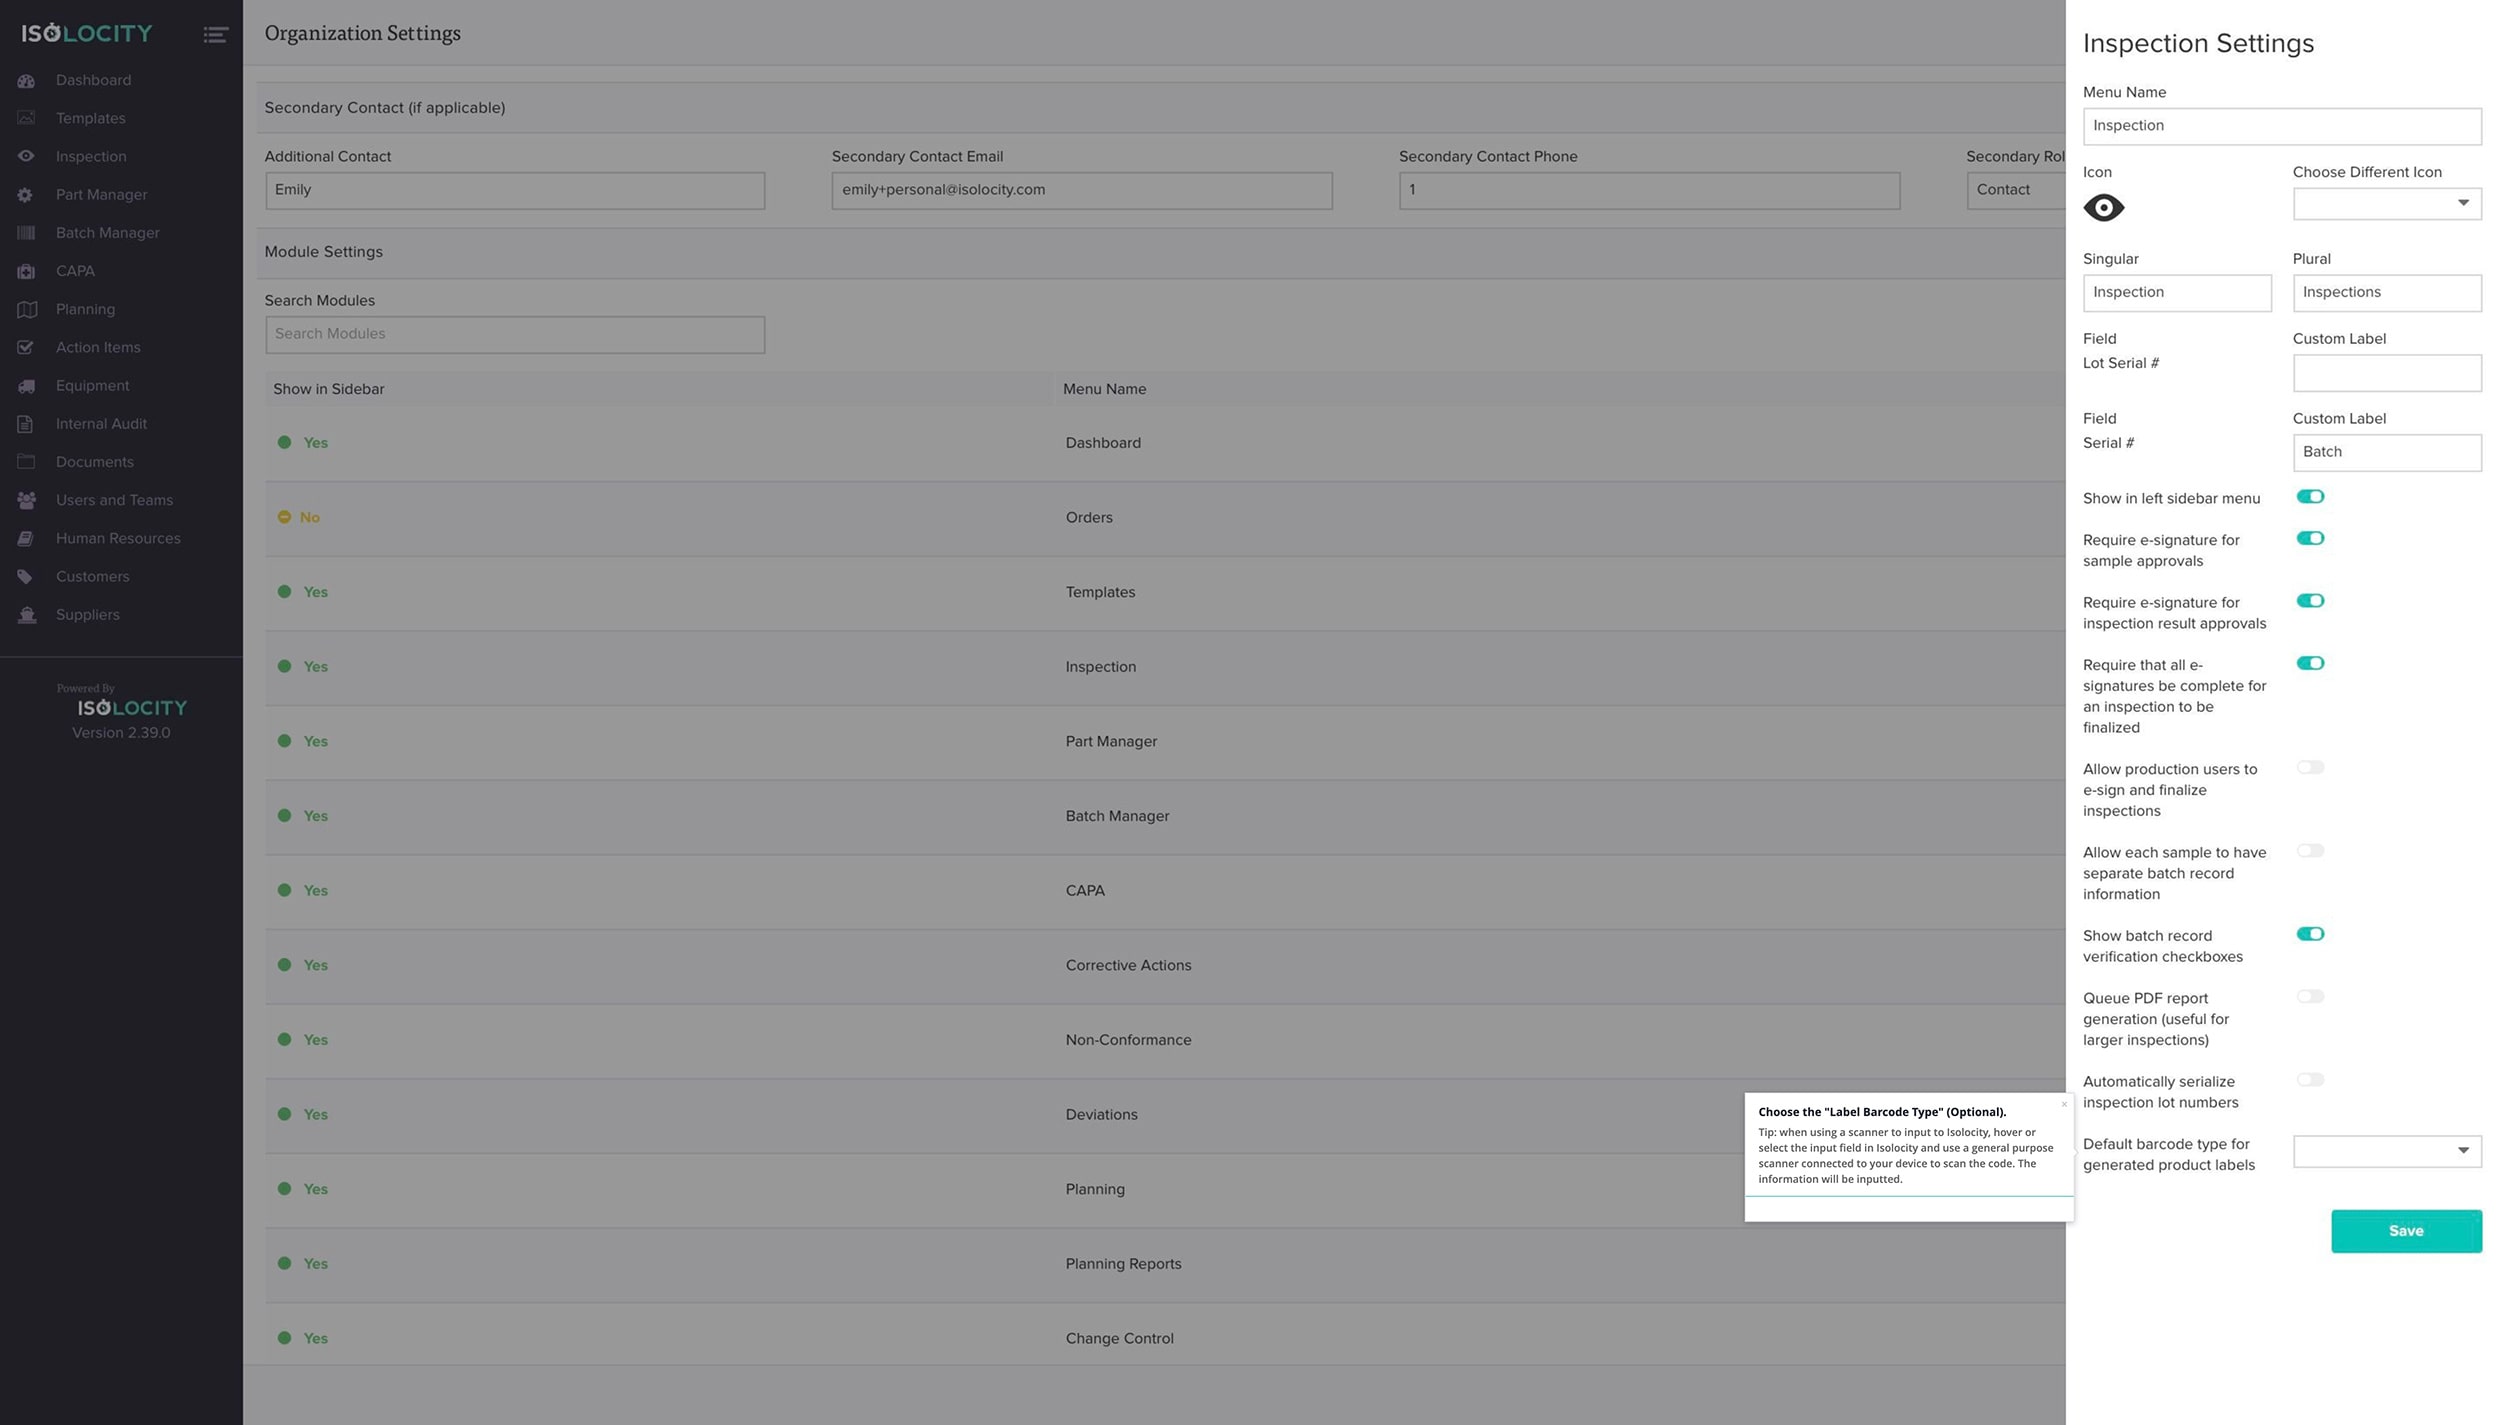
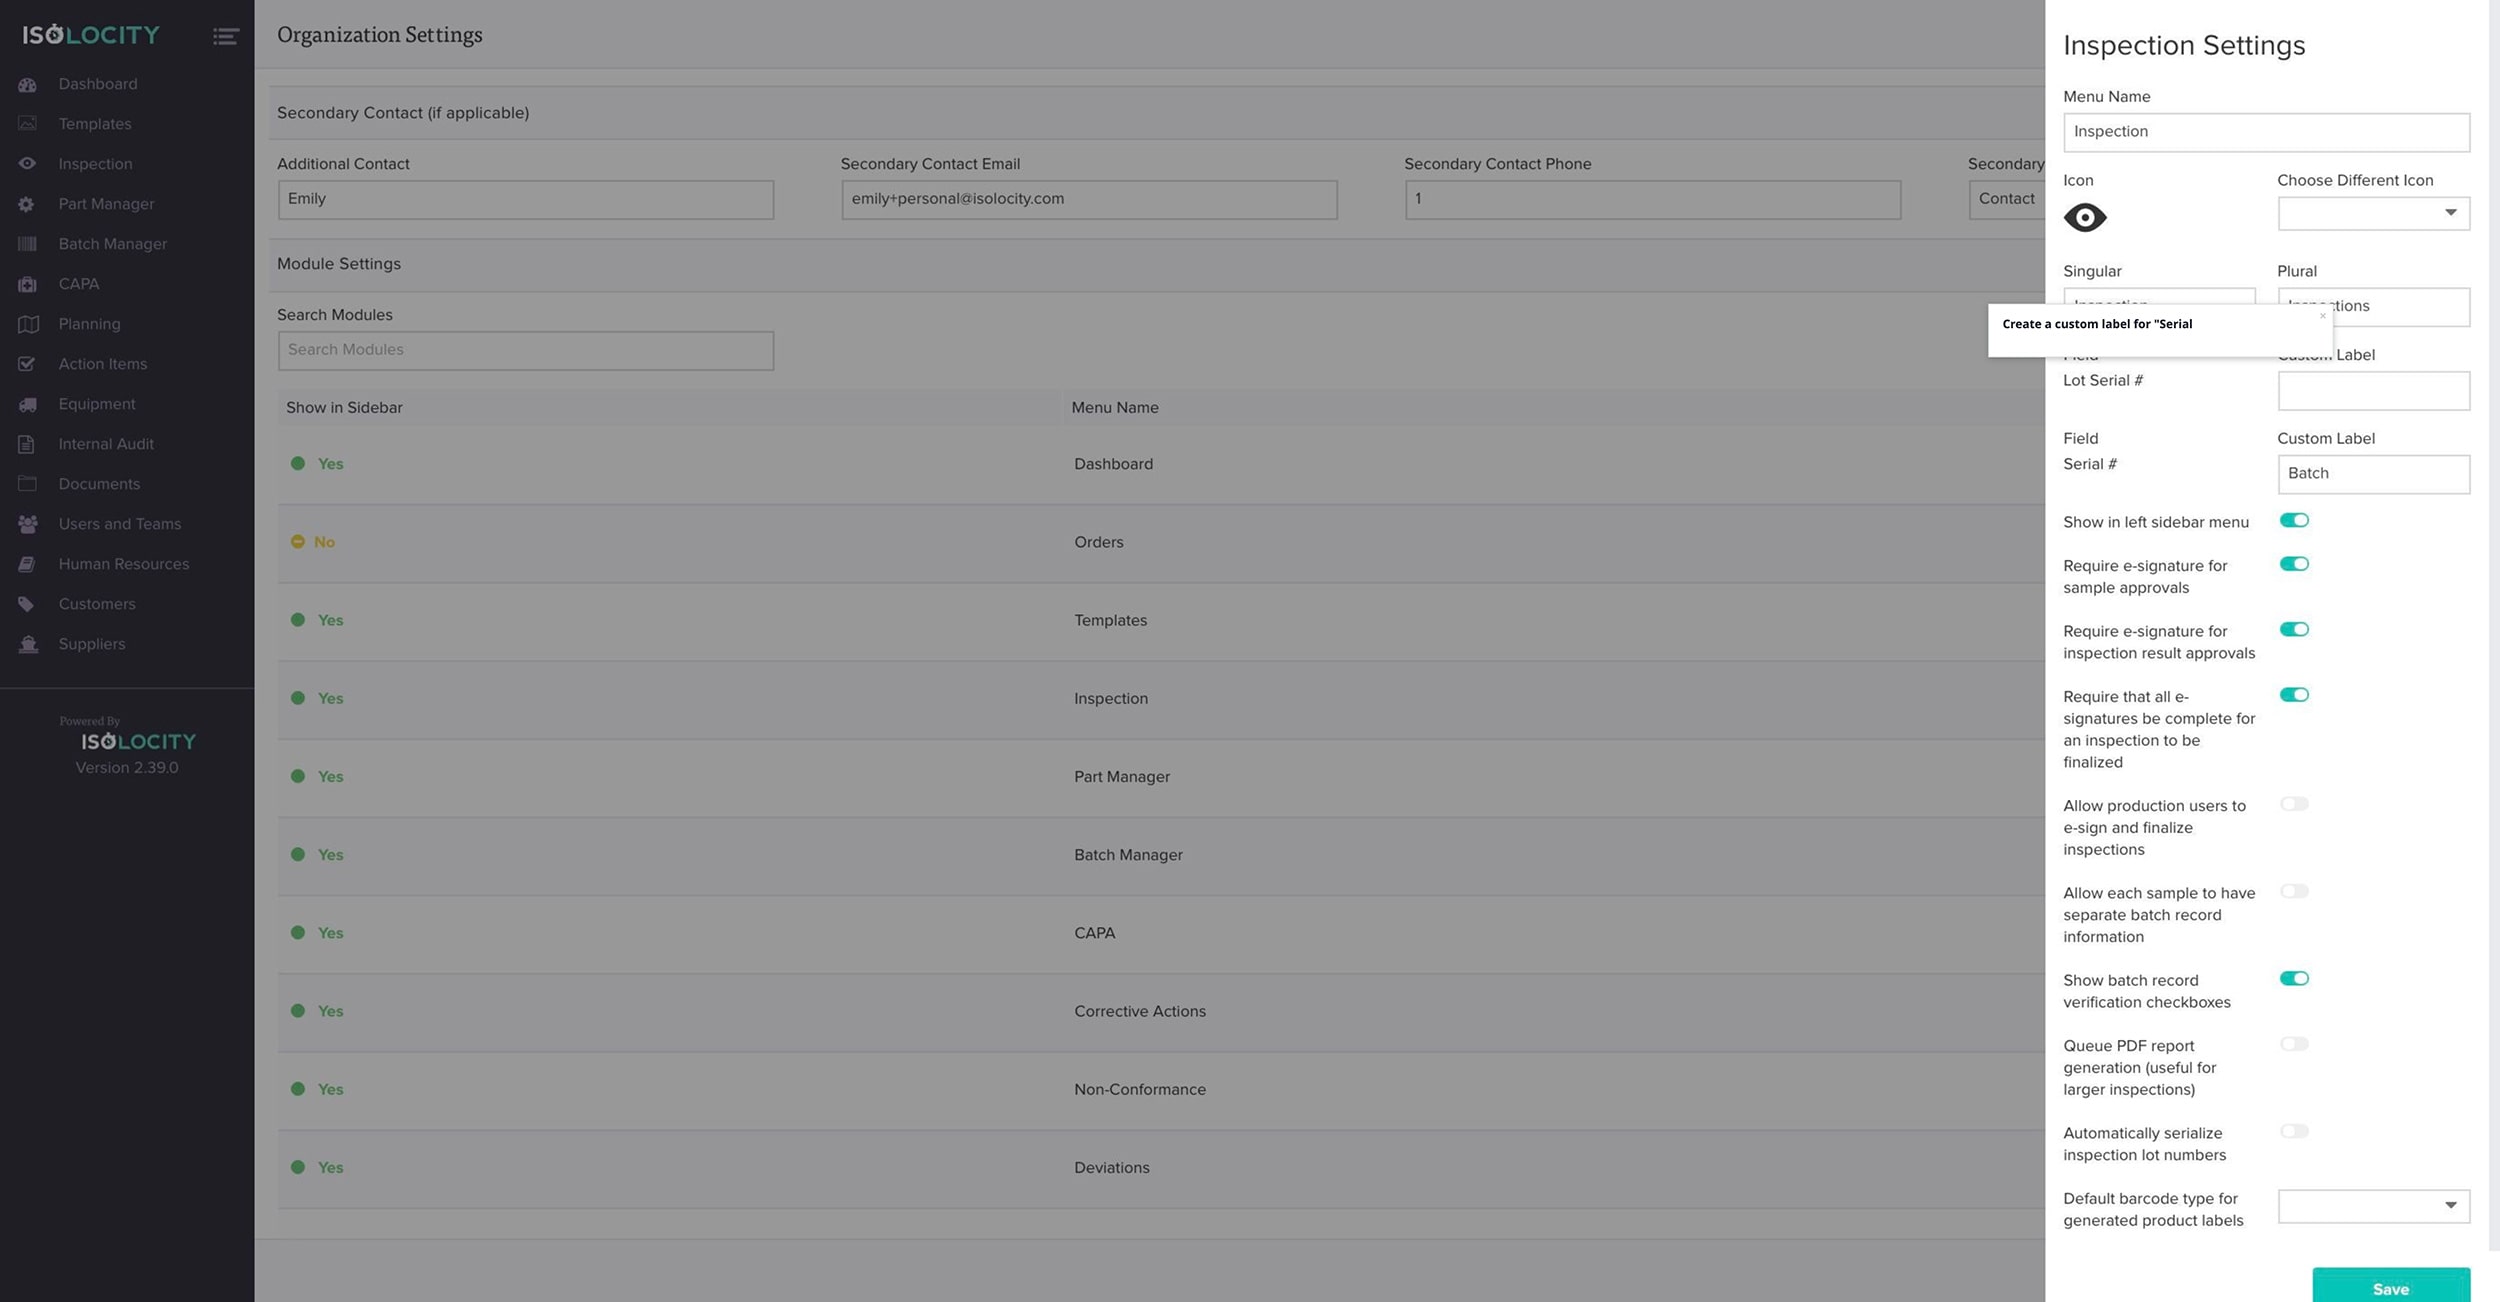
Step #38
Create a custom label for “Lot Serial #”(Optional).
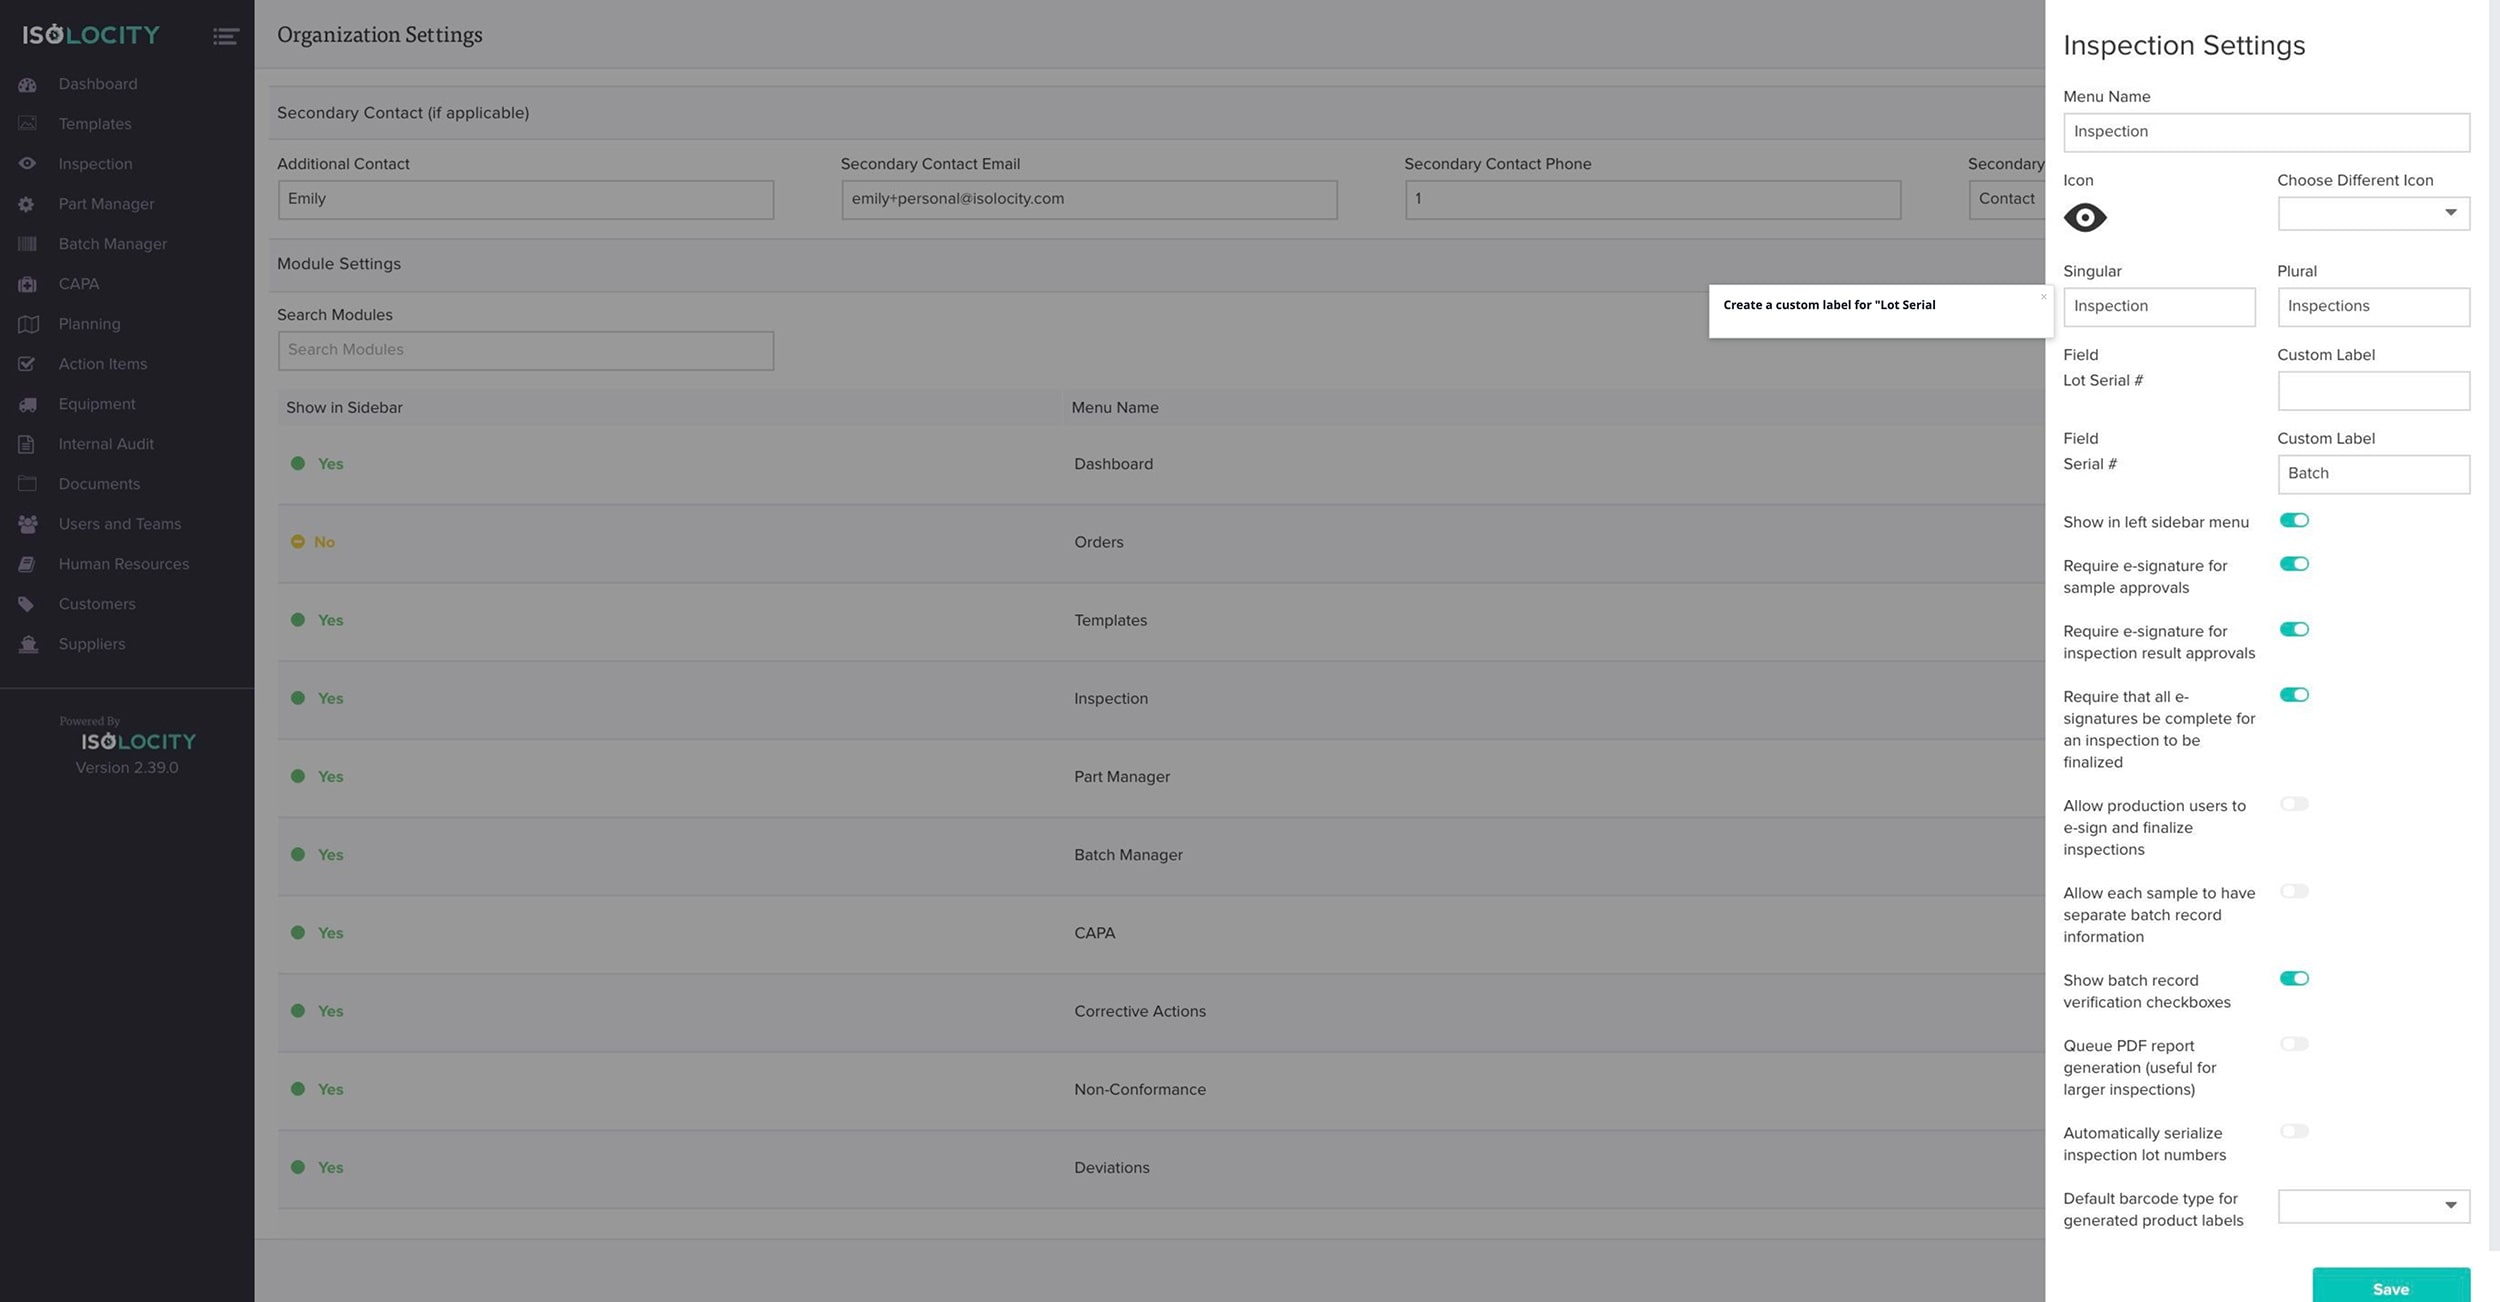
Step #39
Create a custom label for “Serial #”(Optional).
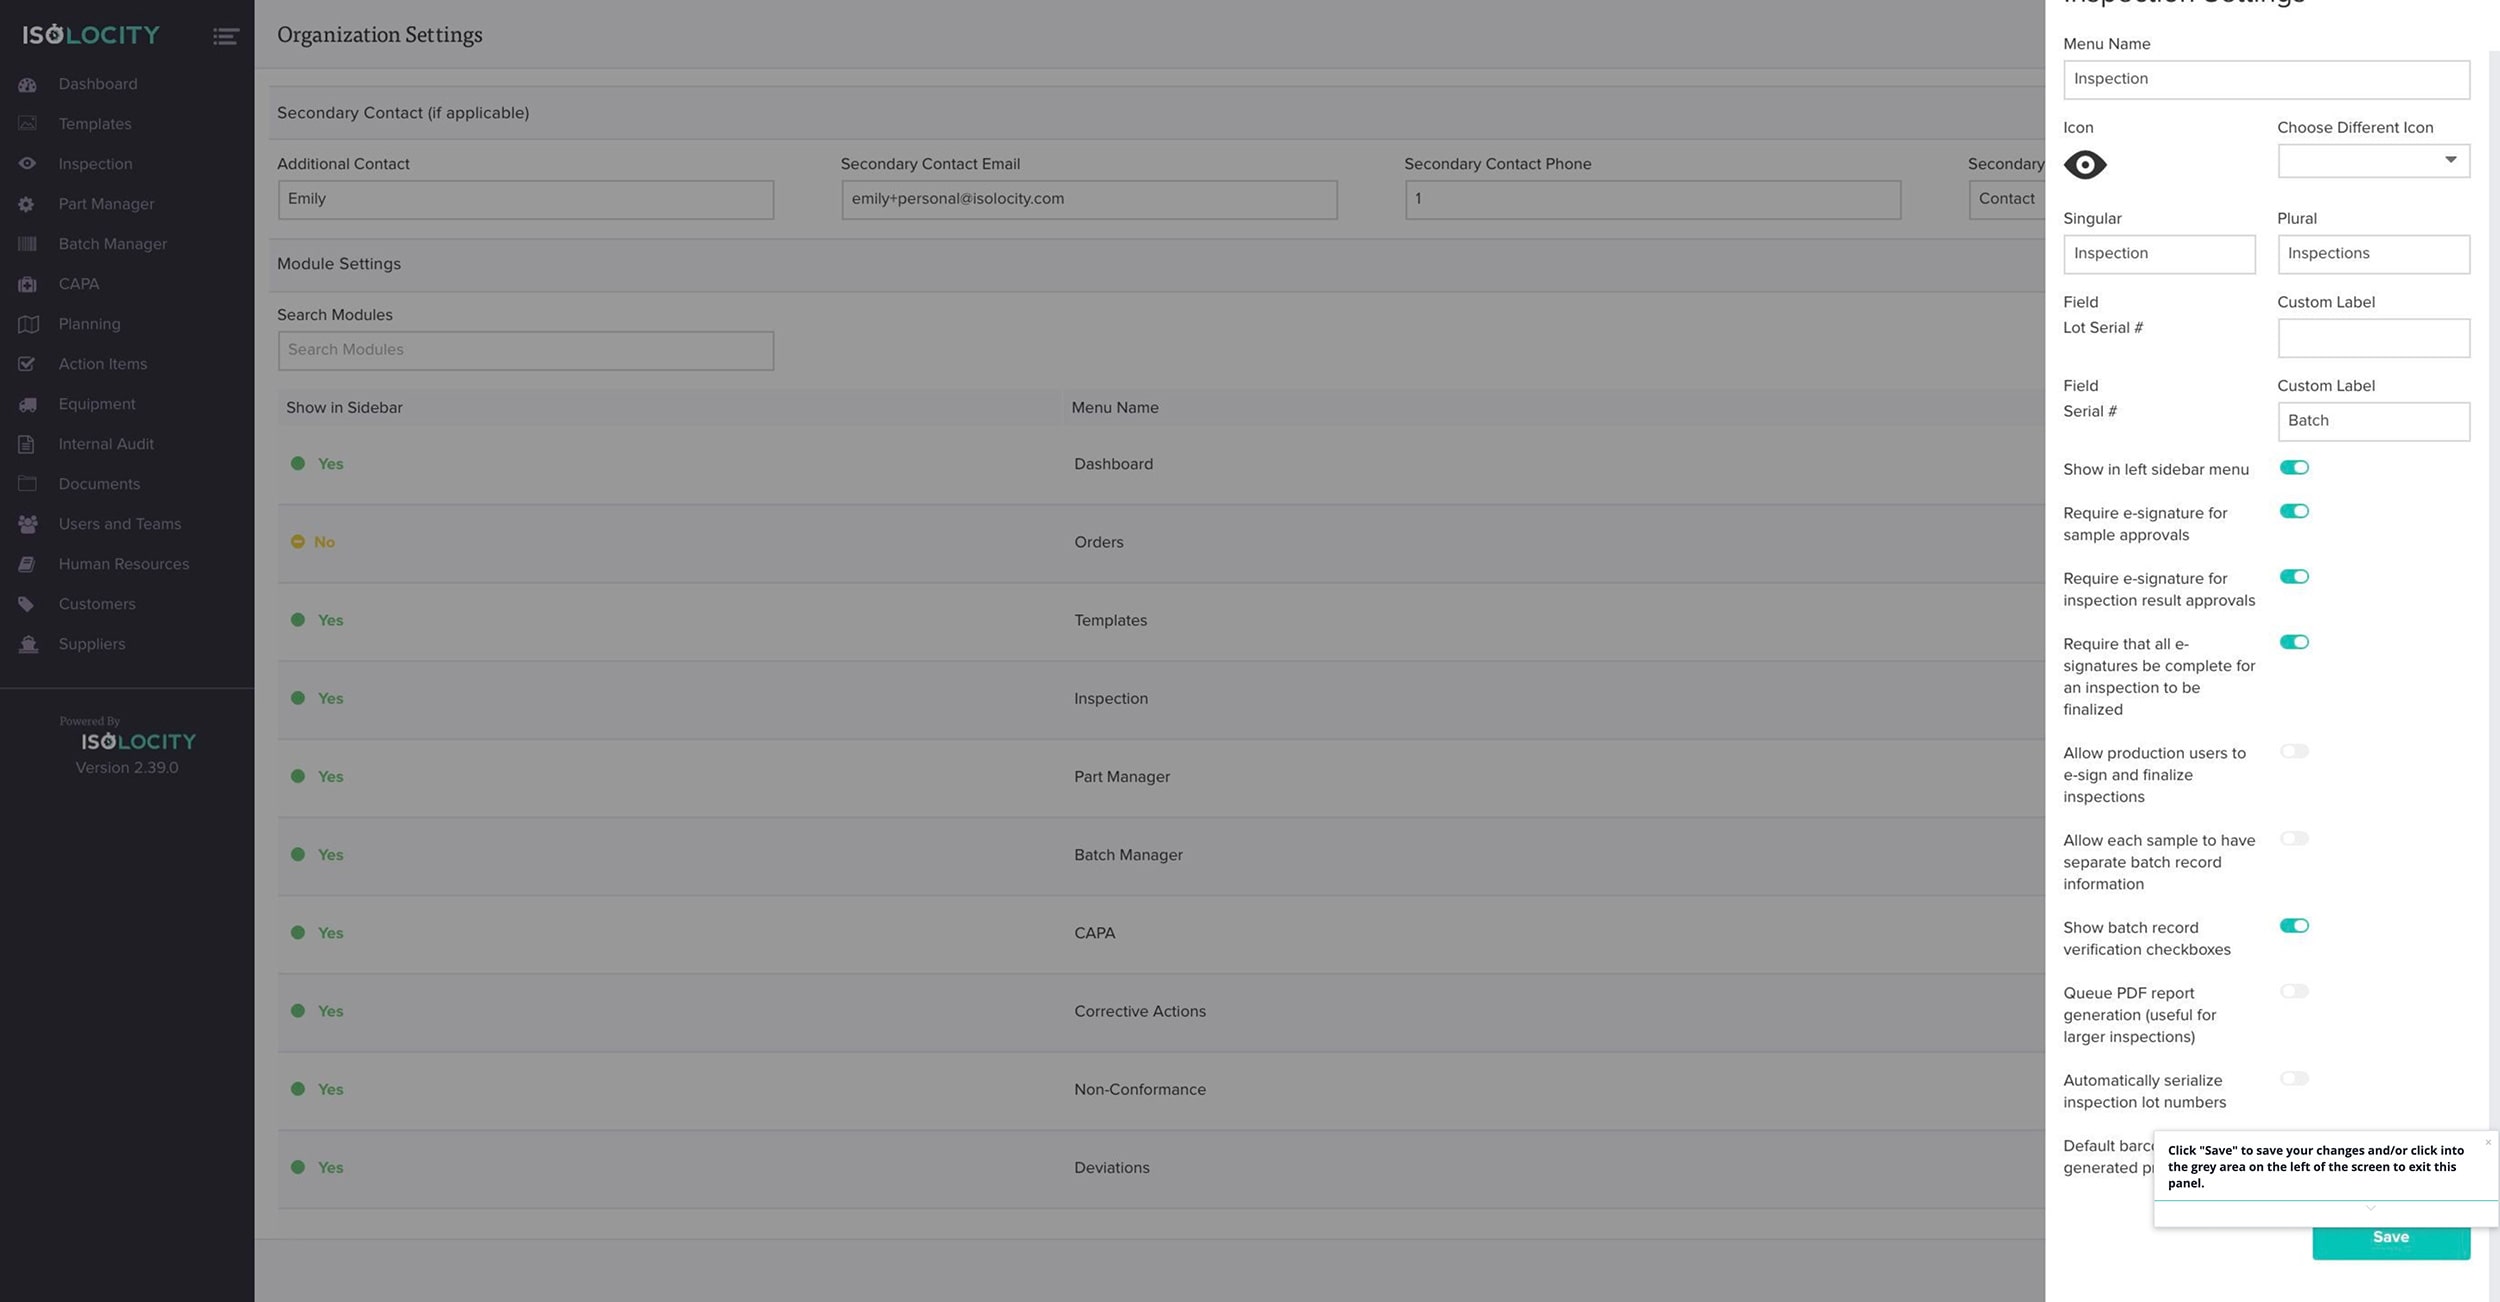
Step #40
Click “Save” to save your changes and/or click into the grey area on the left of the screen to exit this panel.
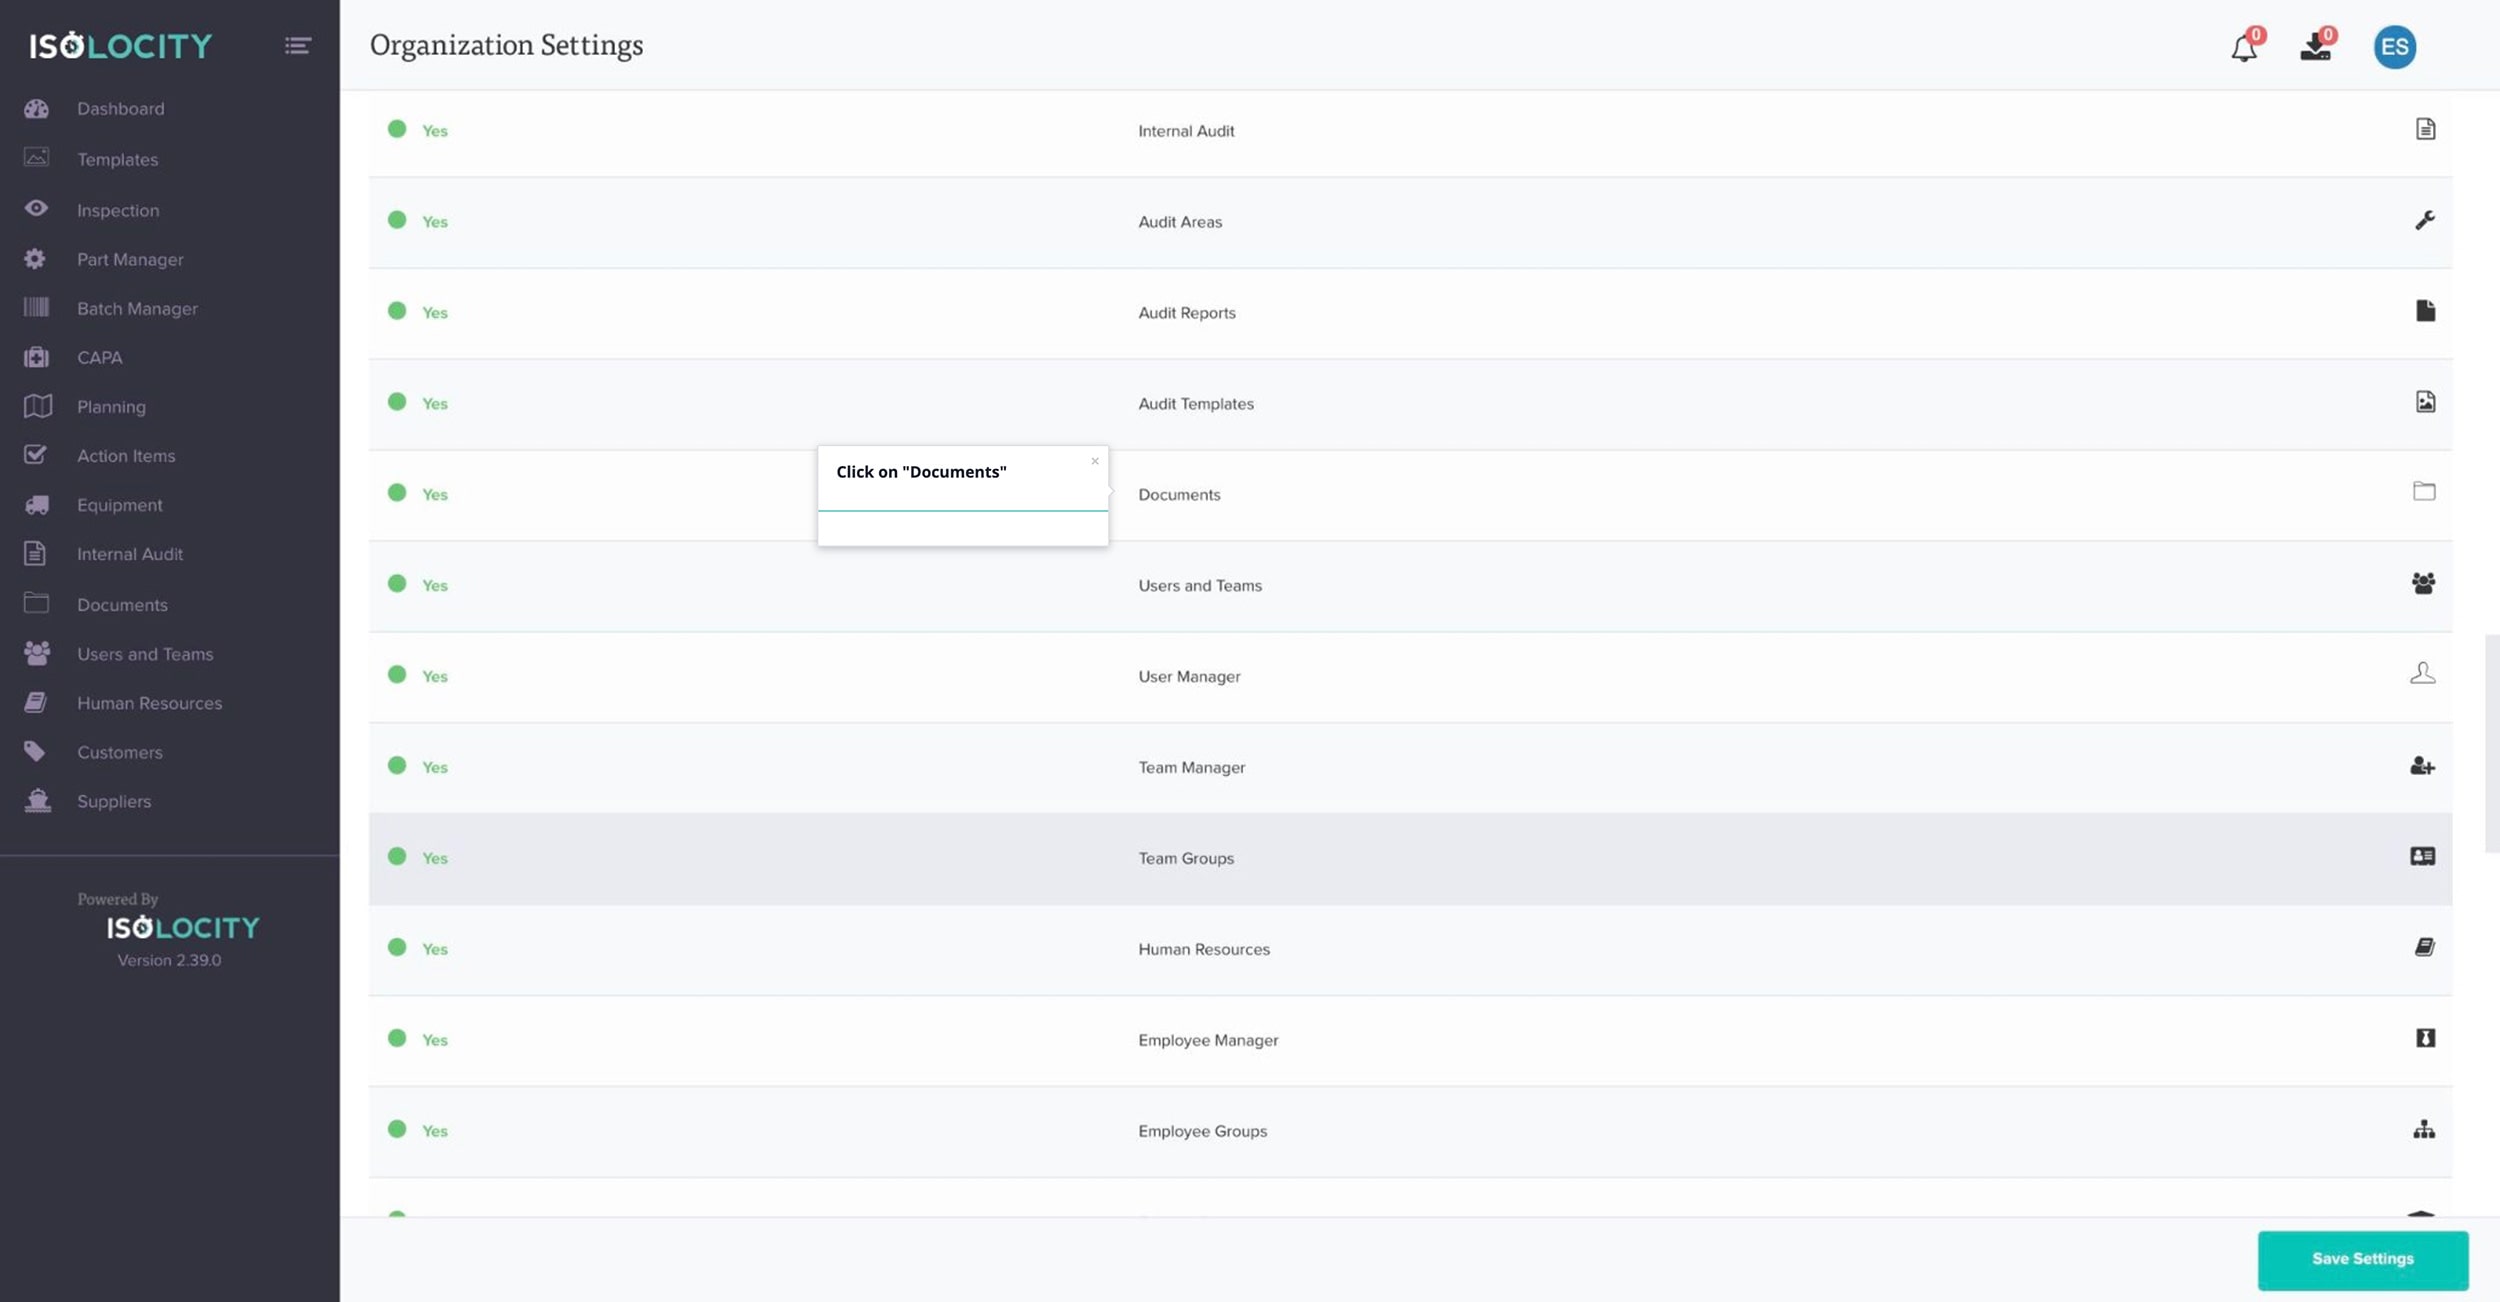
Step #41
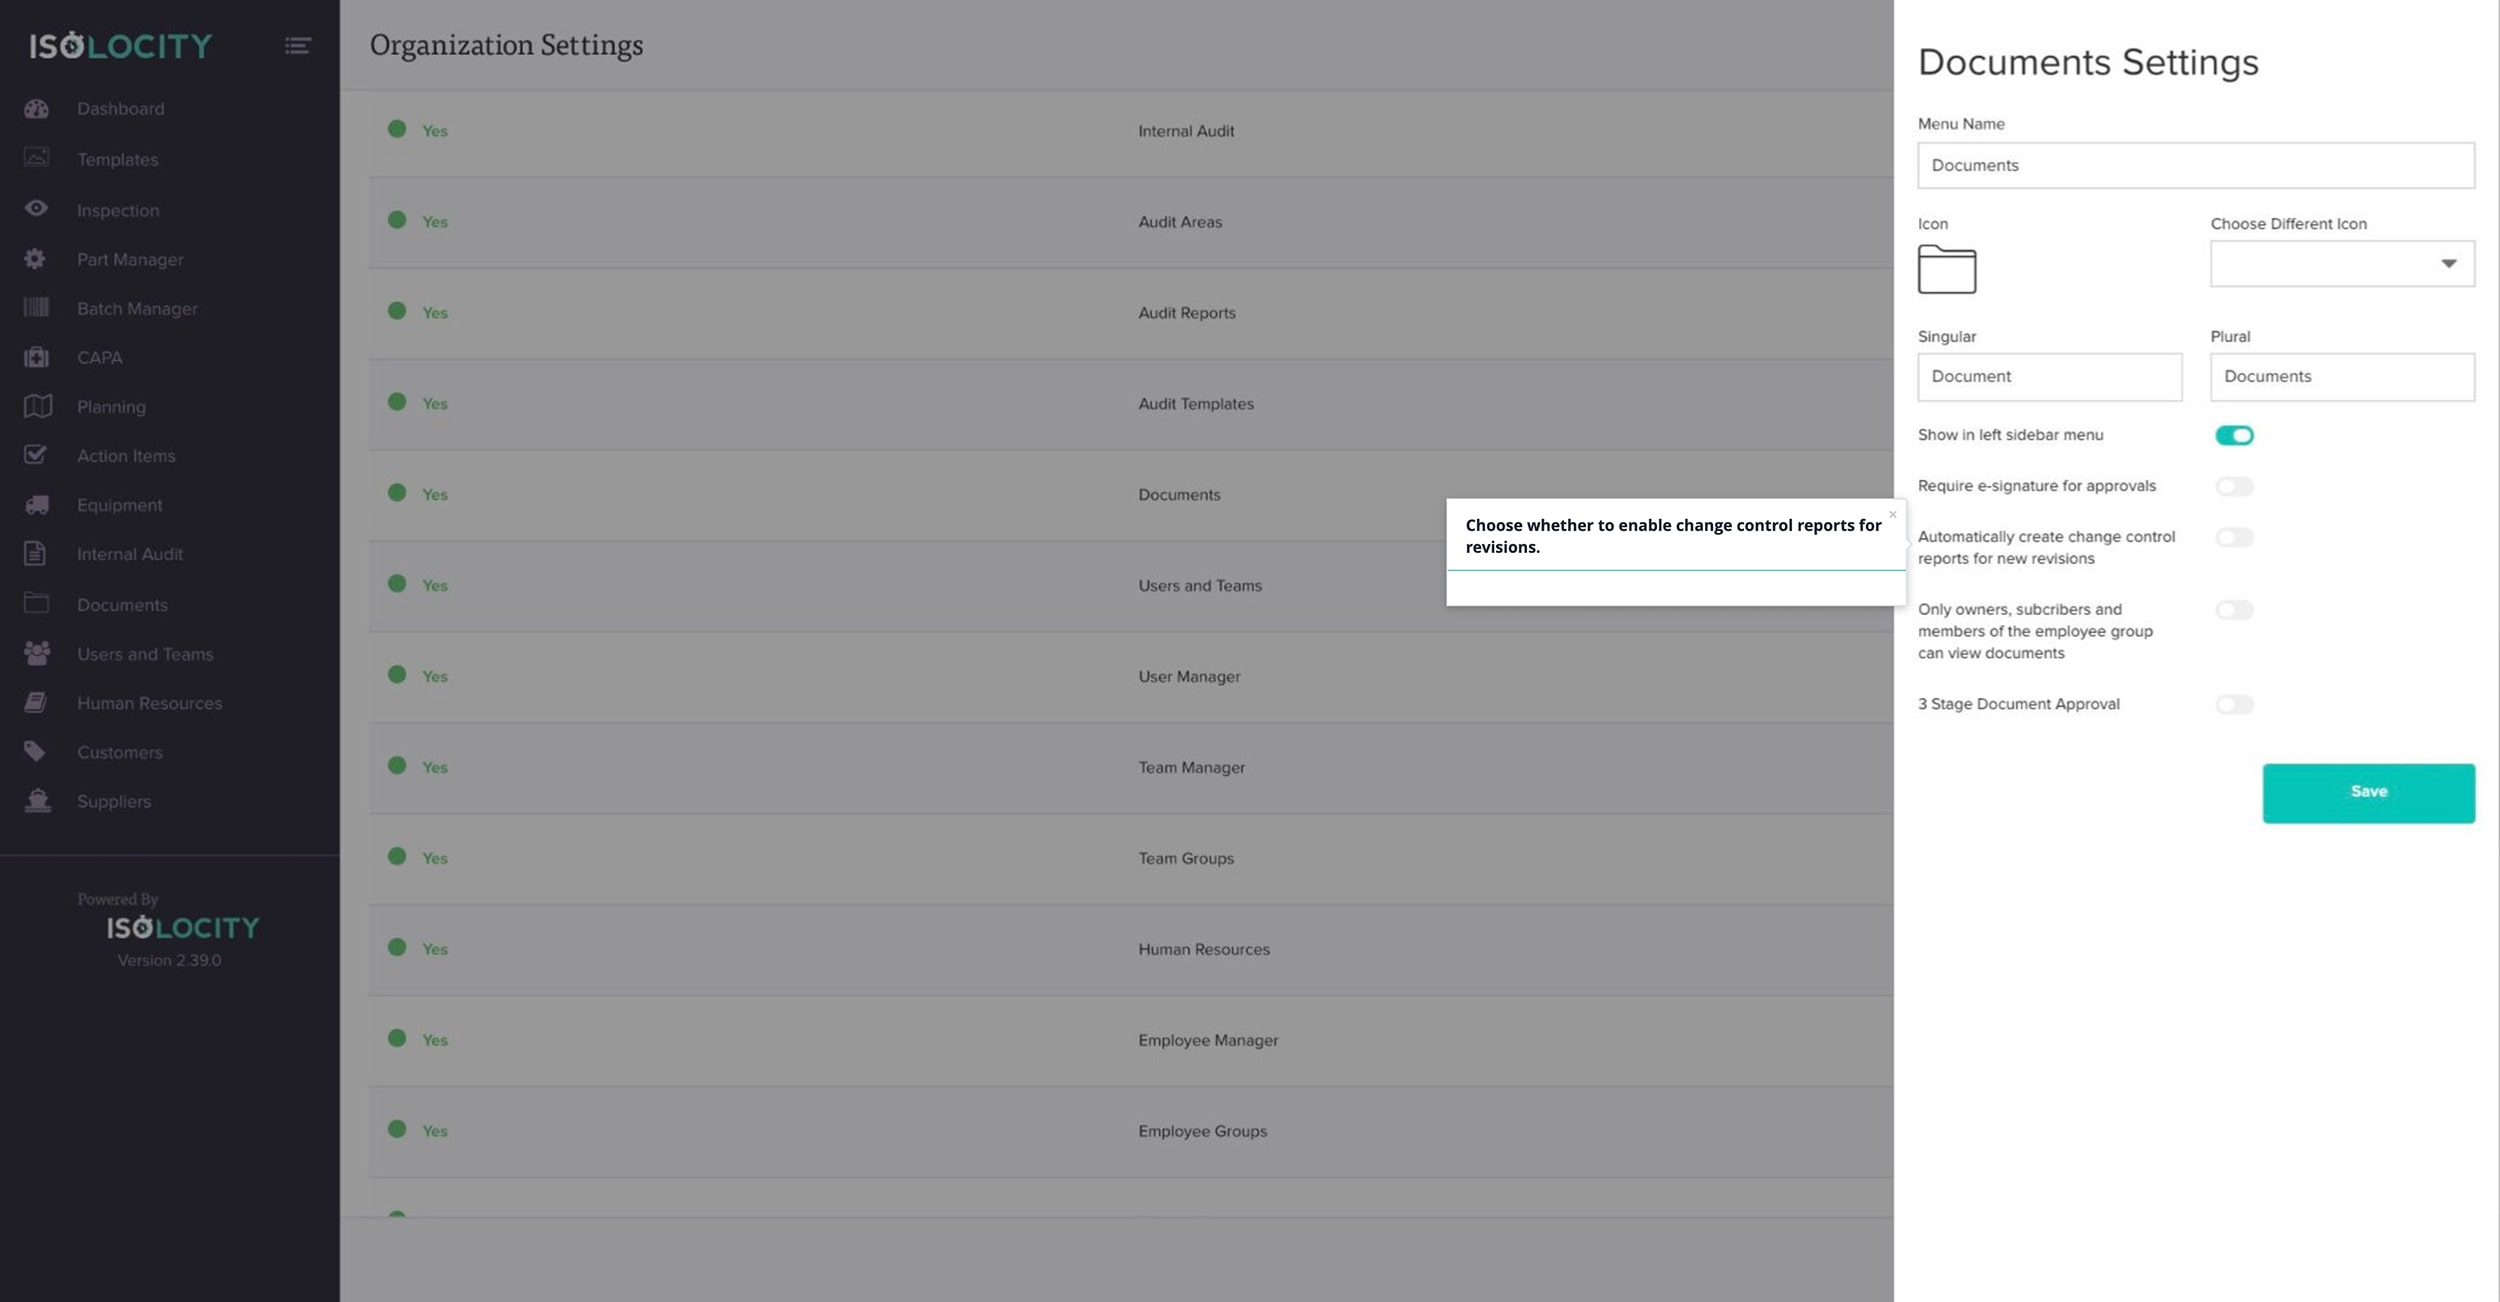
Click on “Documents”
Step #42
Select whether to use e-Signatures for approvals.
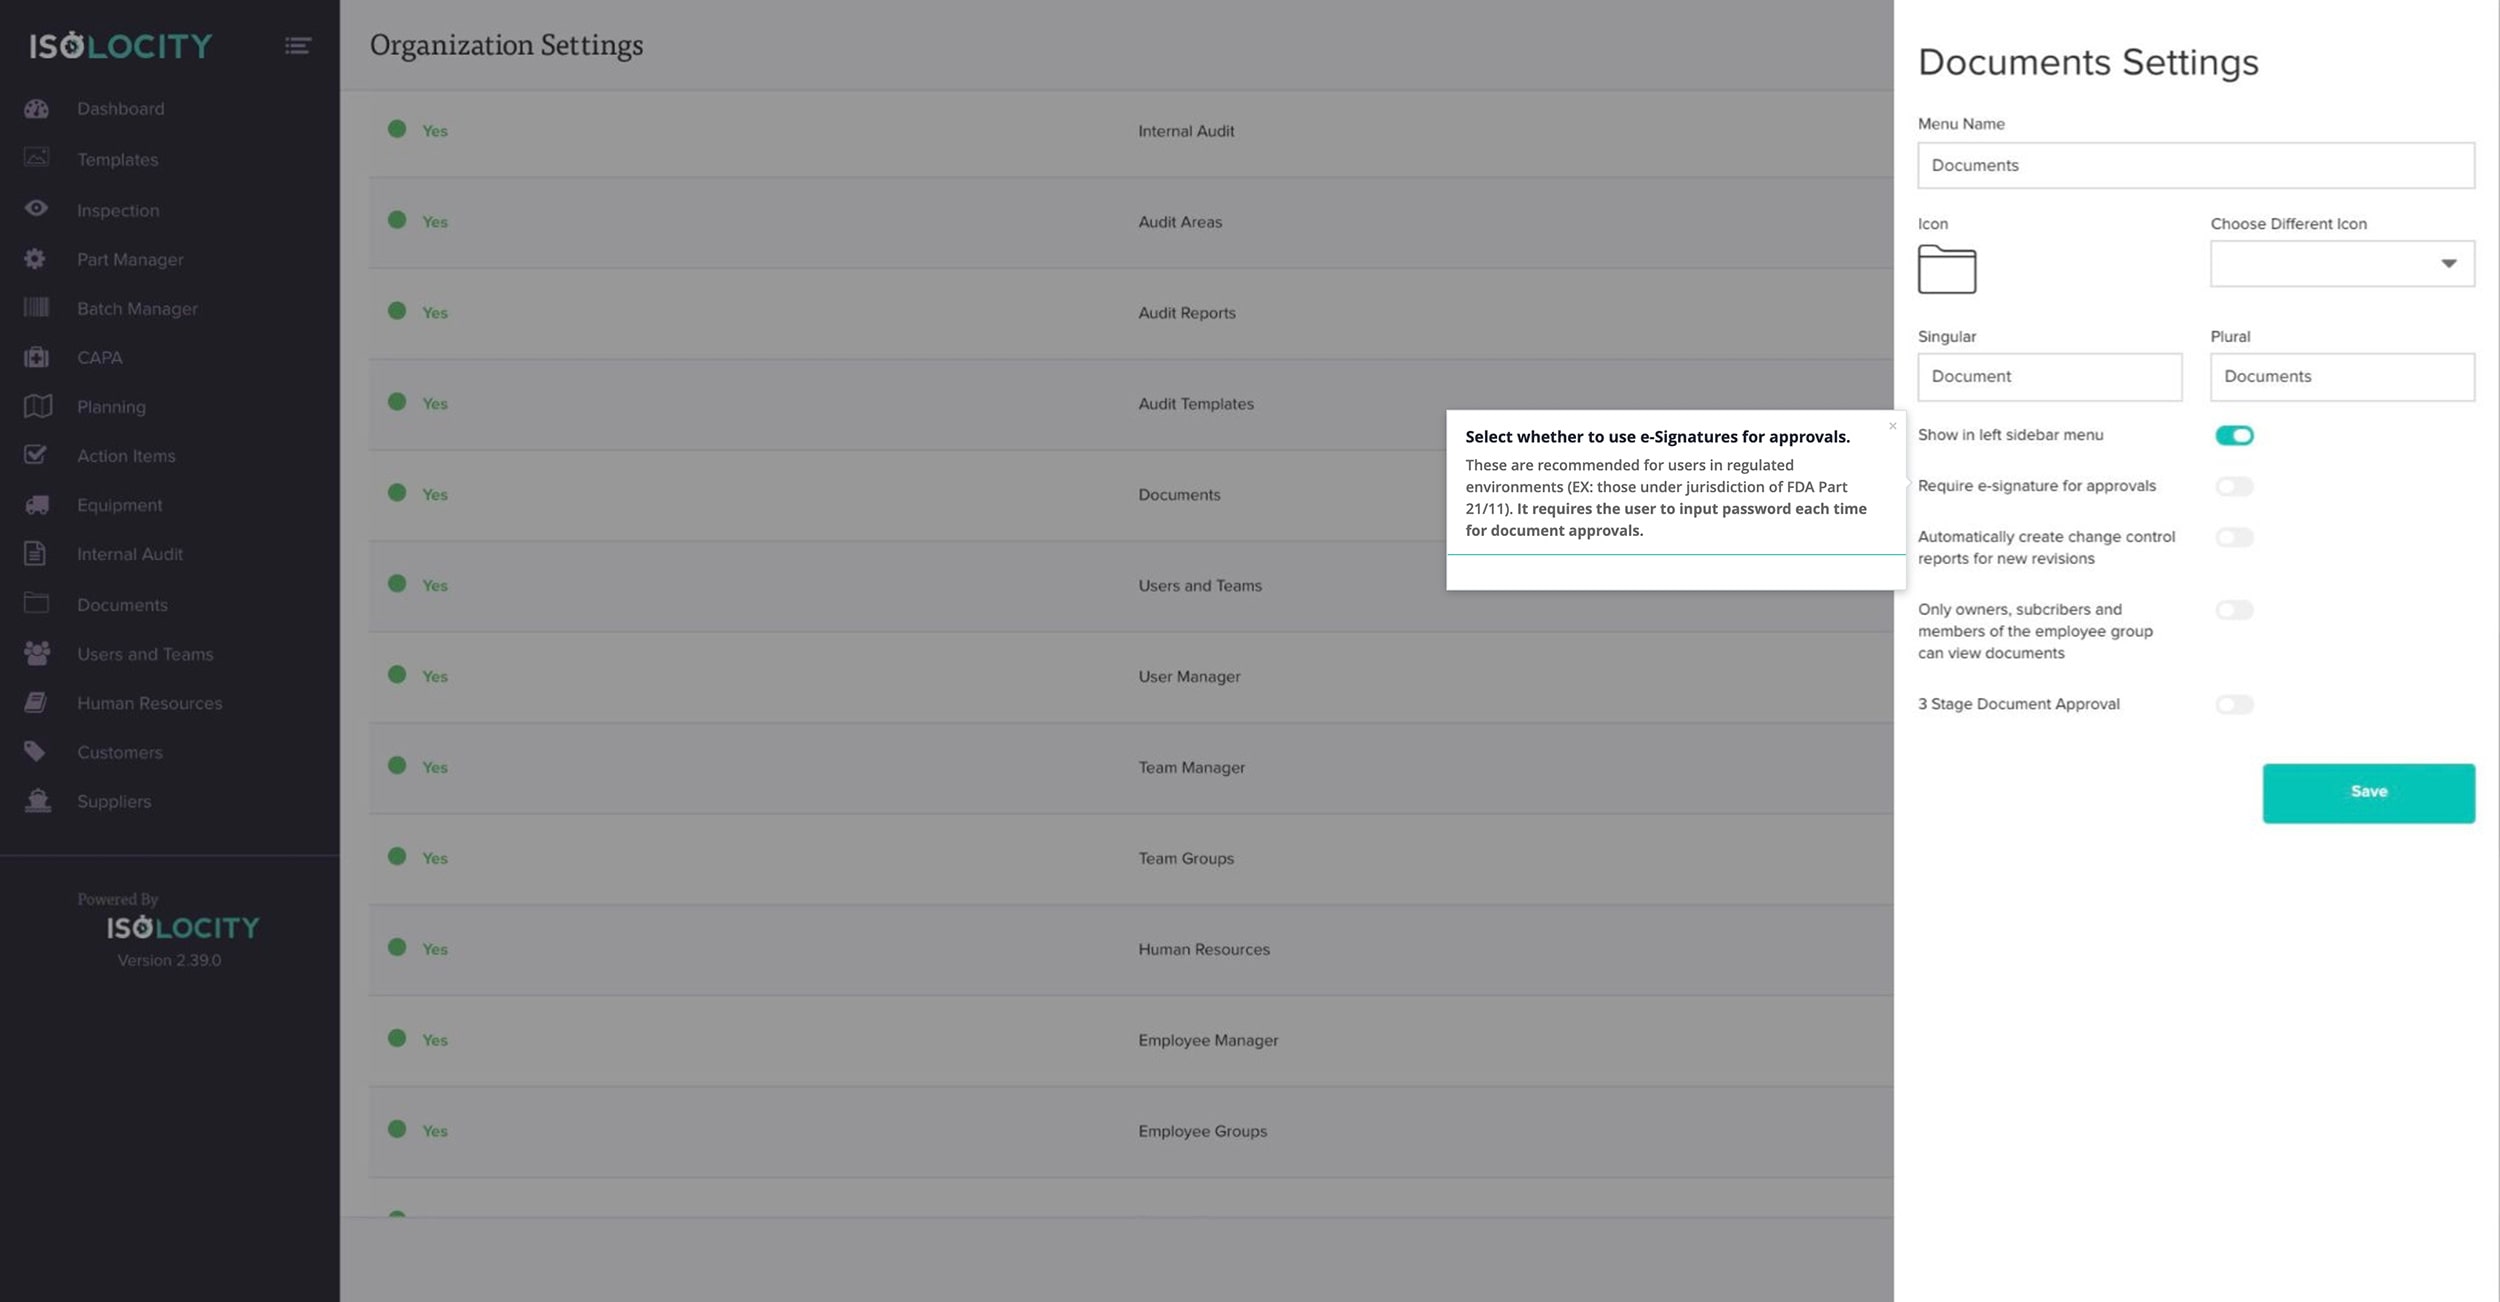
Step #43
Choose whether to enable change control reports for revisions.
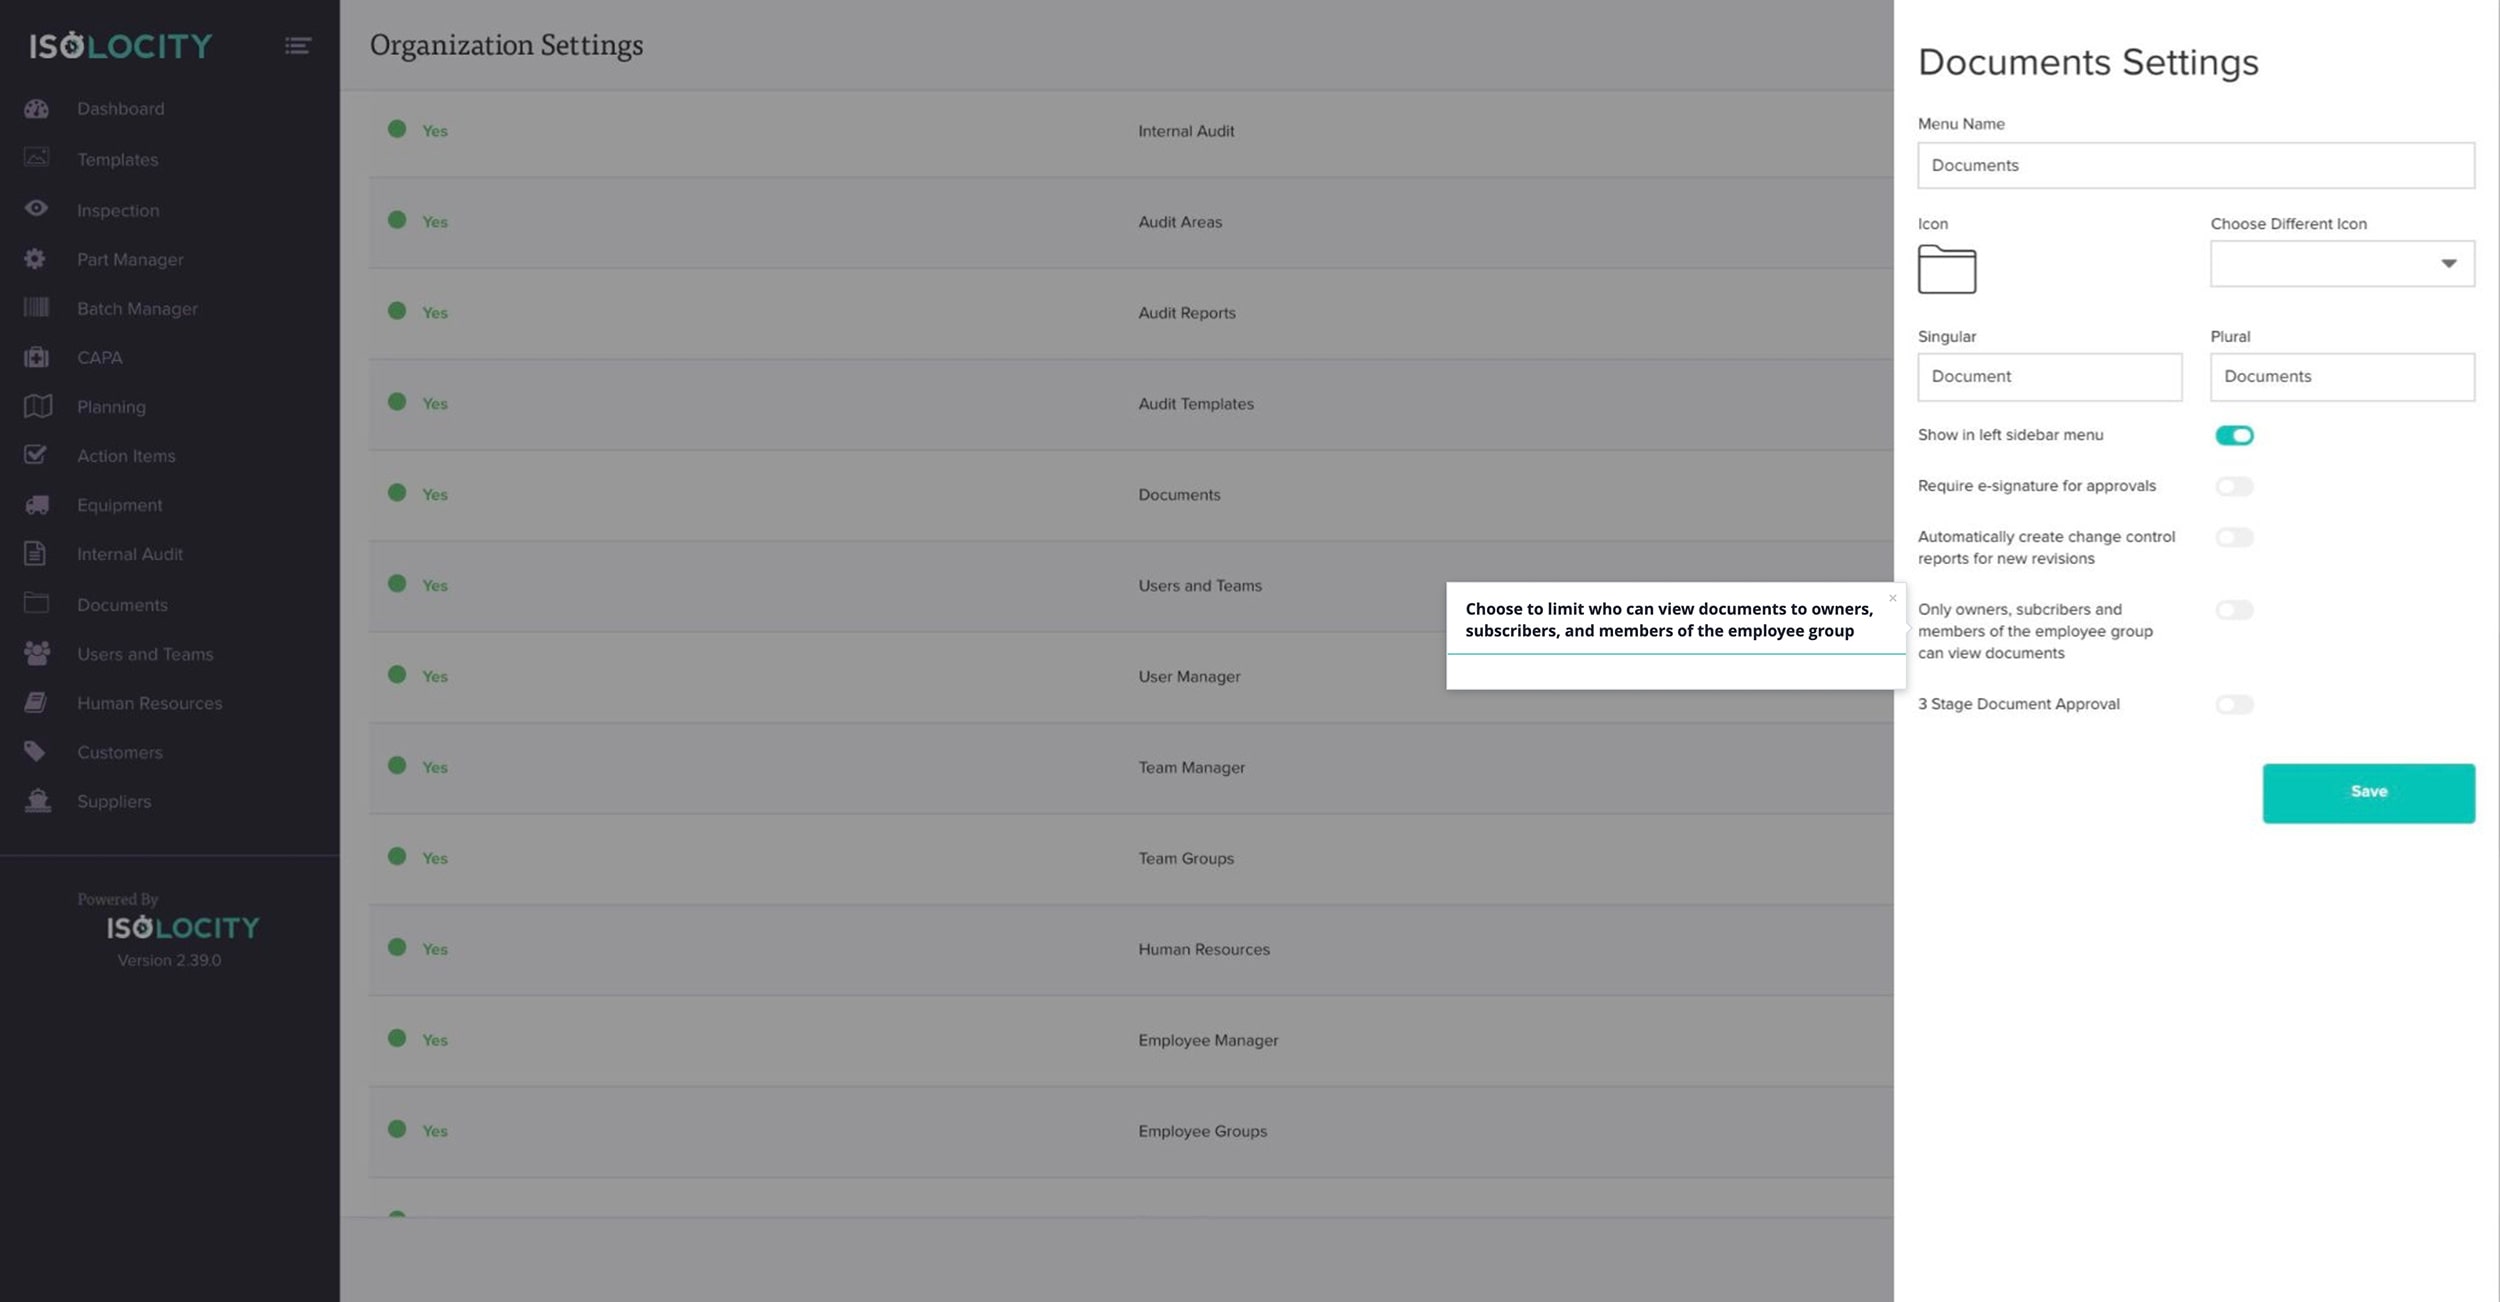
Step #44
Choose to limit who can view documents to owners, subscribers, and members of the employee group
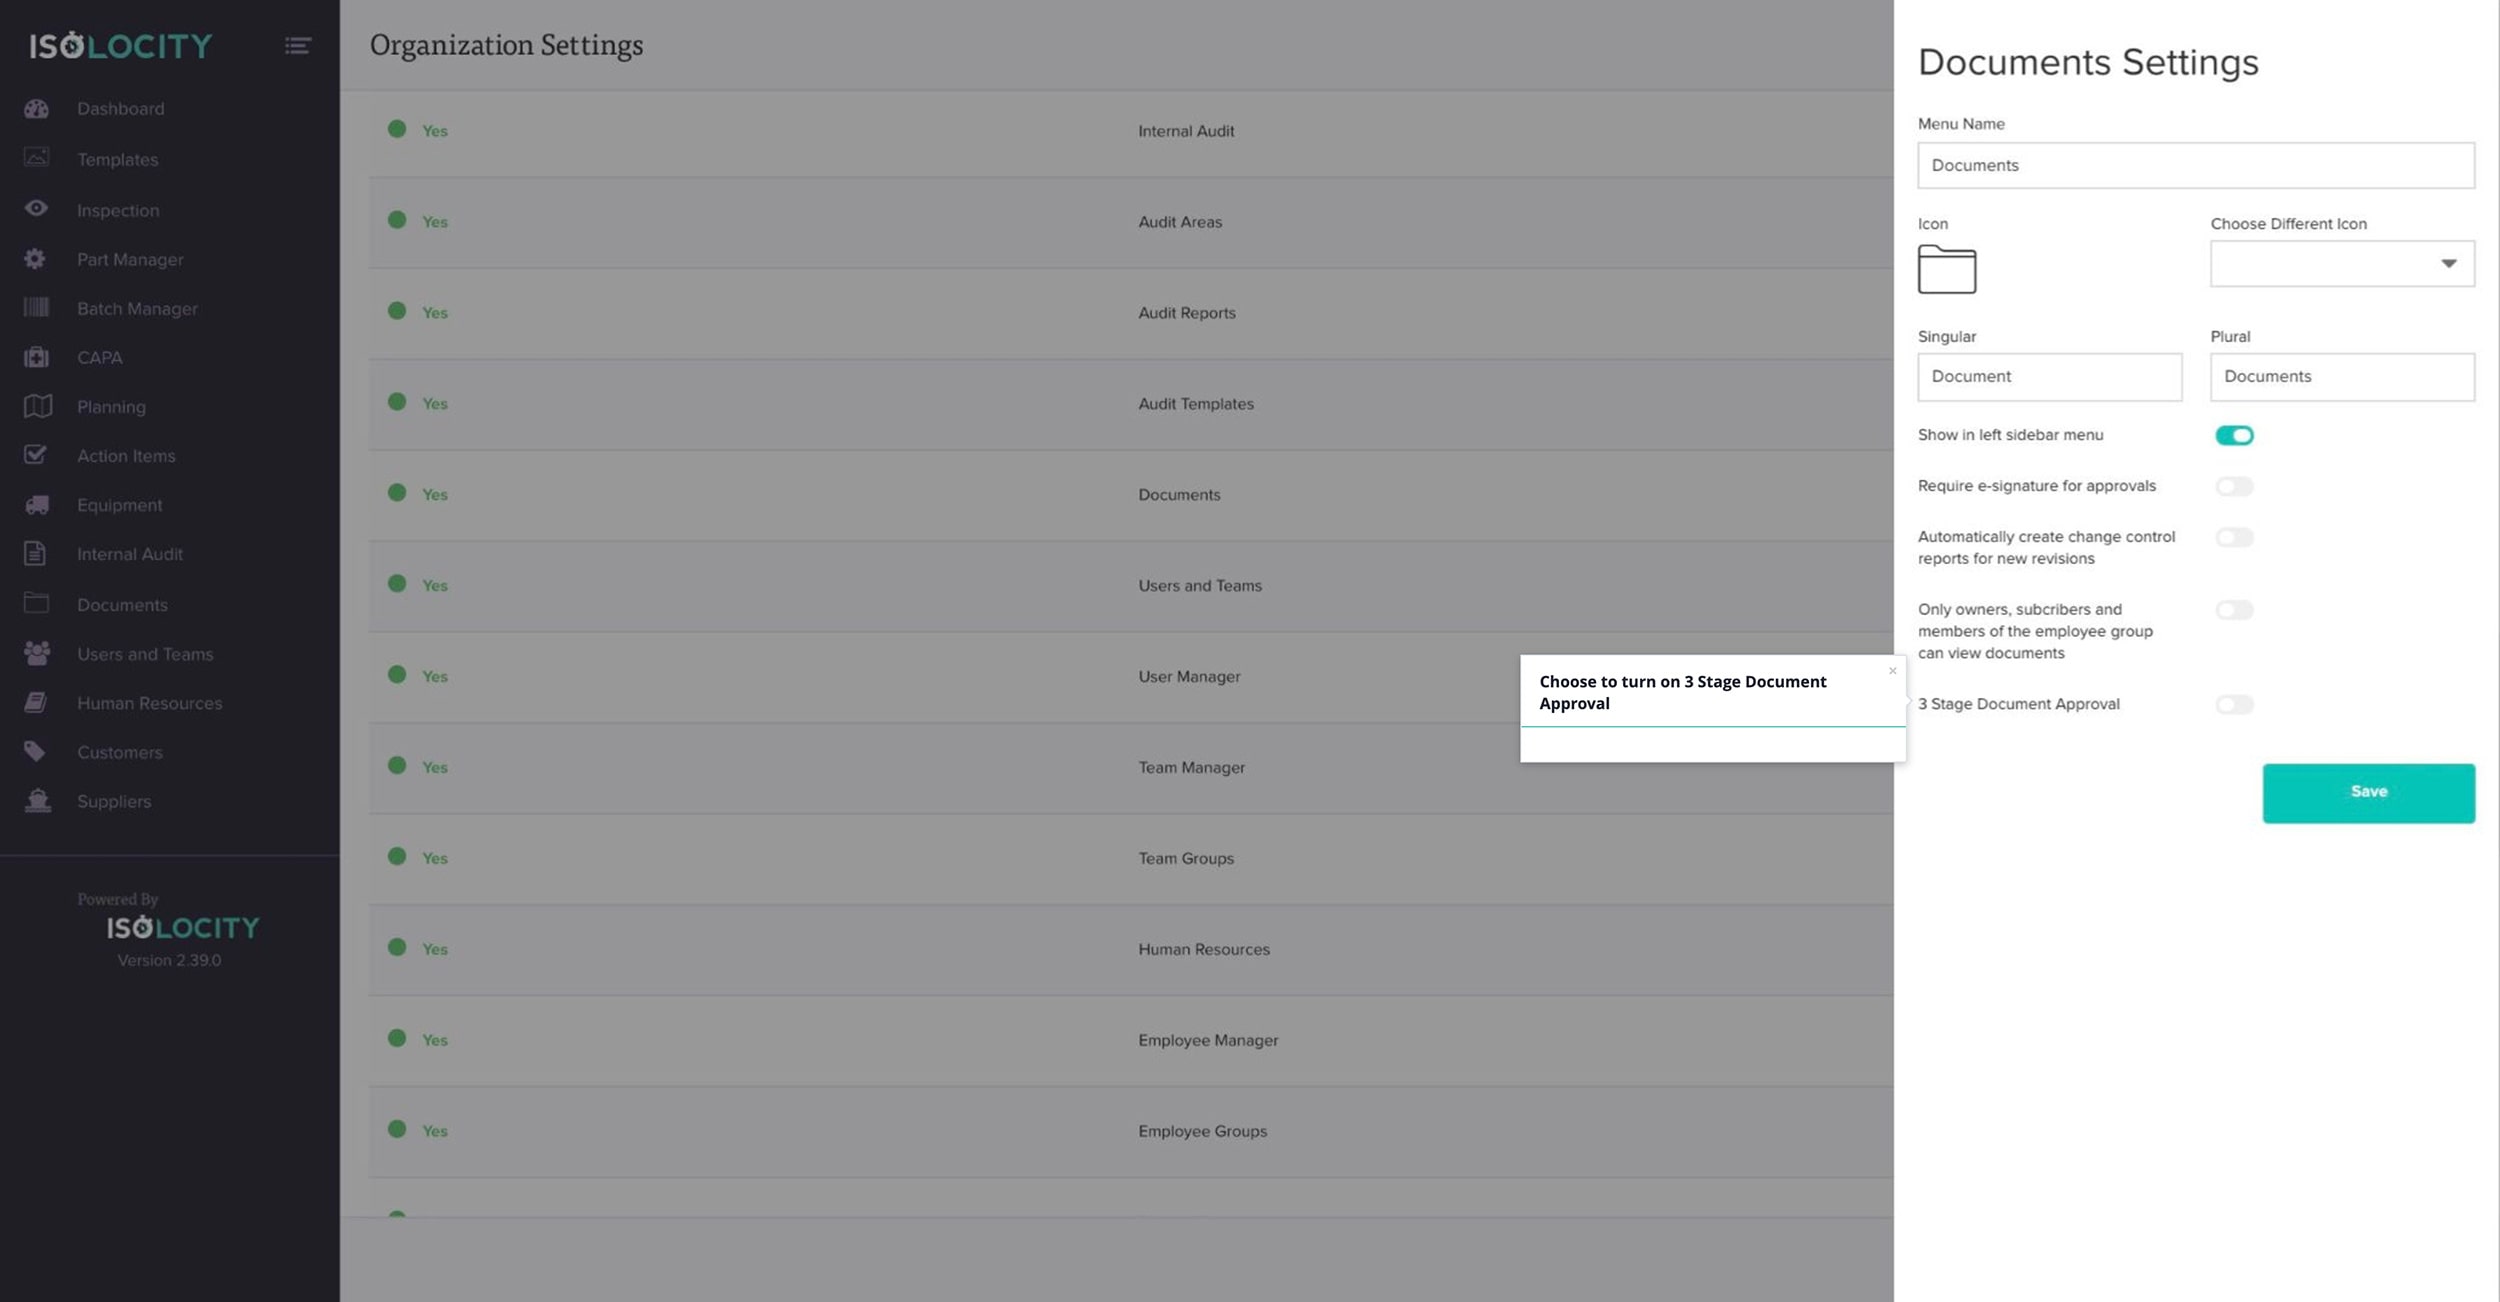
Step #45
Choose to turn on 3 Stage Document Approval
Step #46
Click “Save” to save your changes and/or click into the grey area on the left of the screen to exit this panel.

Step #47
Click “Save Settings”.