Upload Your Contacts
Use our contact template to include all your contacts in the system at once.
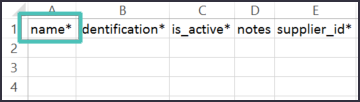
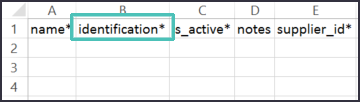
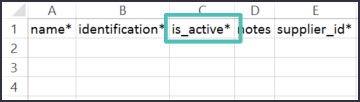
Download Users Mass Upload Template
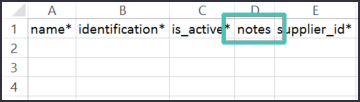
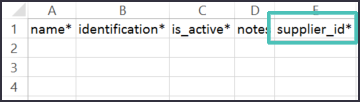
For a required field (one indicated by a “*”) where there is no content available, use a dash (“-“) to leave empty. Please ensure there are no blank rows in your submission.

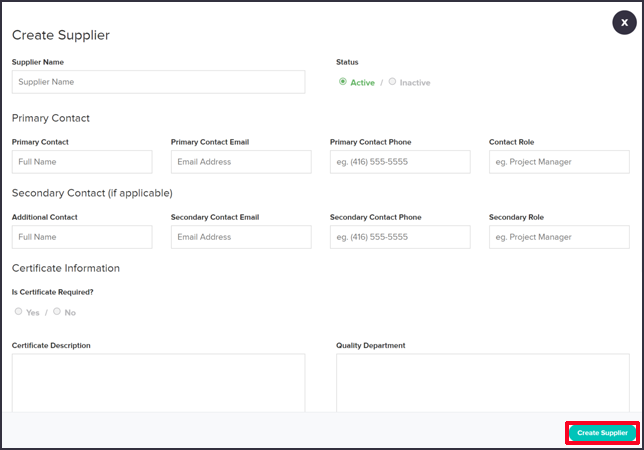
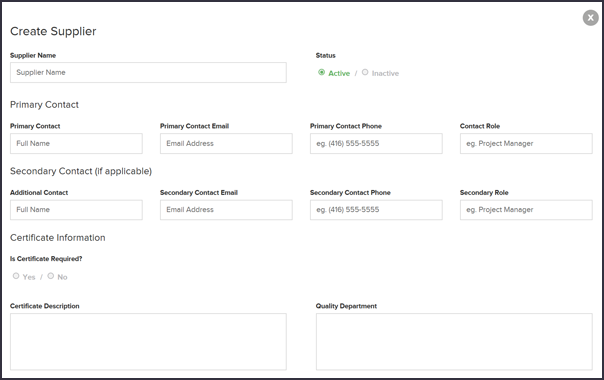
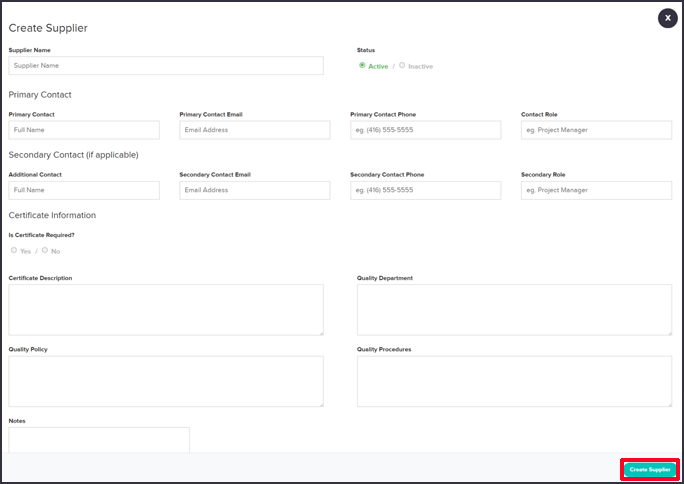
Name: Name of the Company

Type: Either Customer or Supplier, no other text is accepted in this field

Primary_name: The name of the primary contact at the company

Primary_email: The email address of the primary contact at the company

Primary_phone: The phone number of the primary contact at the company

Primary_position: The job title of the primary contact at the company

Secondary Fields: similar to the primary fields, except for an optional secondary contact at the company

Notes: any miscellaneous notes you would like to keep on record about this client.


