Adding A New Non-Conformance Report (NCR)
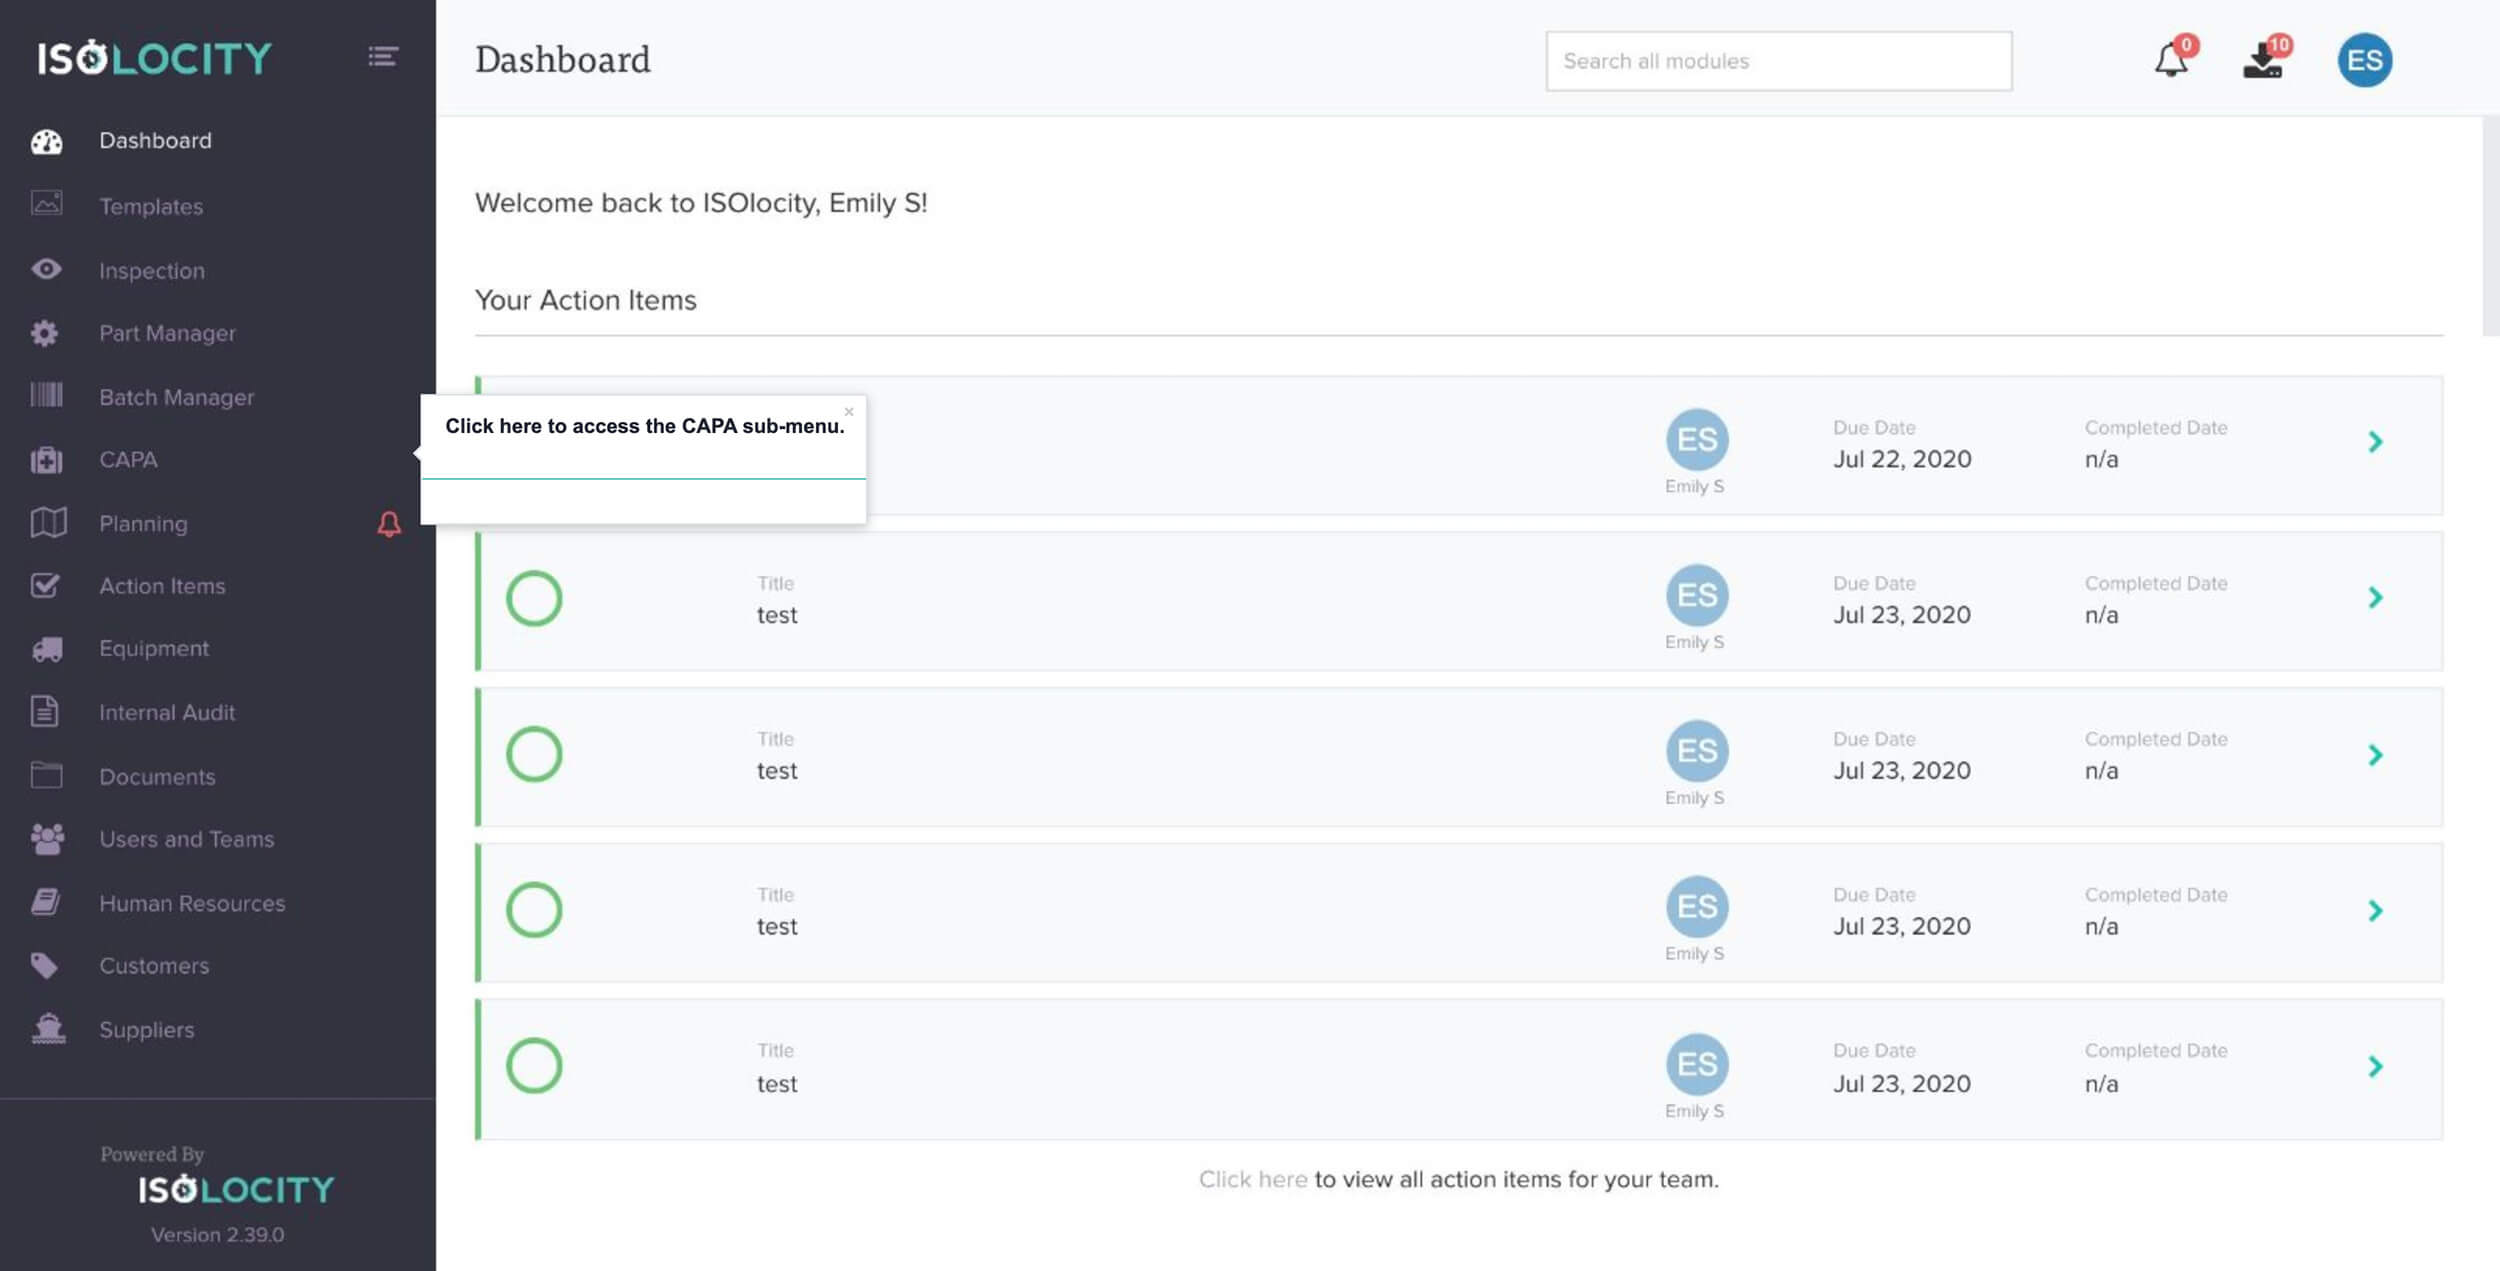
Step #1
Click here to access the CAPA sub-menu.
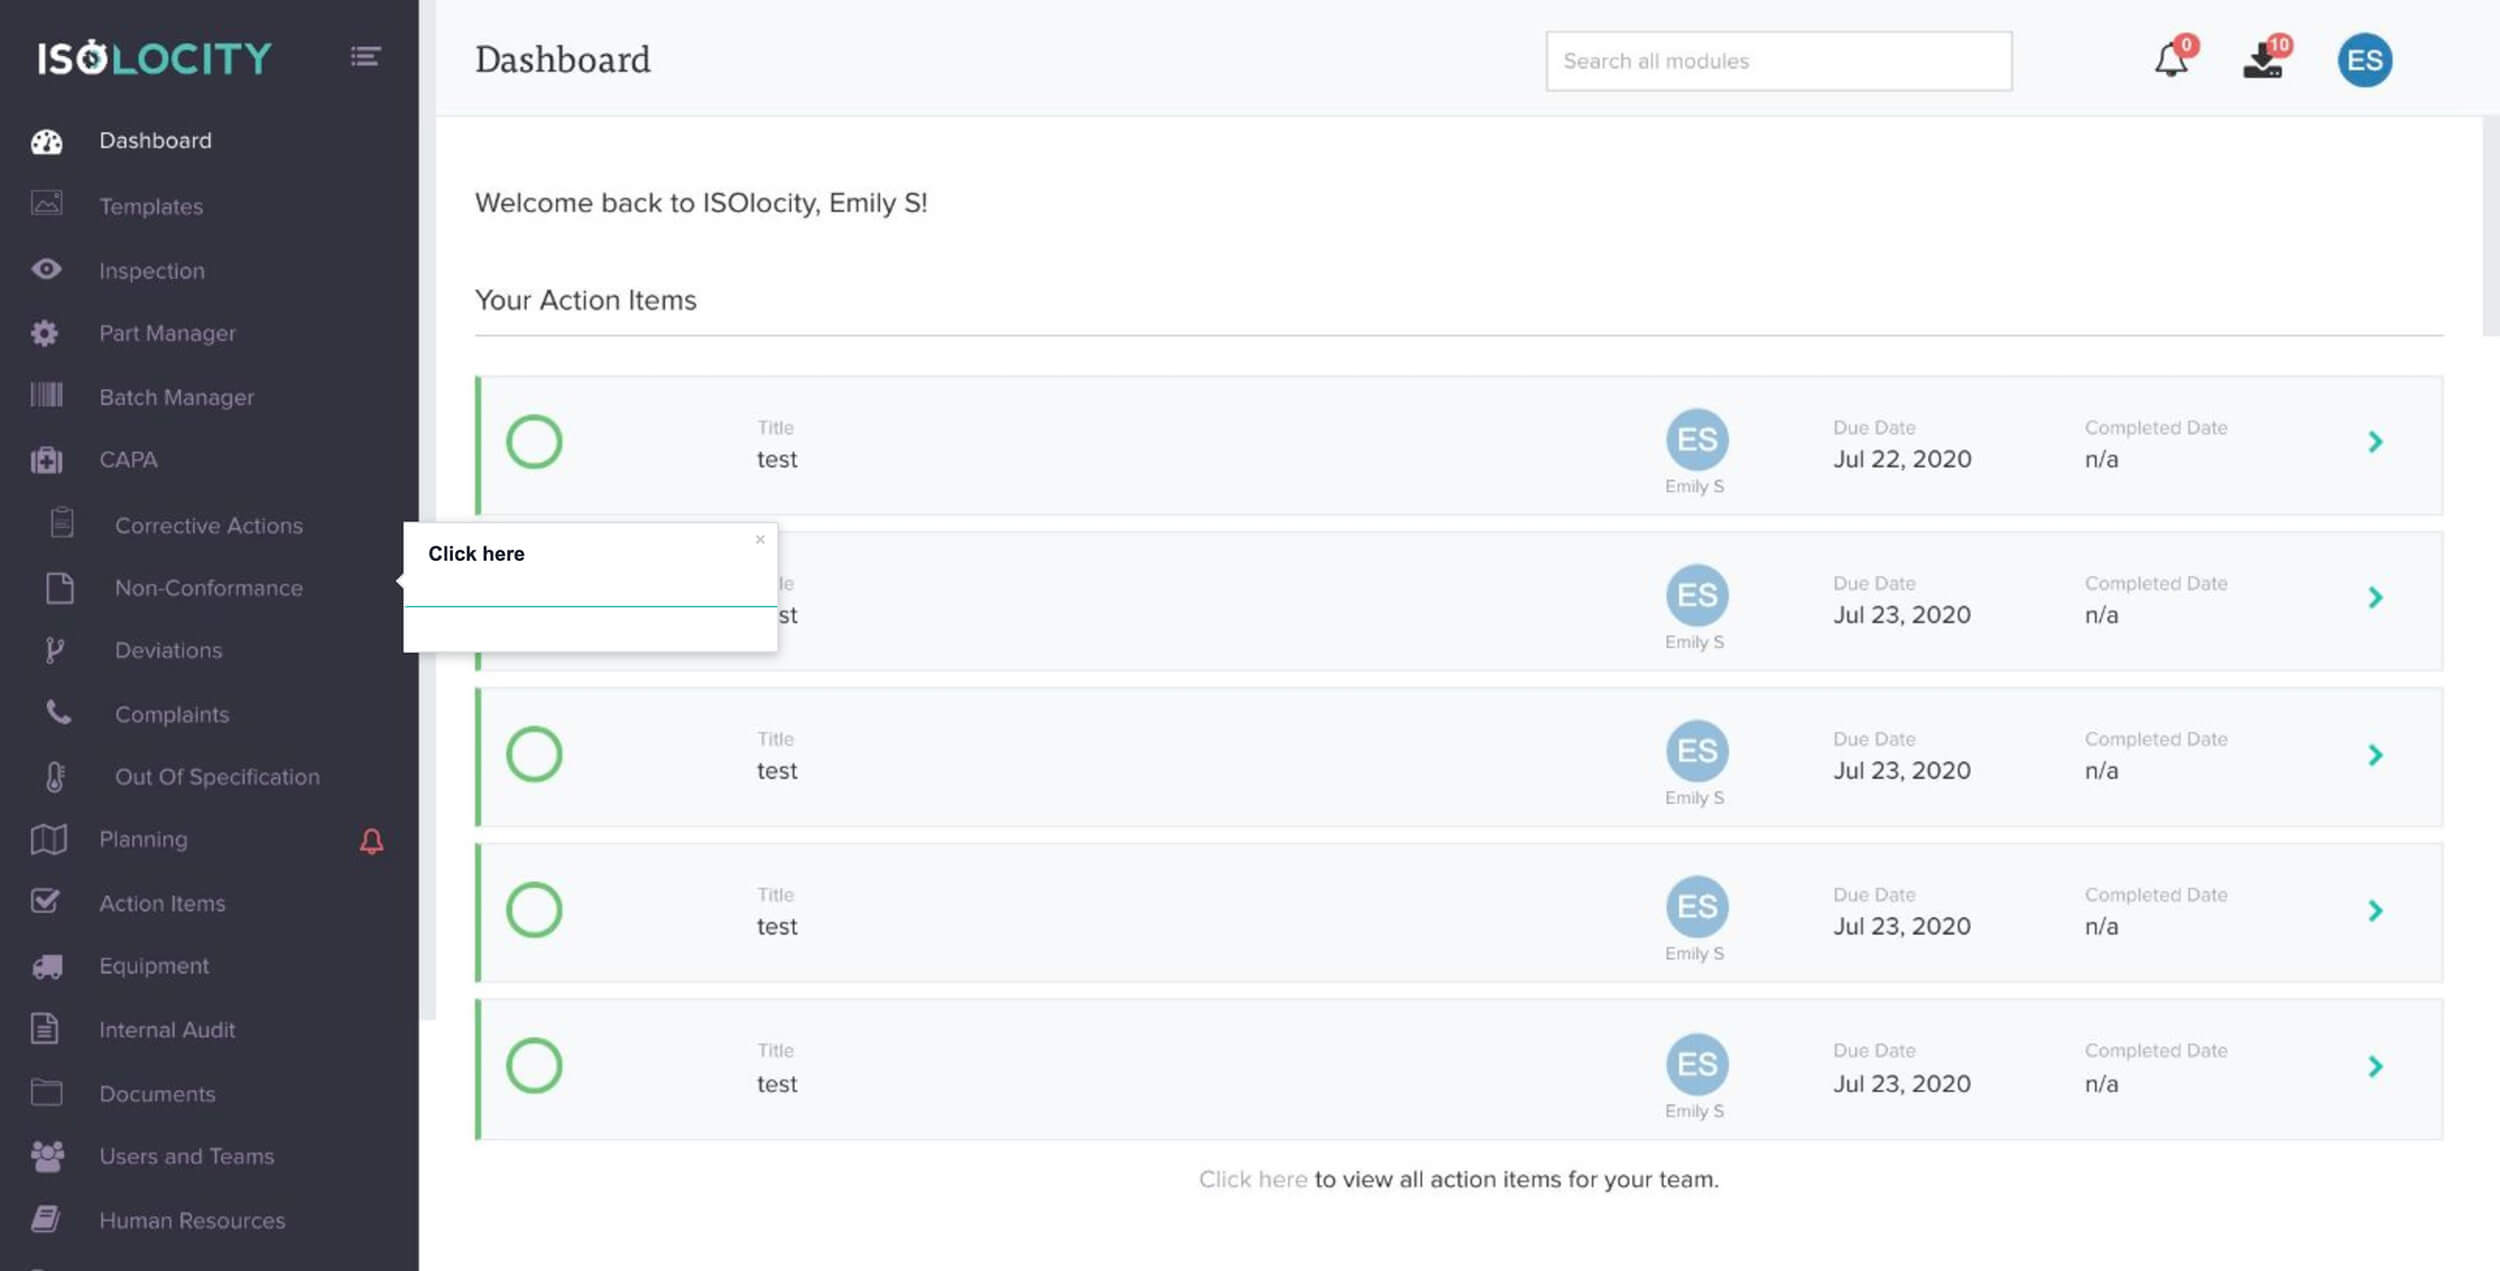
Step #2
Click here
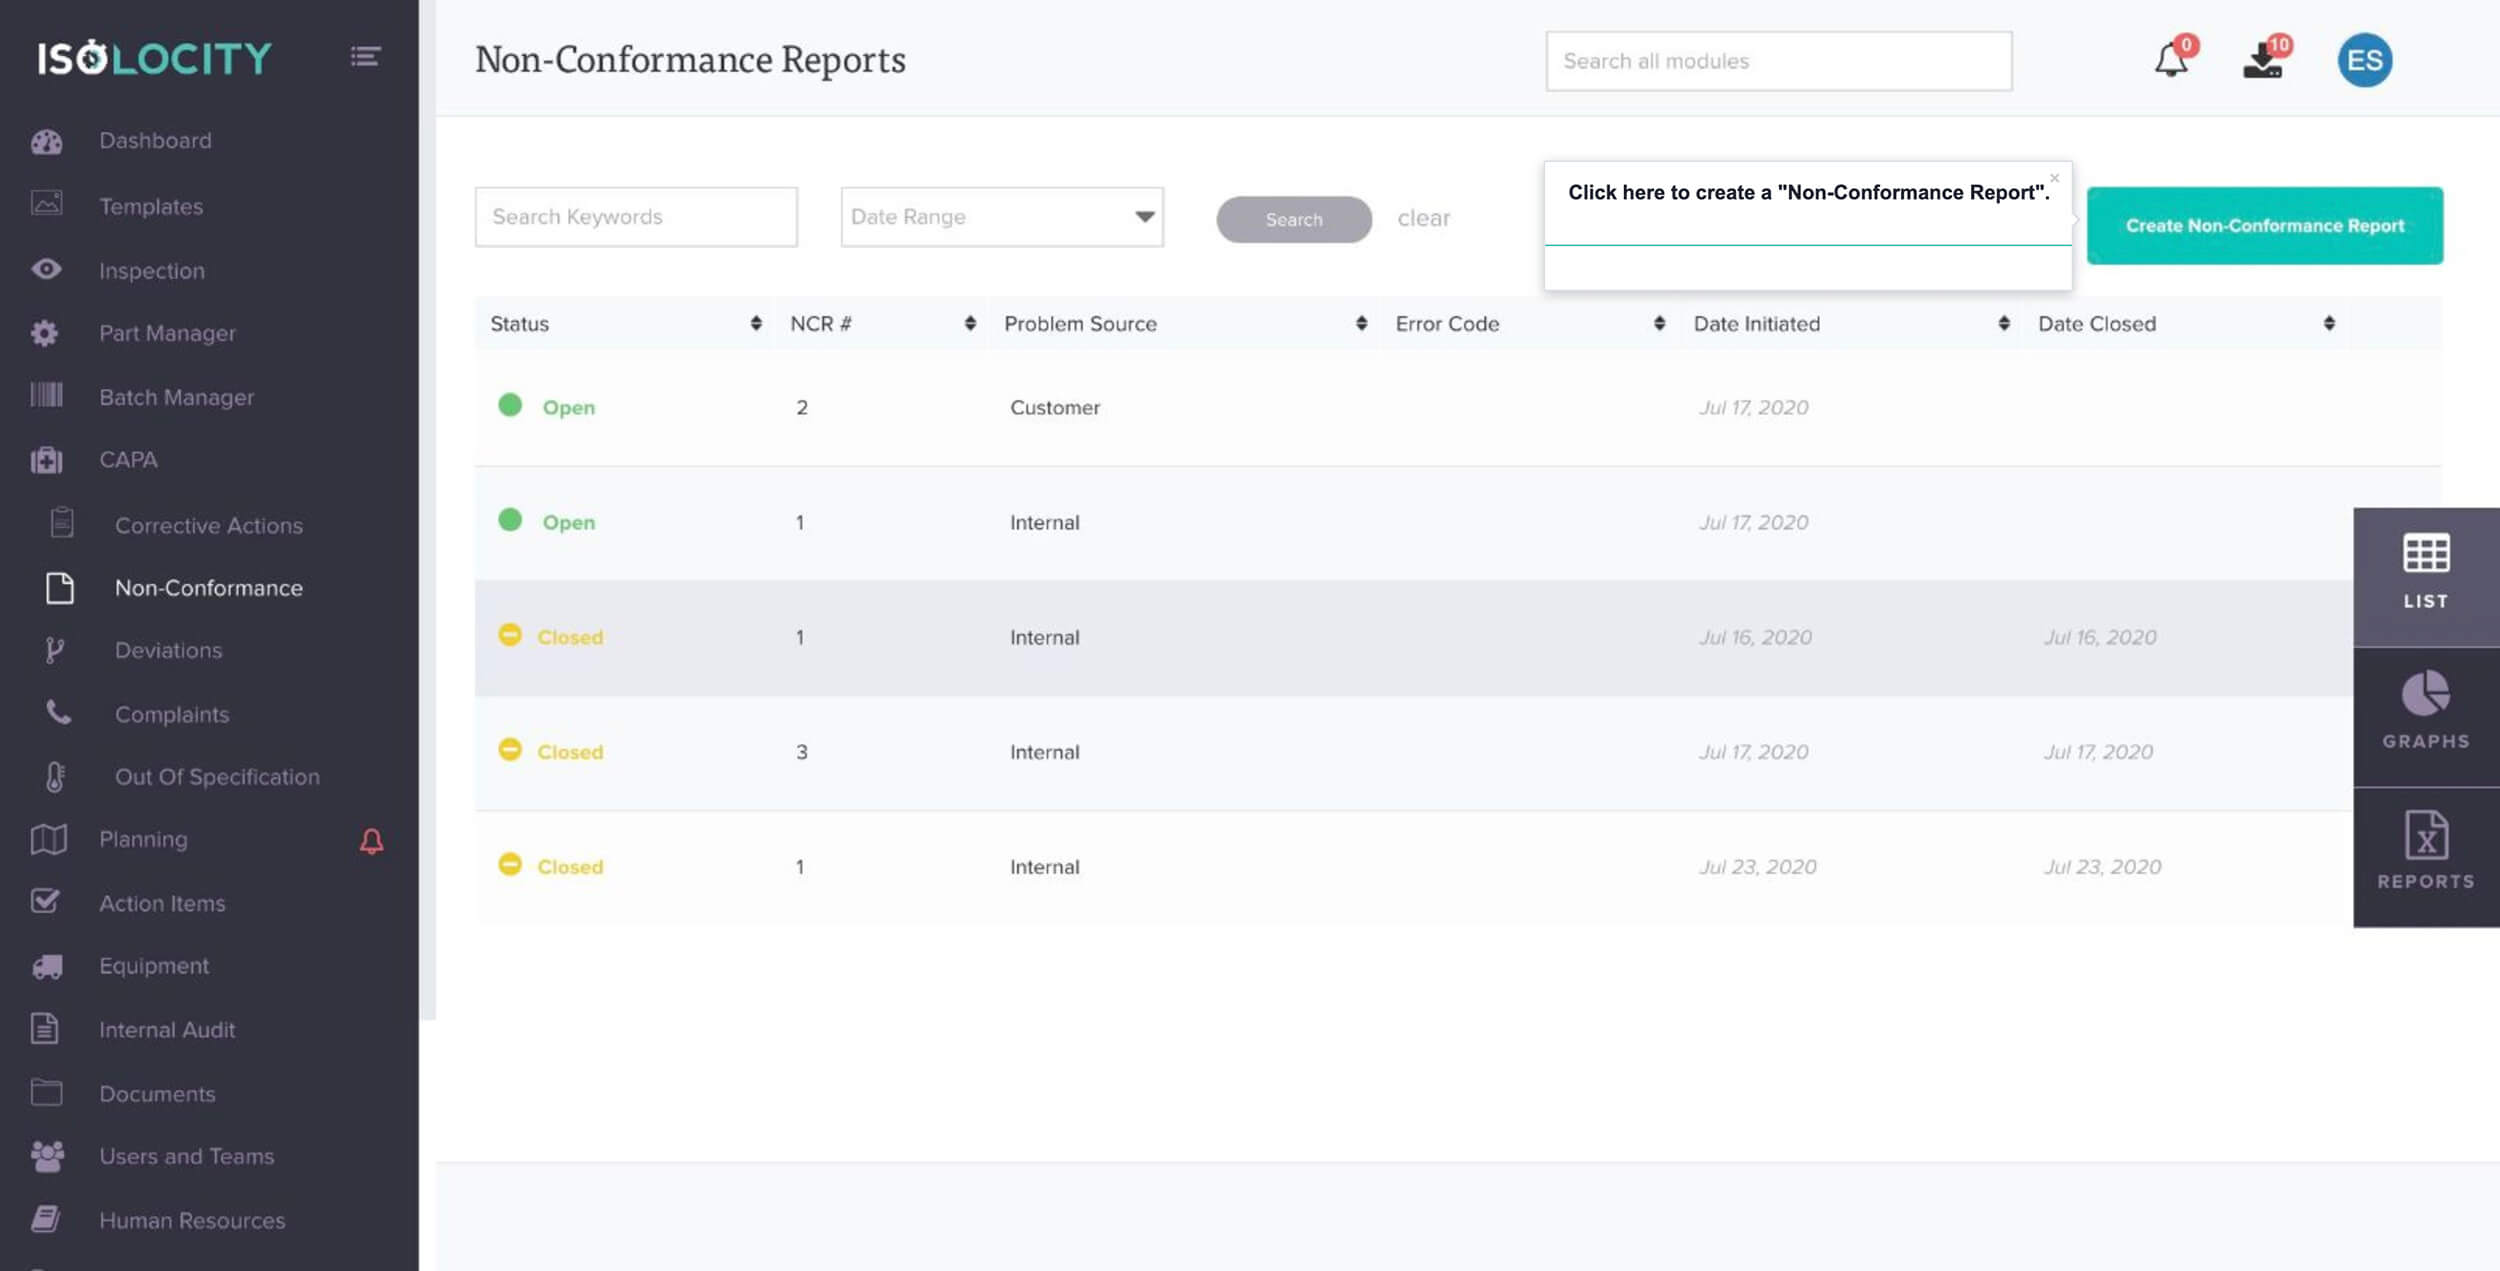
Step #3
Click here to create a “Non-Conformance Report”.
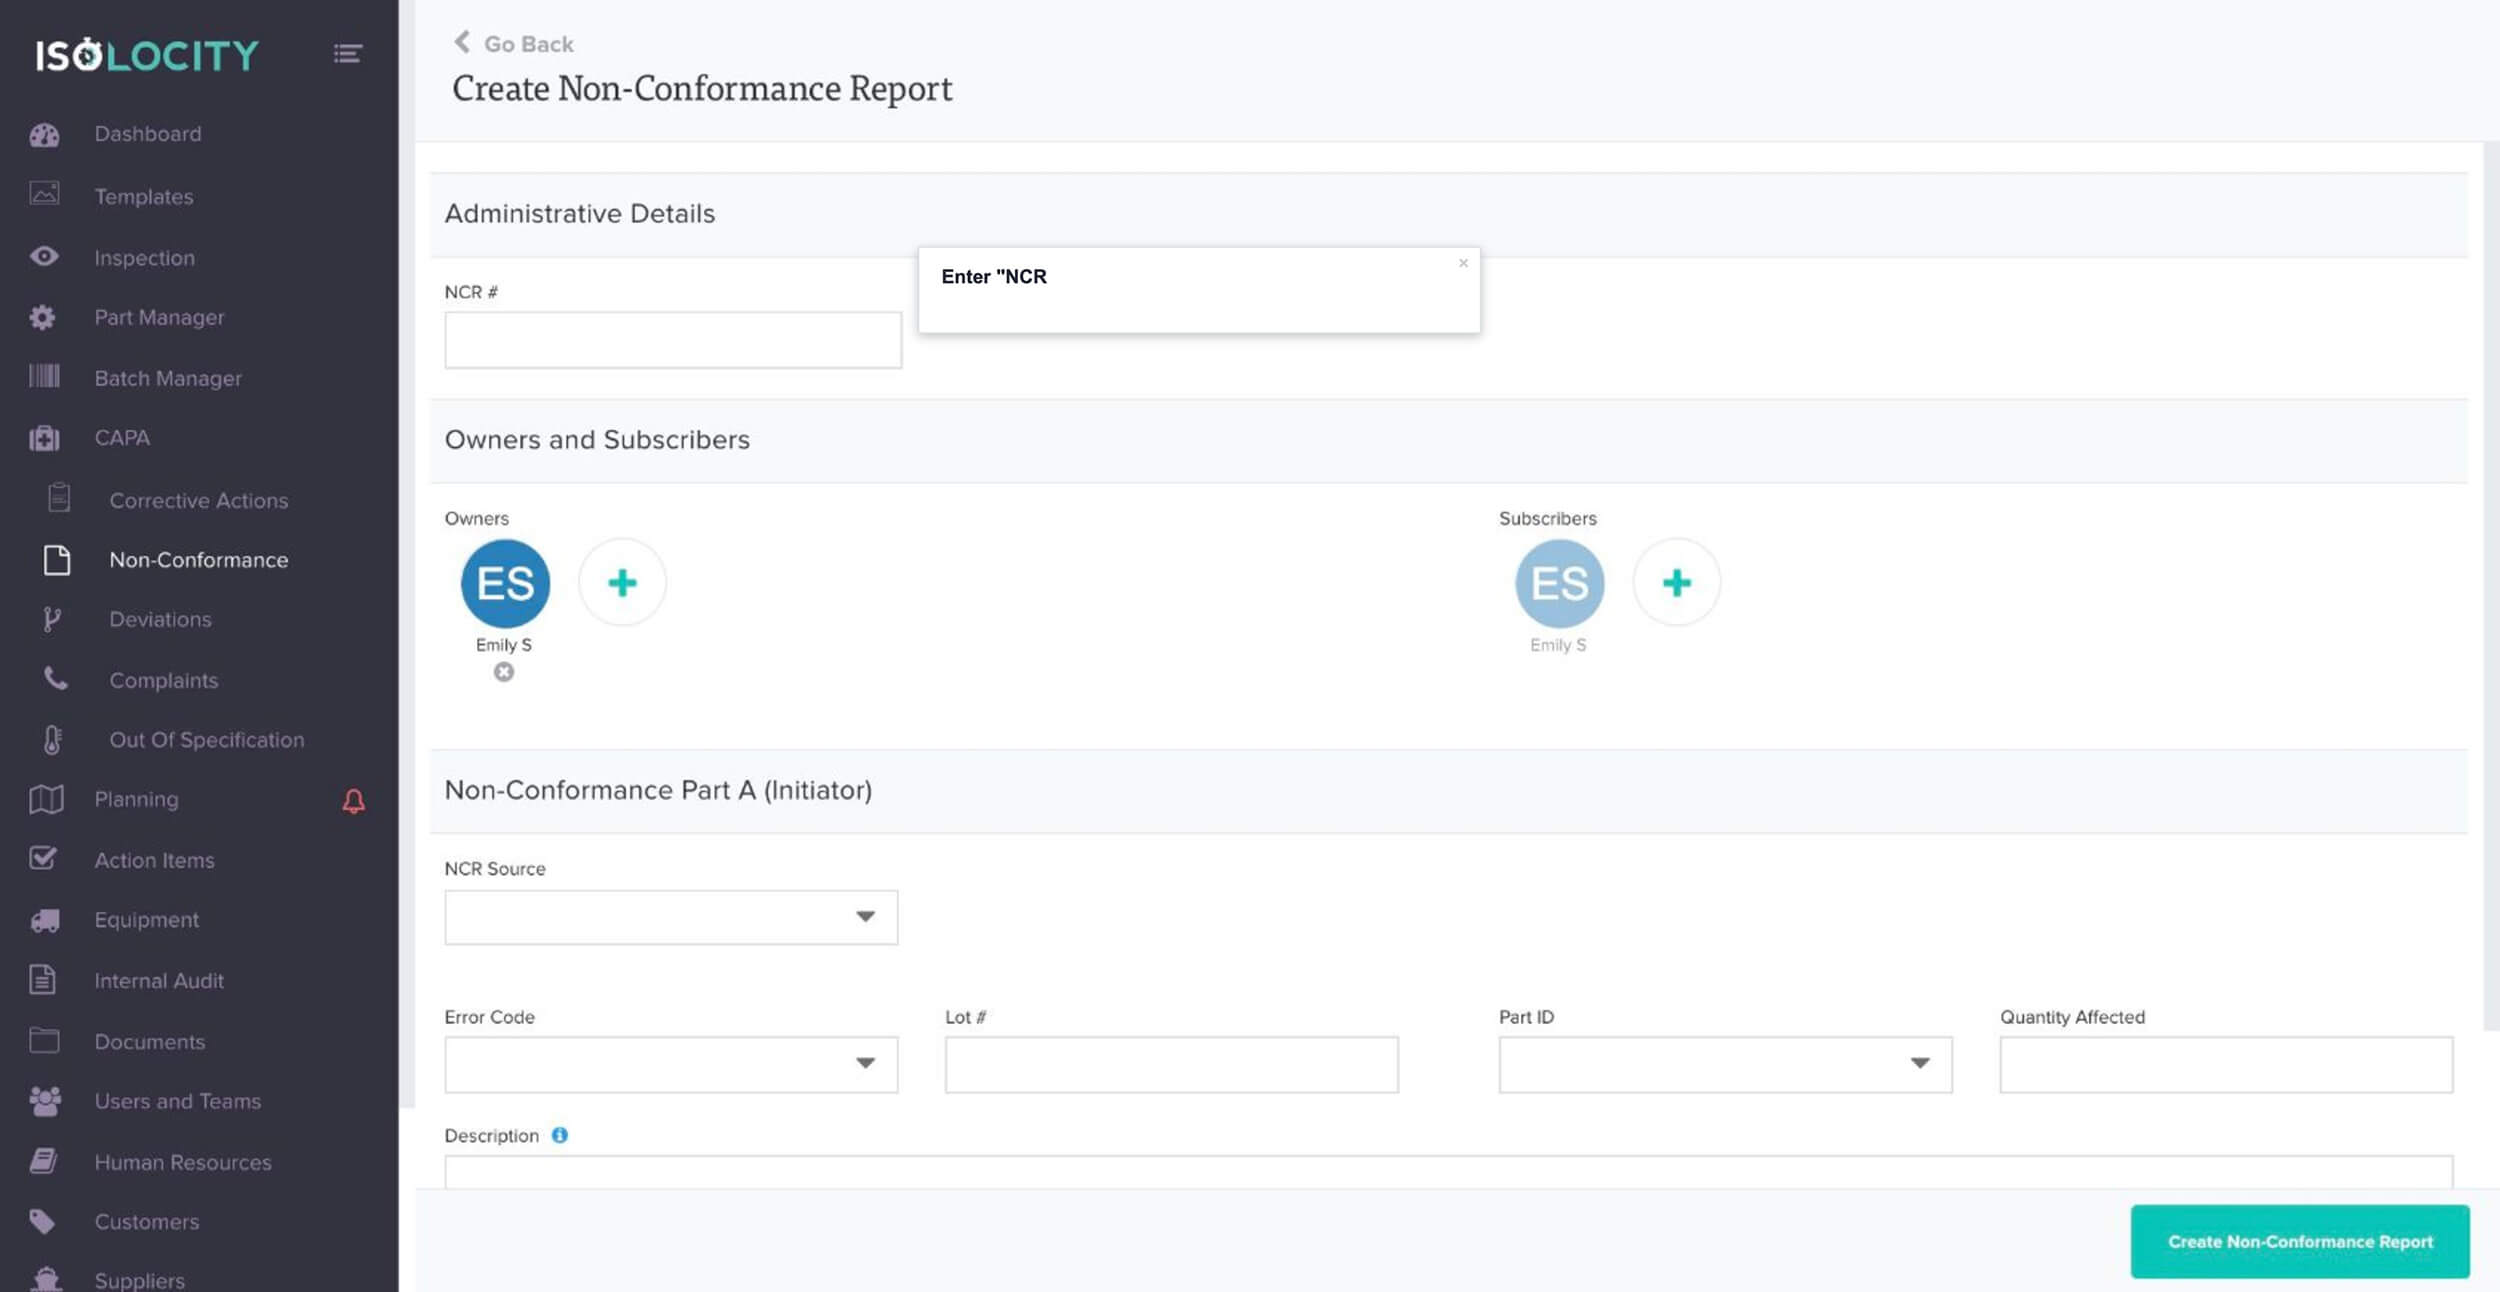
Step #4
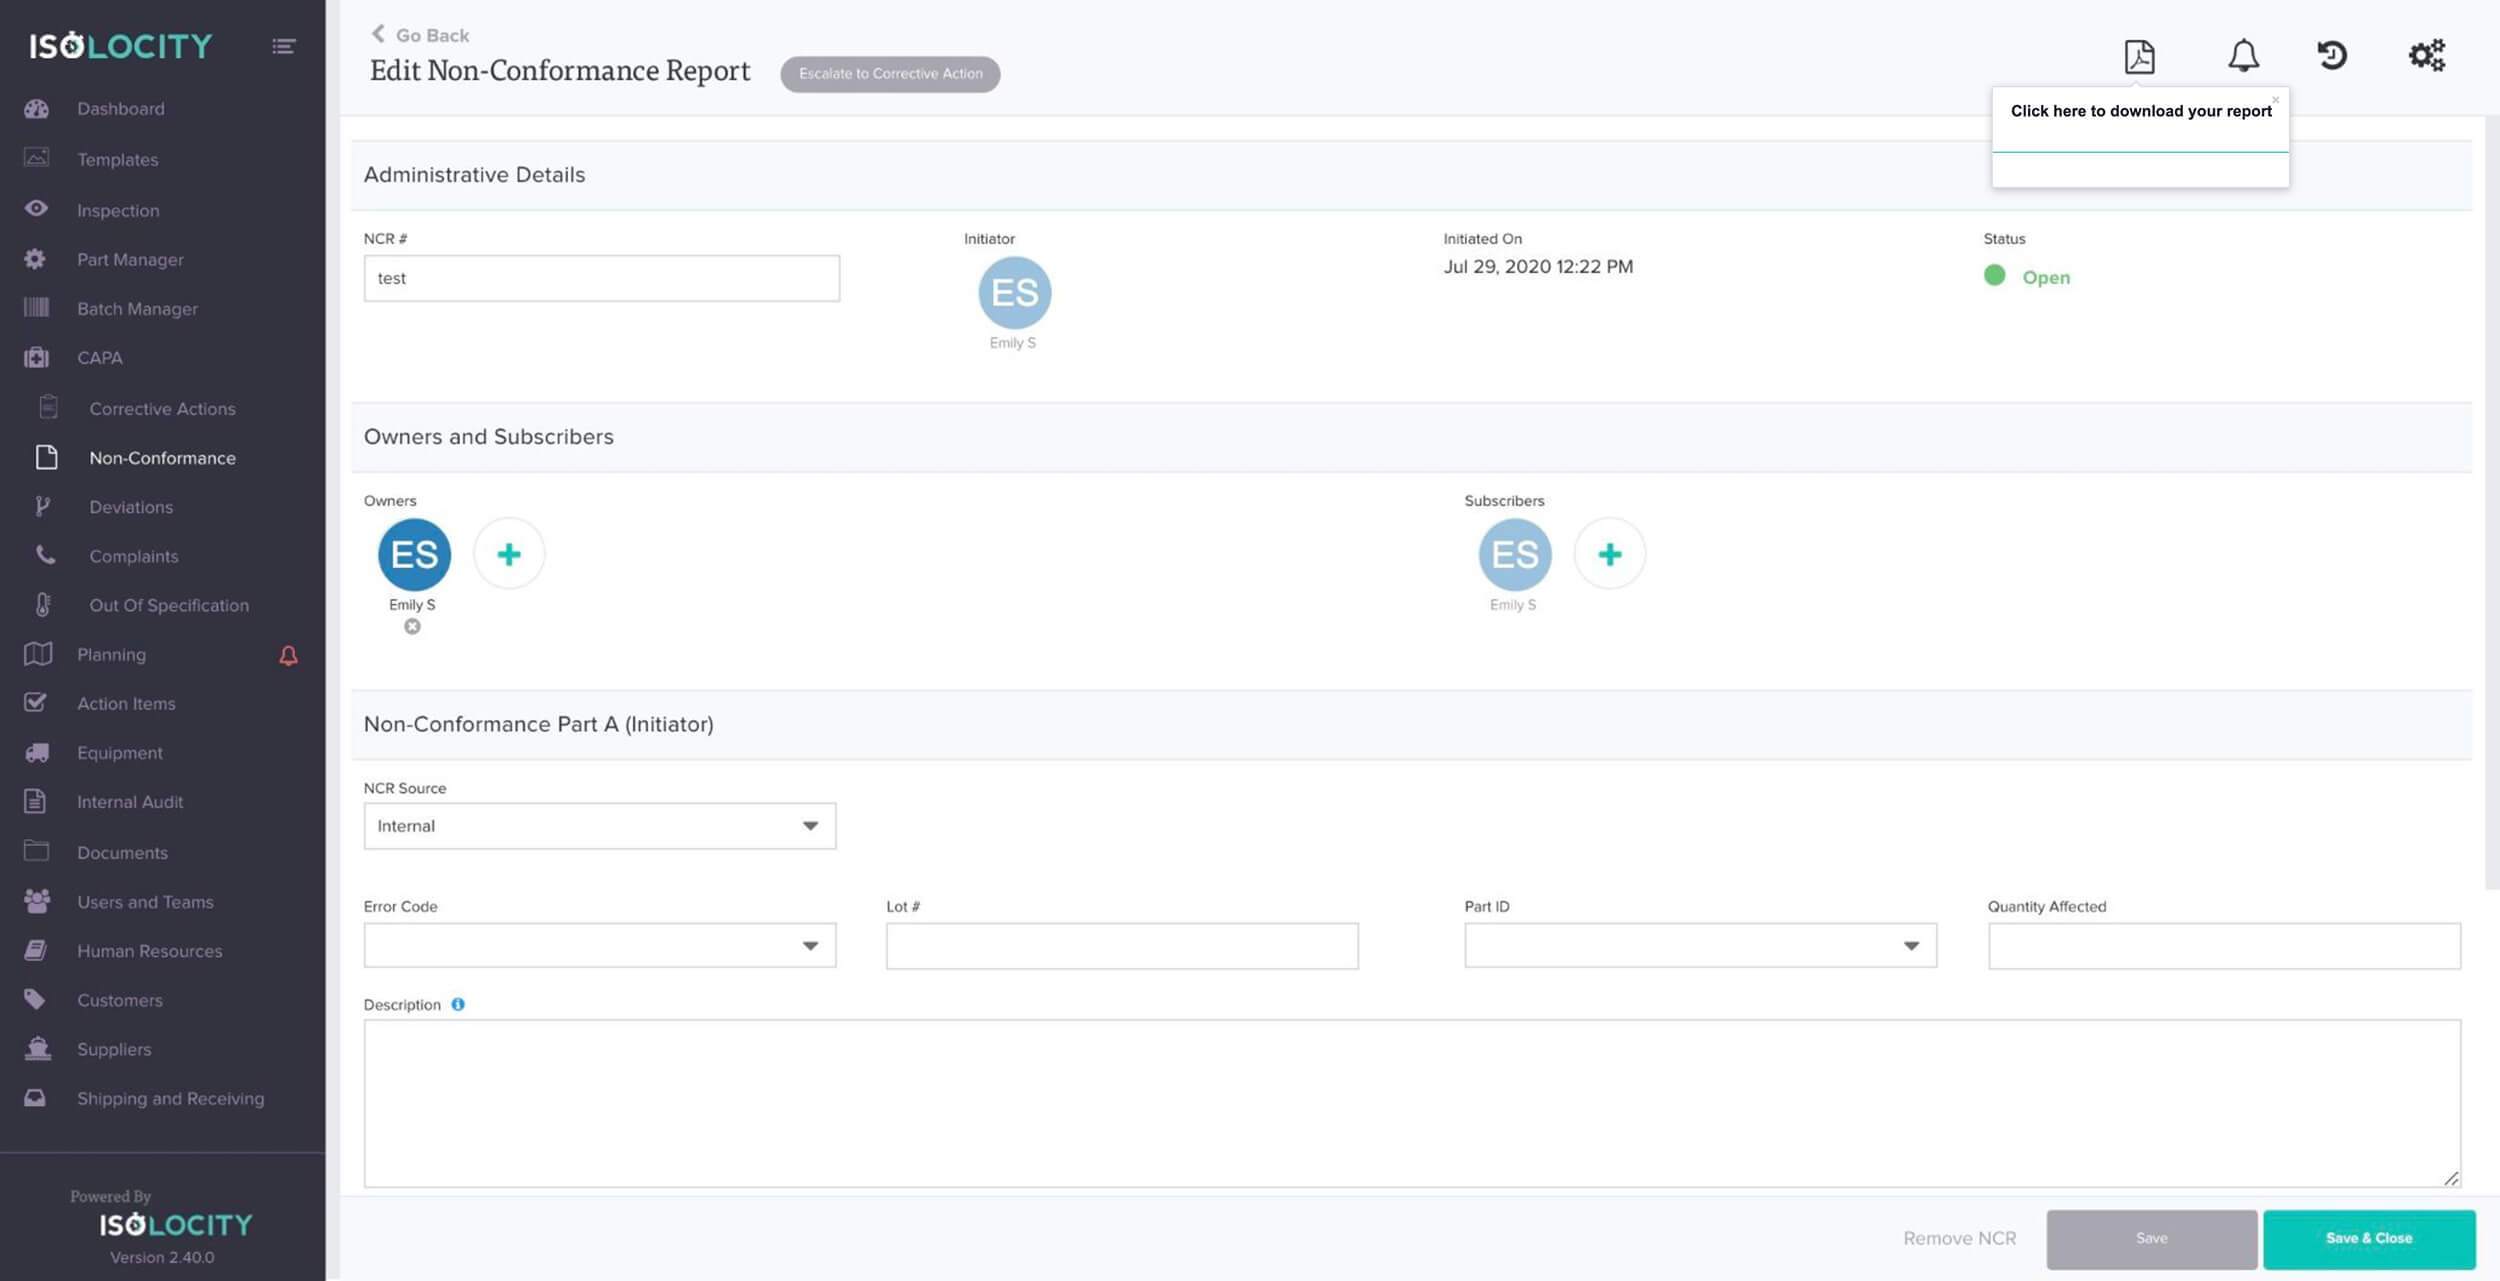
Enter “NCR #” (Required).
Step #5
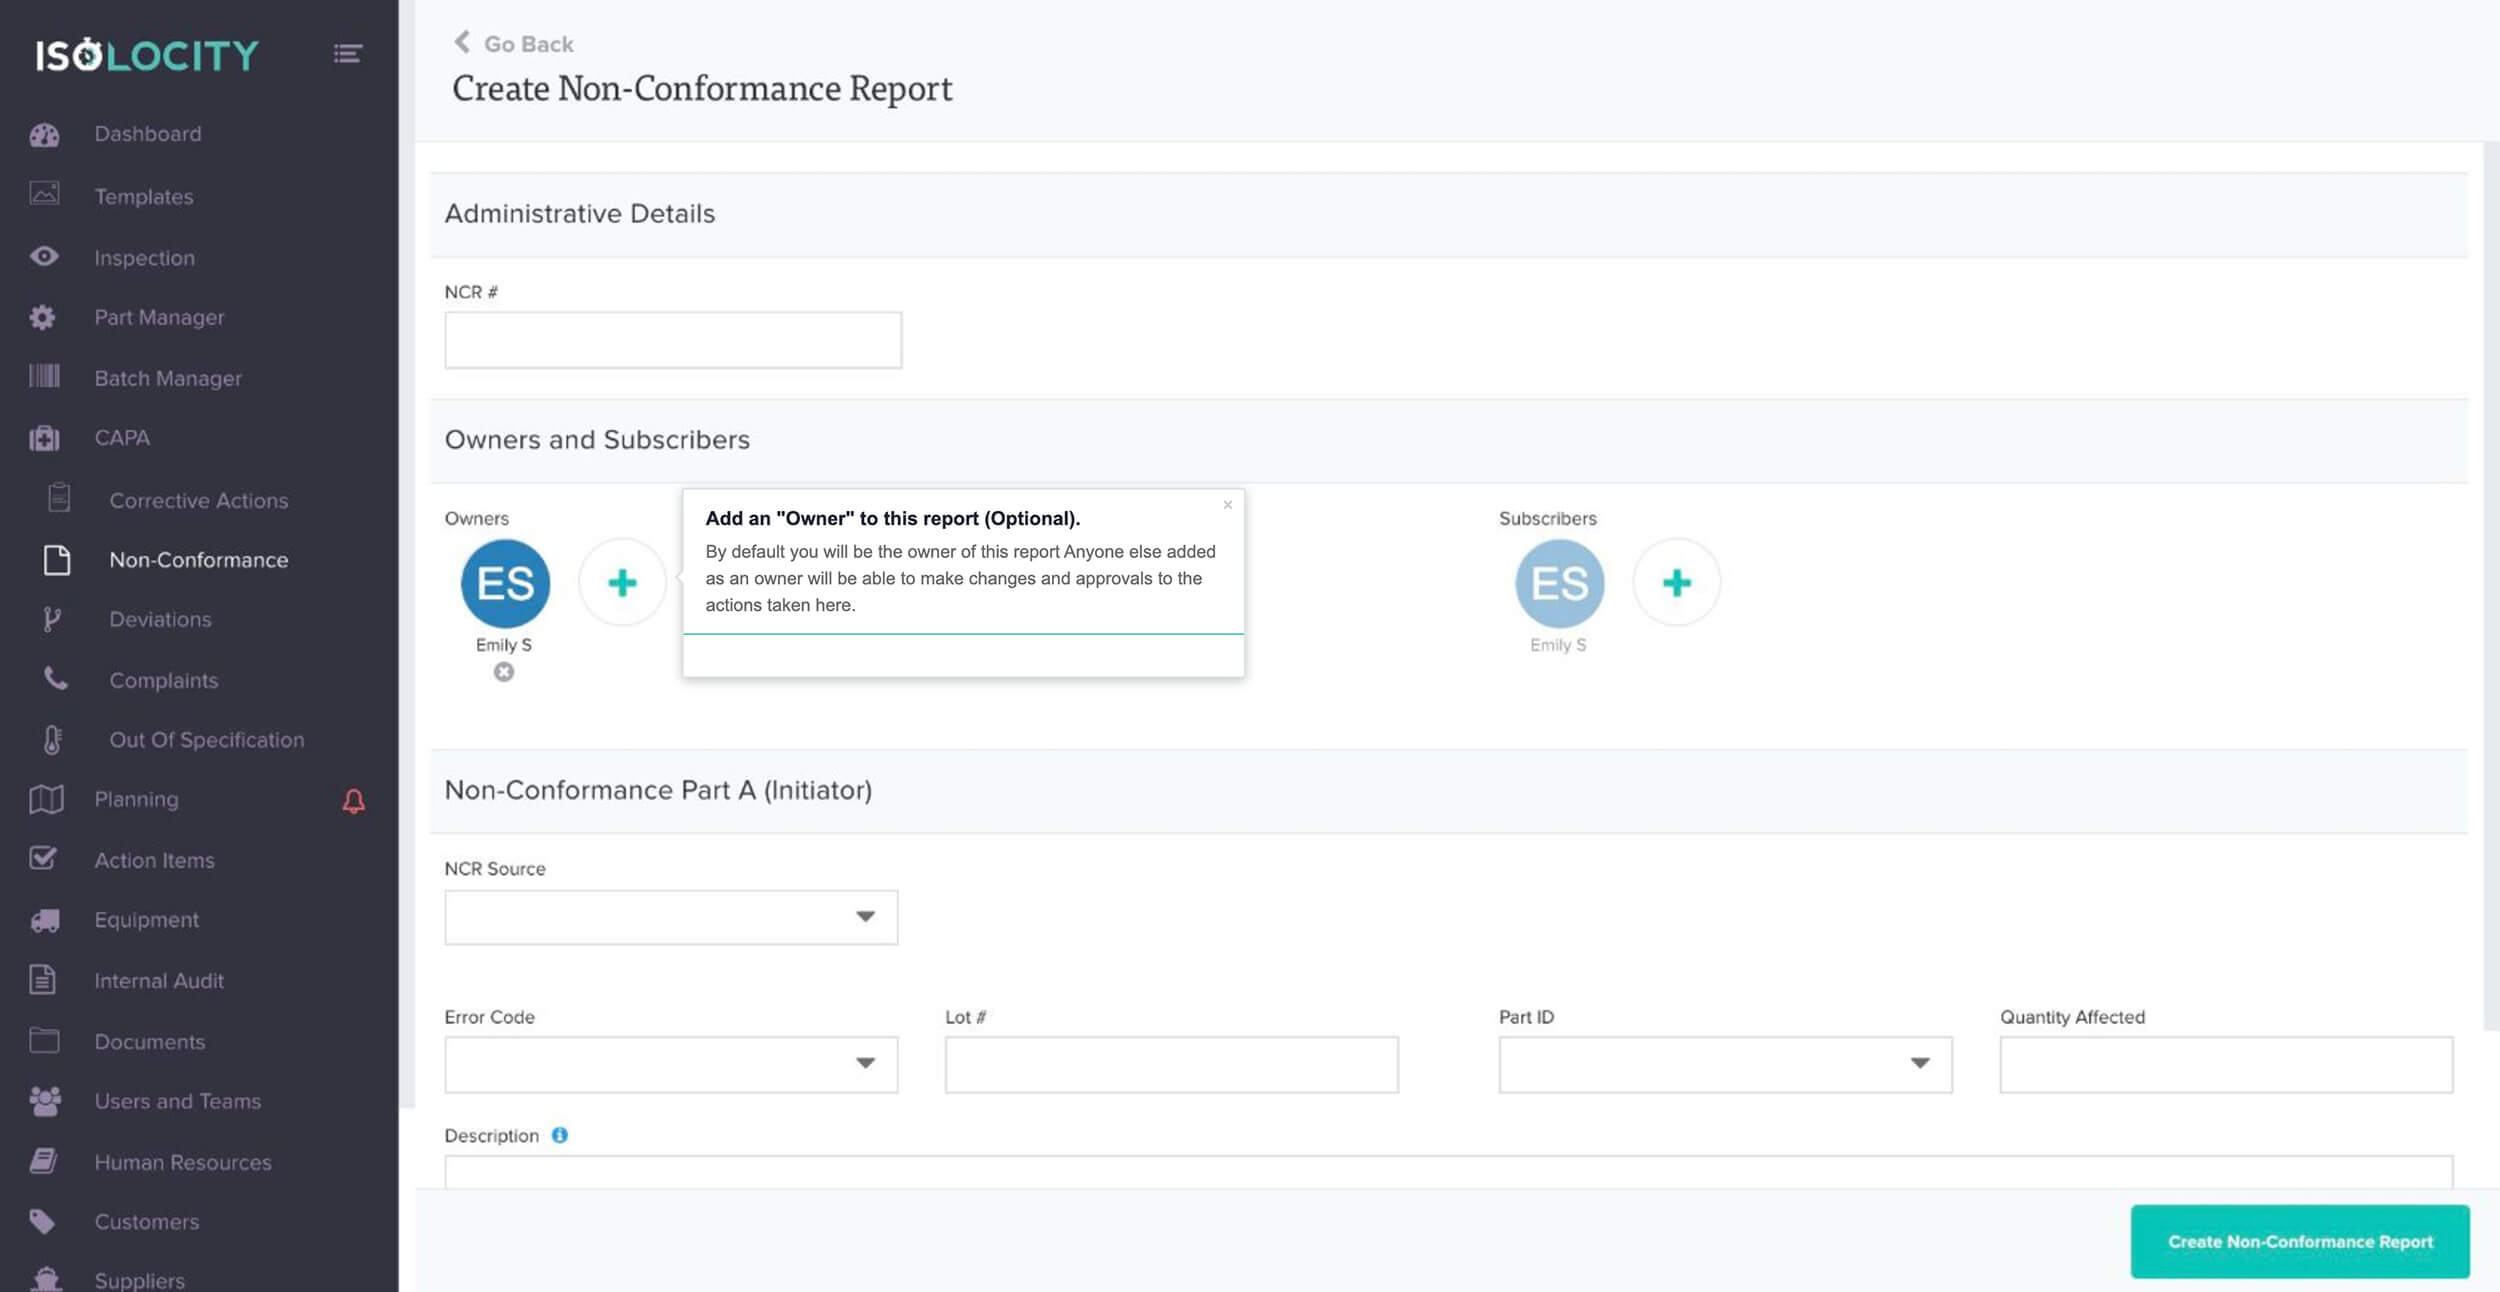
Add an “Owner” to this report (Optional).
Step #6
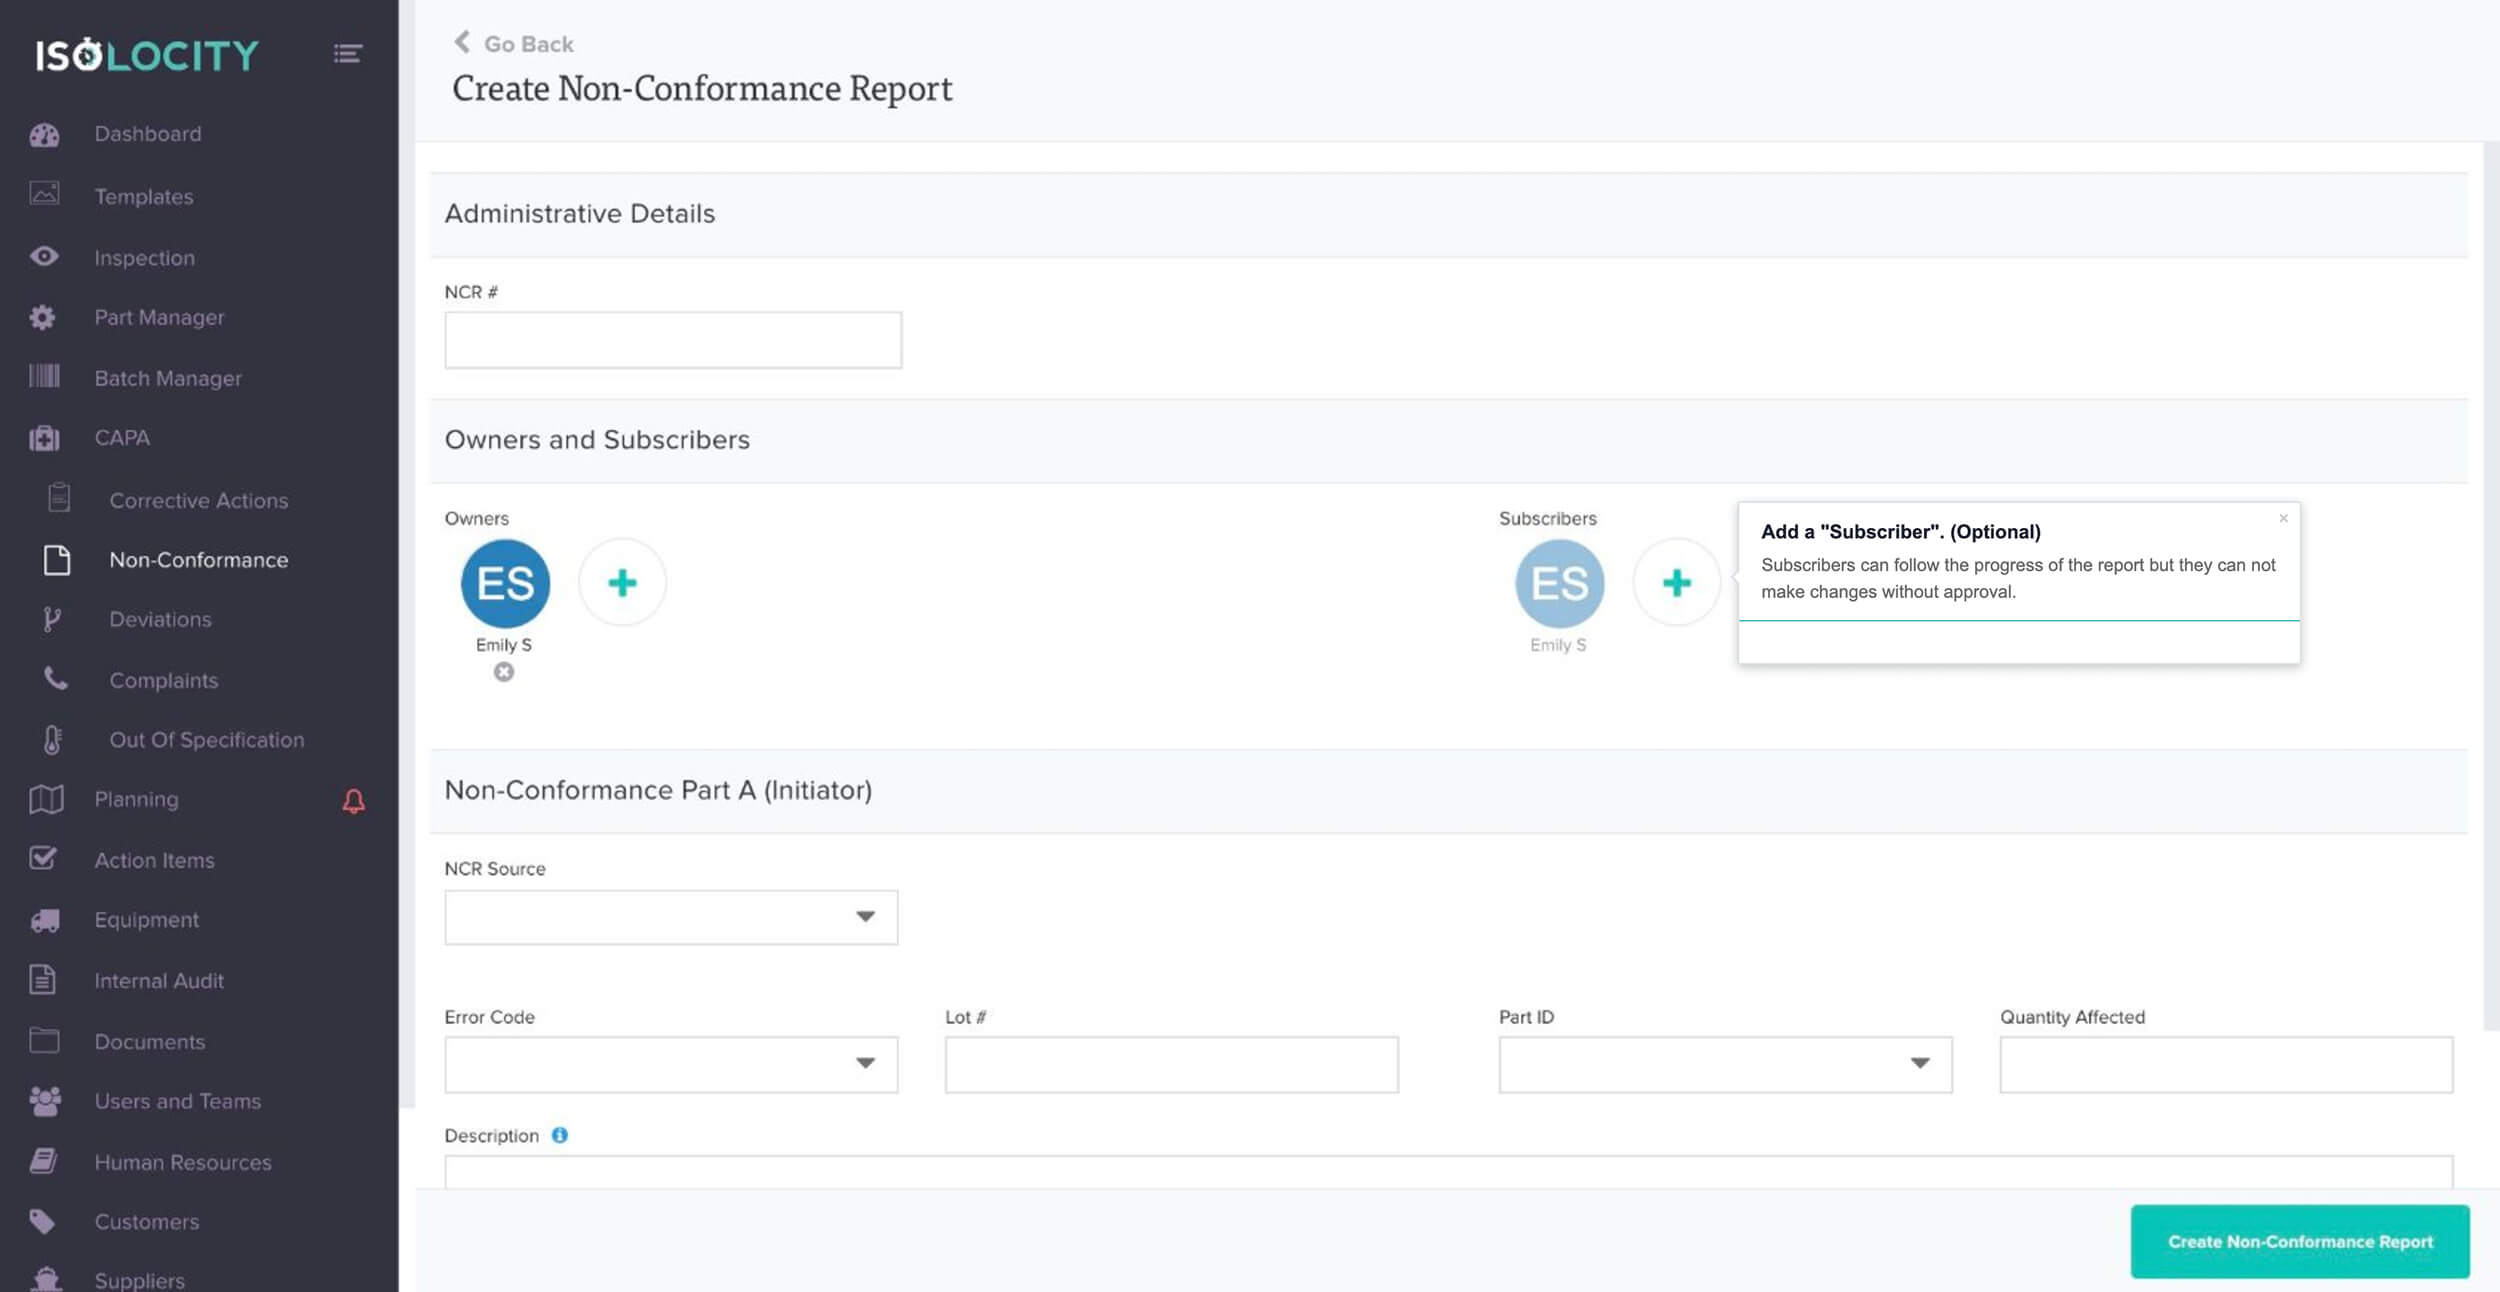
Add a “Subscriber”. (Optional)
Step #7
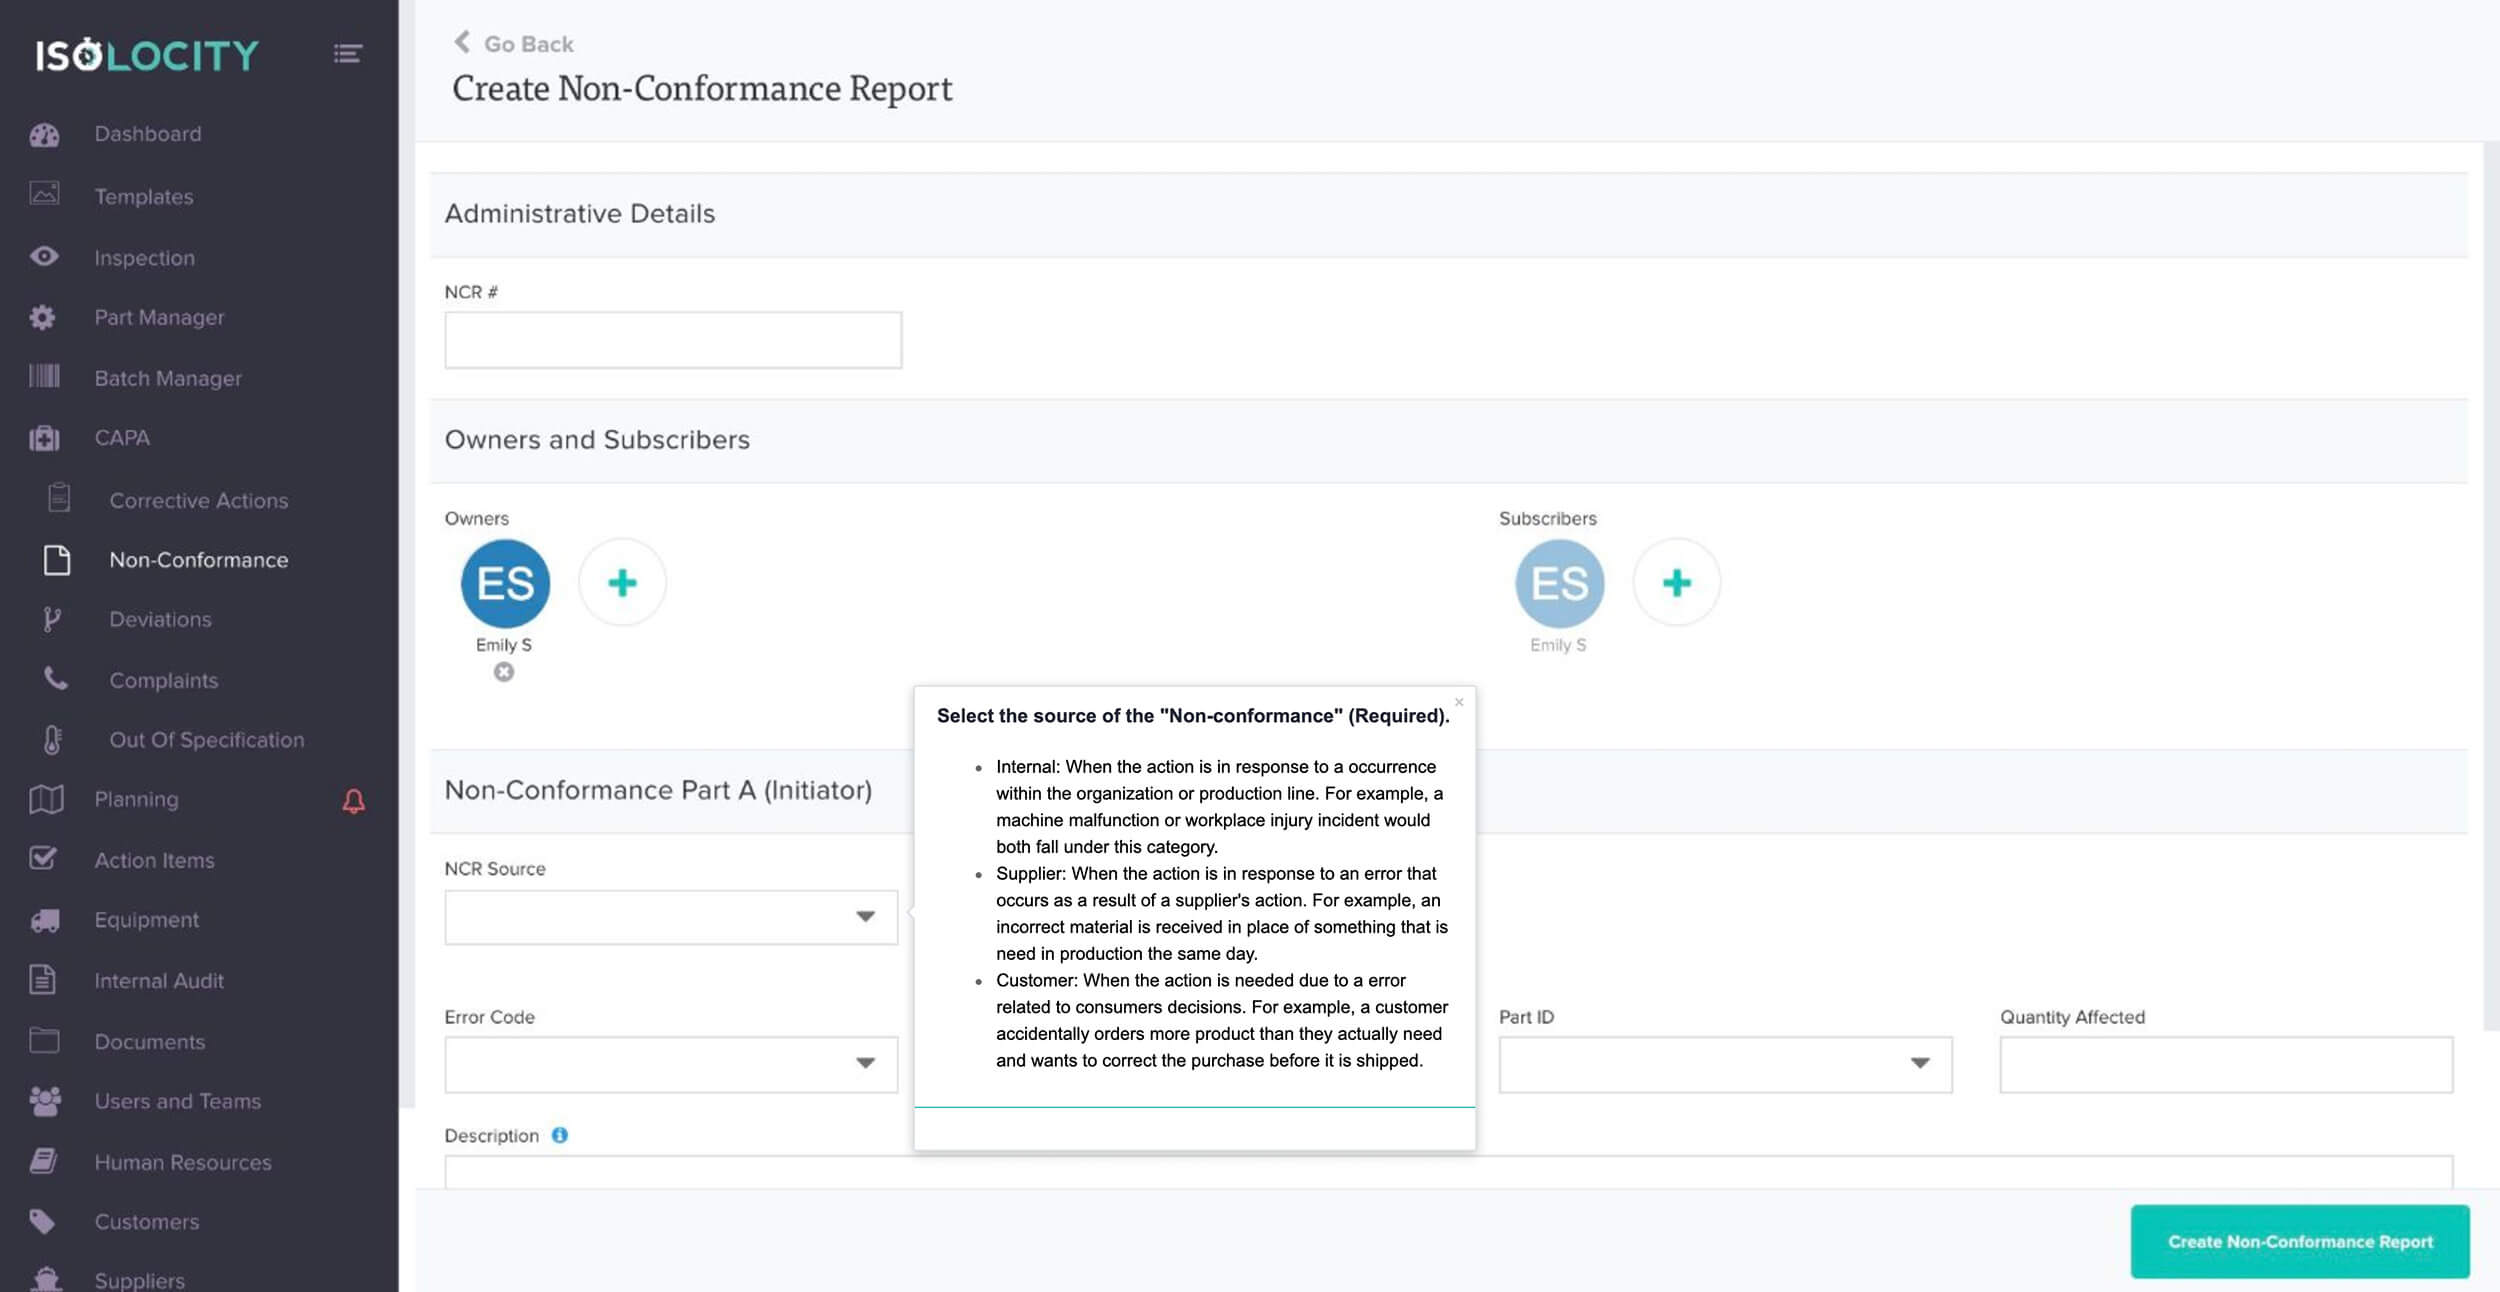
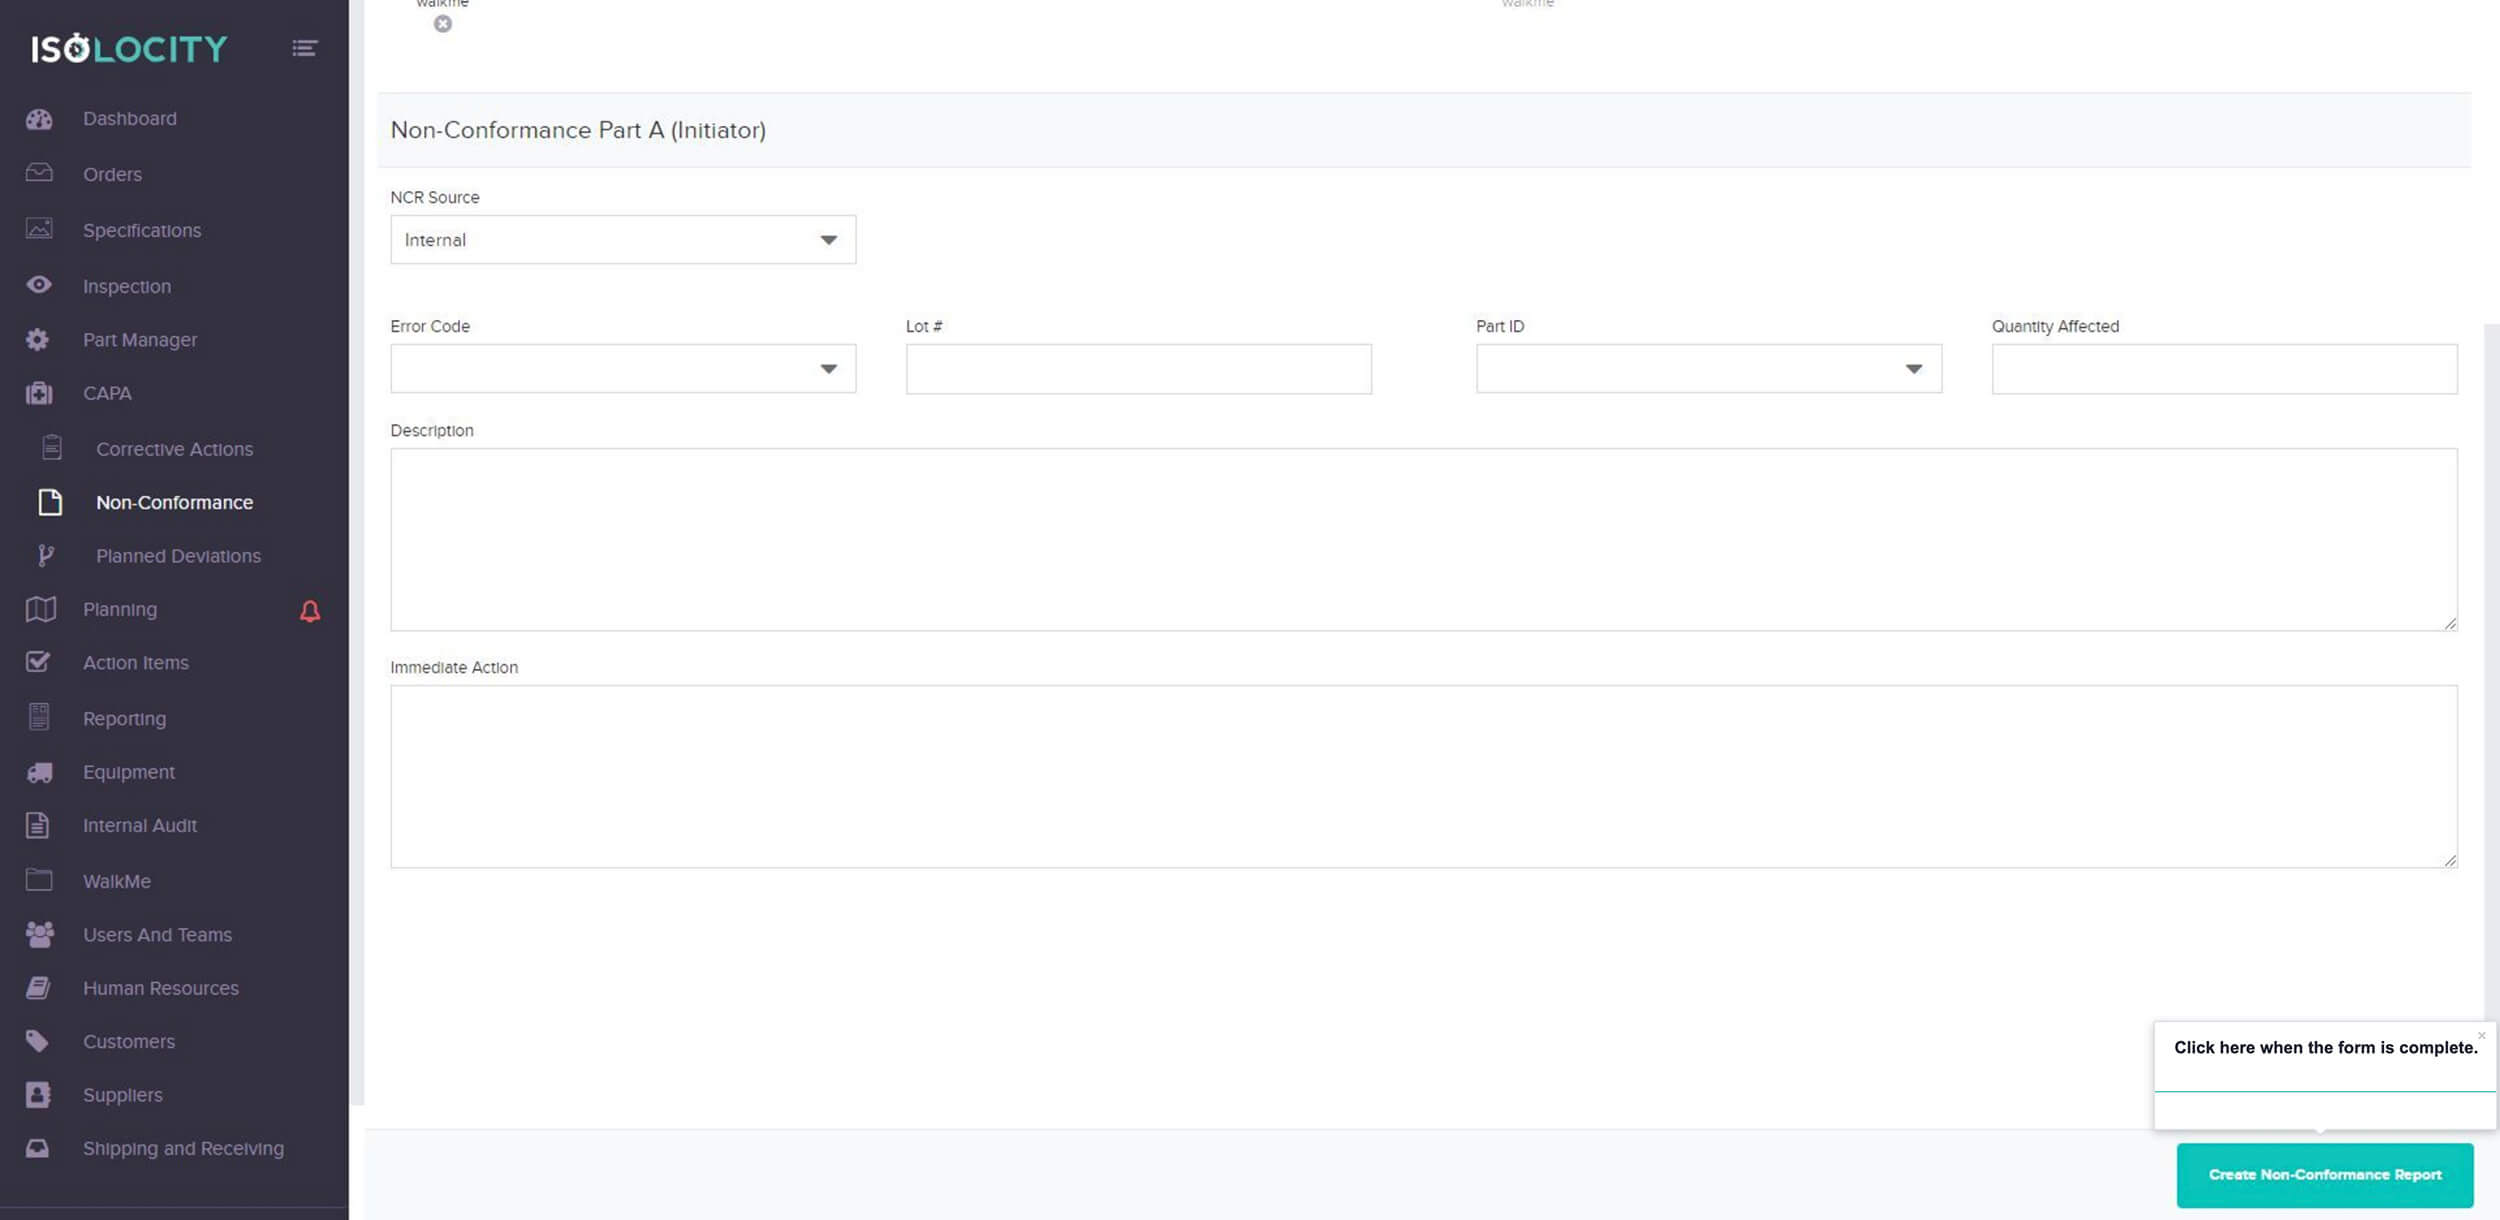
Select the source of the “Non-conformance” (Required).
Step #8
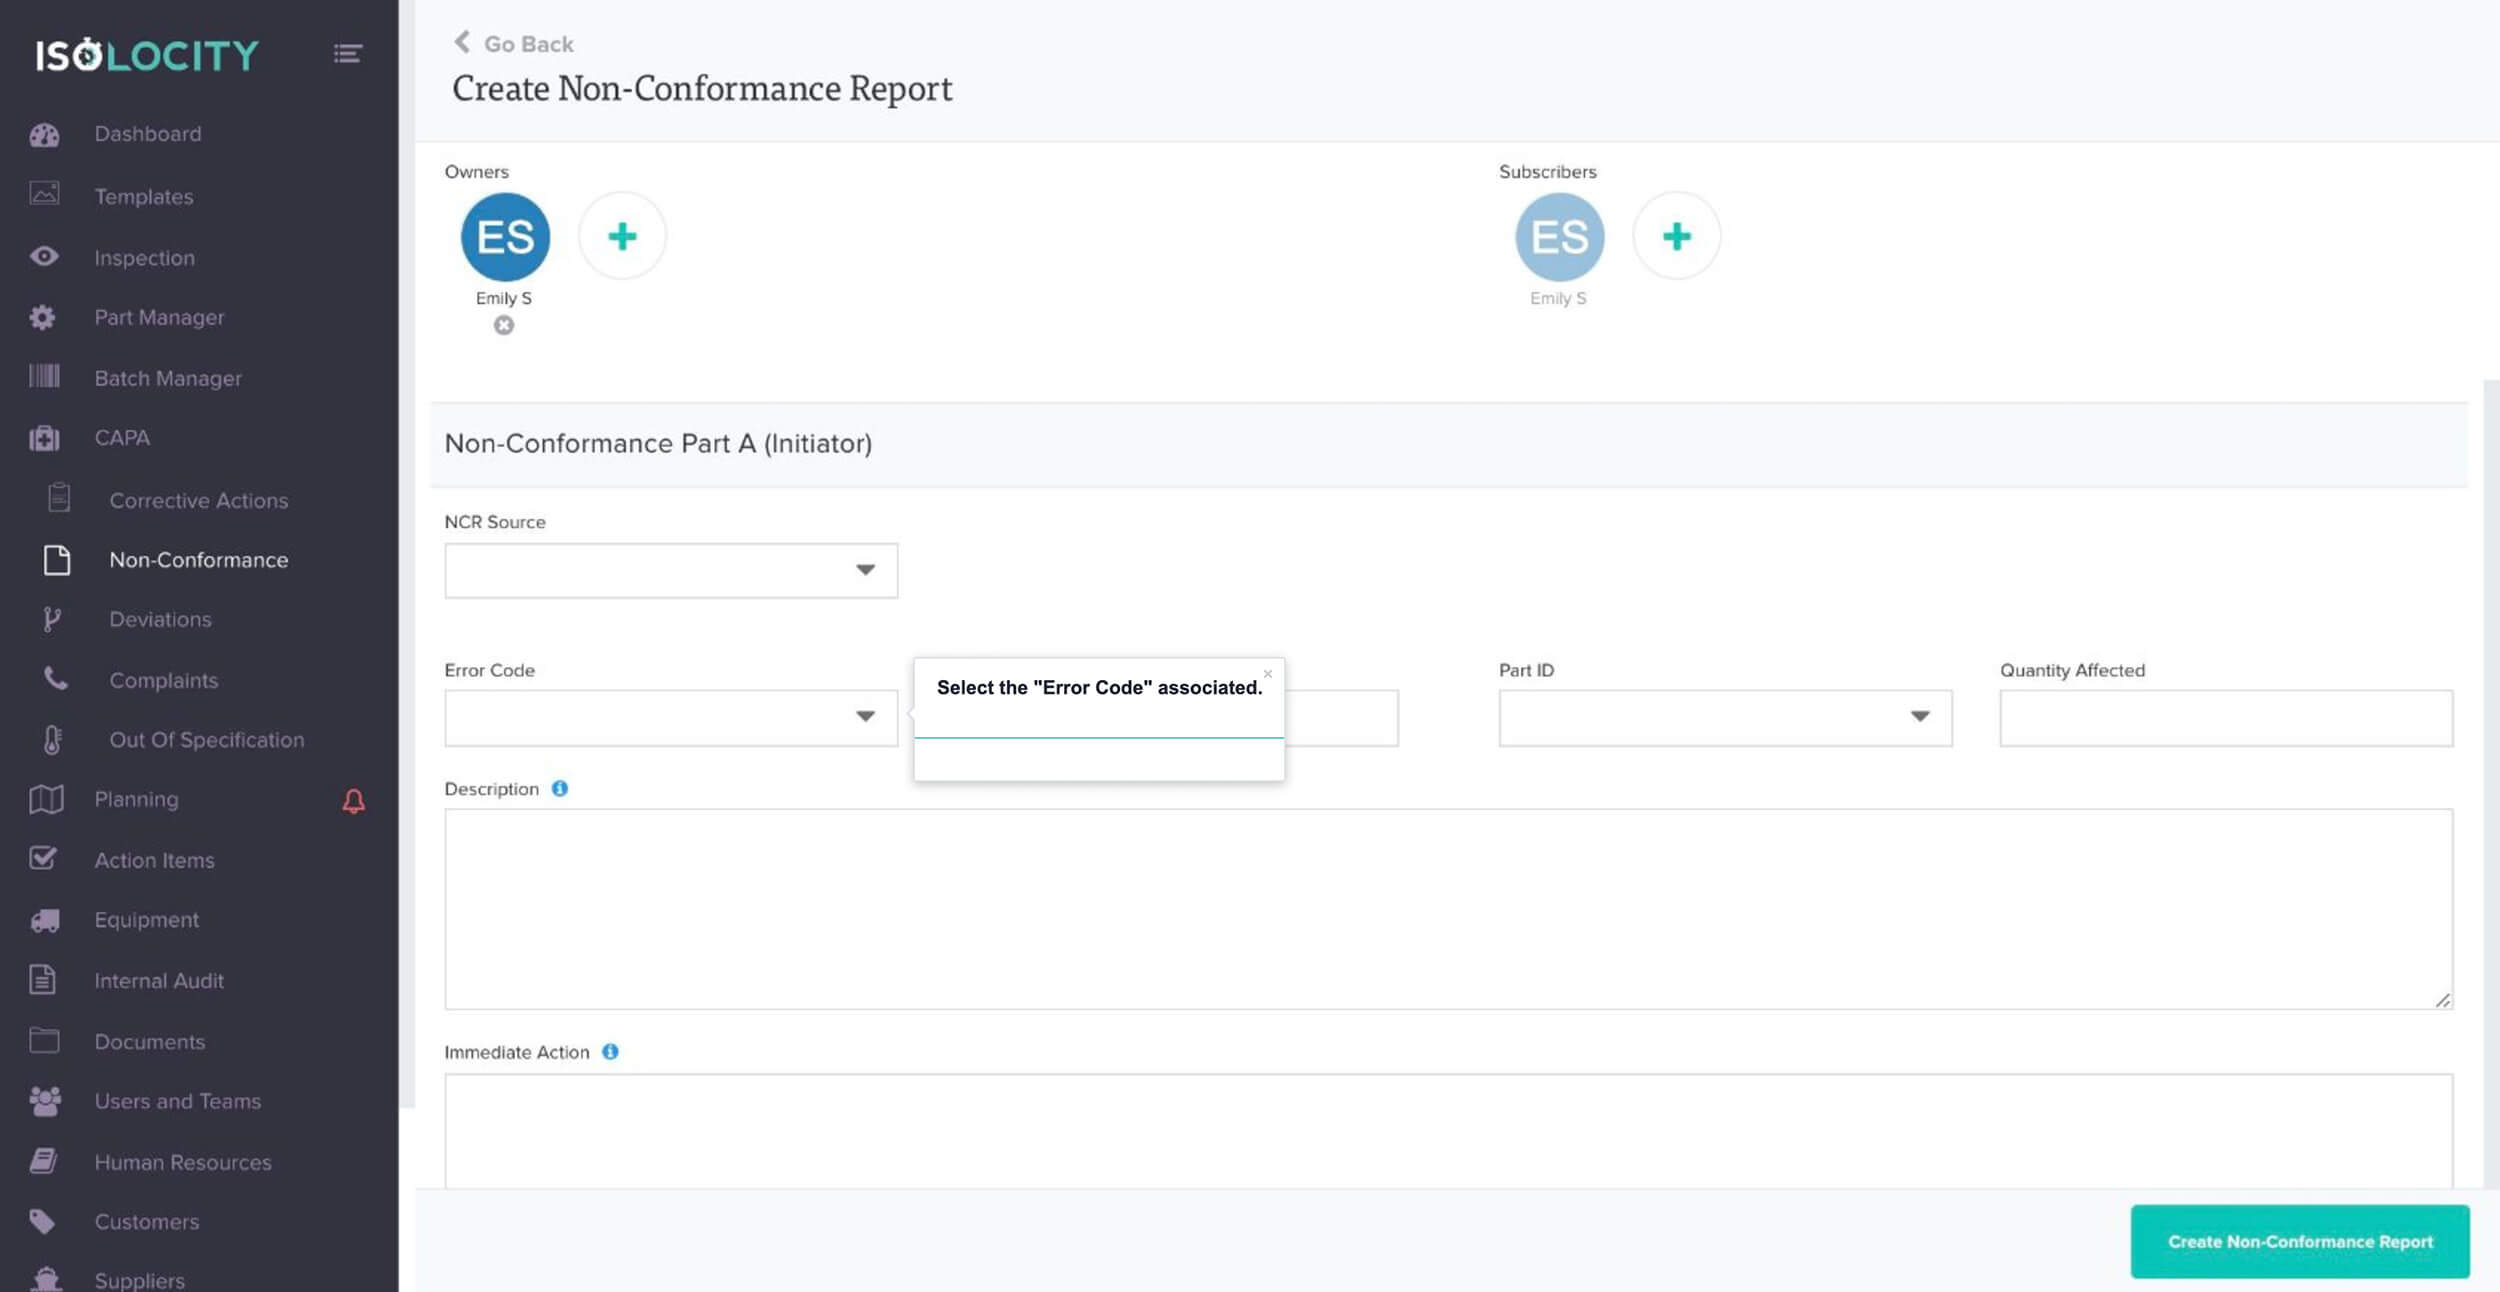
Select the “Error Code” associated.
Step #9
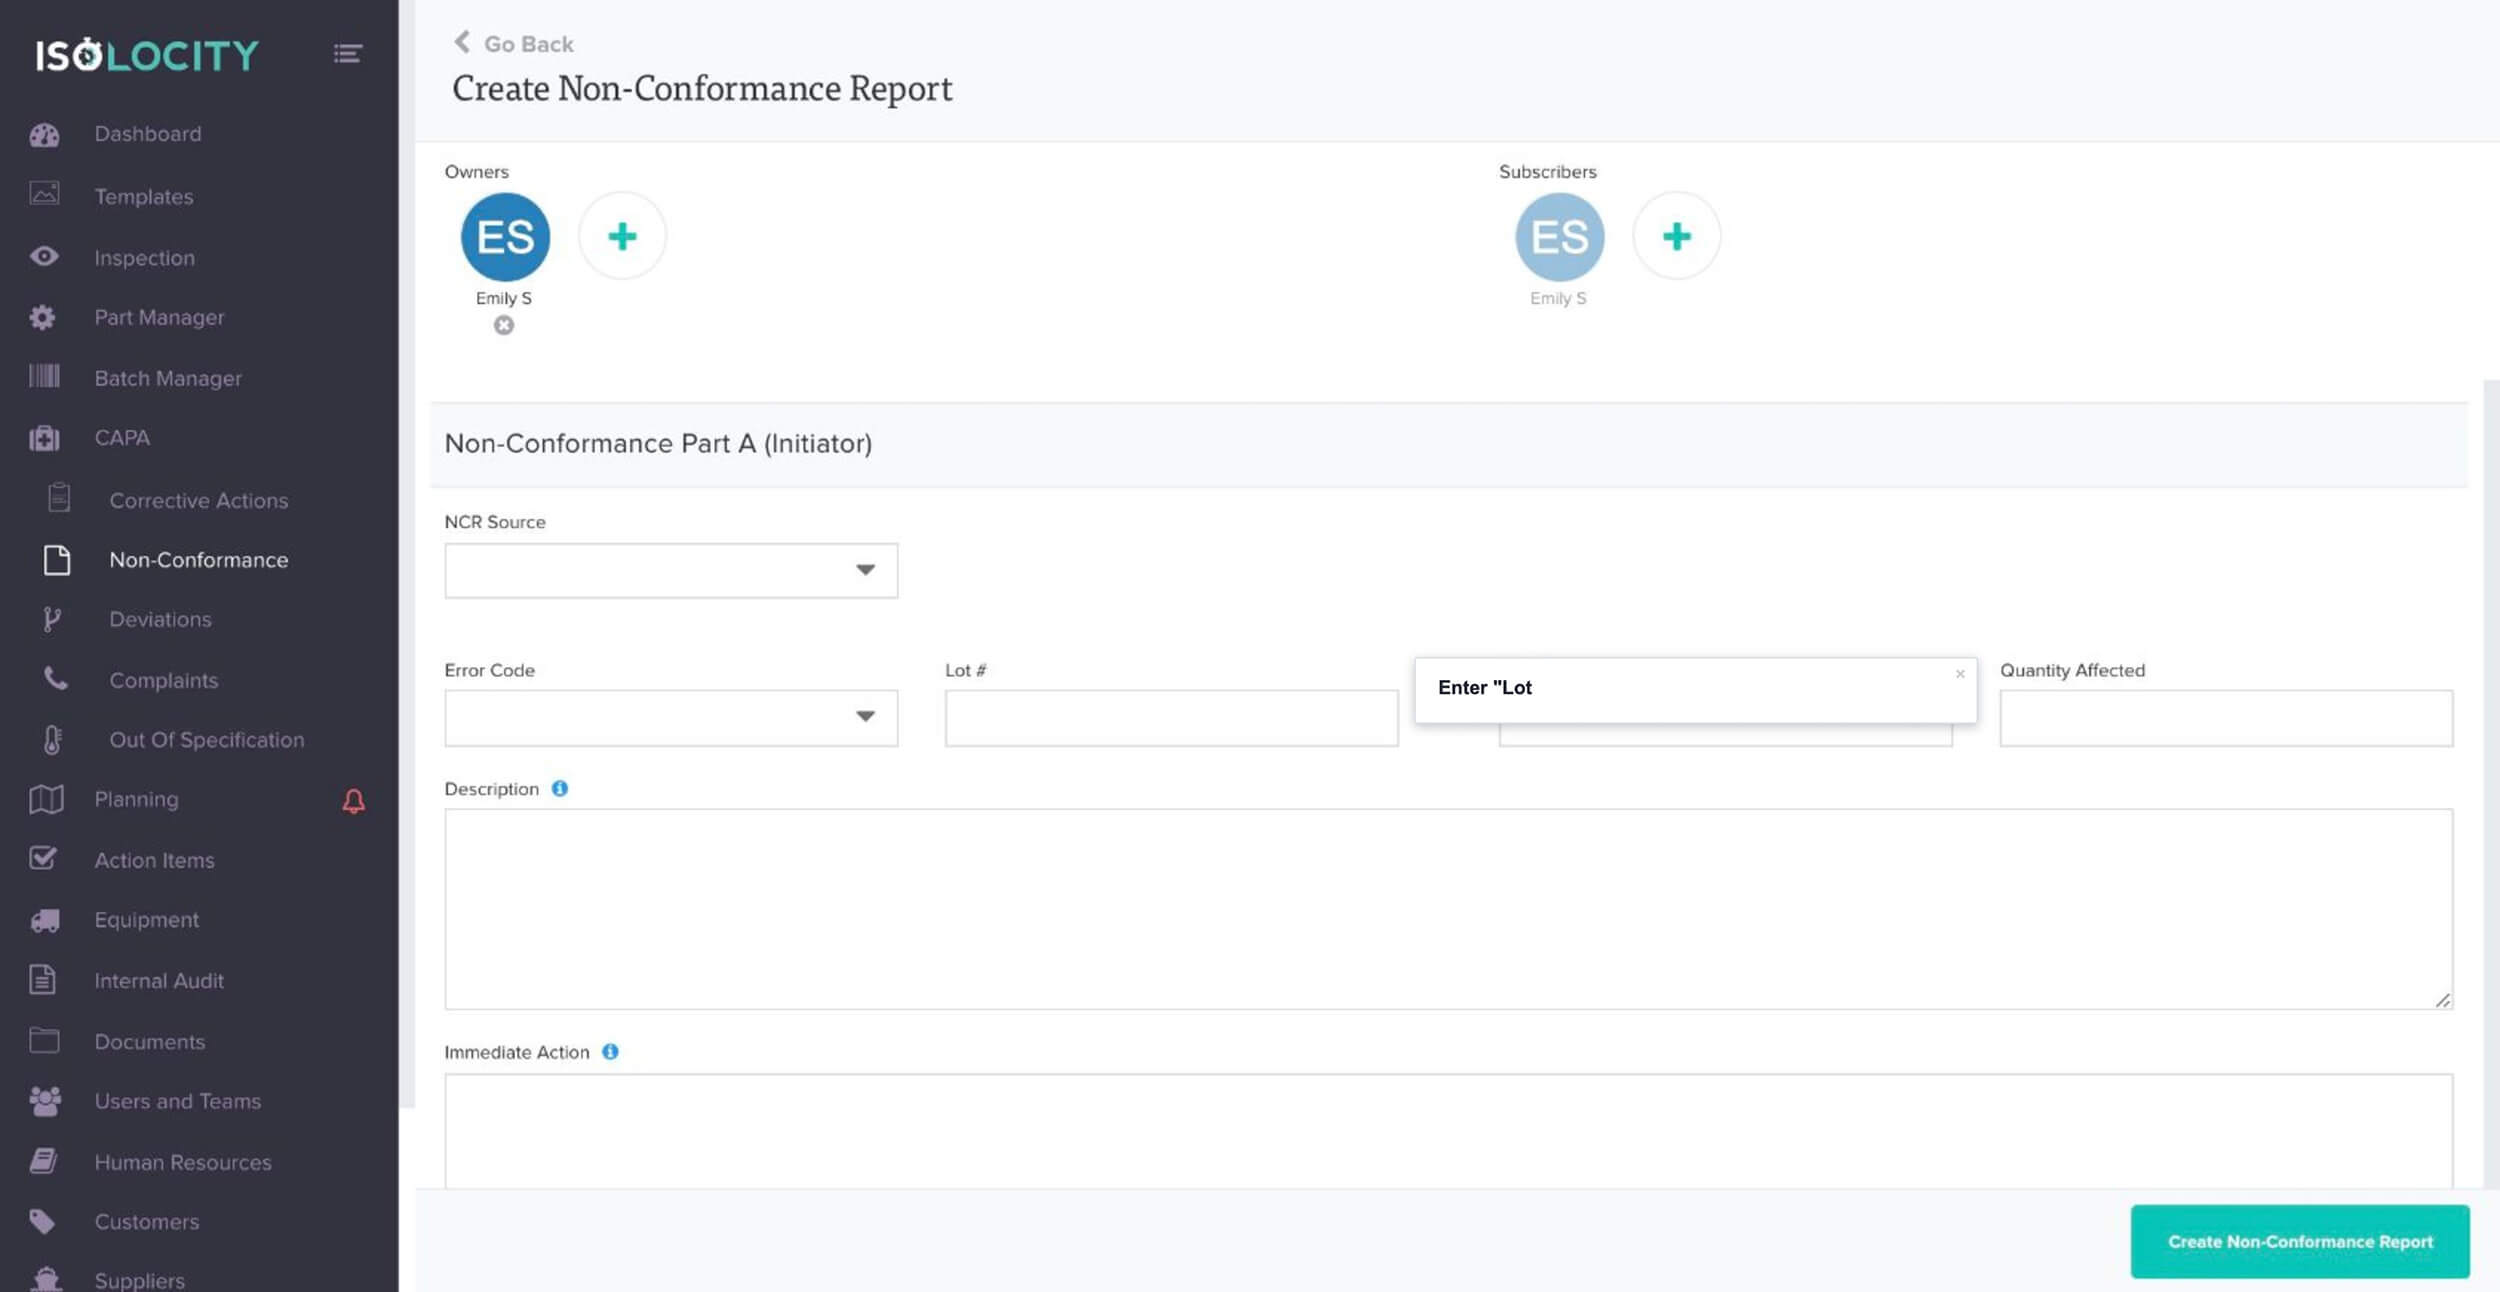
Enter “Lot #” for the group of products related (Optional).
Step #10
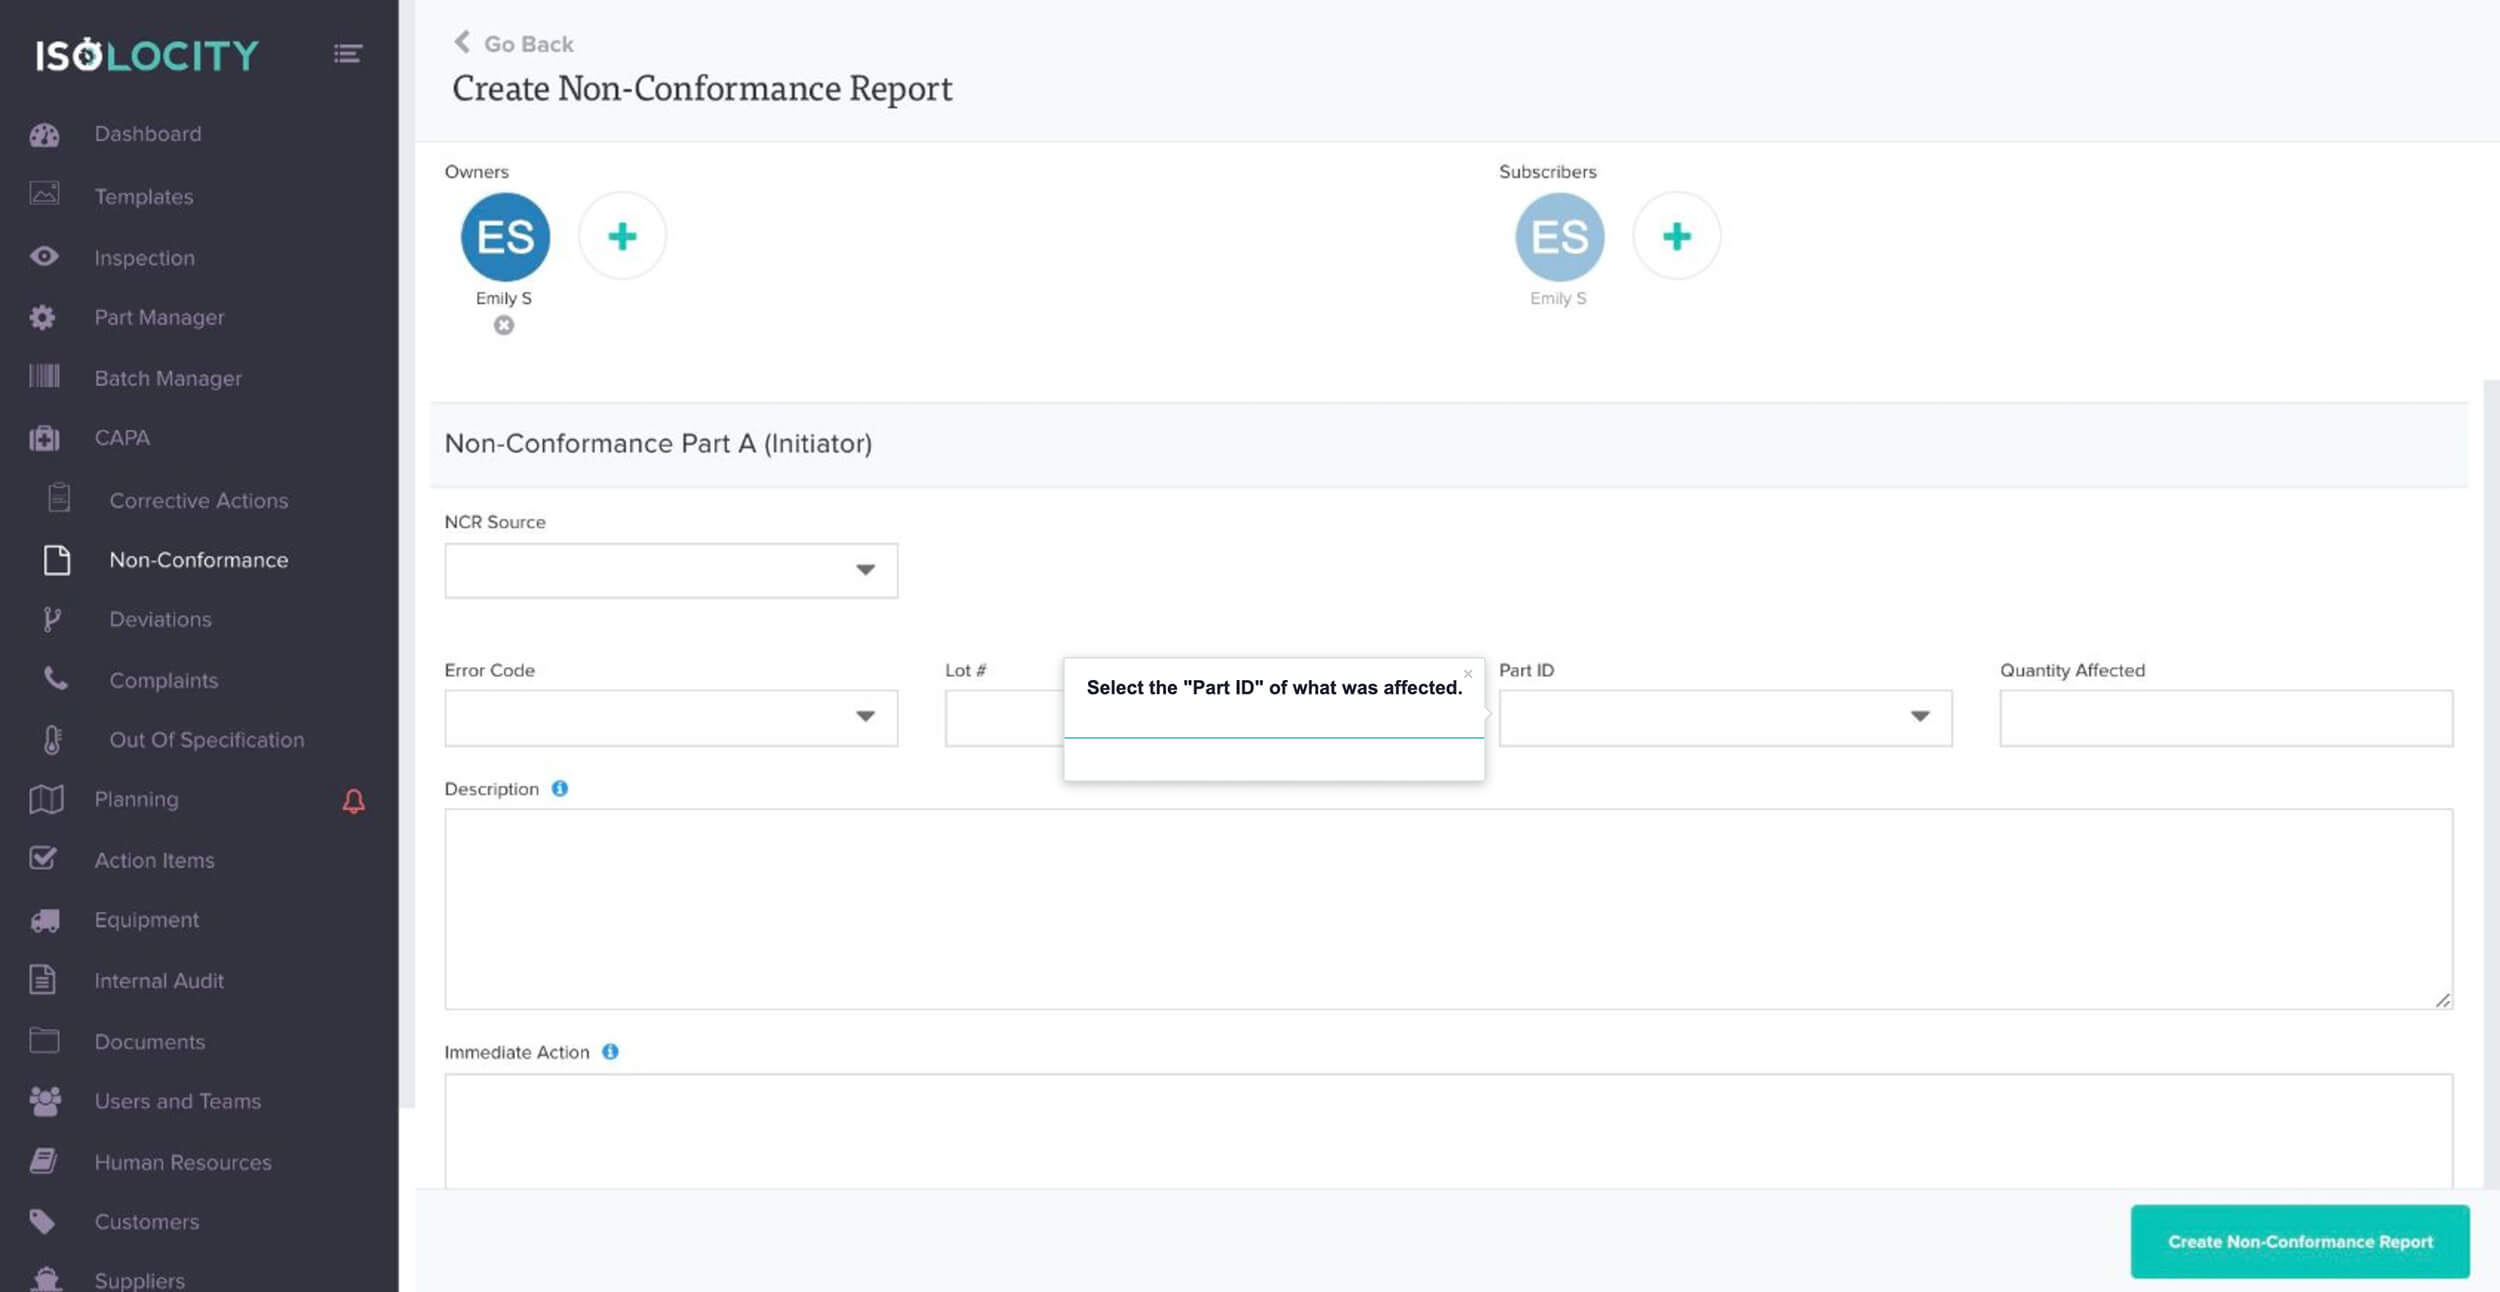
Select the “Part ID” of what was affected.
Step #11
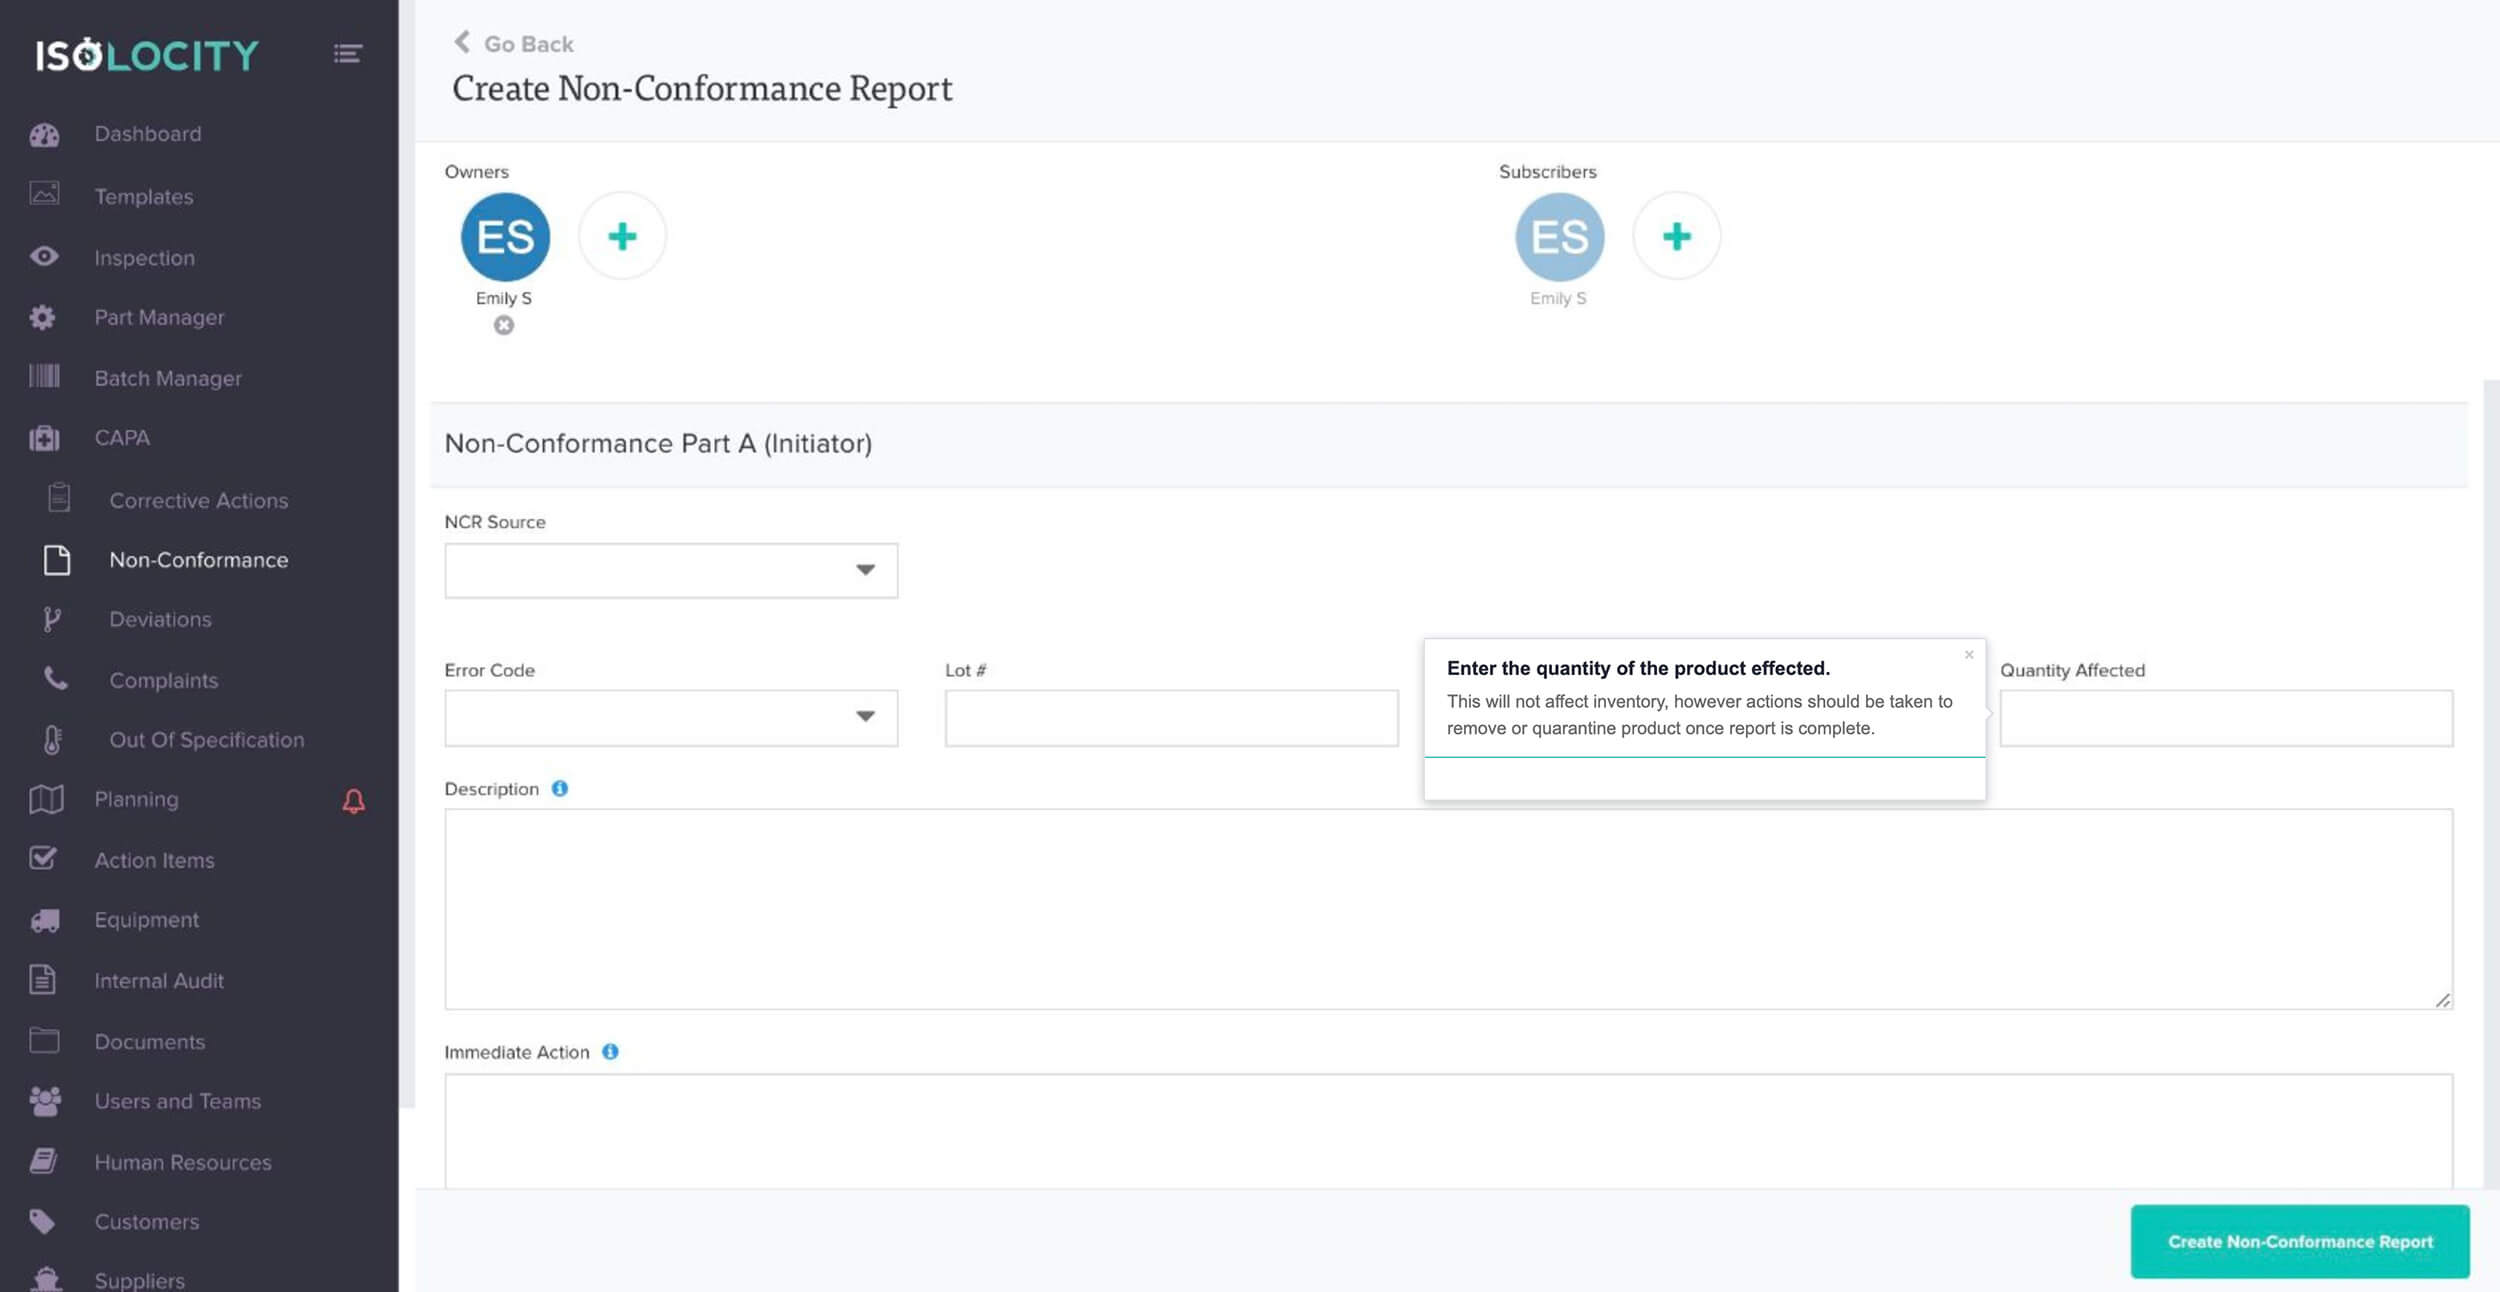
Enter the quantity of the product effected.
Step #12
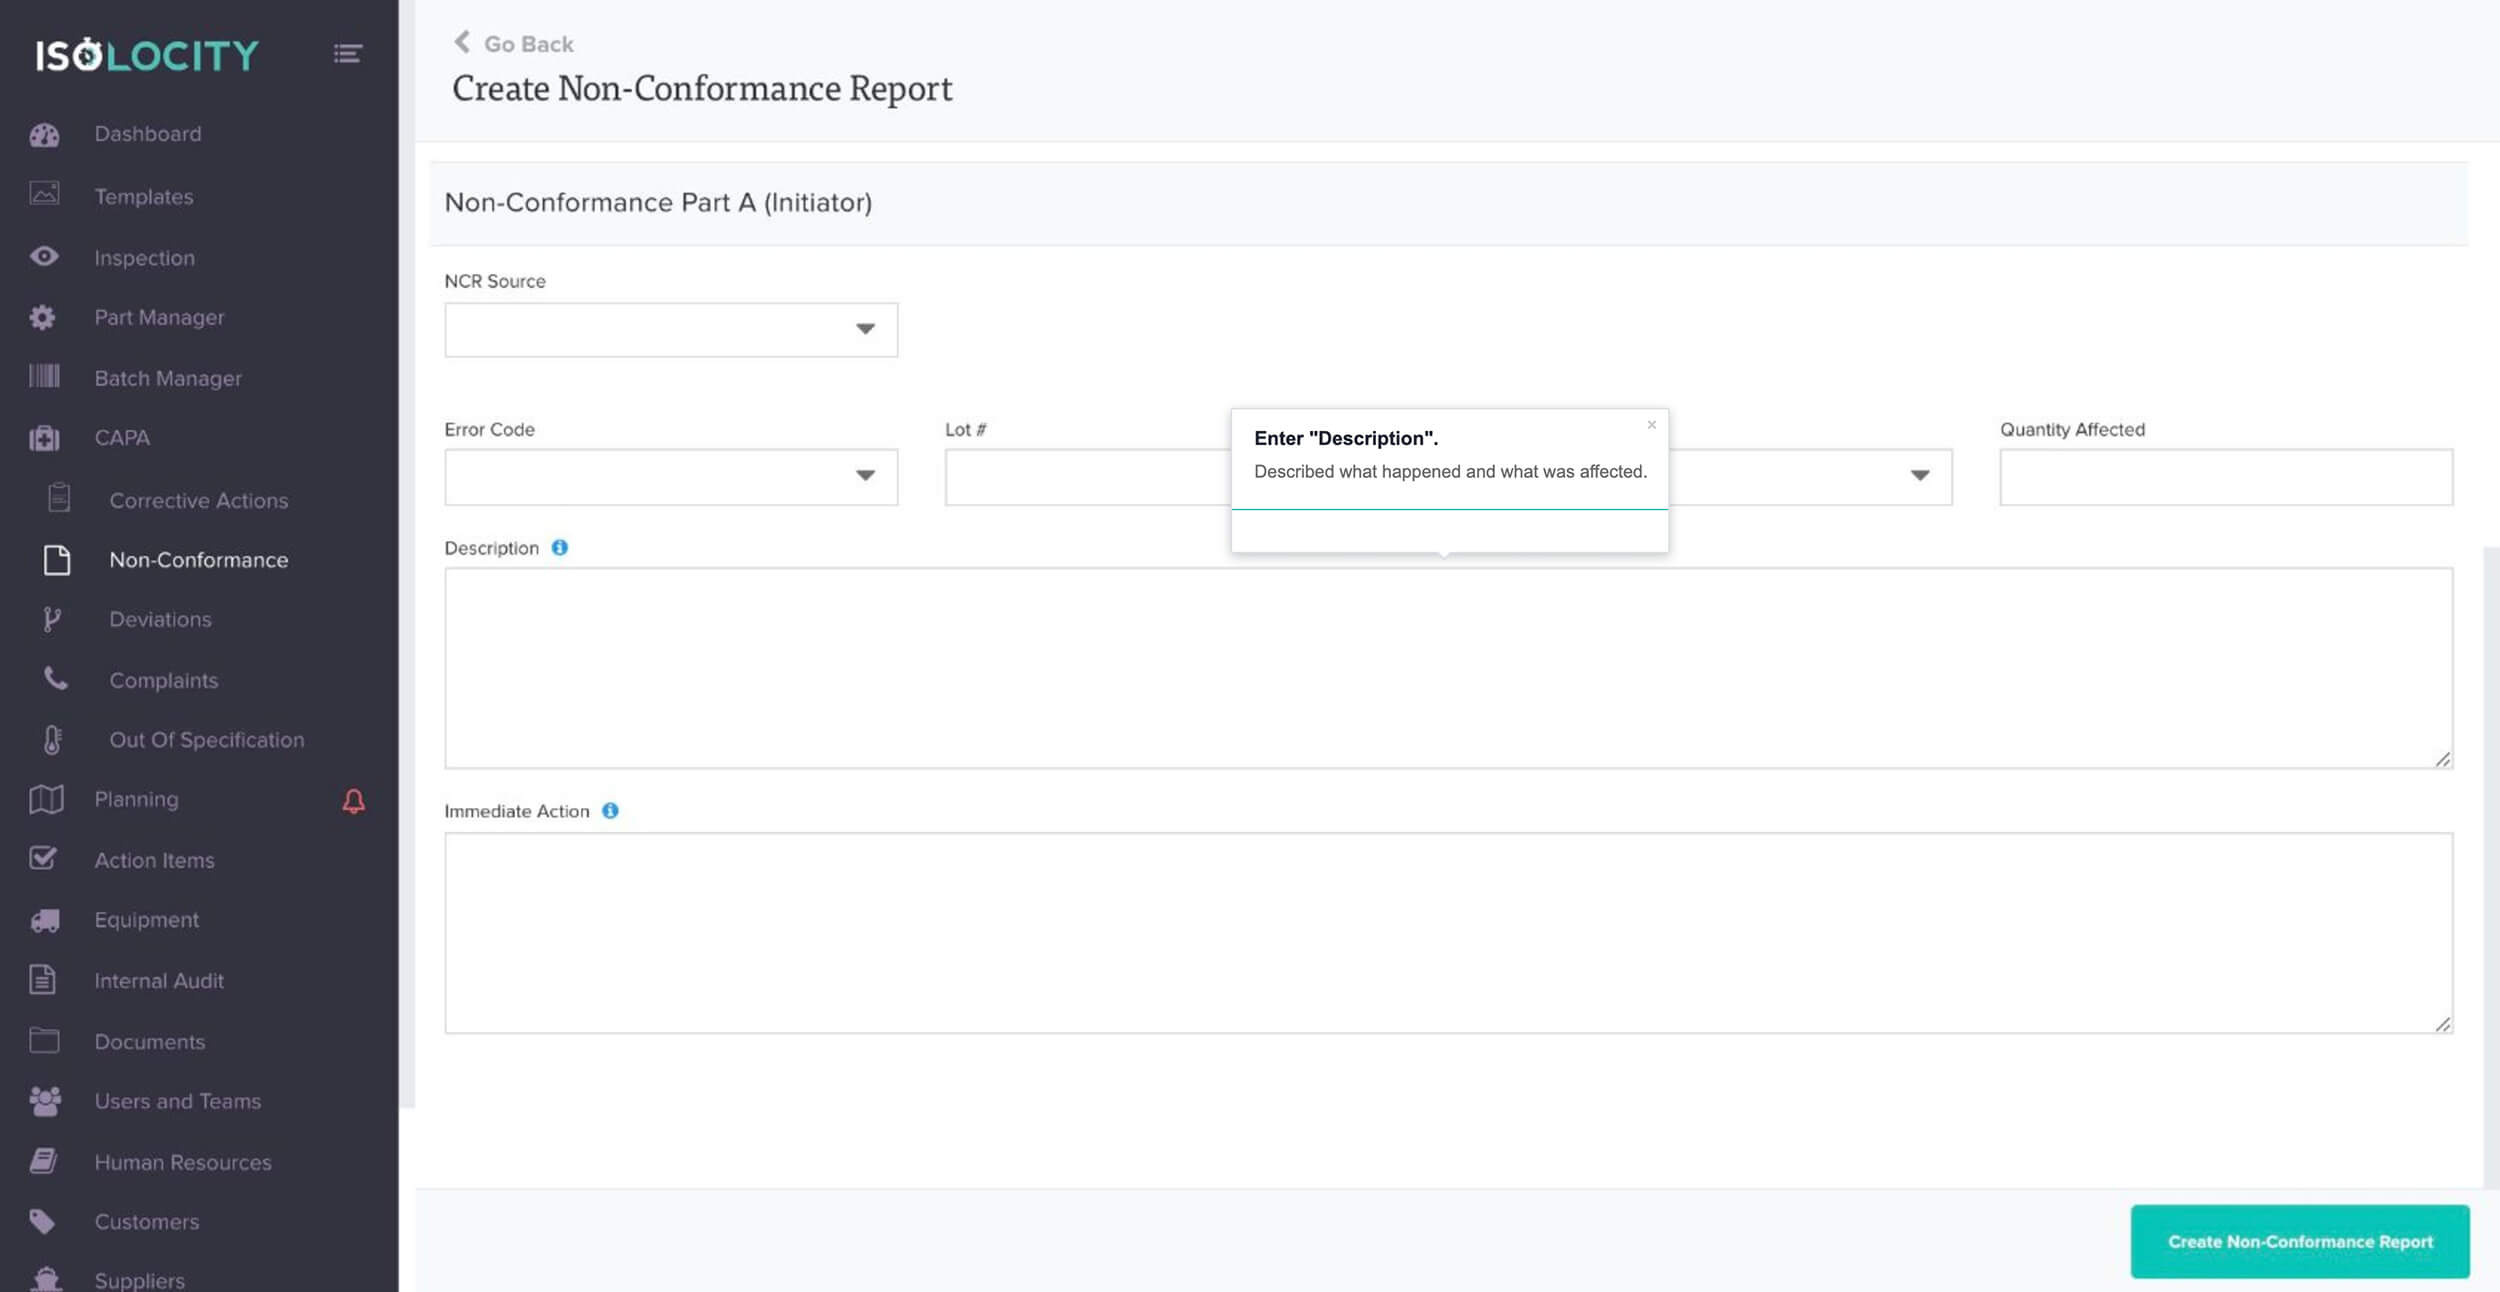
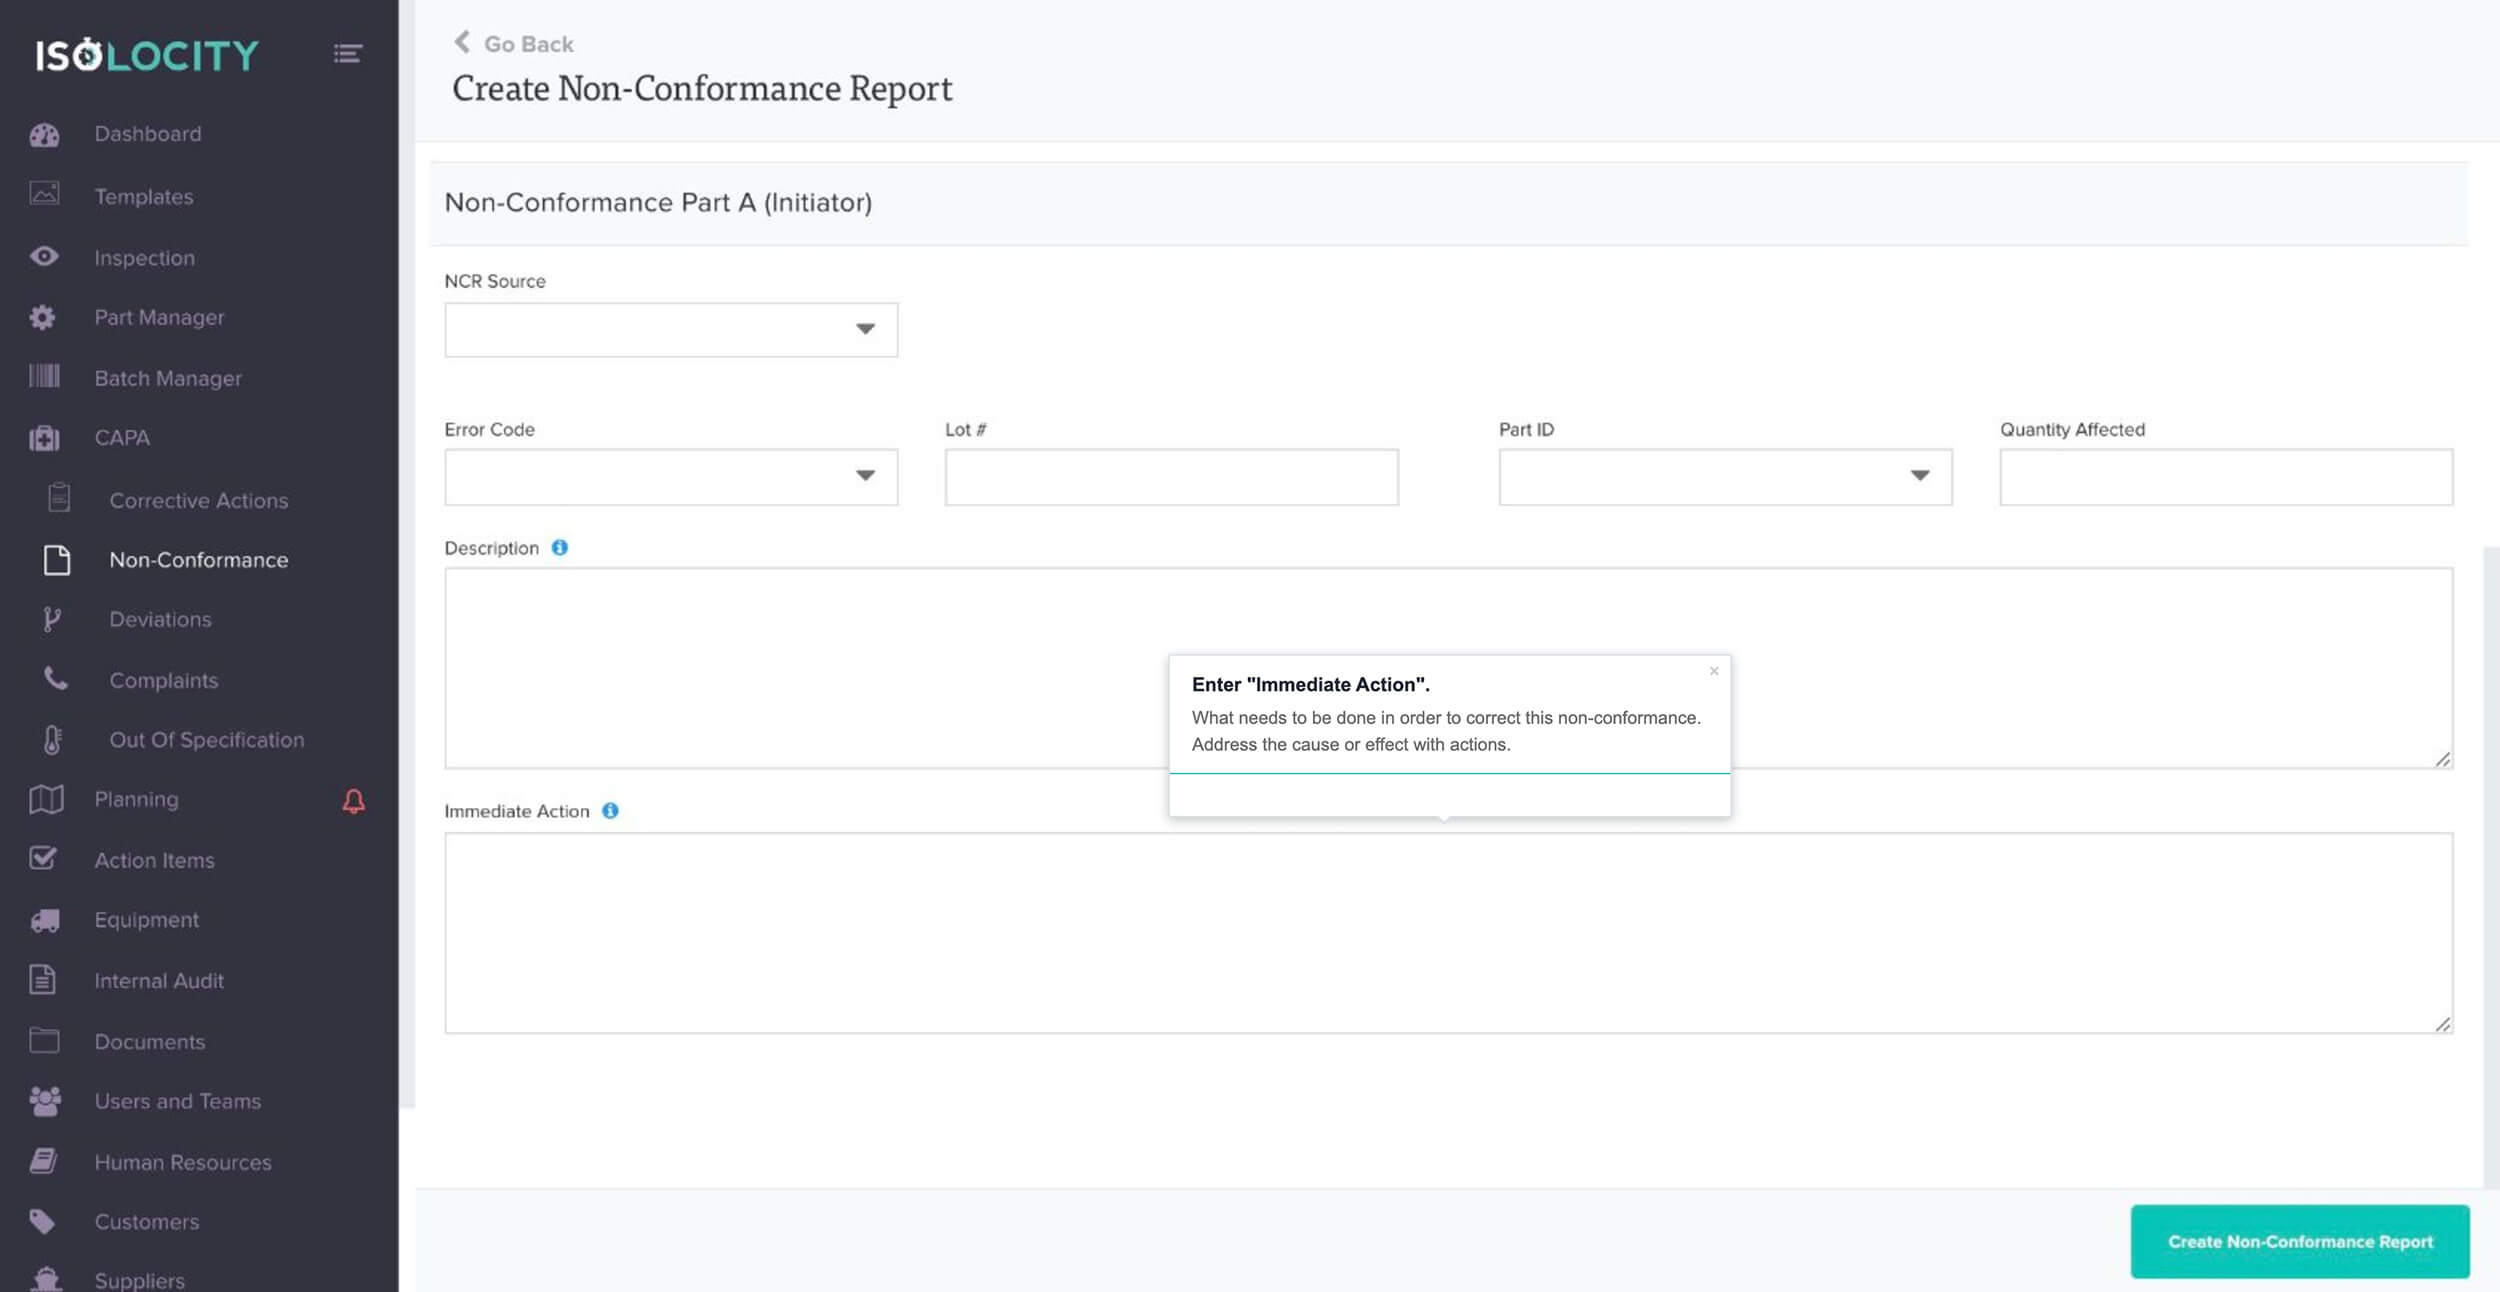
Enter “Description”.
Step #13
Enter “Immediate Action”.
Step #14
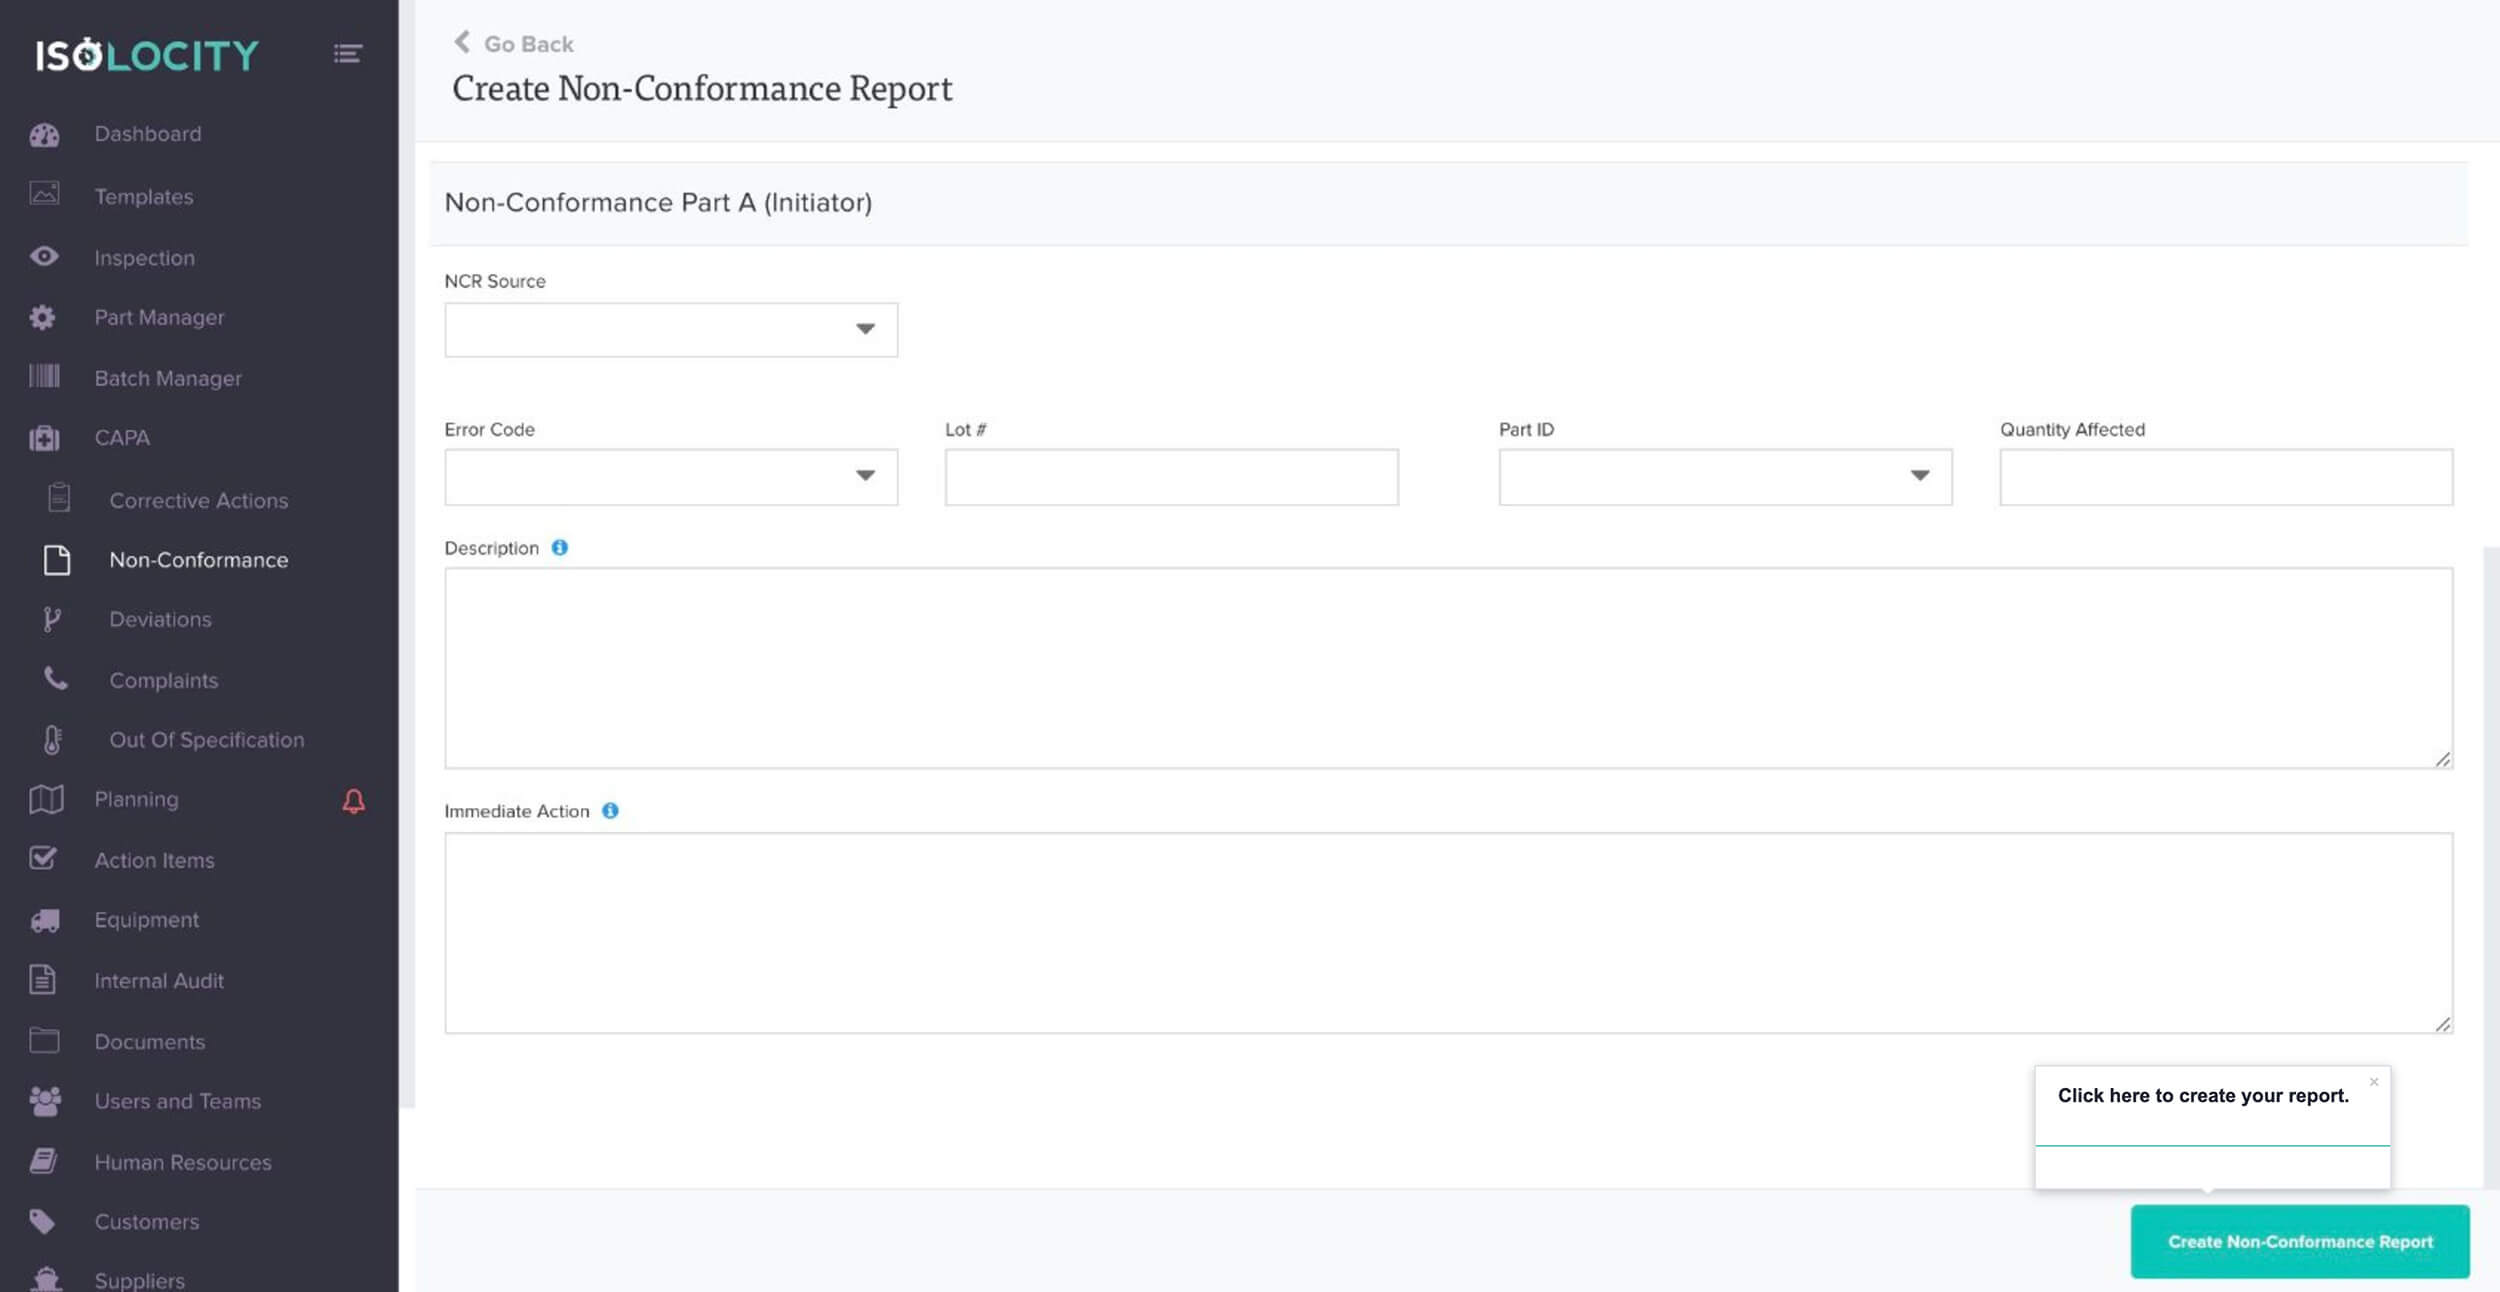
Click here to create your report.
Step #15
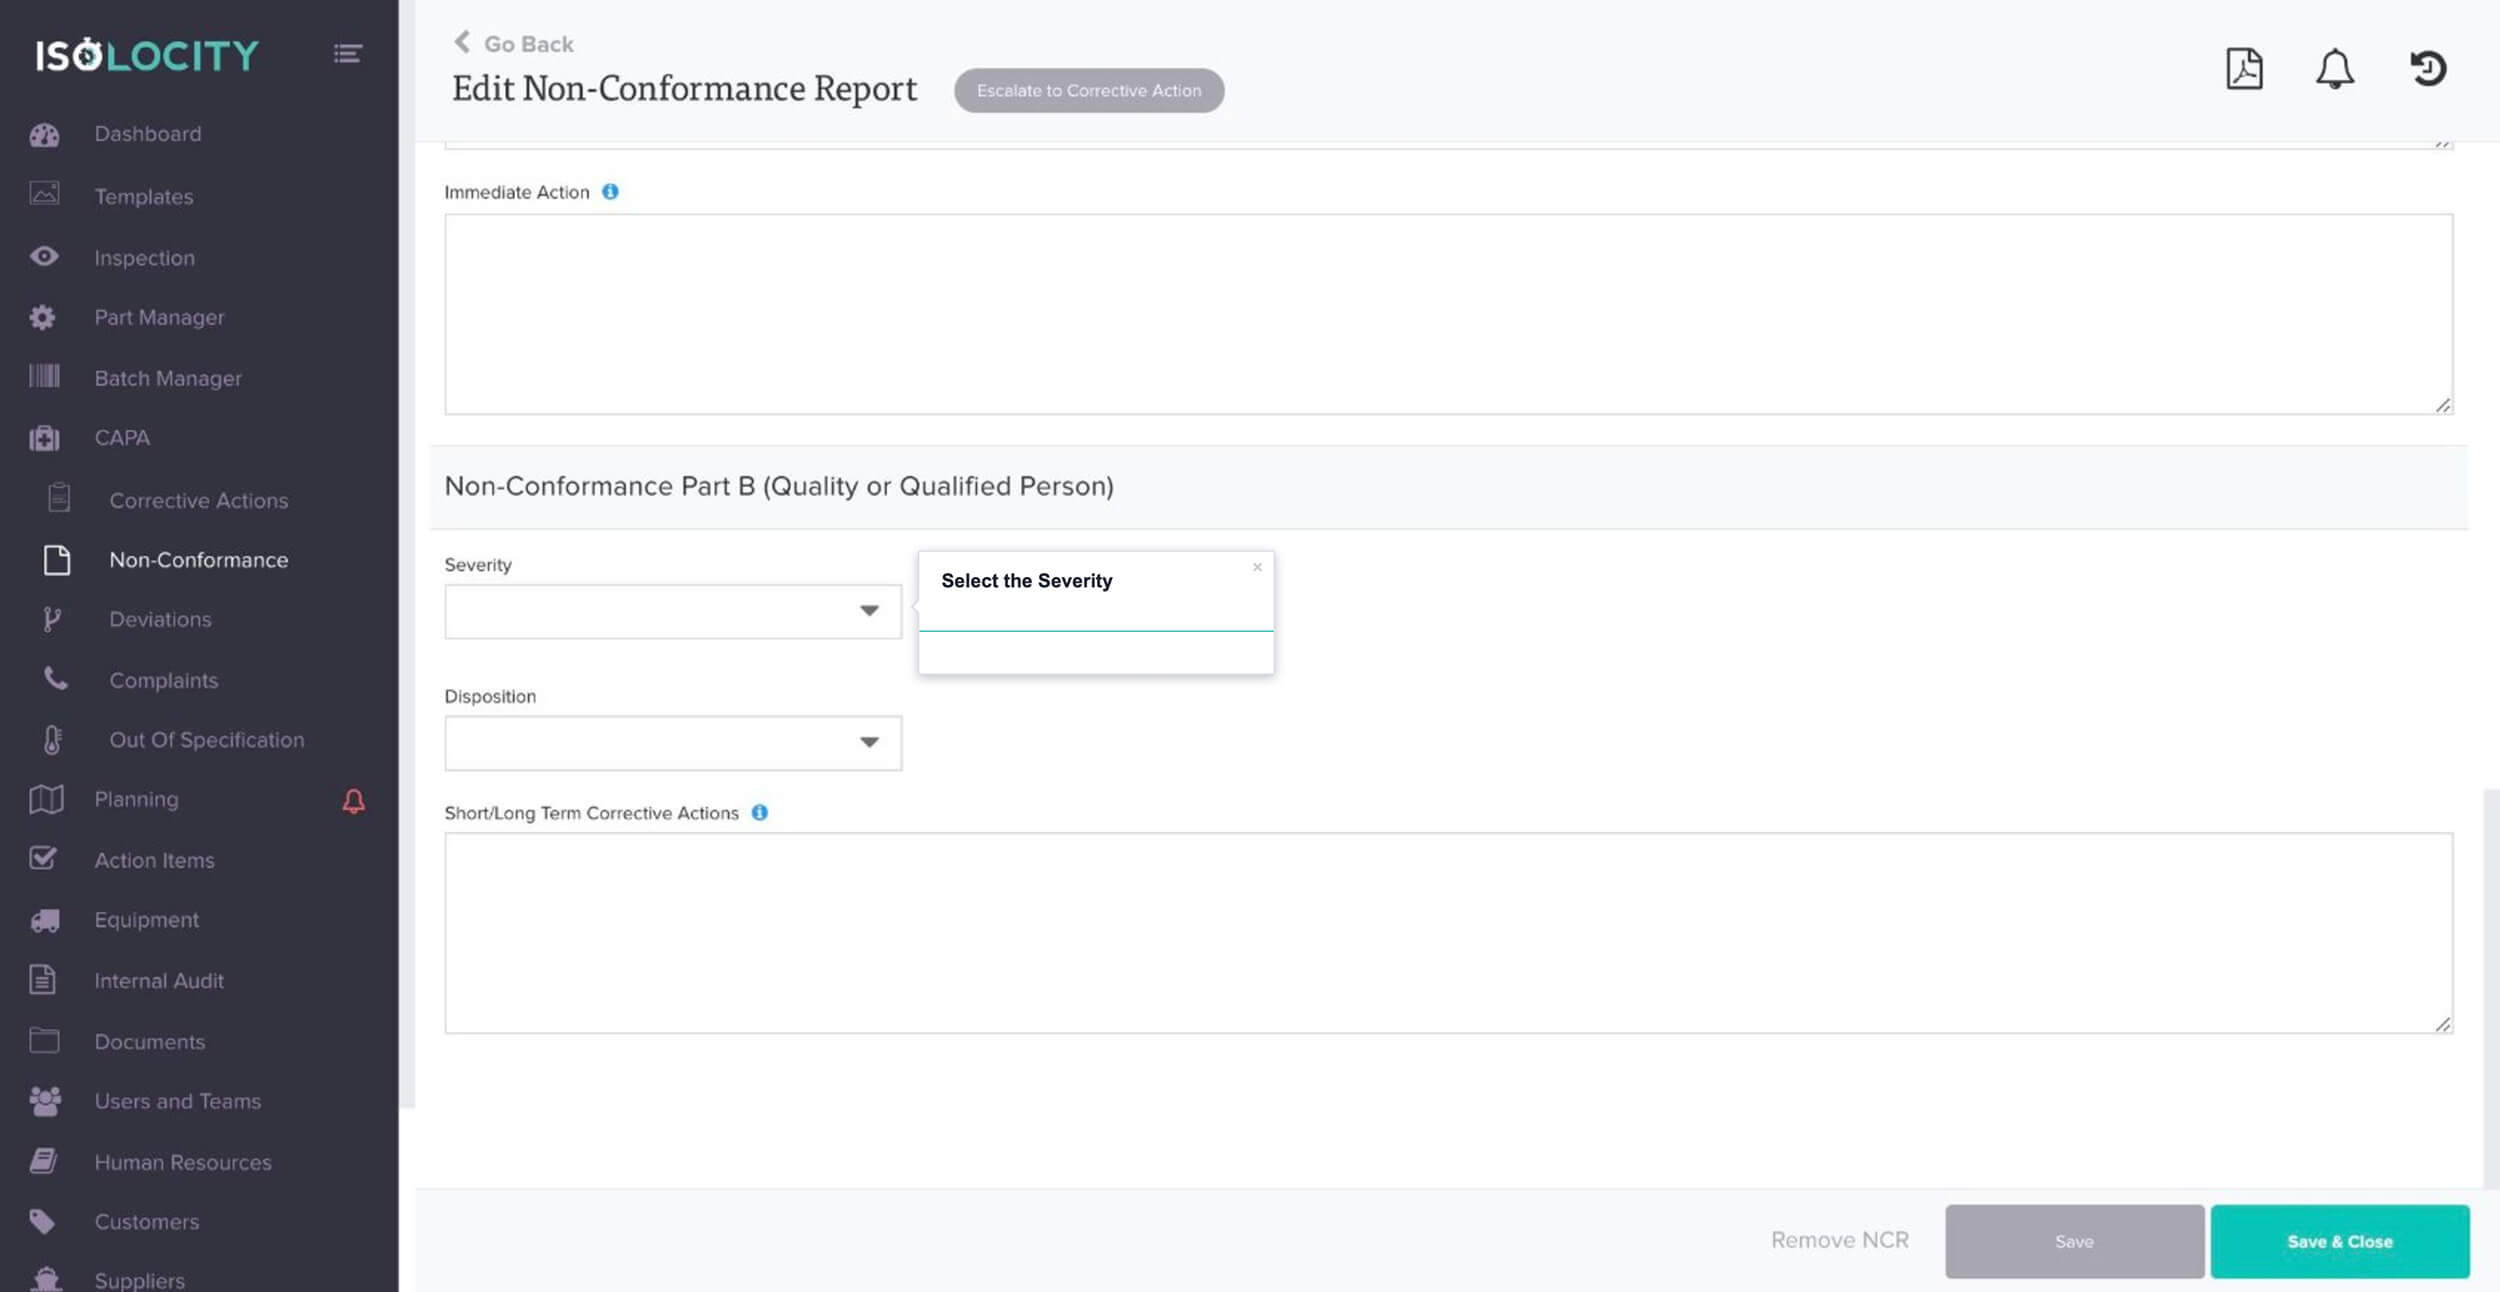
Select the Severity
Step #16
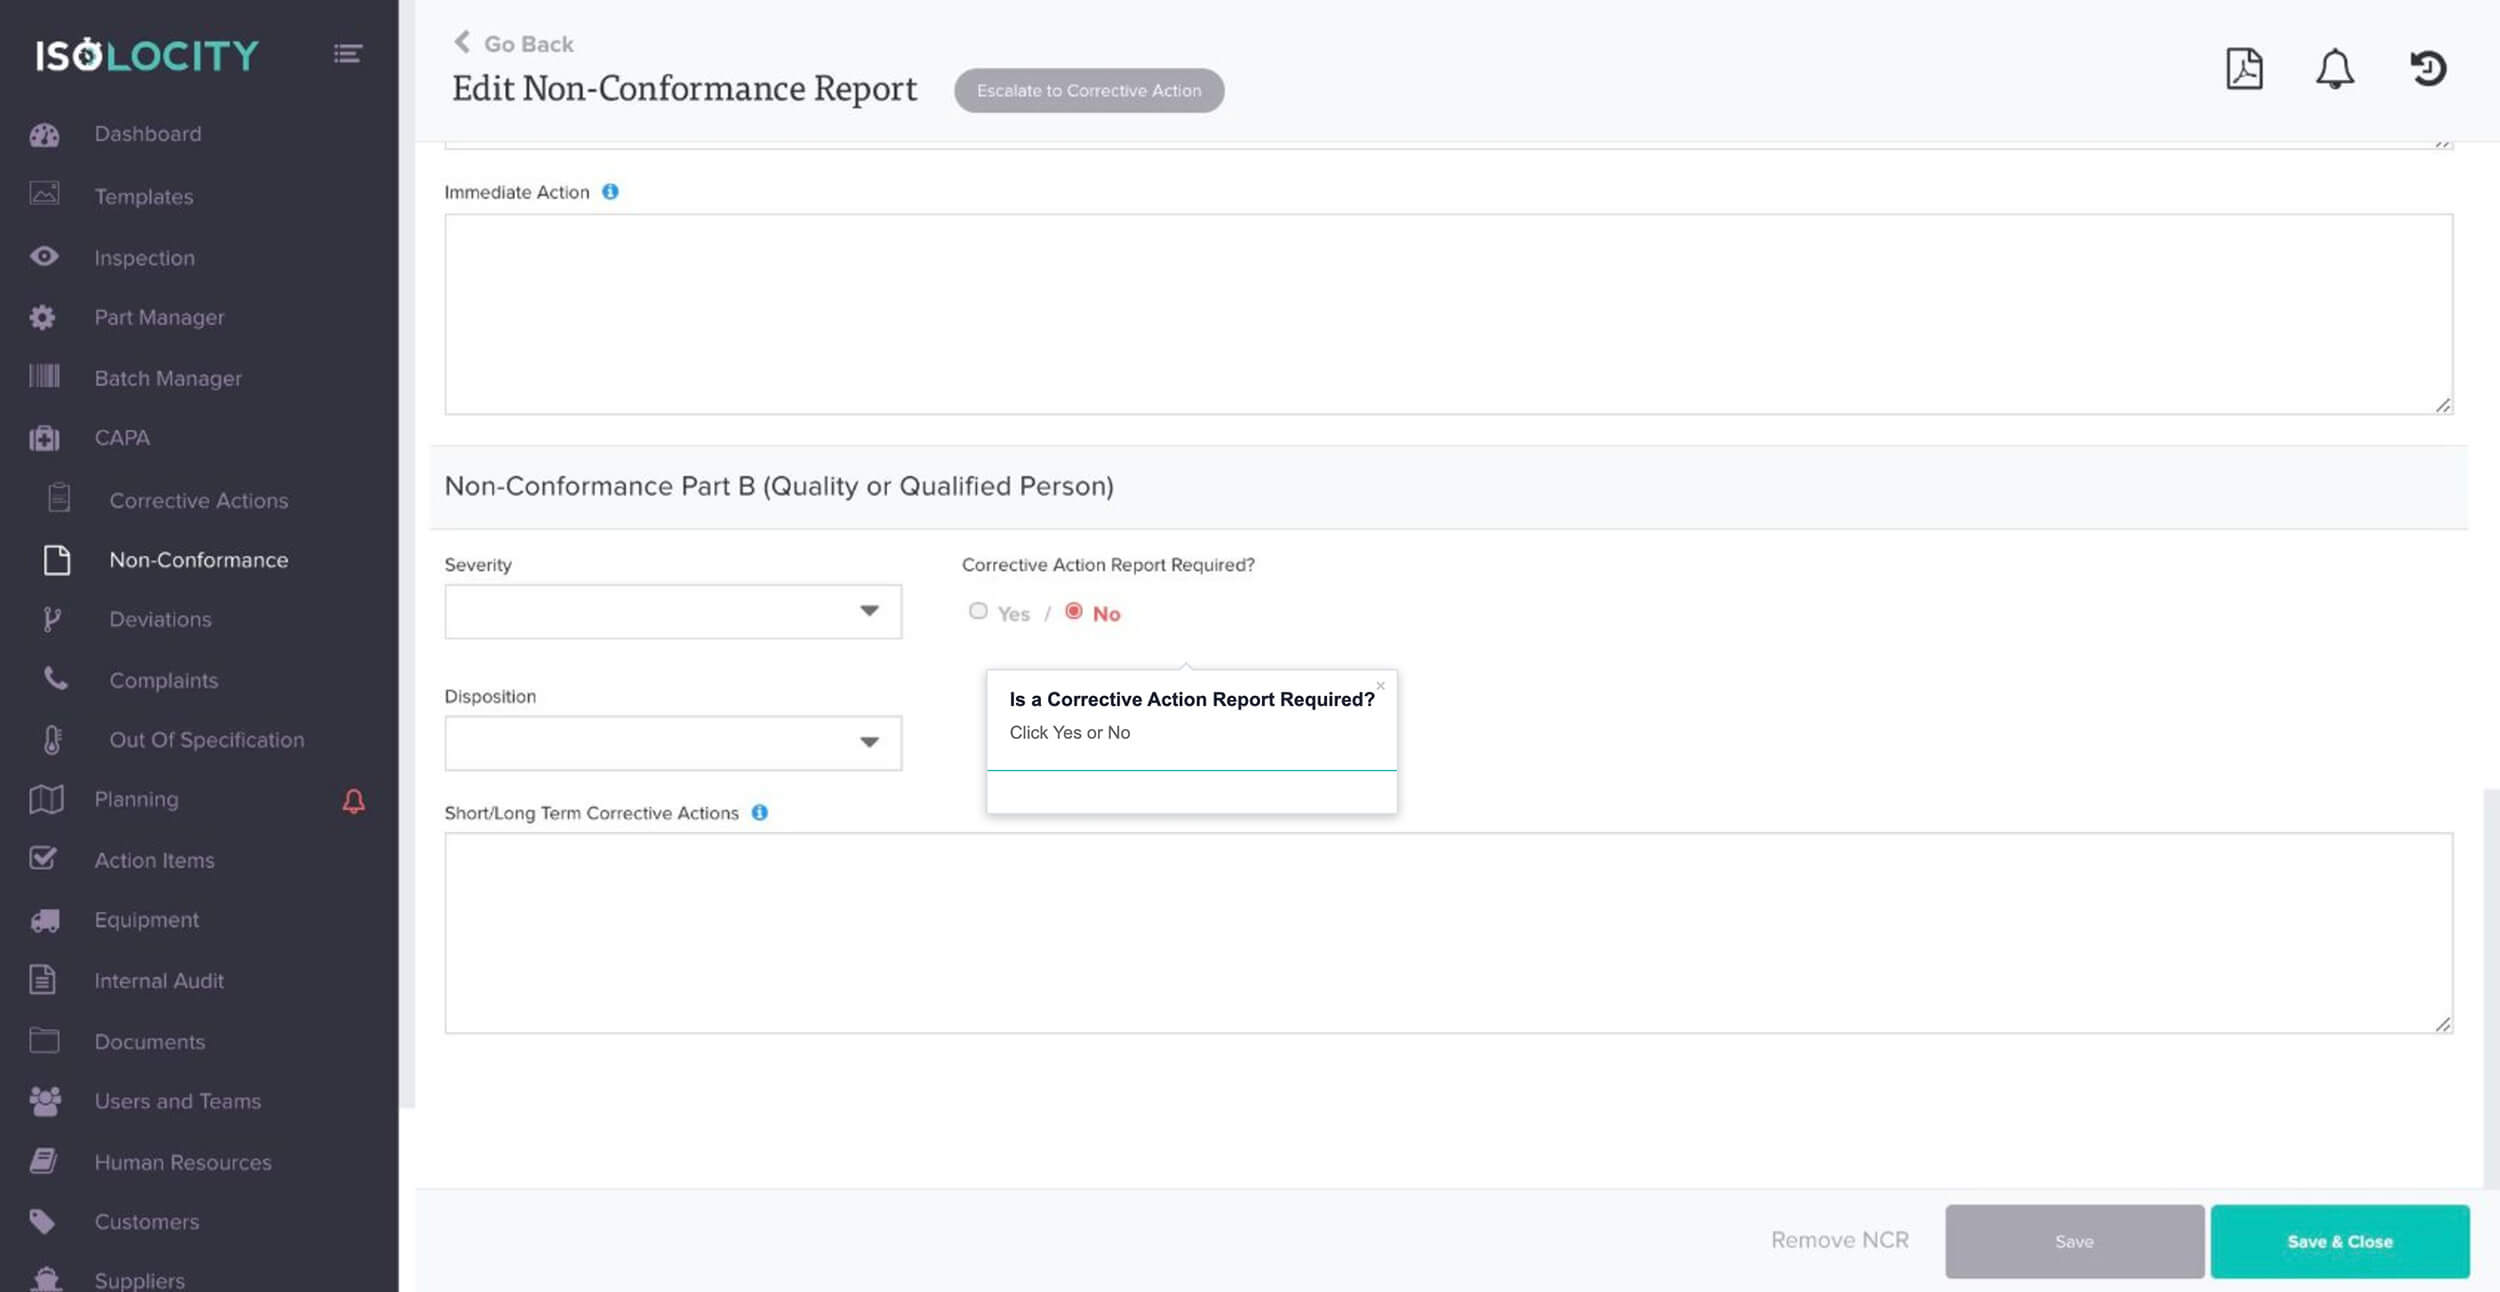
Is a Corrective Action Report Required?
Step #17
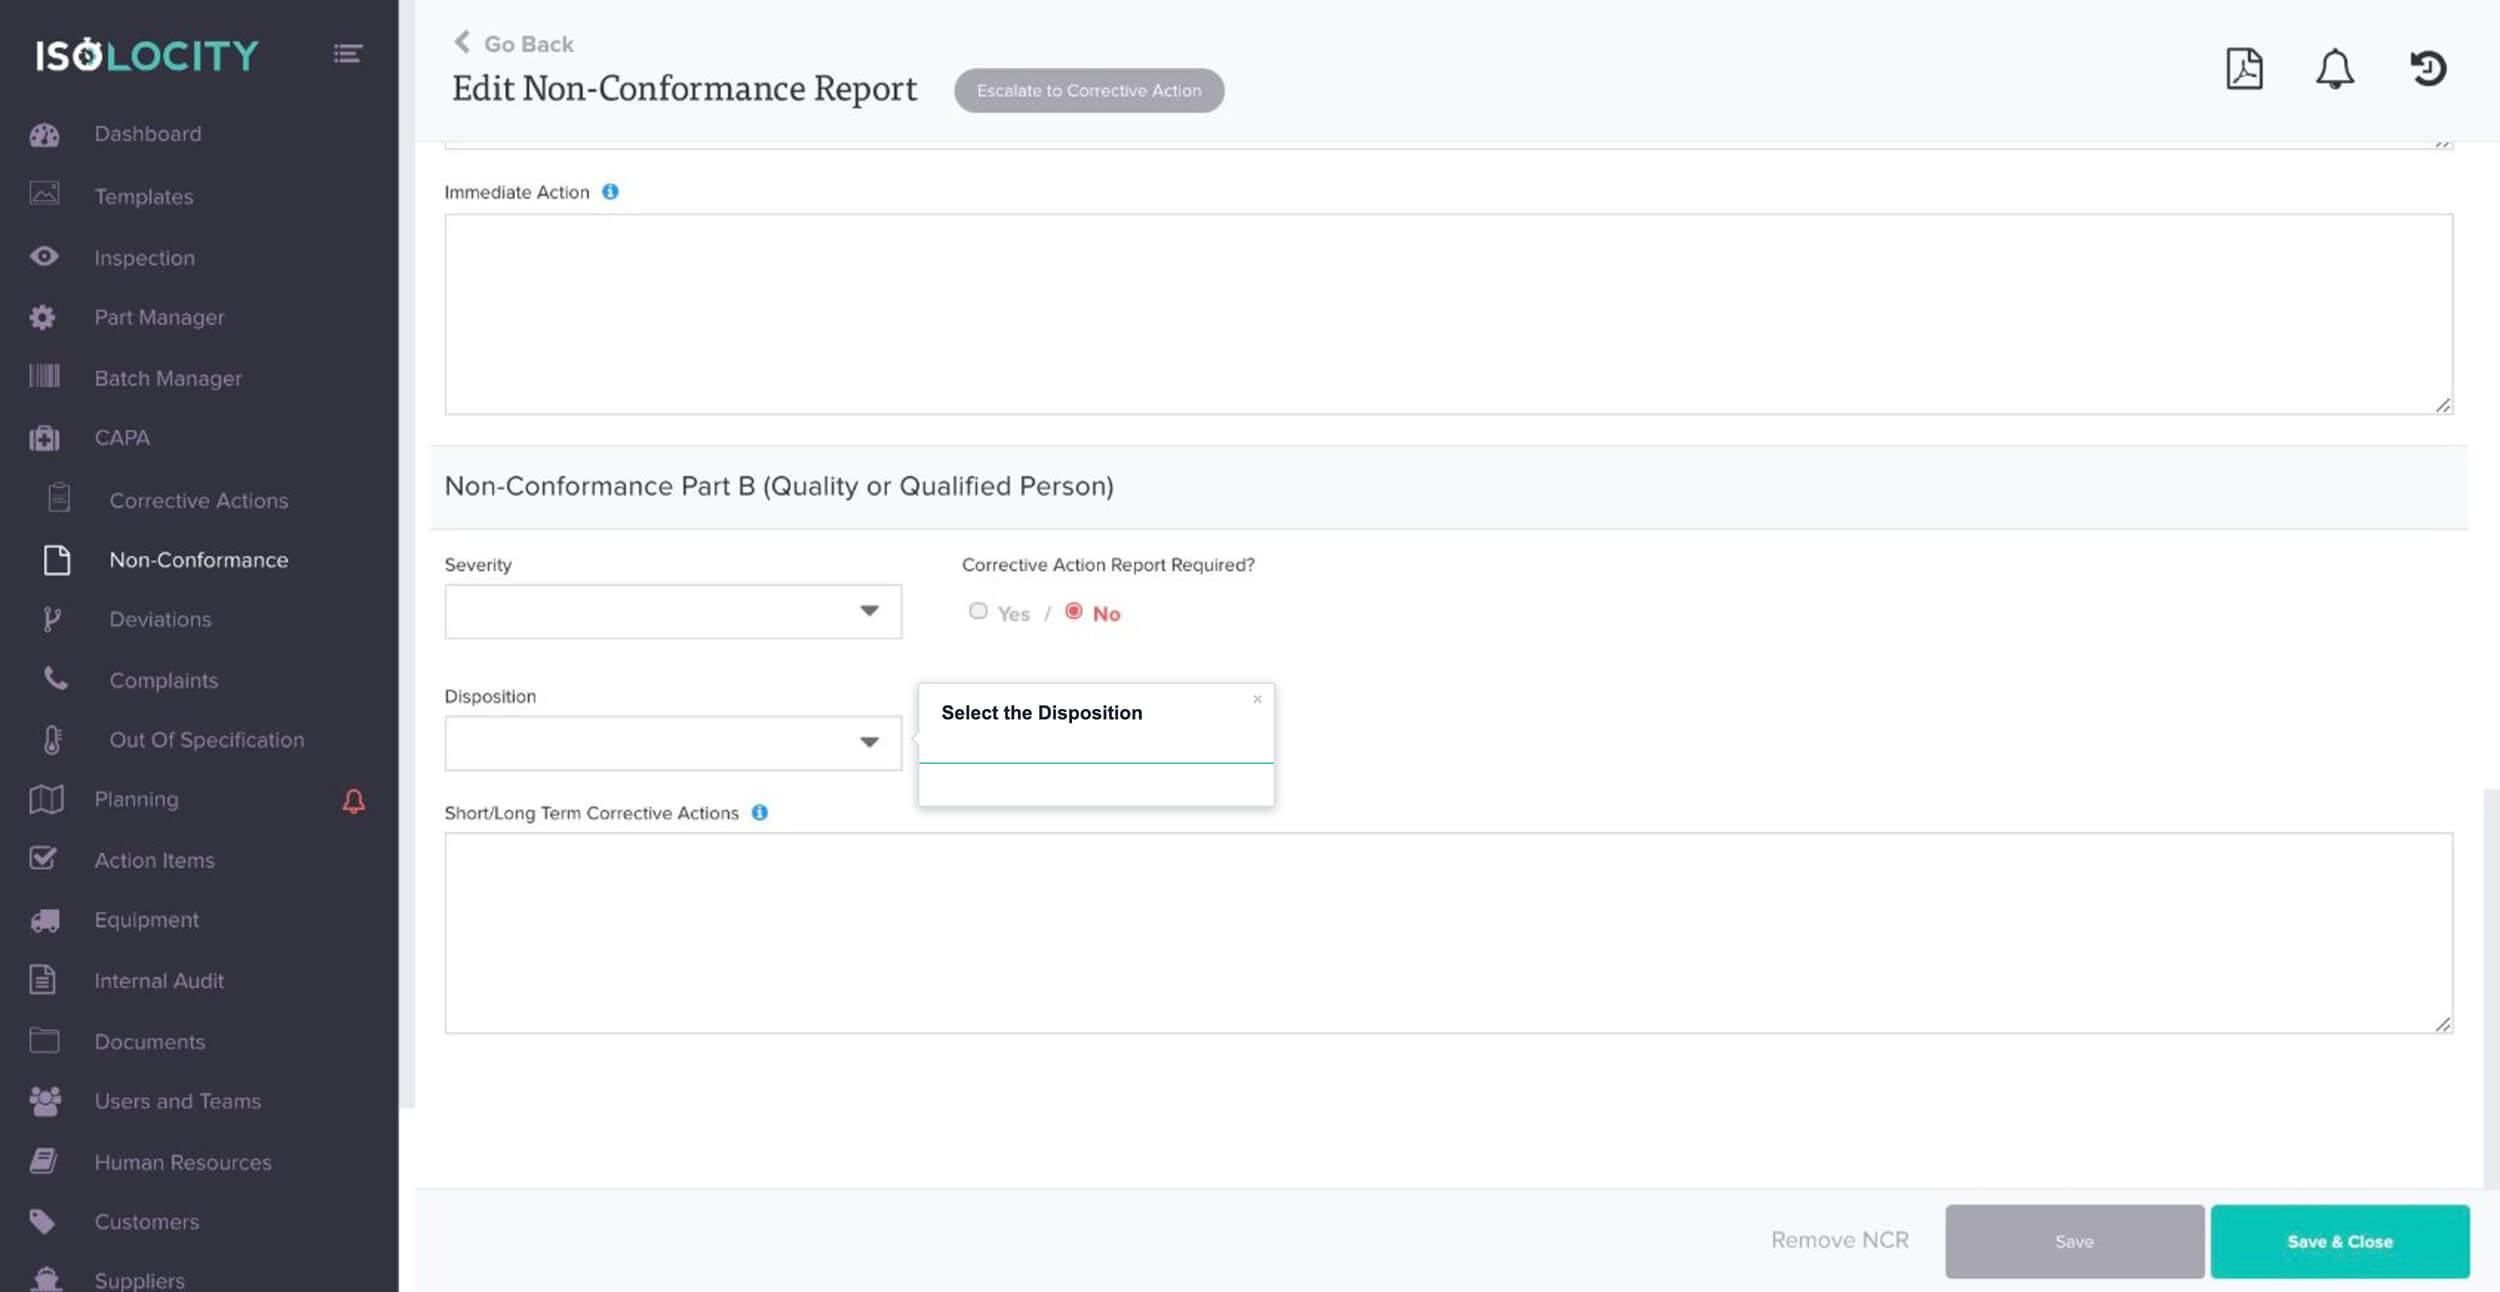
Select the Disposition
Step #18
Enter any Short/Long Term Corrective Actions
Step #19
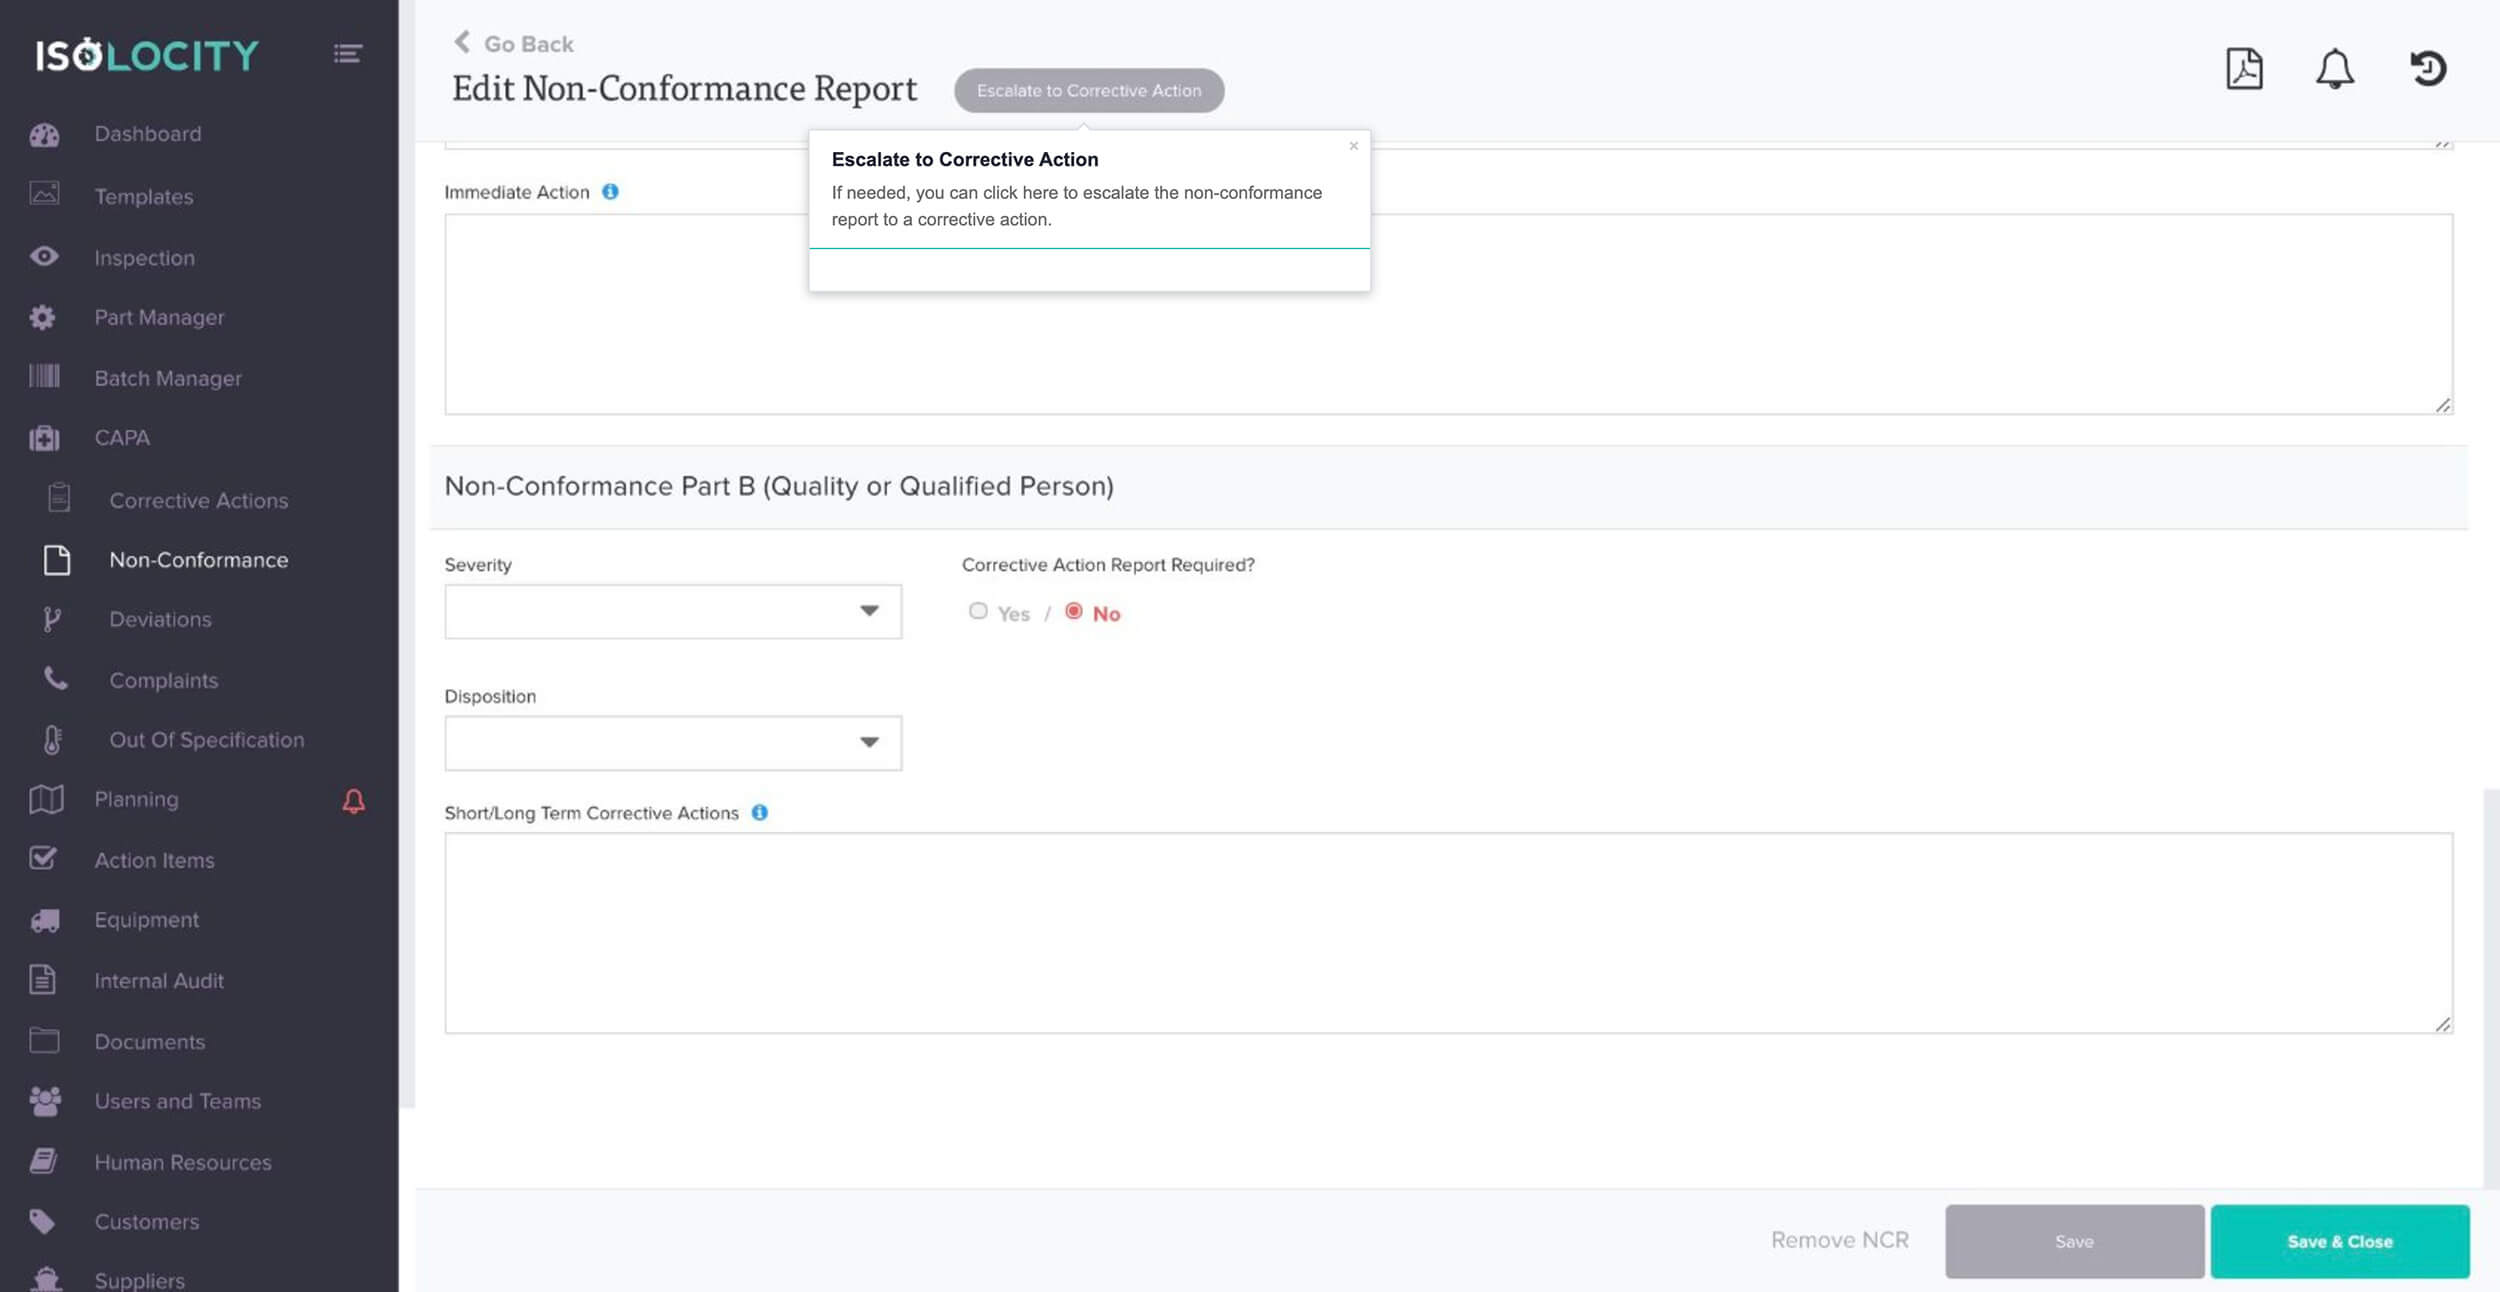
Escalate to Corrective Action
Step #20
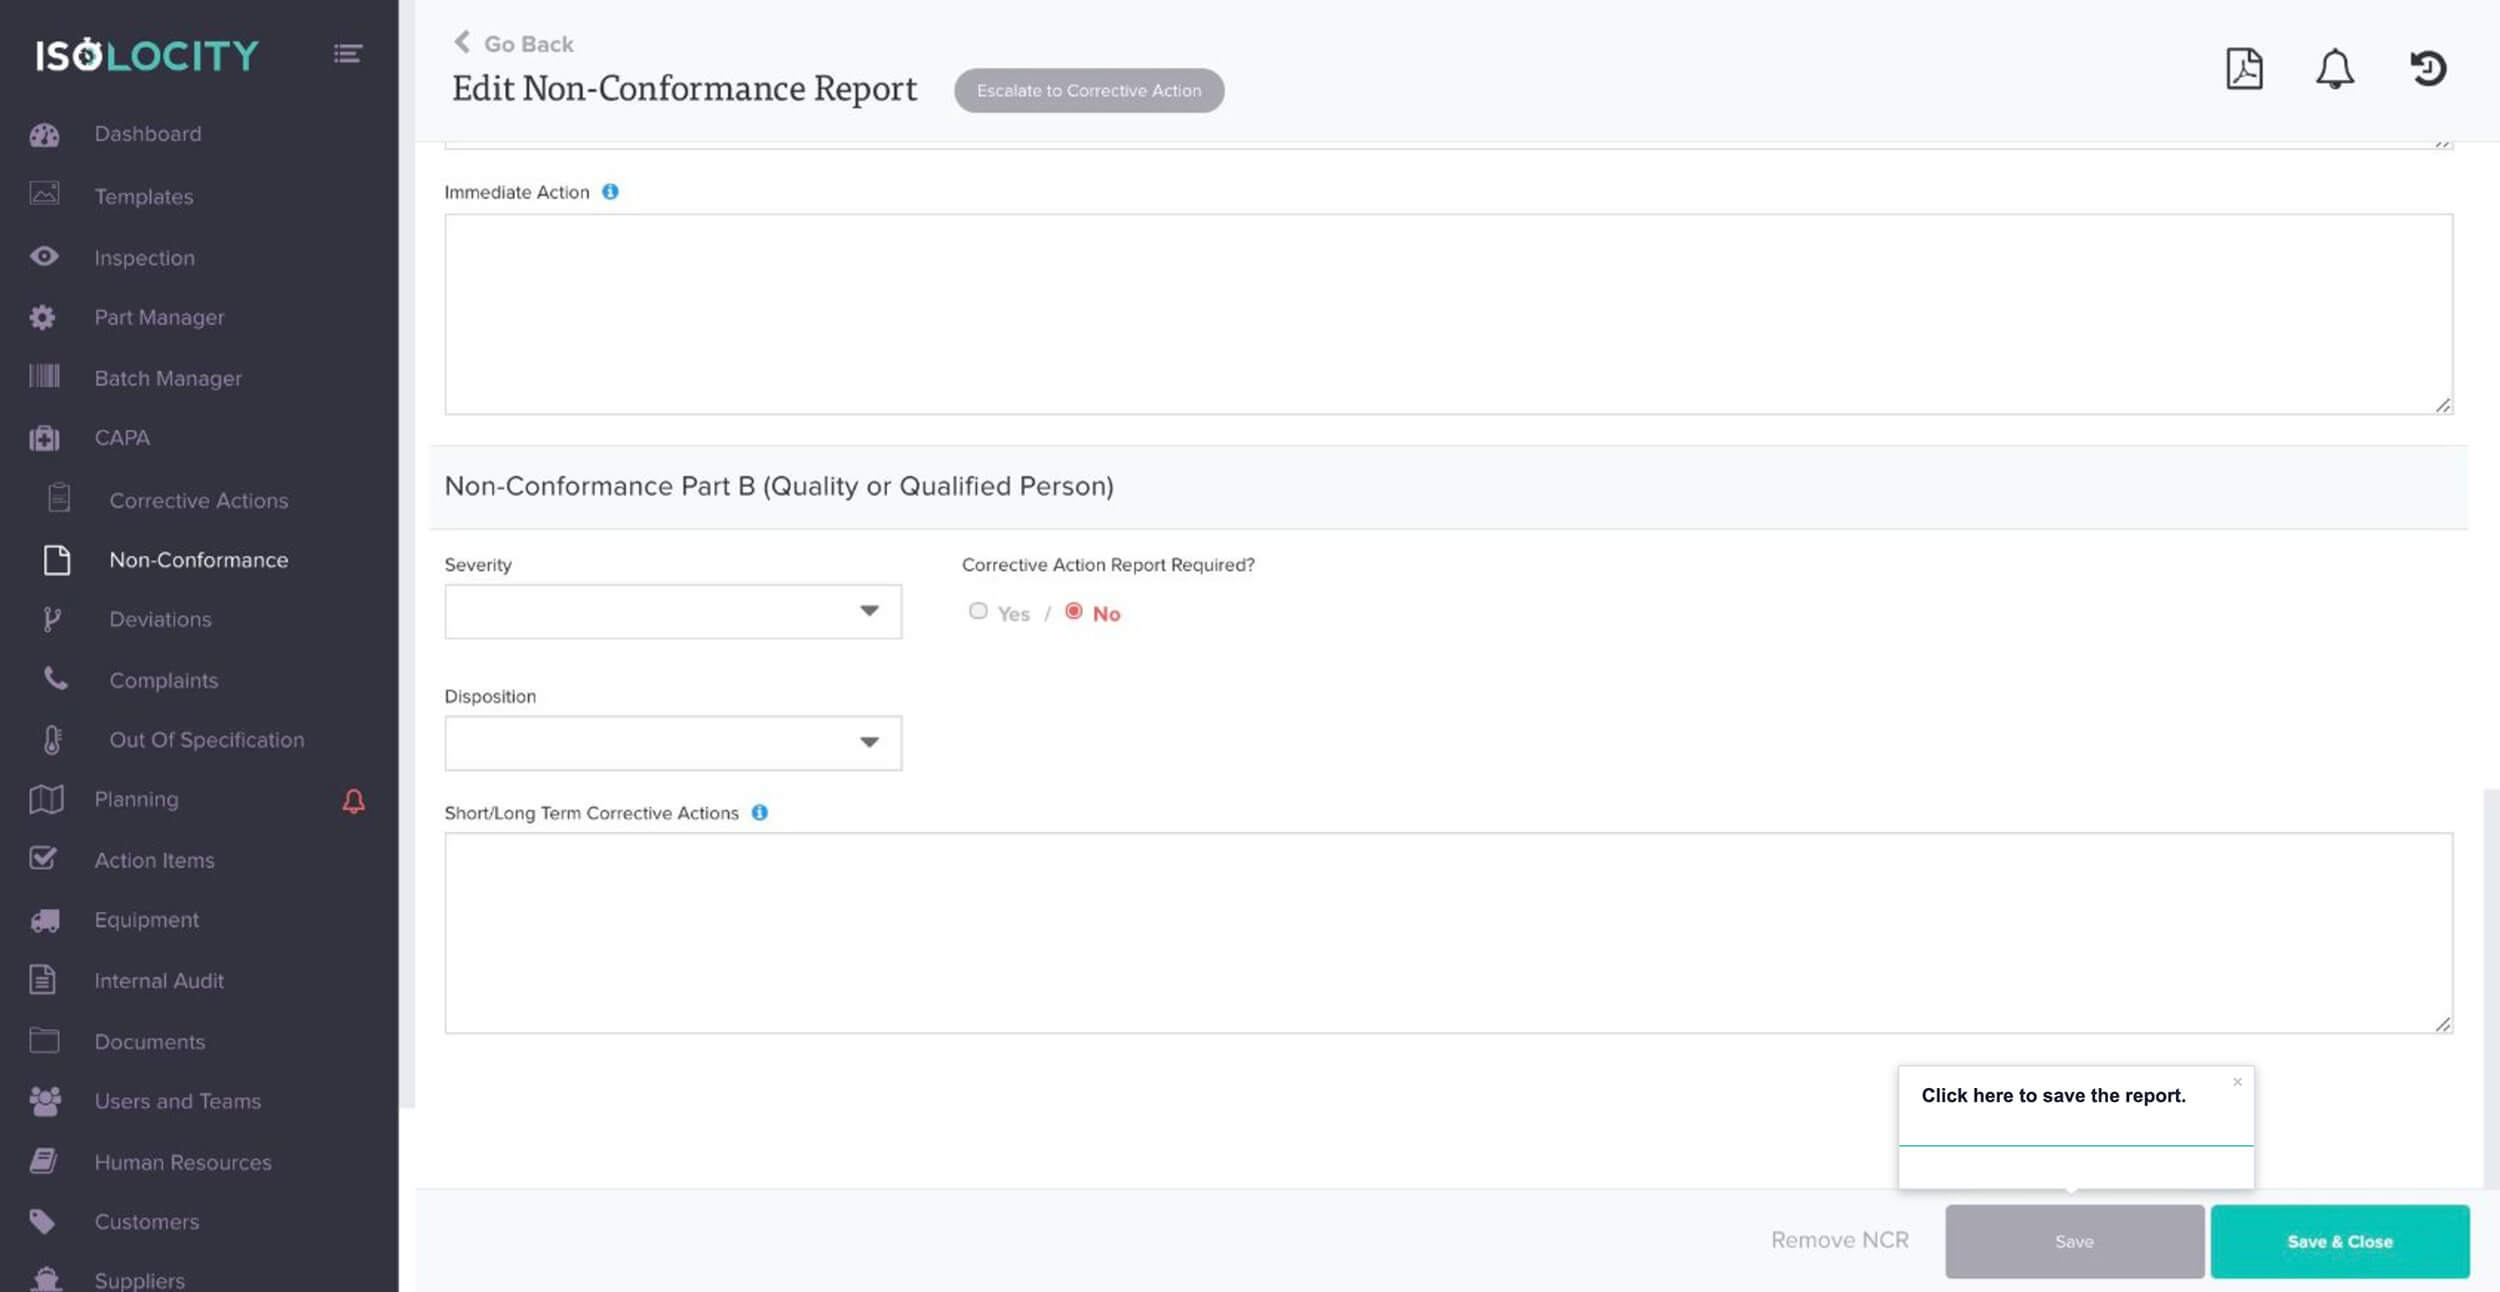
Click here to save the report.
Step #21
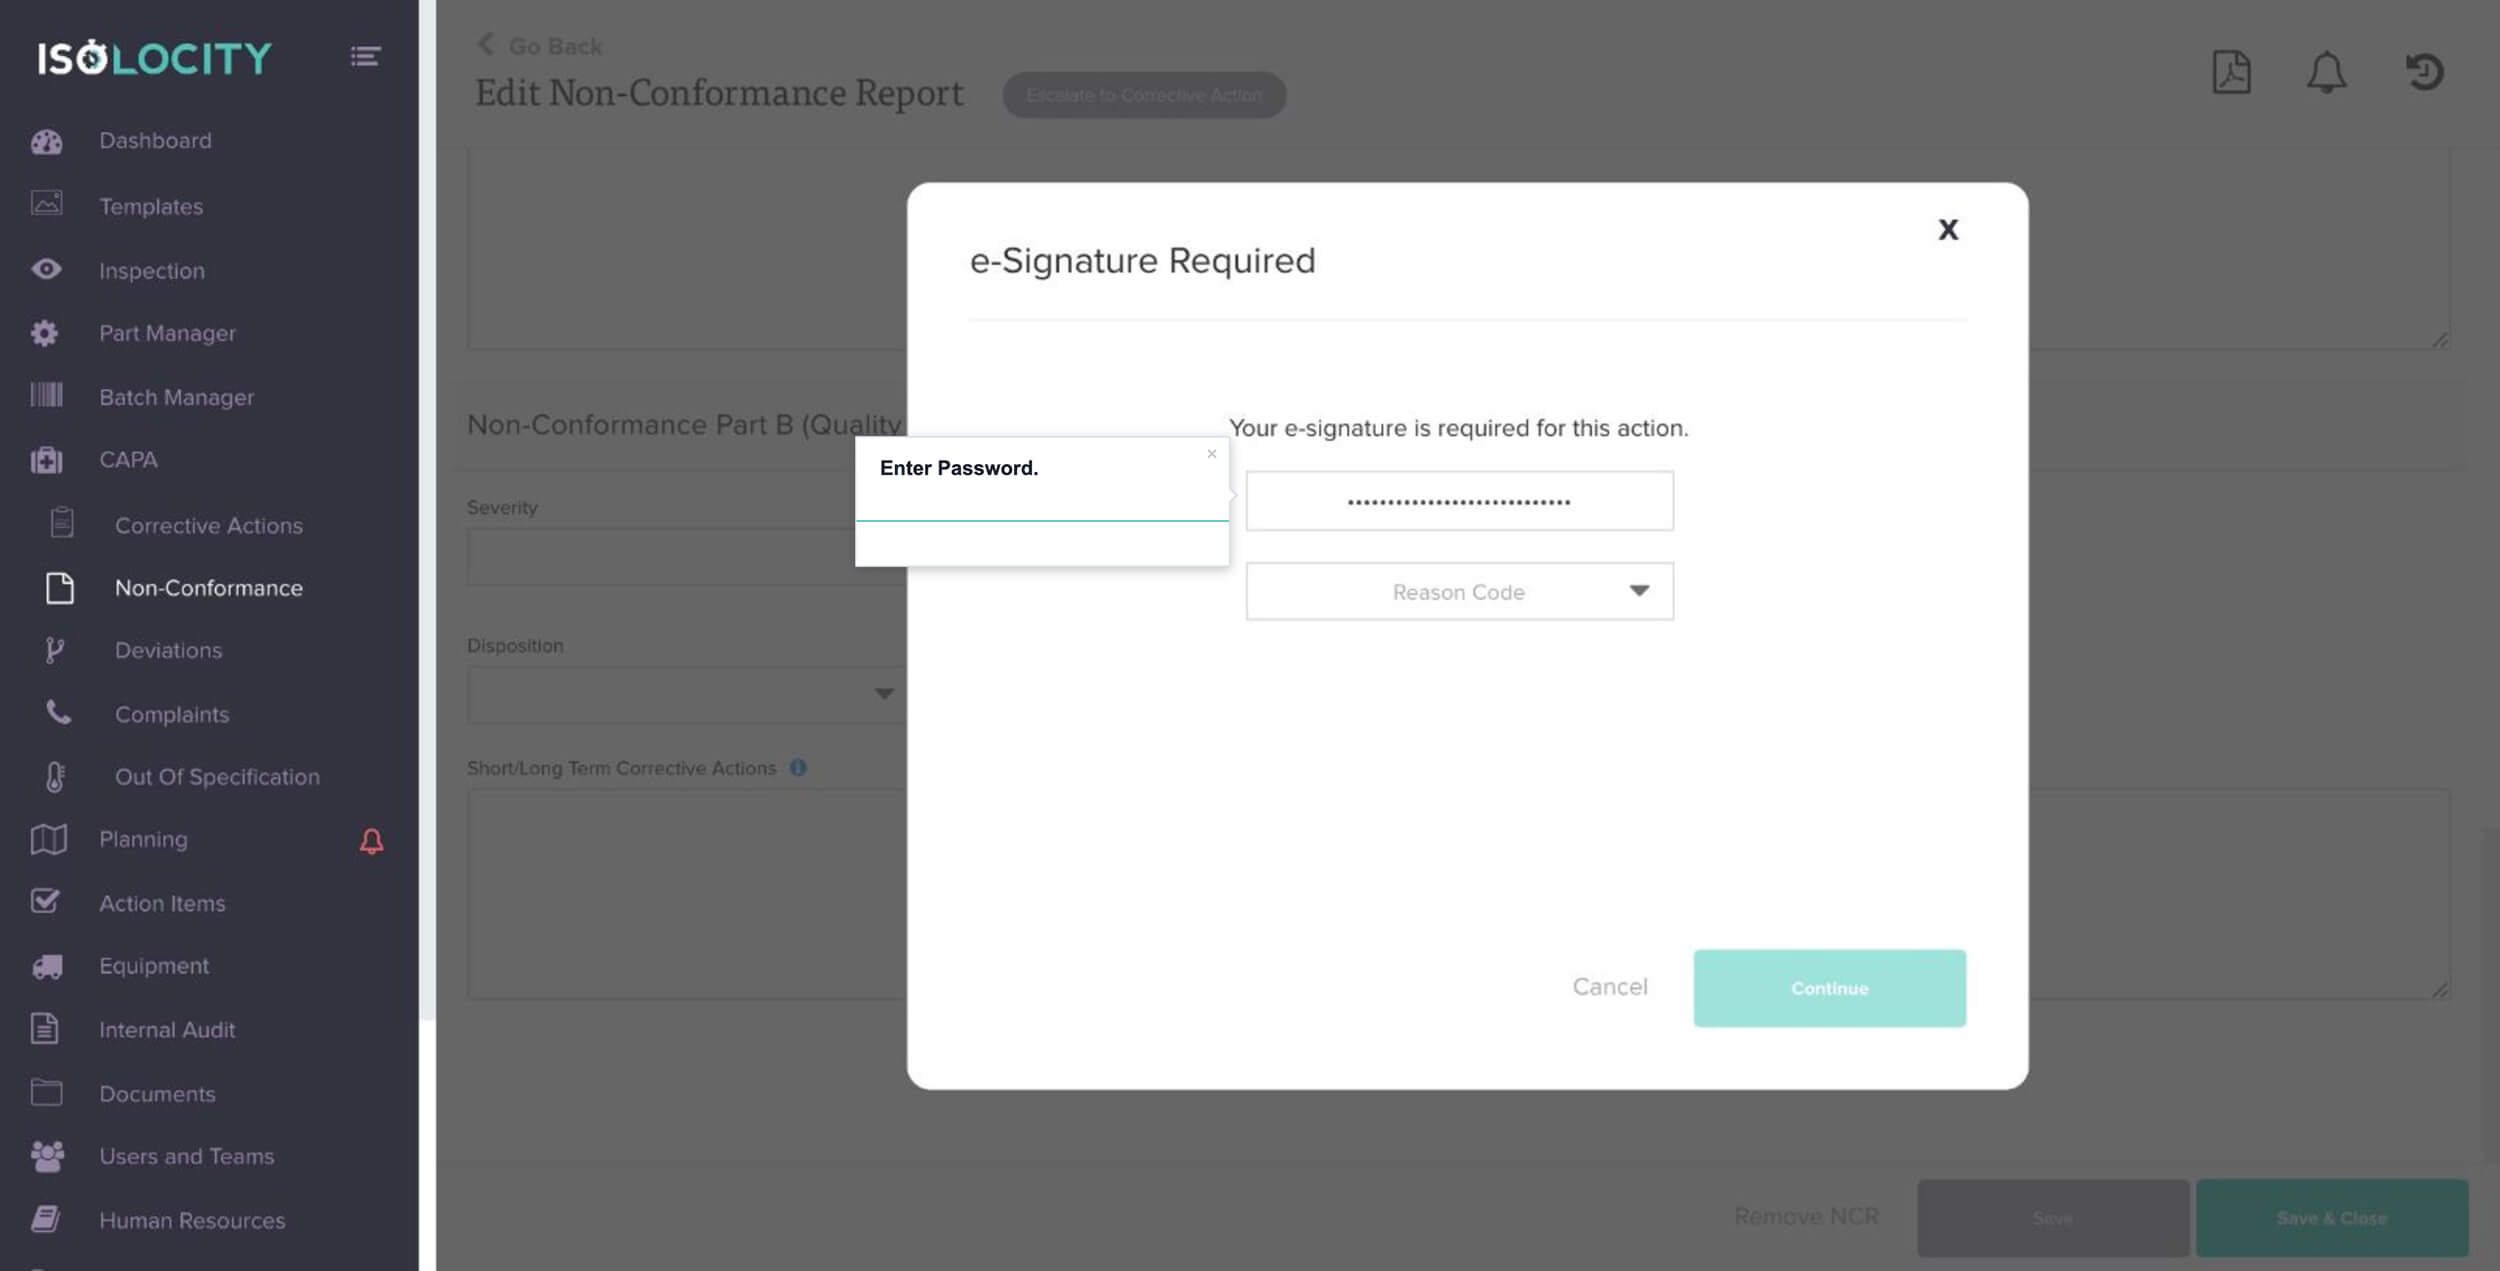
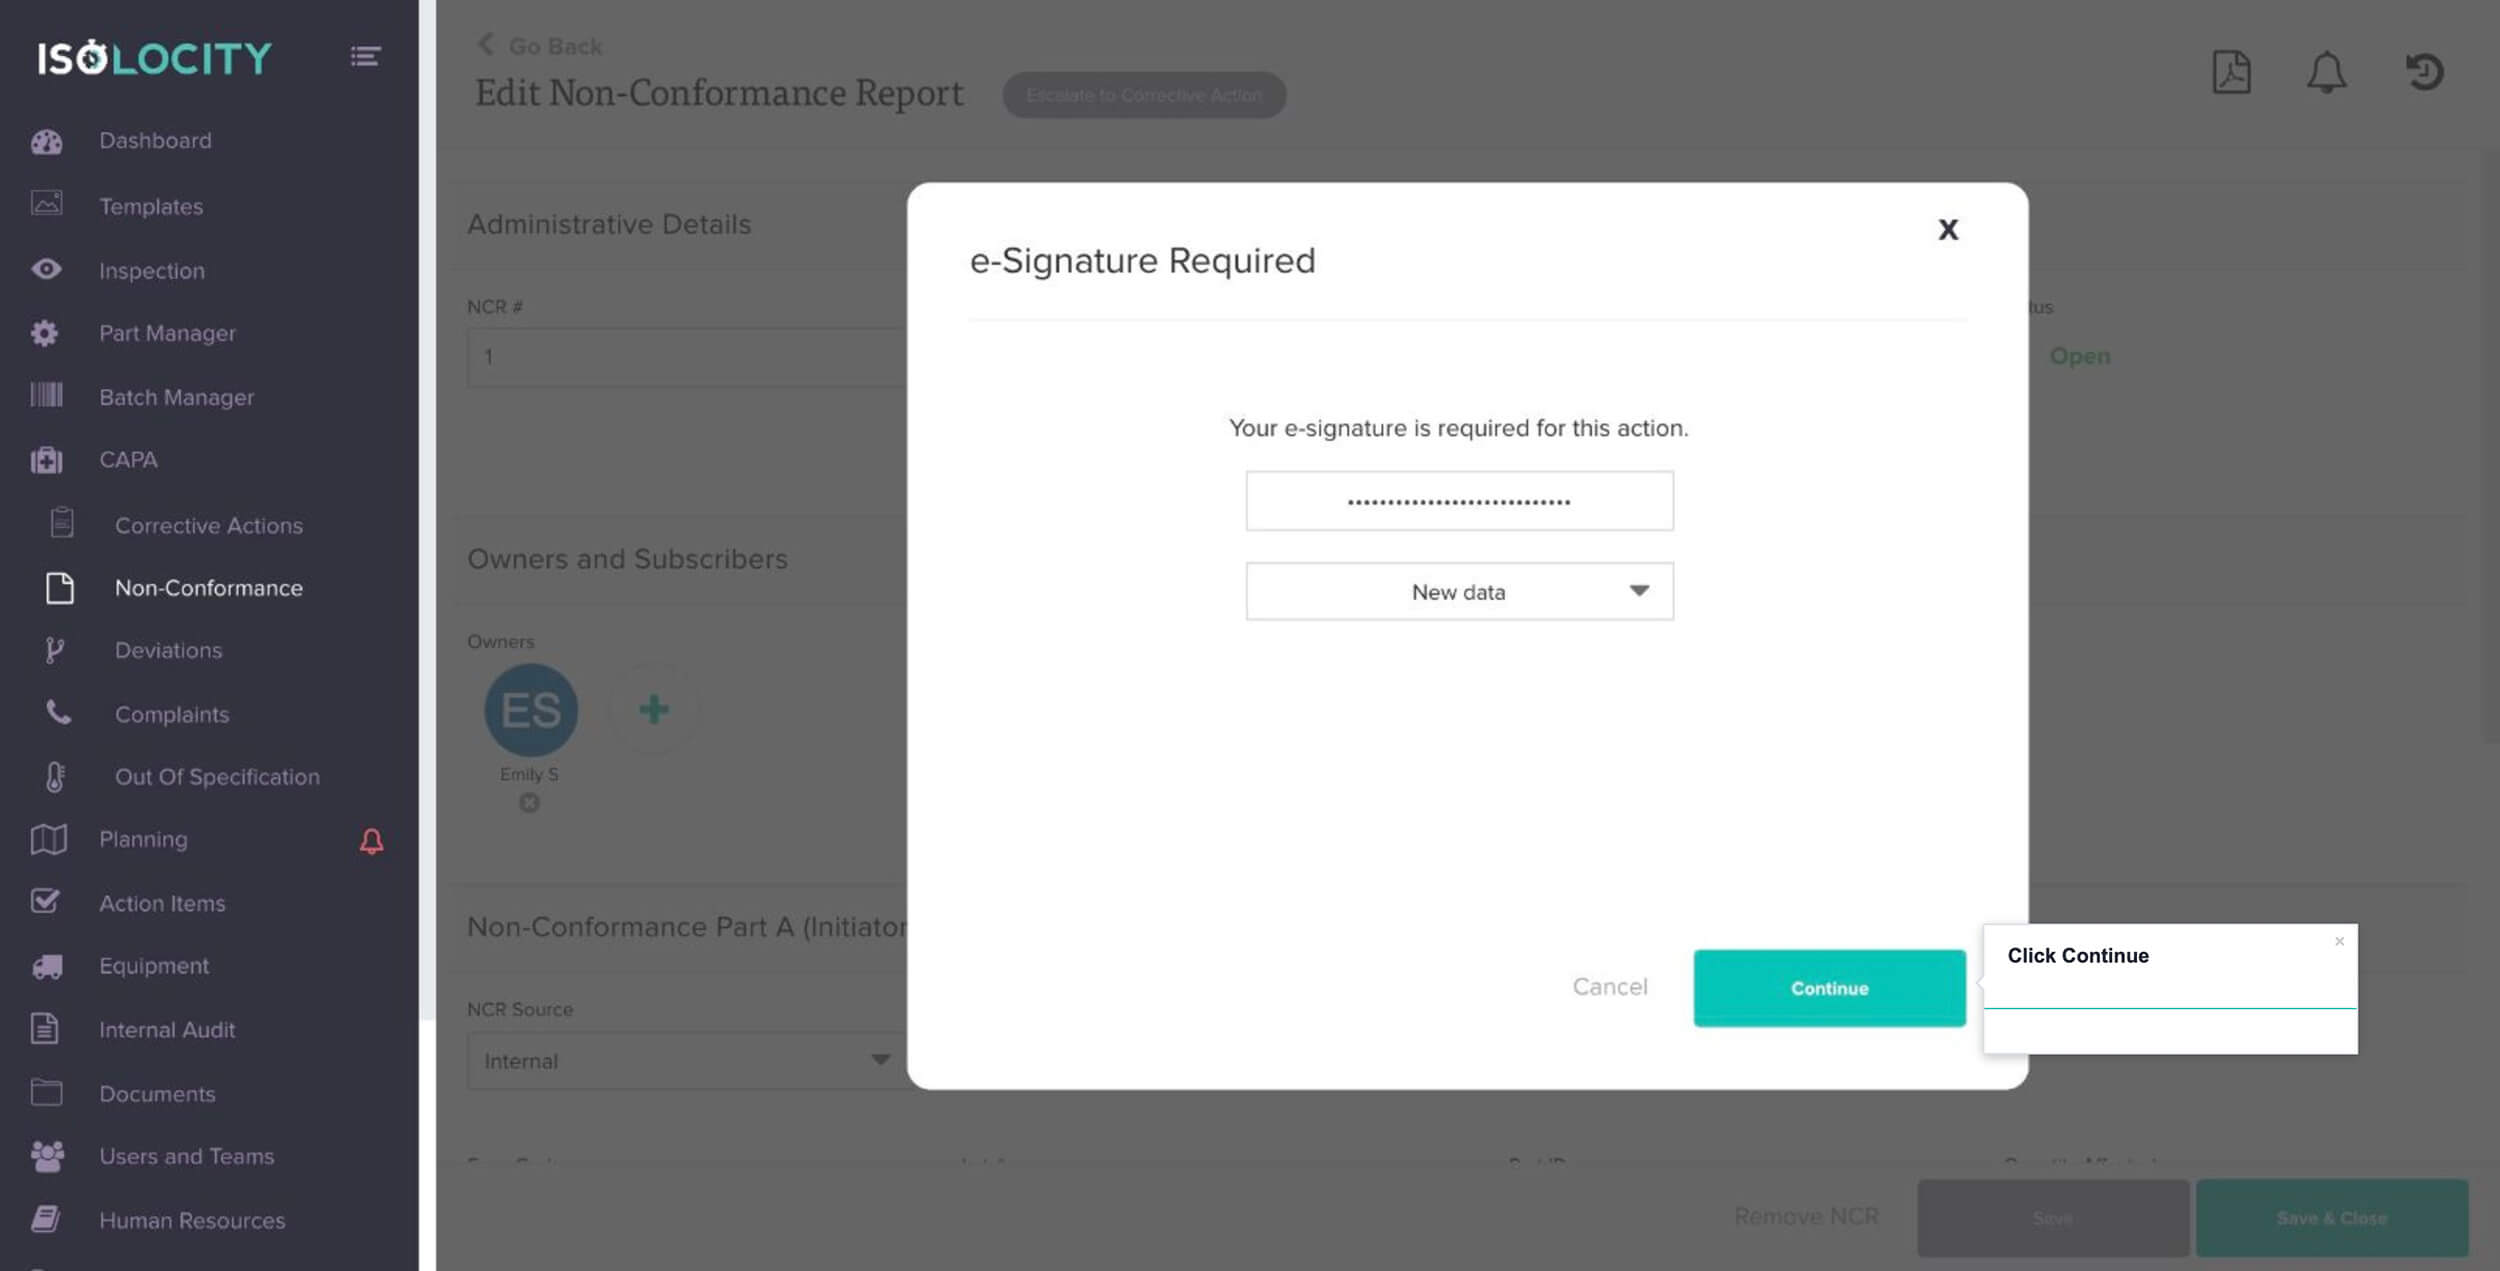
Enter Password.
Step #22
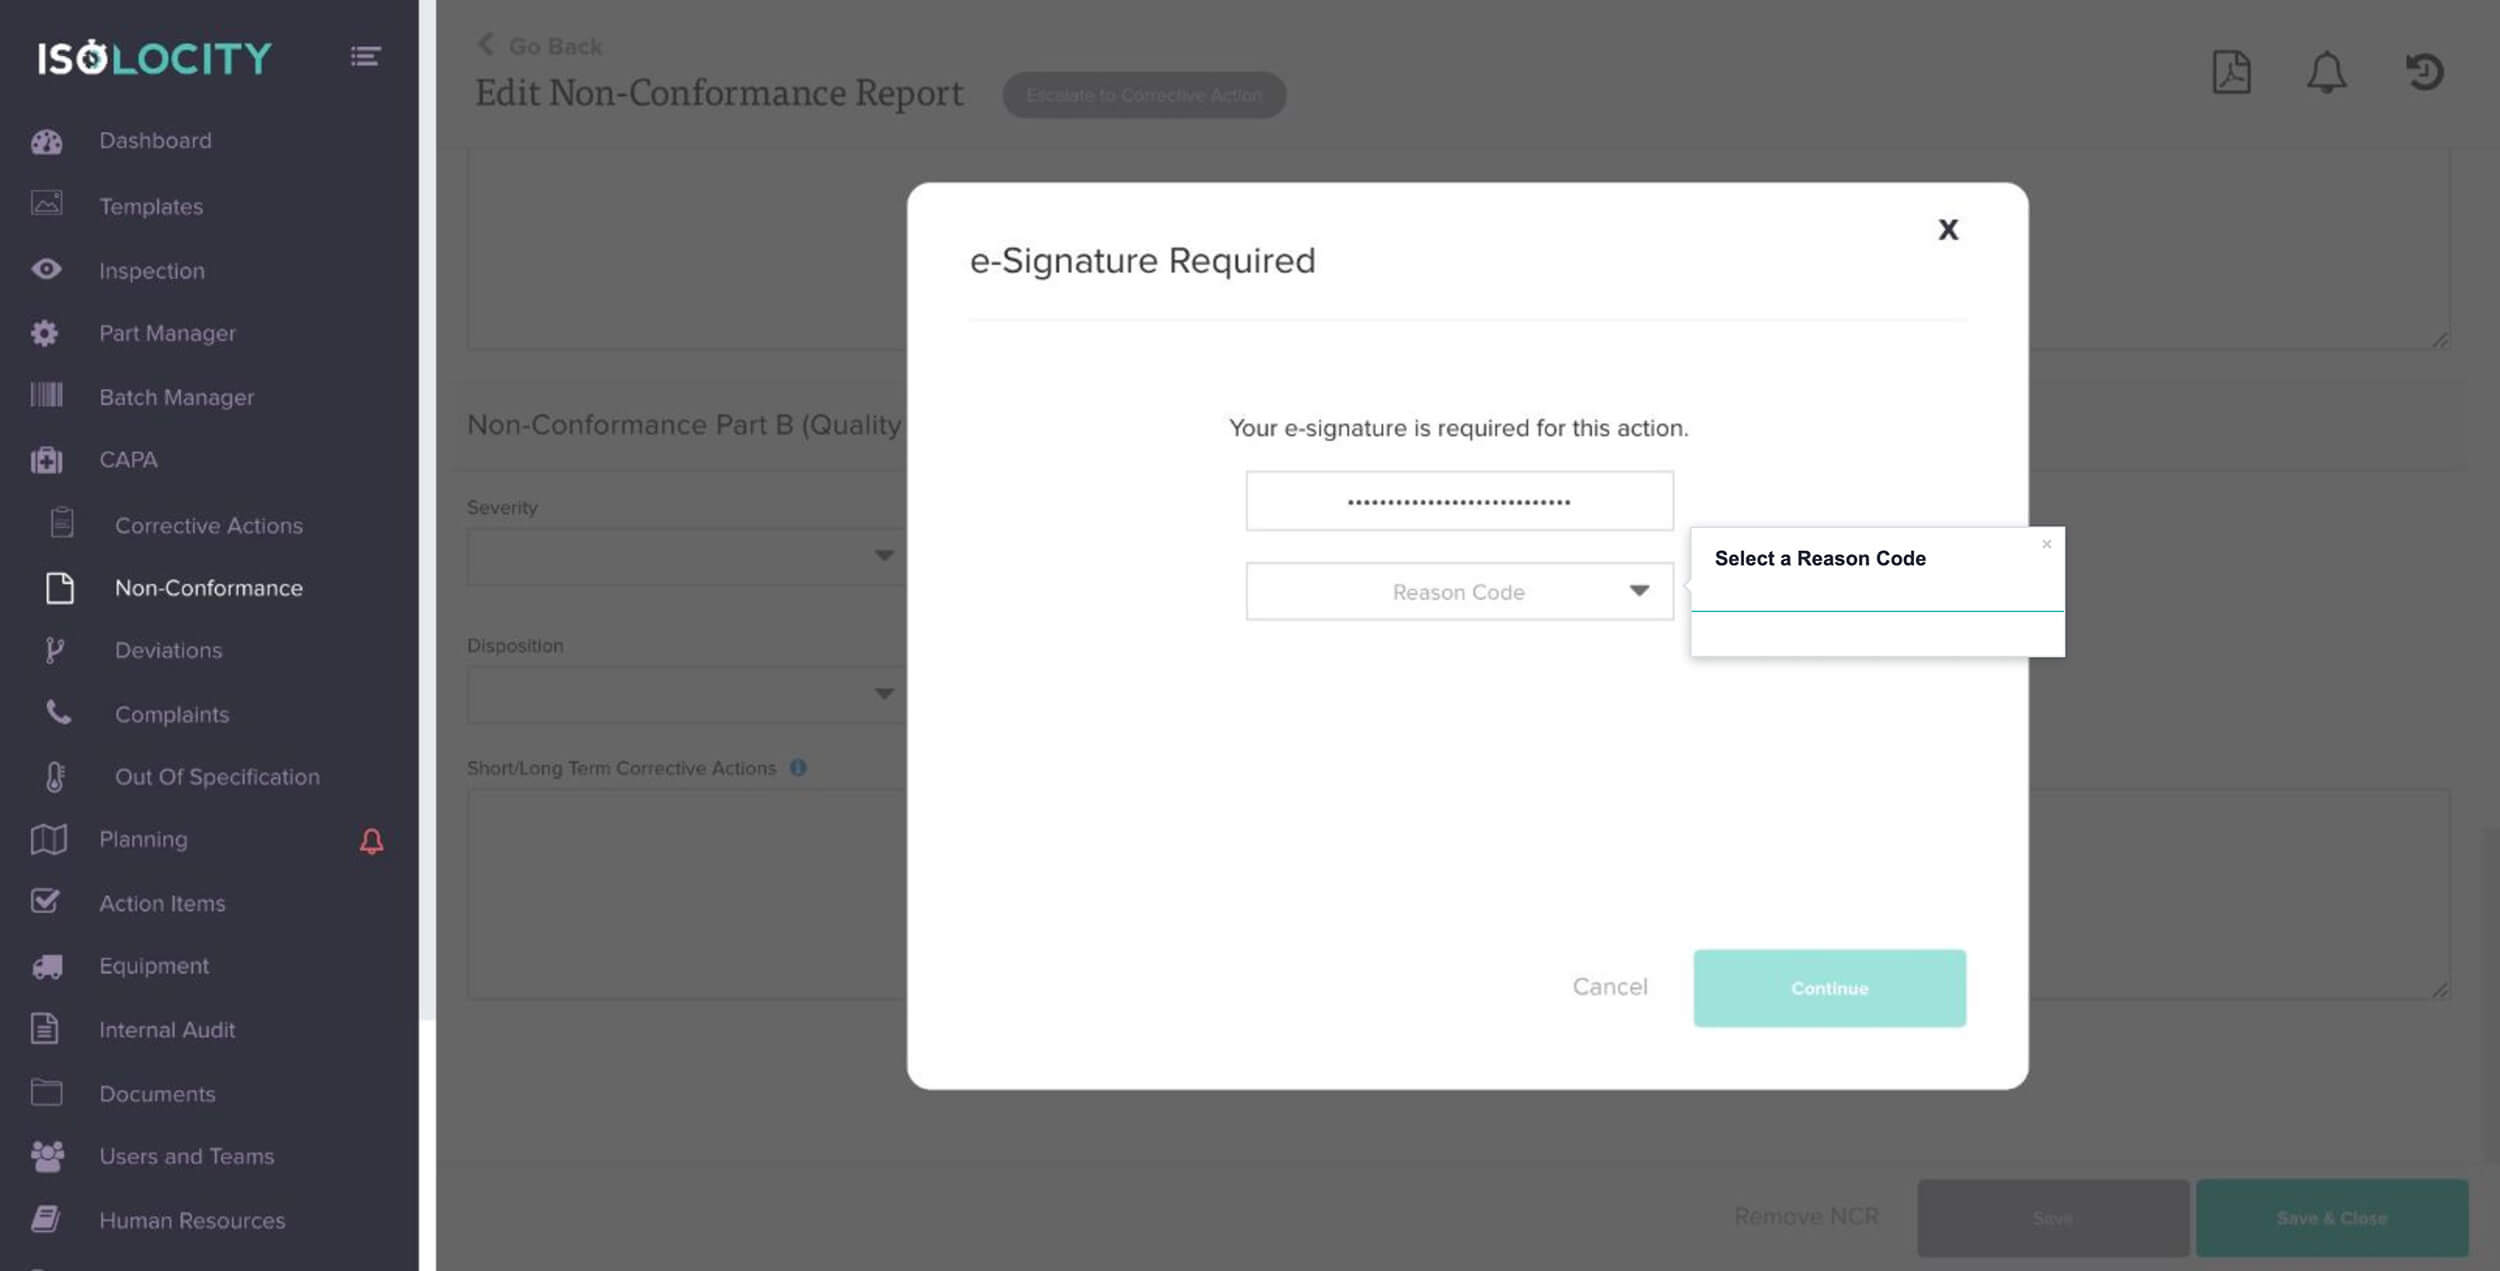
Select a Reason Code
Step #23
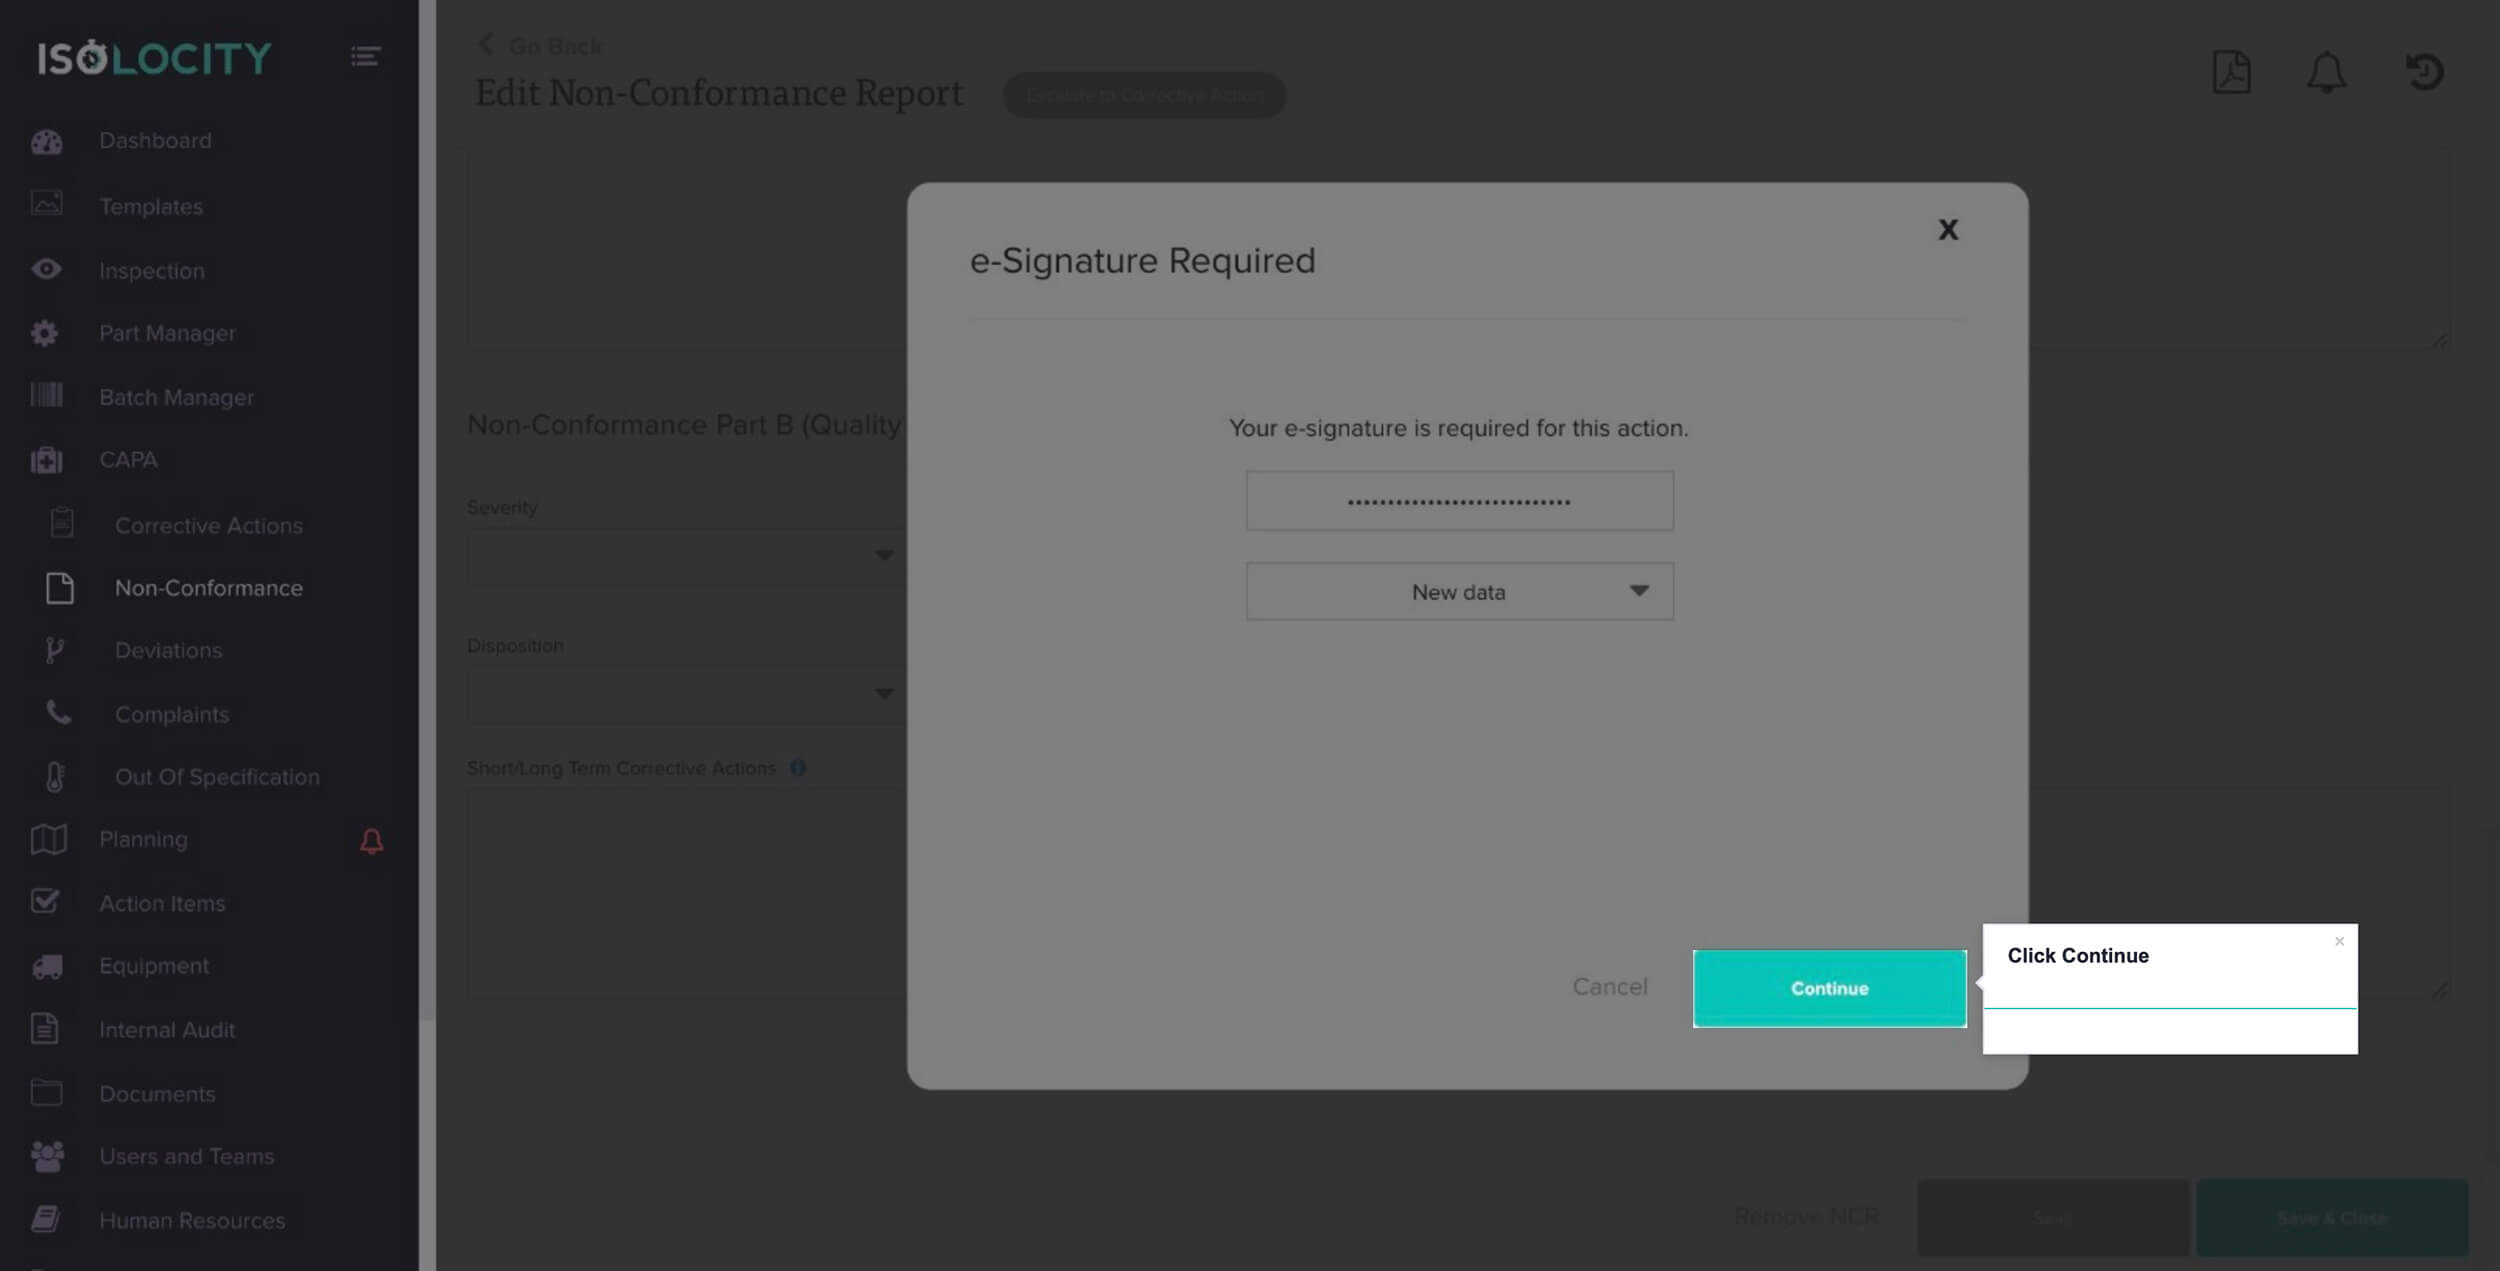
Click Continue
Step #24
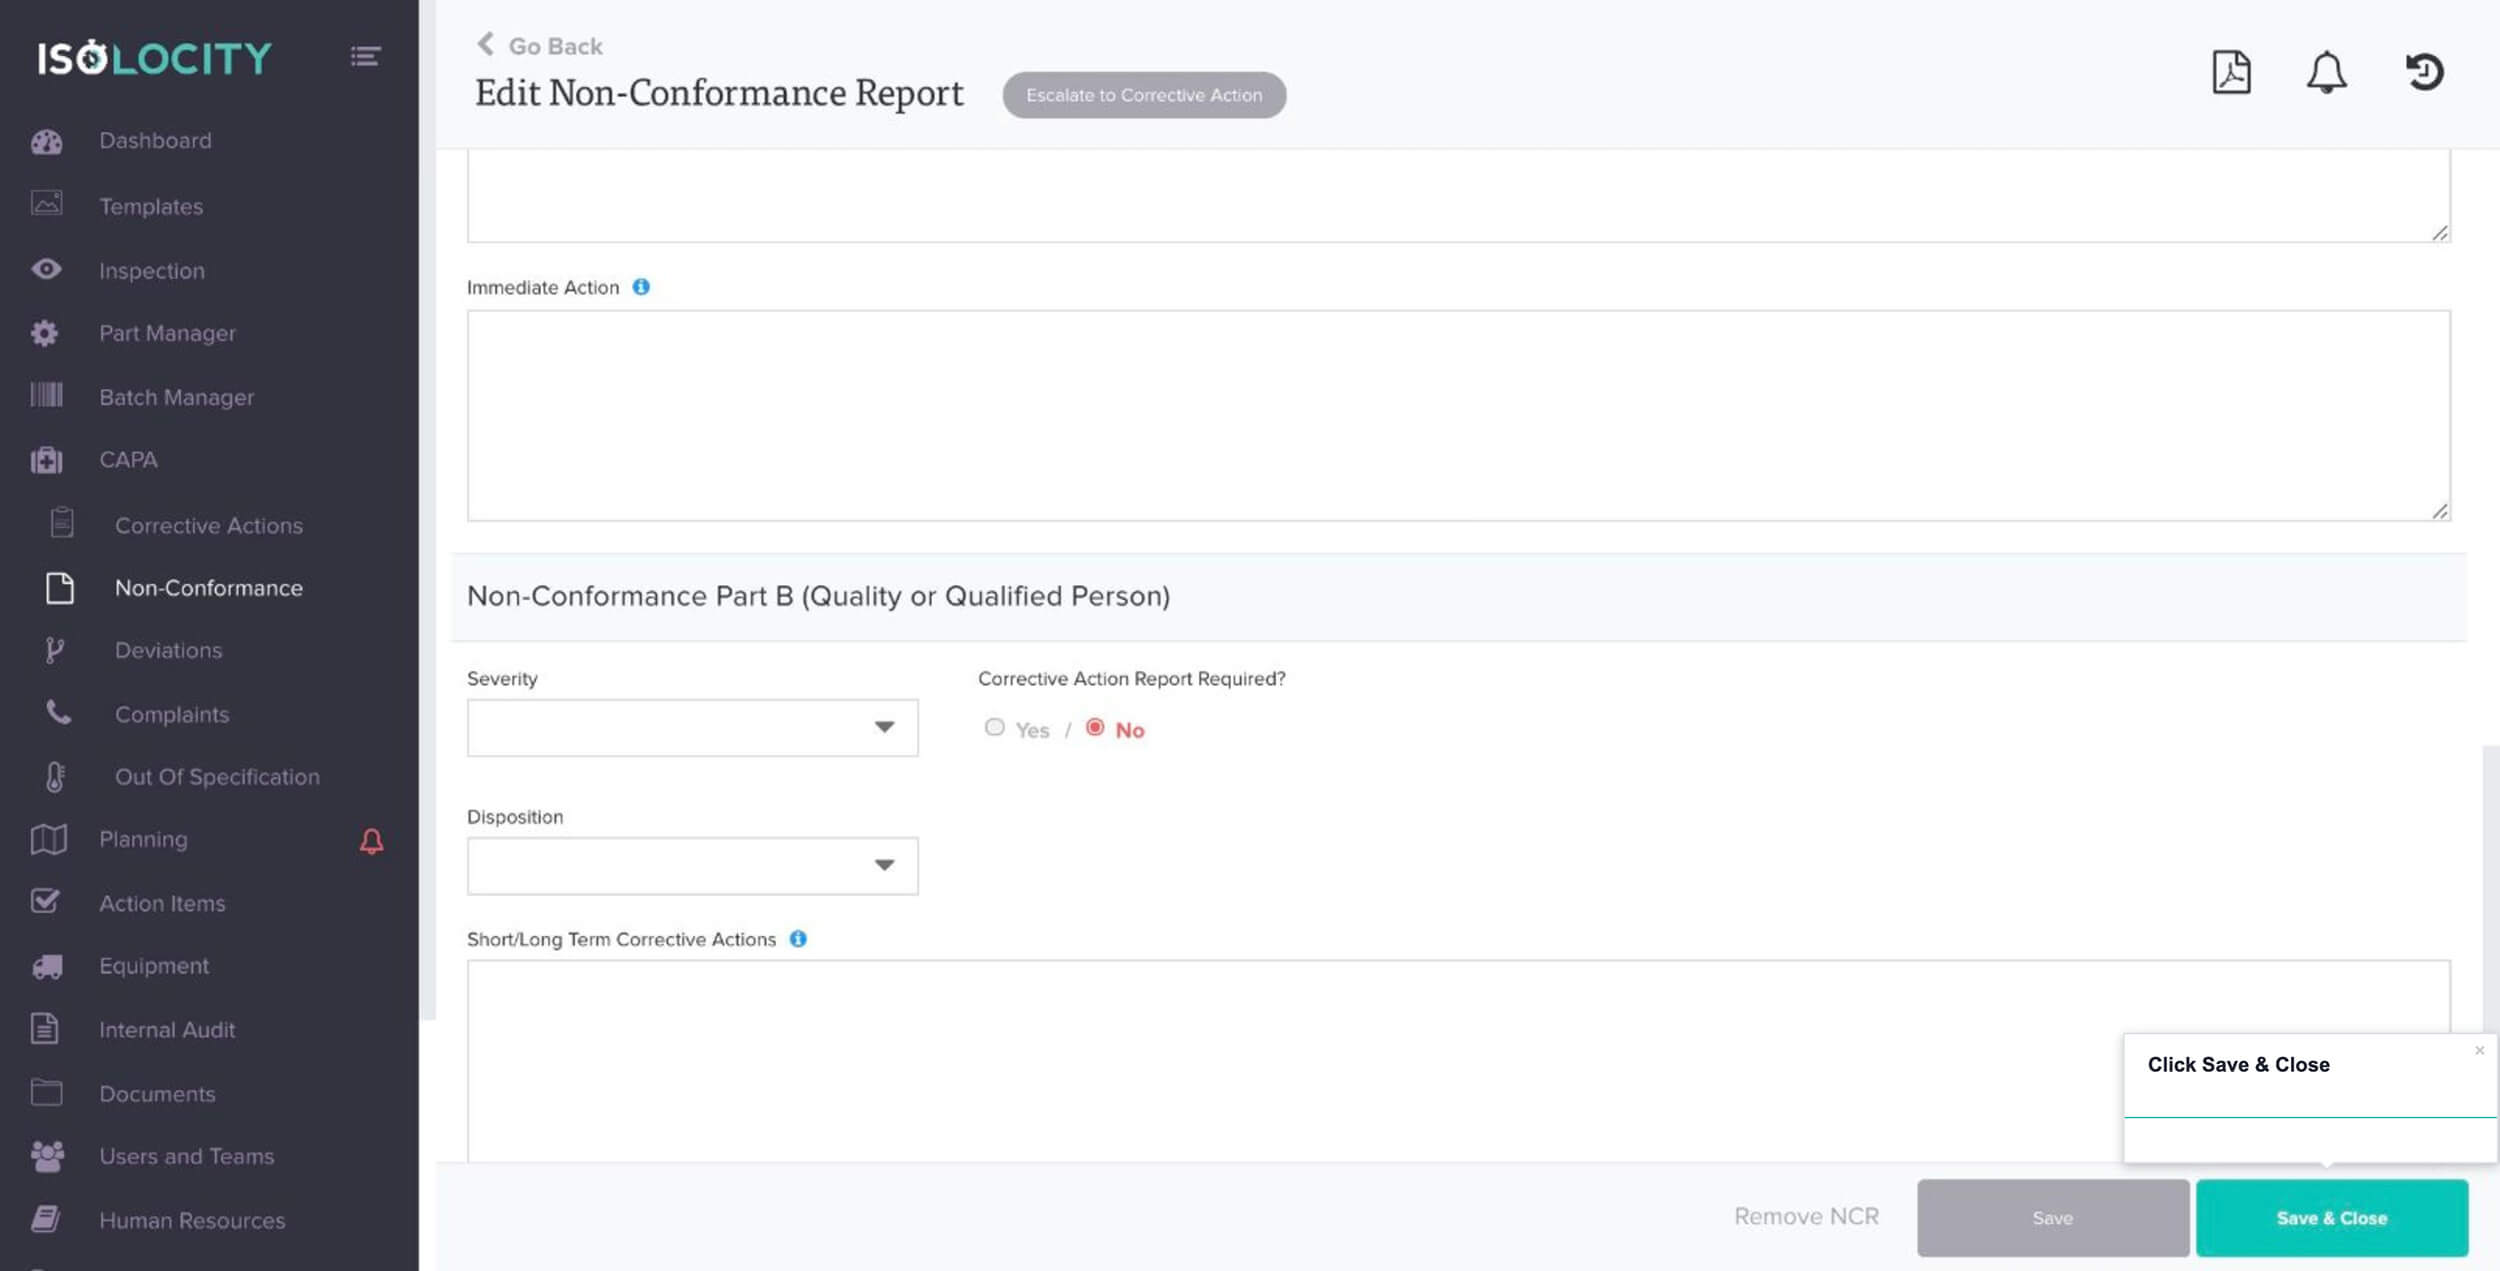
Click Save & Close
Step #25
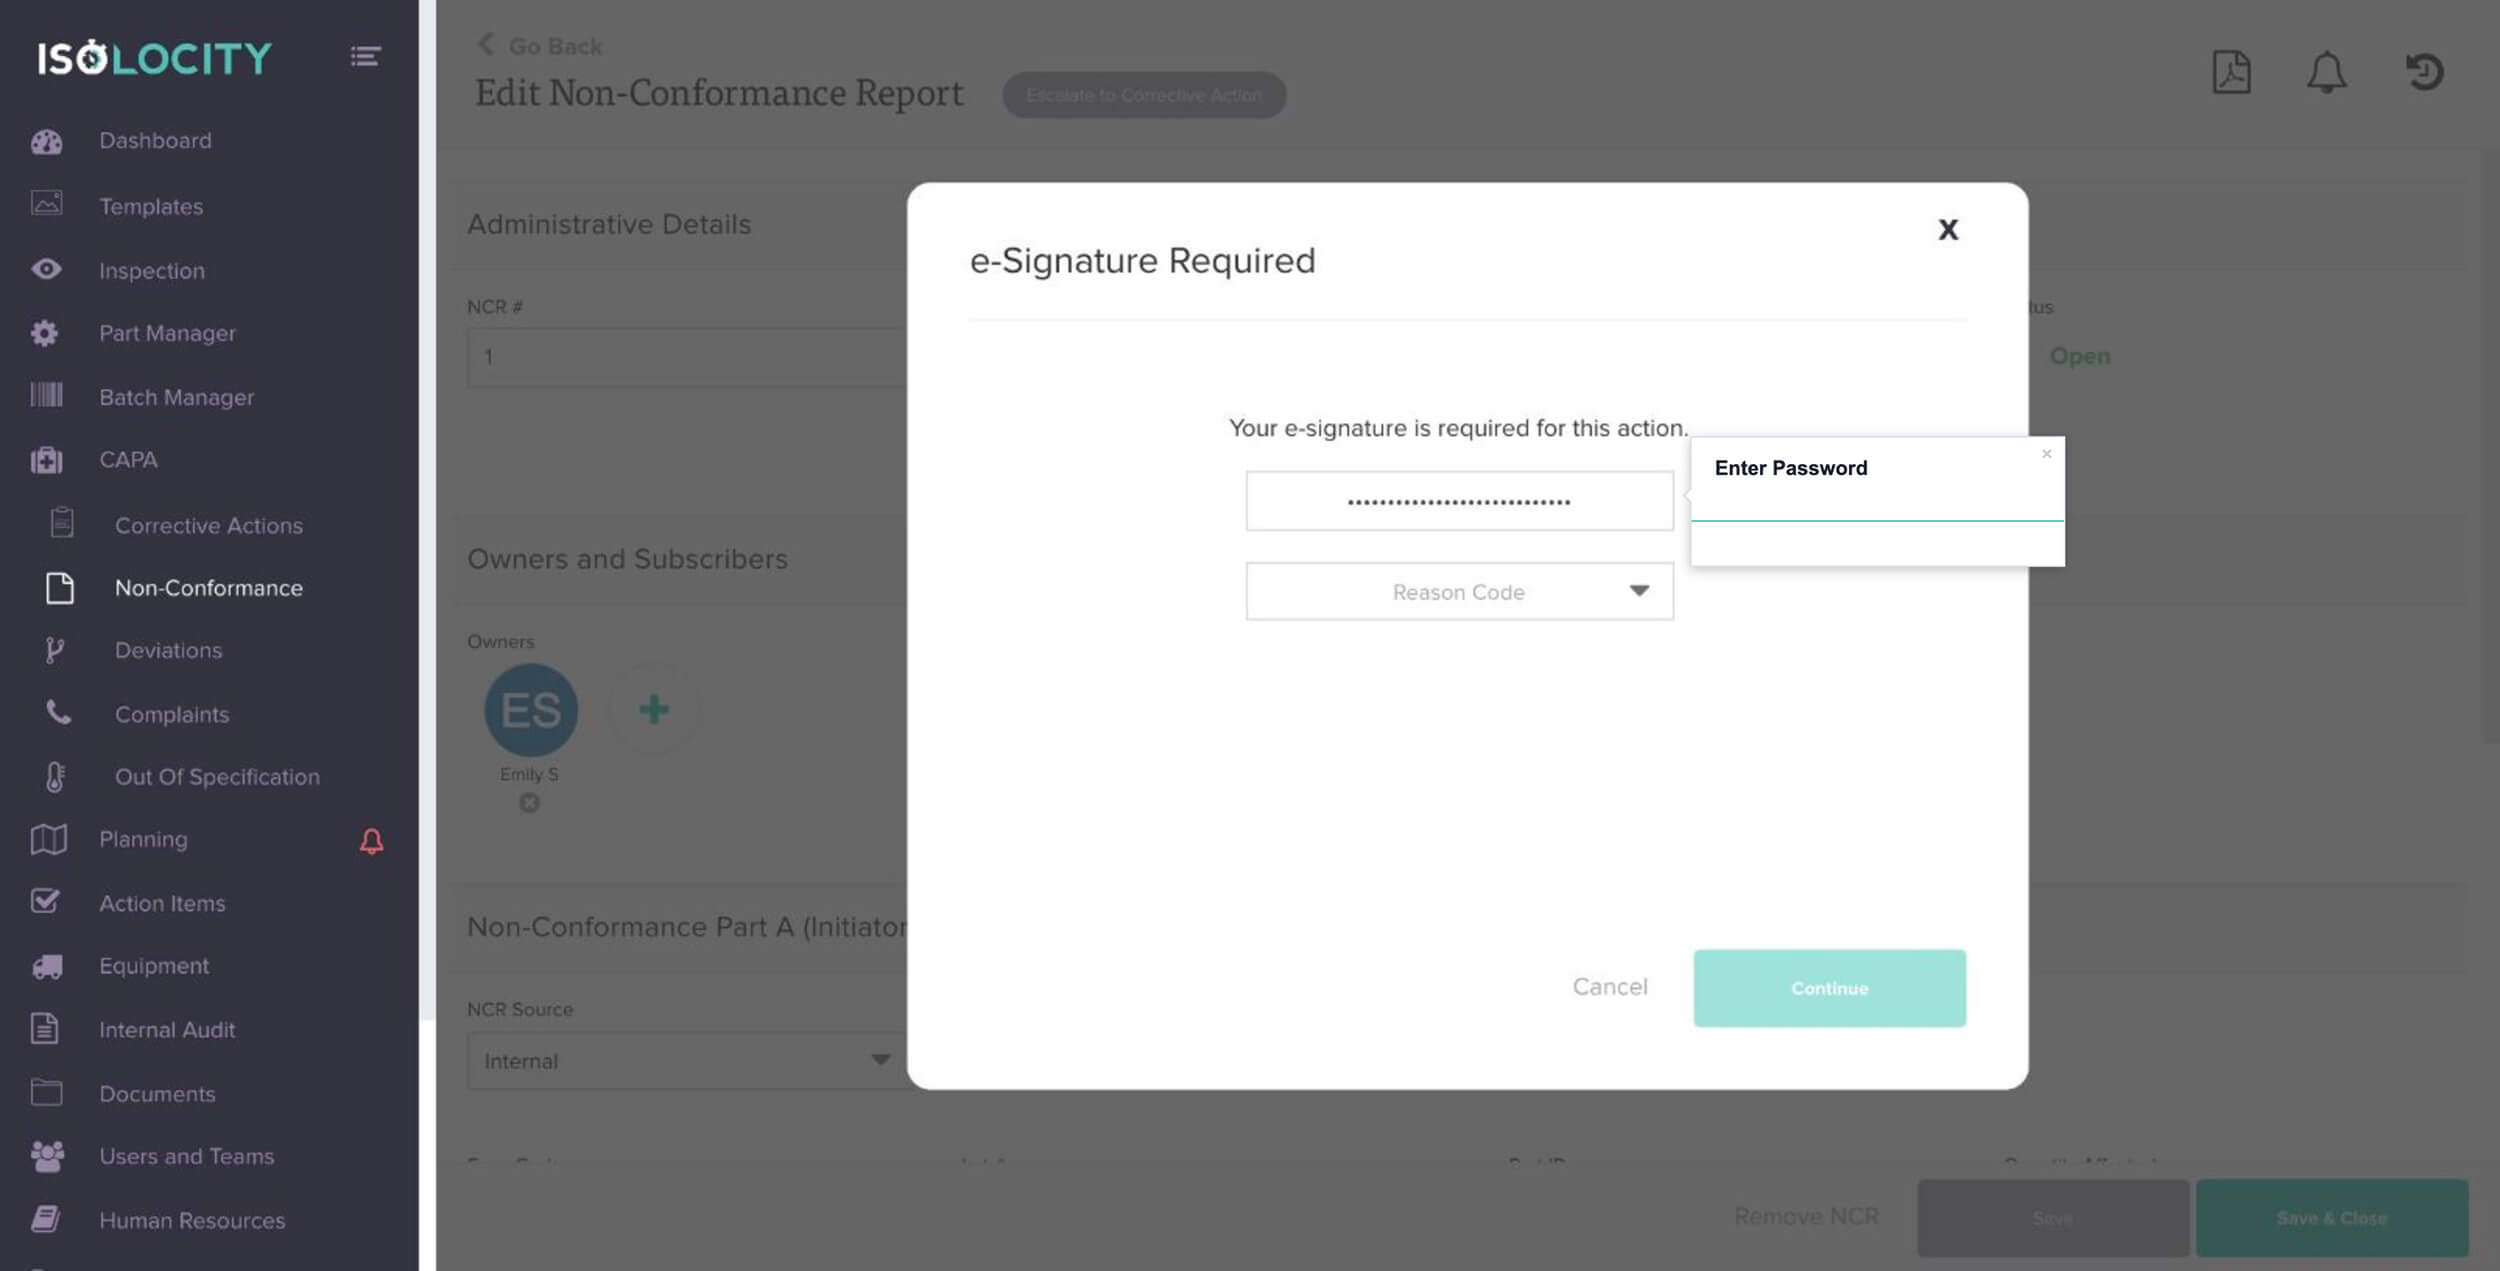
Enter Password
Step #26
Click Continue
Step #27
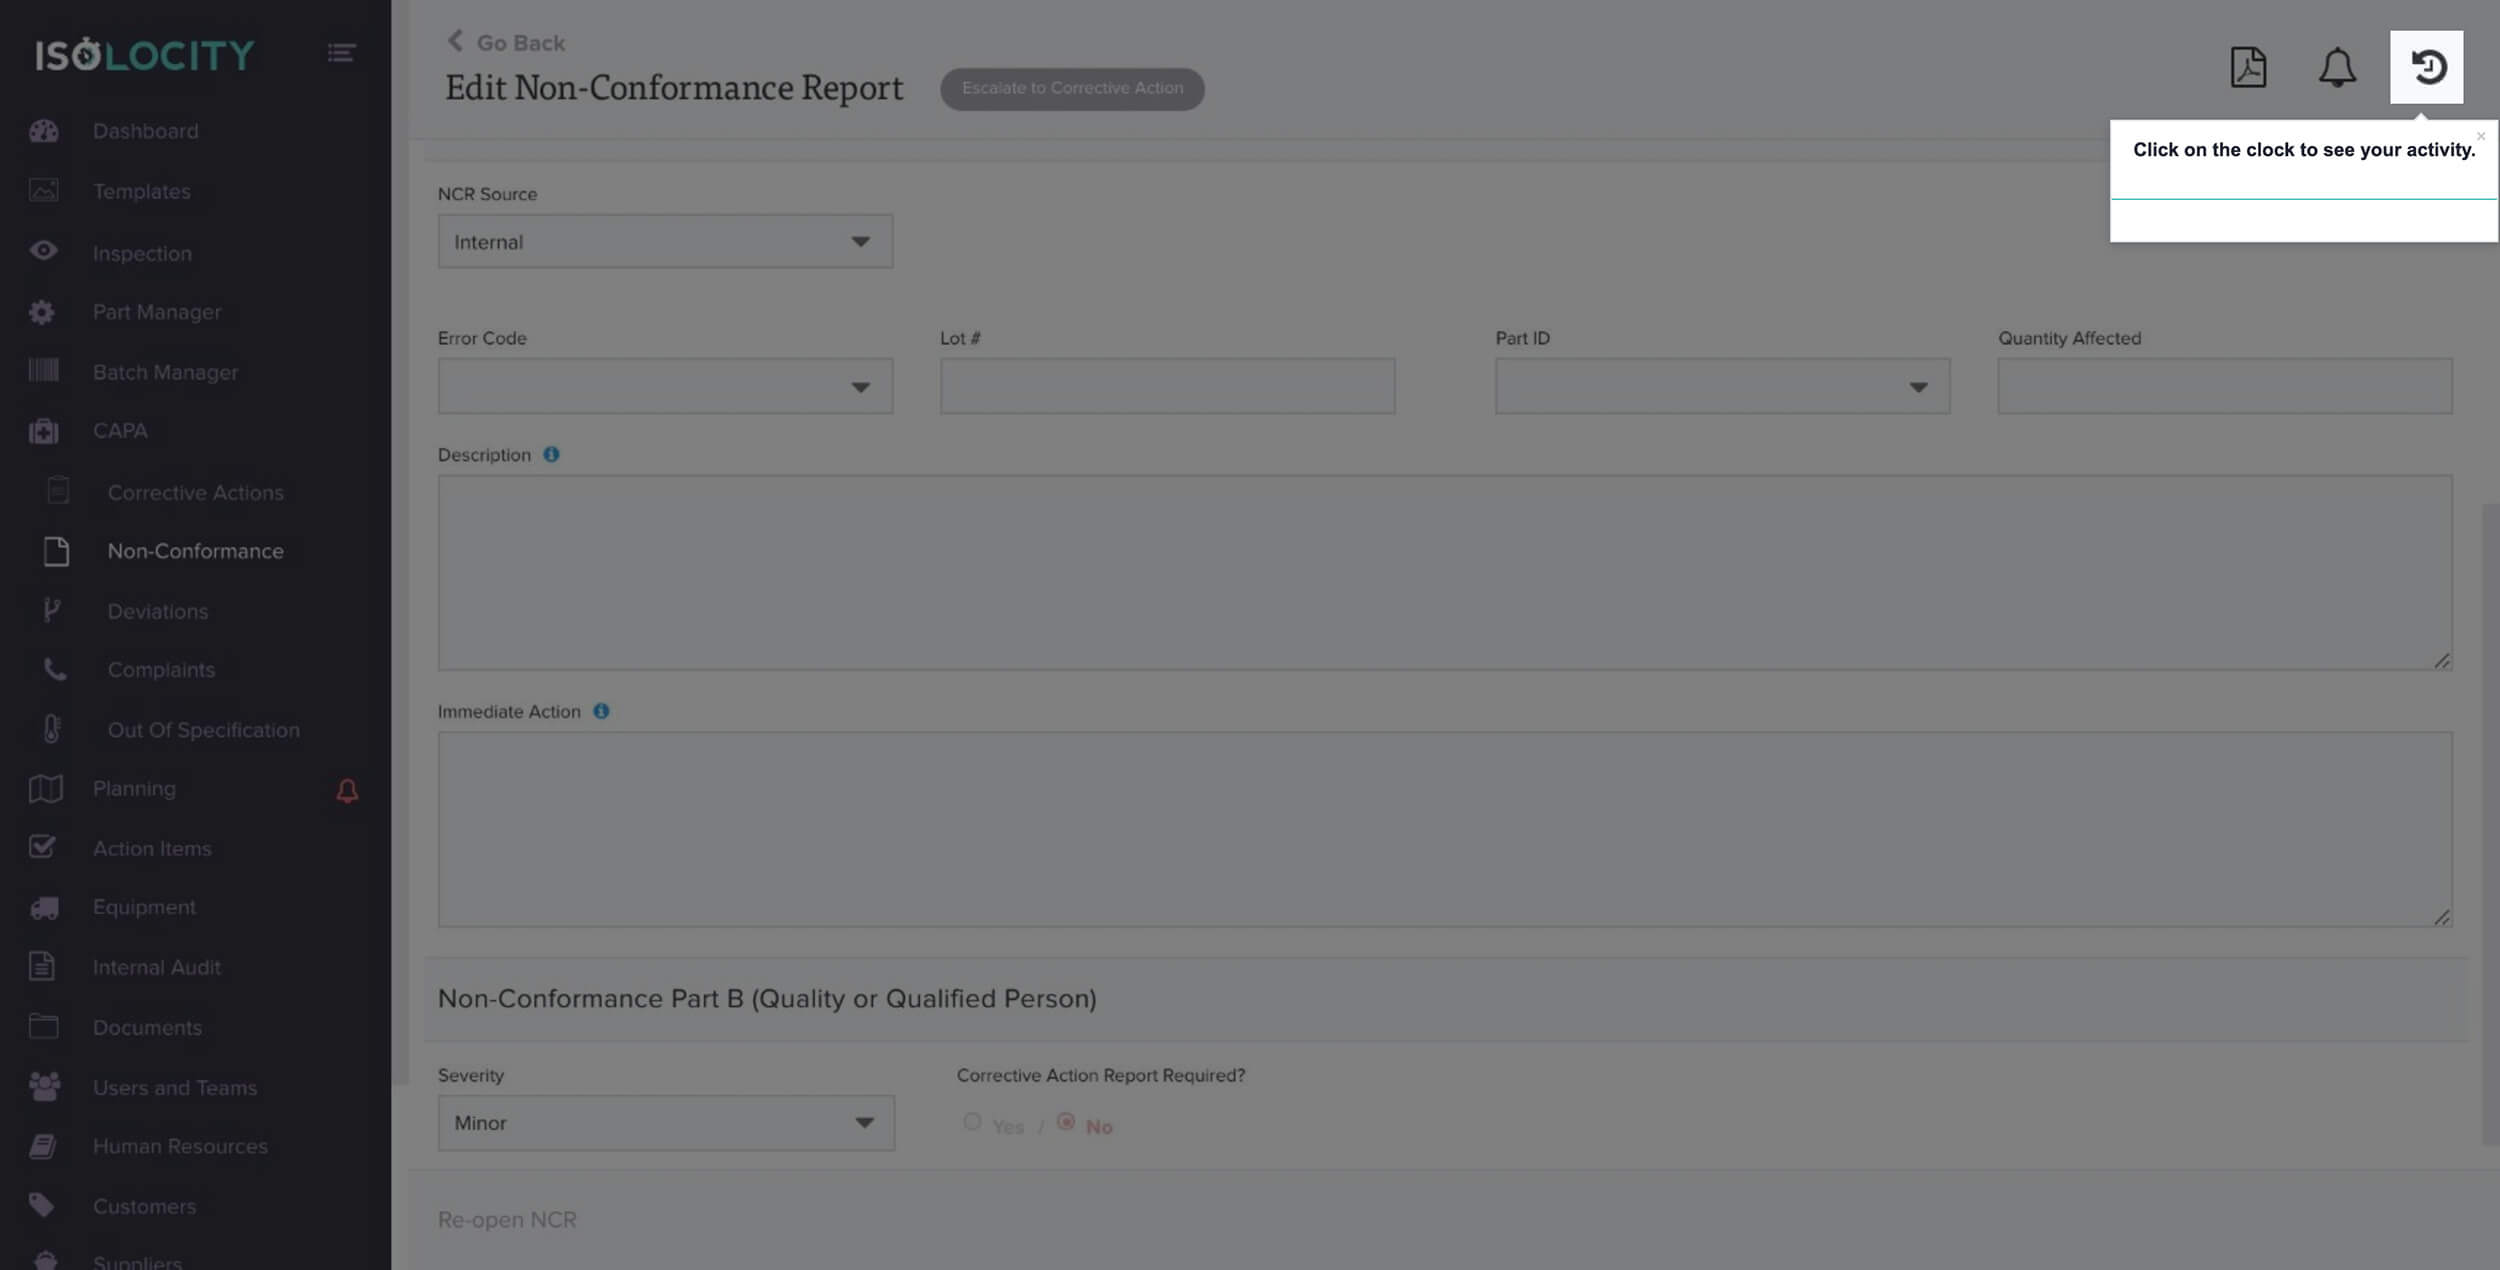
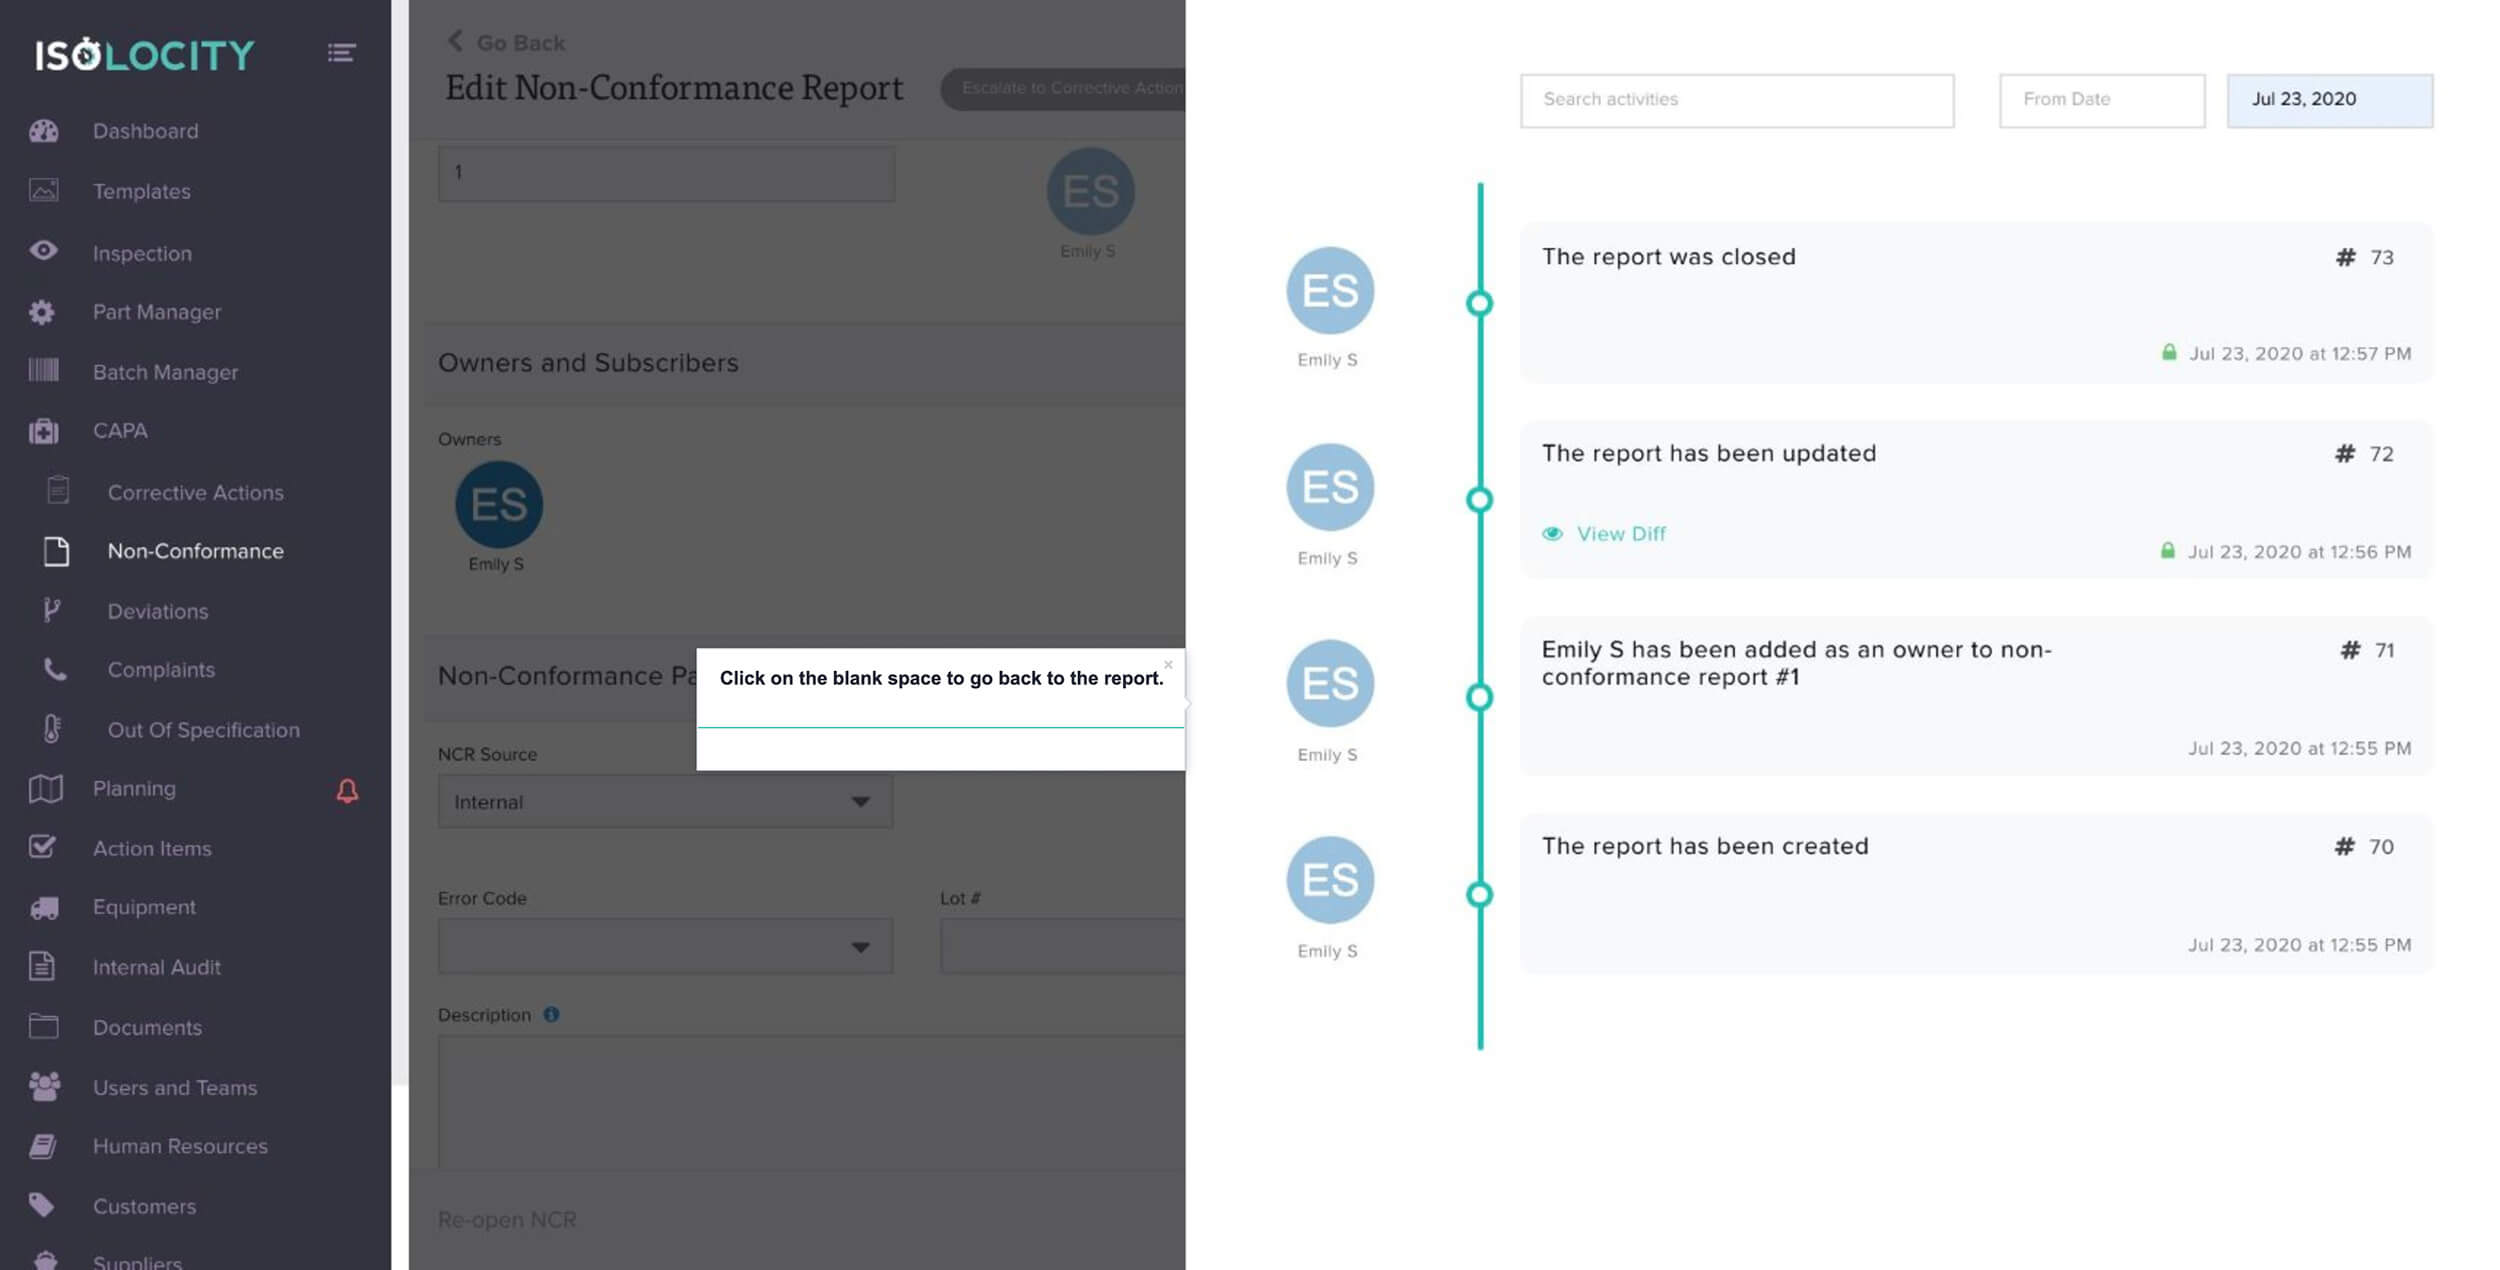
Click on the clock to see your activity.
Step #28
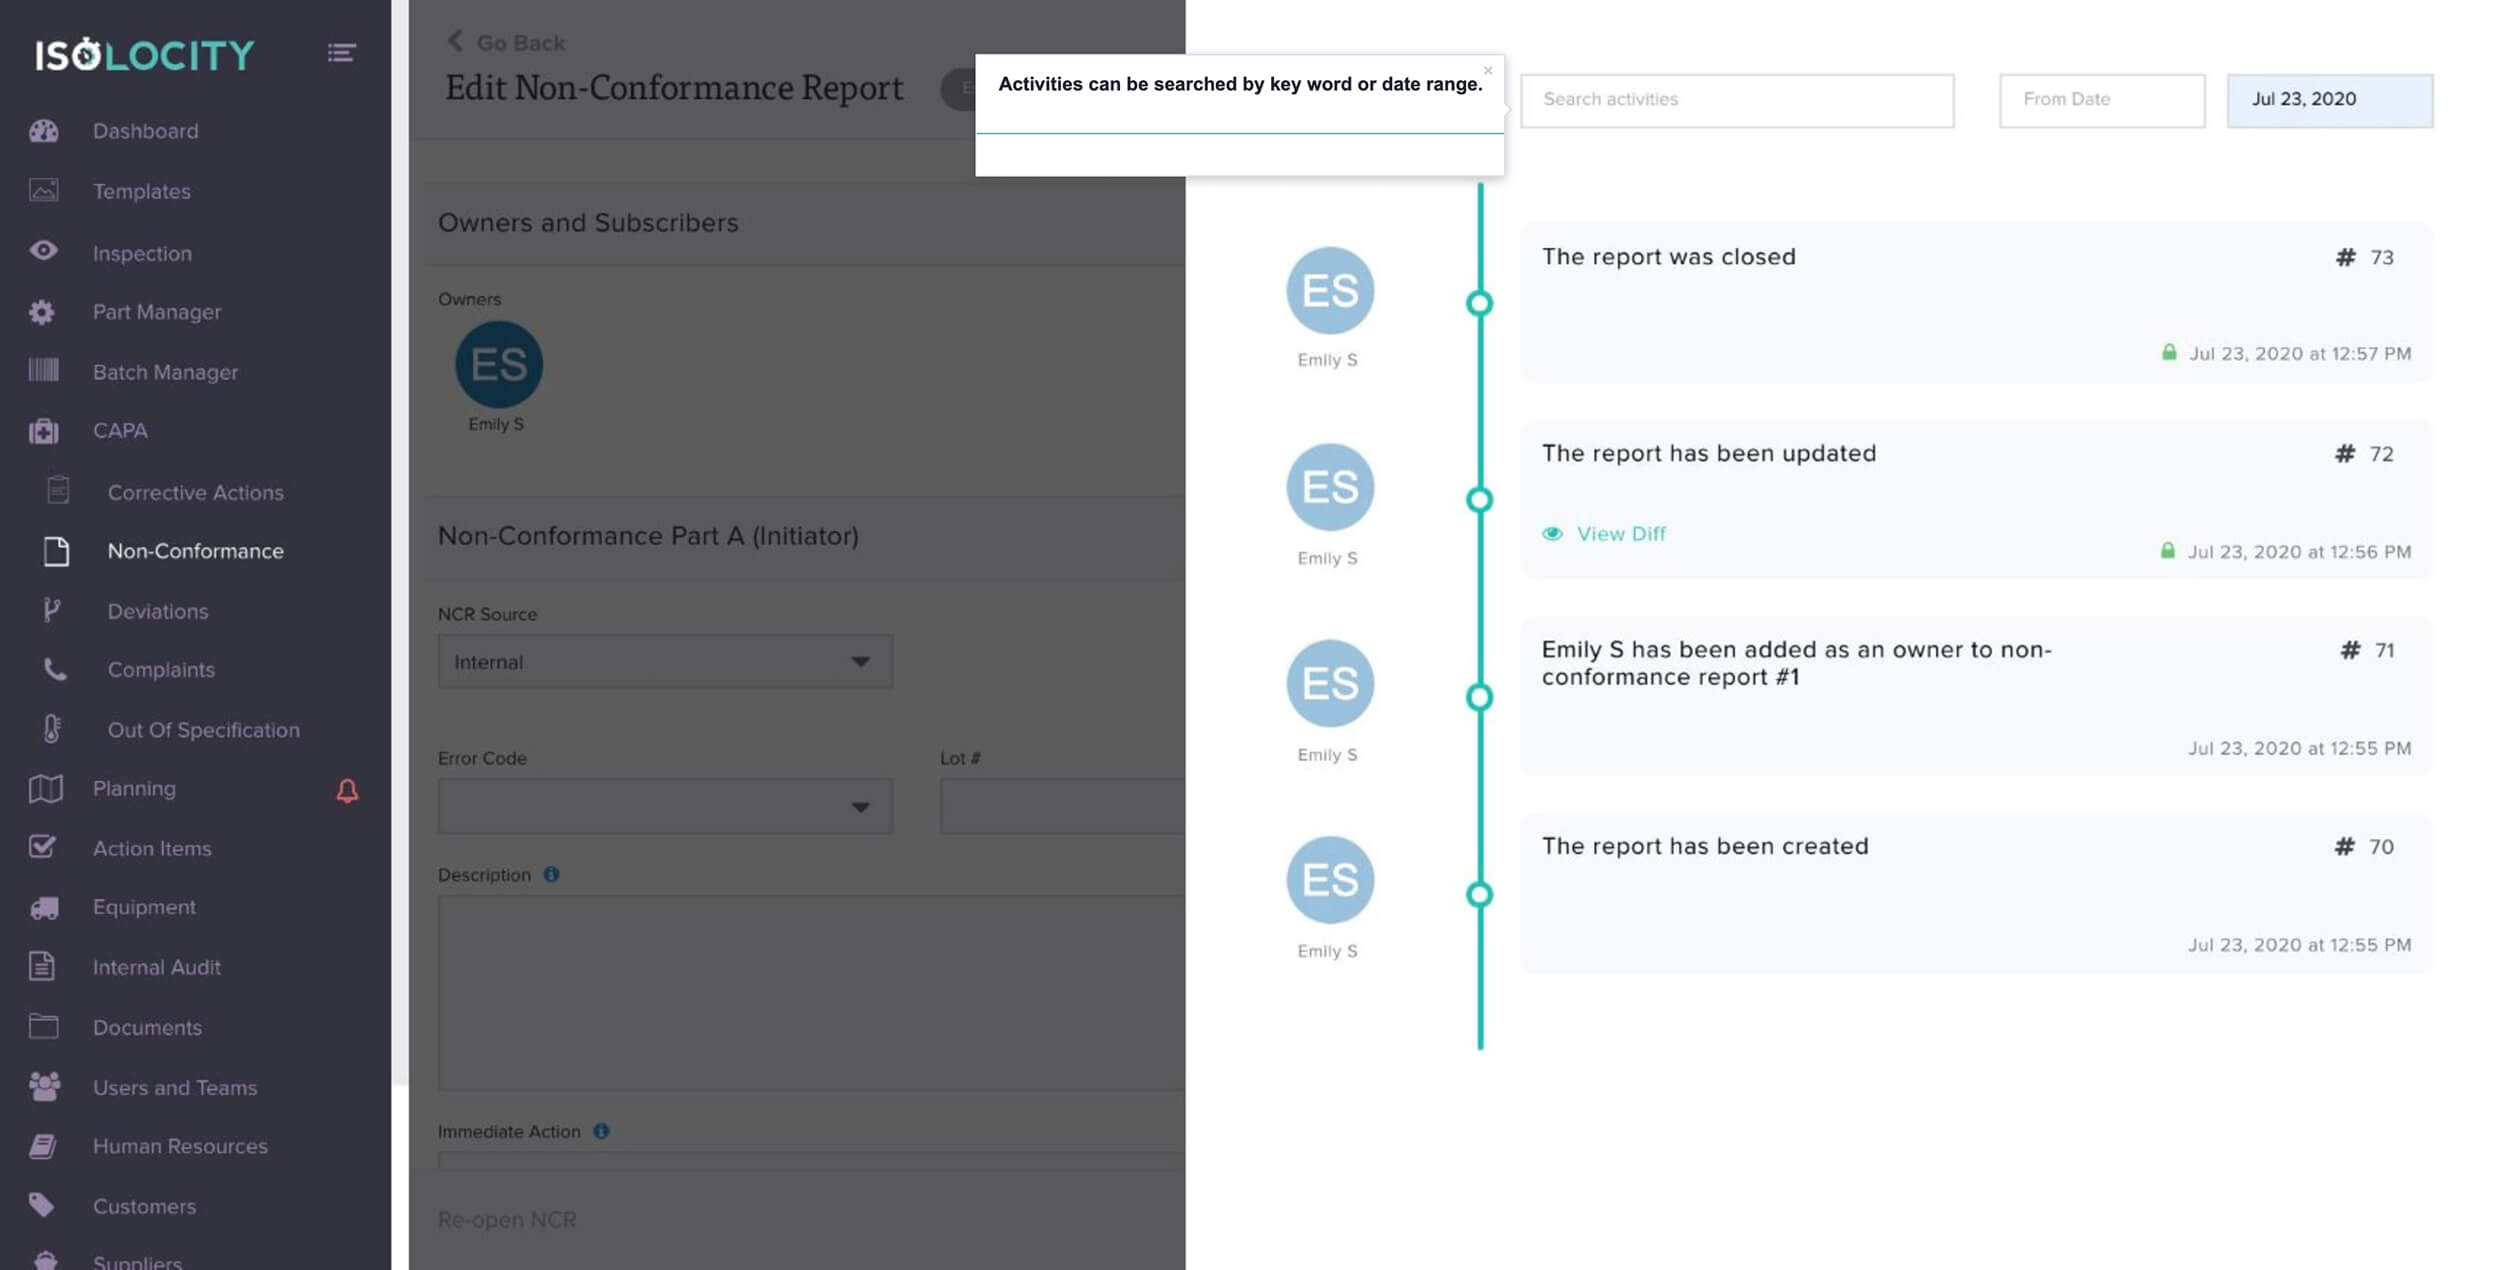
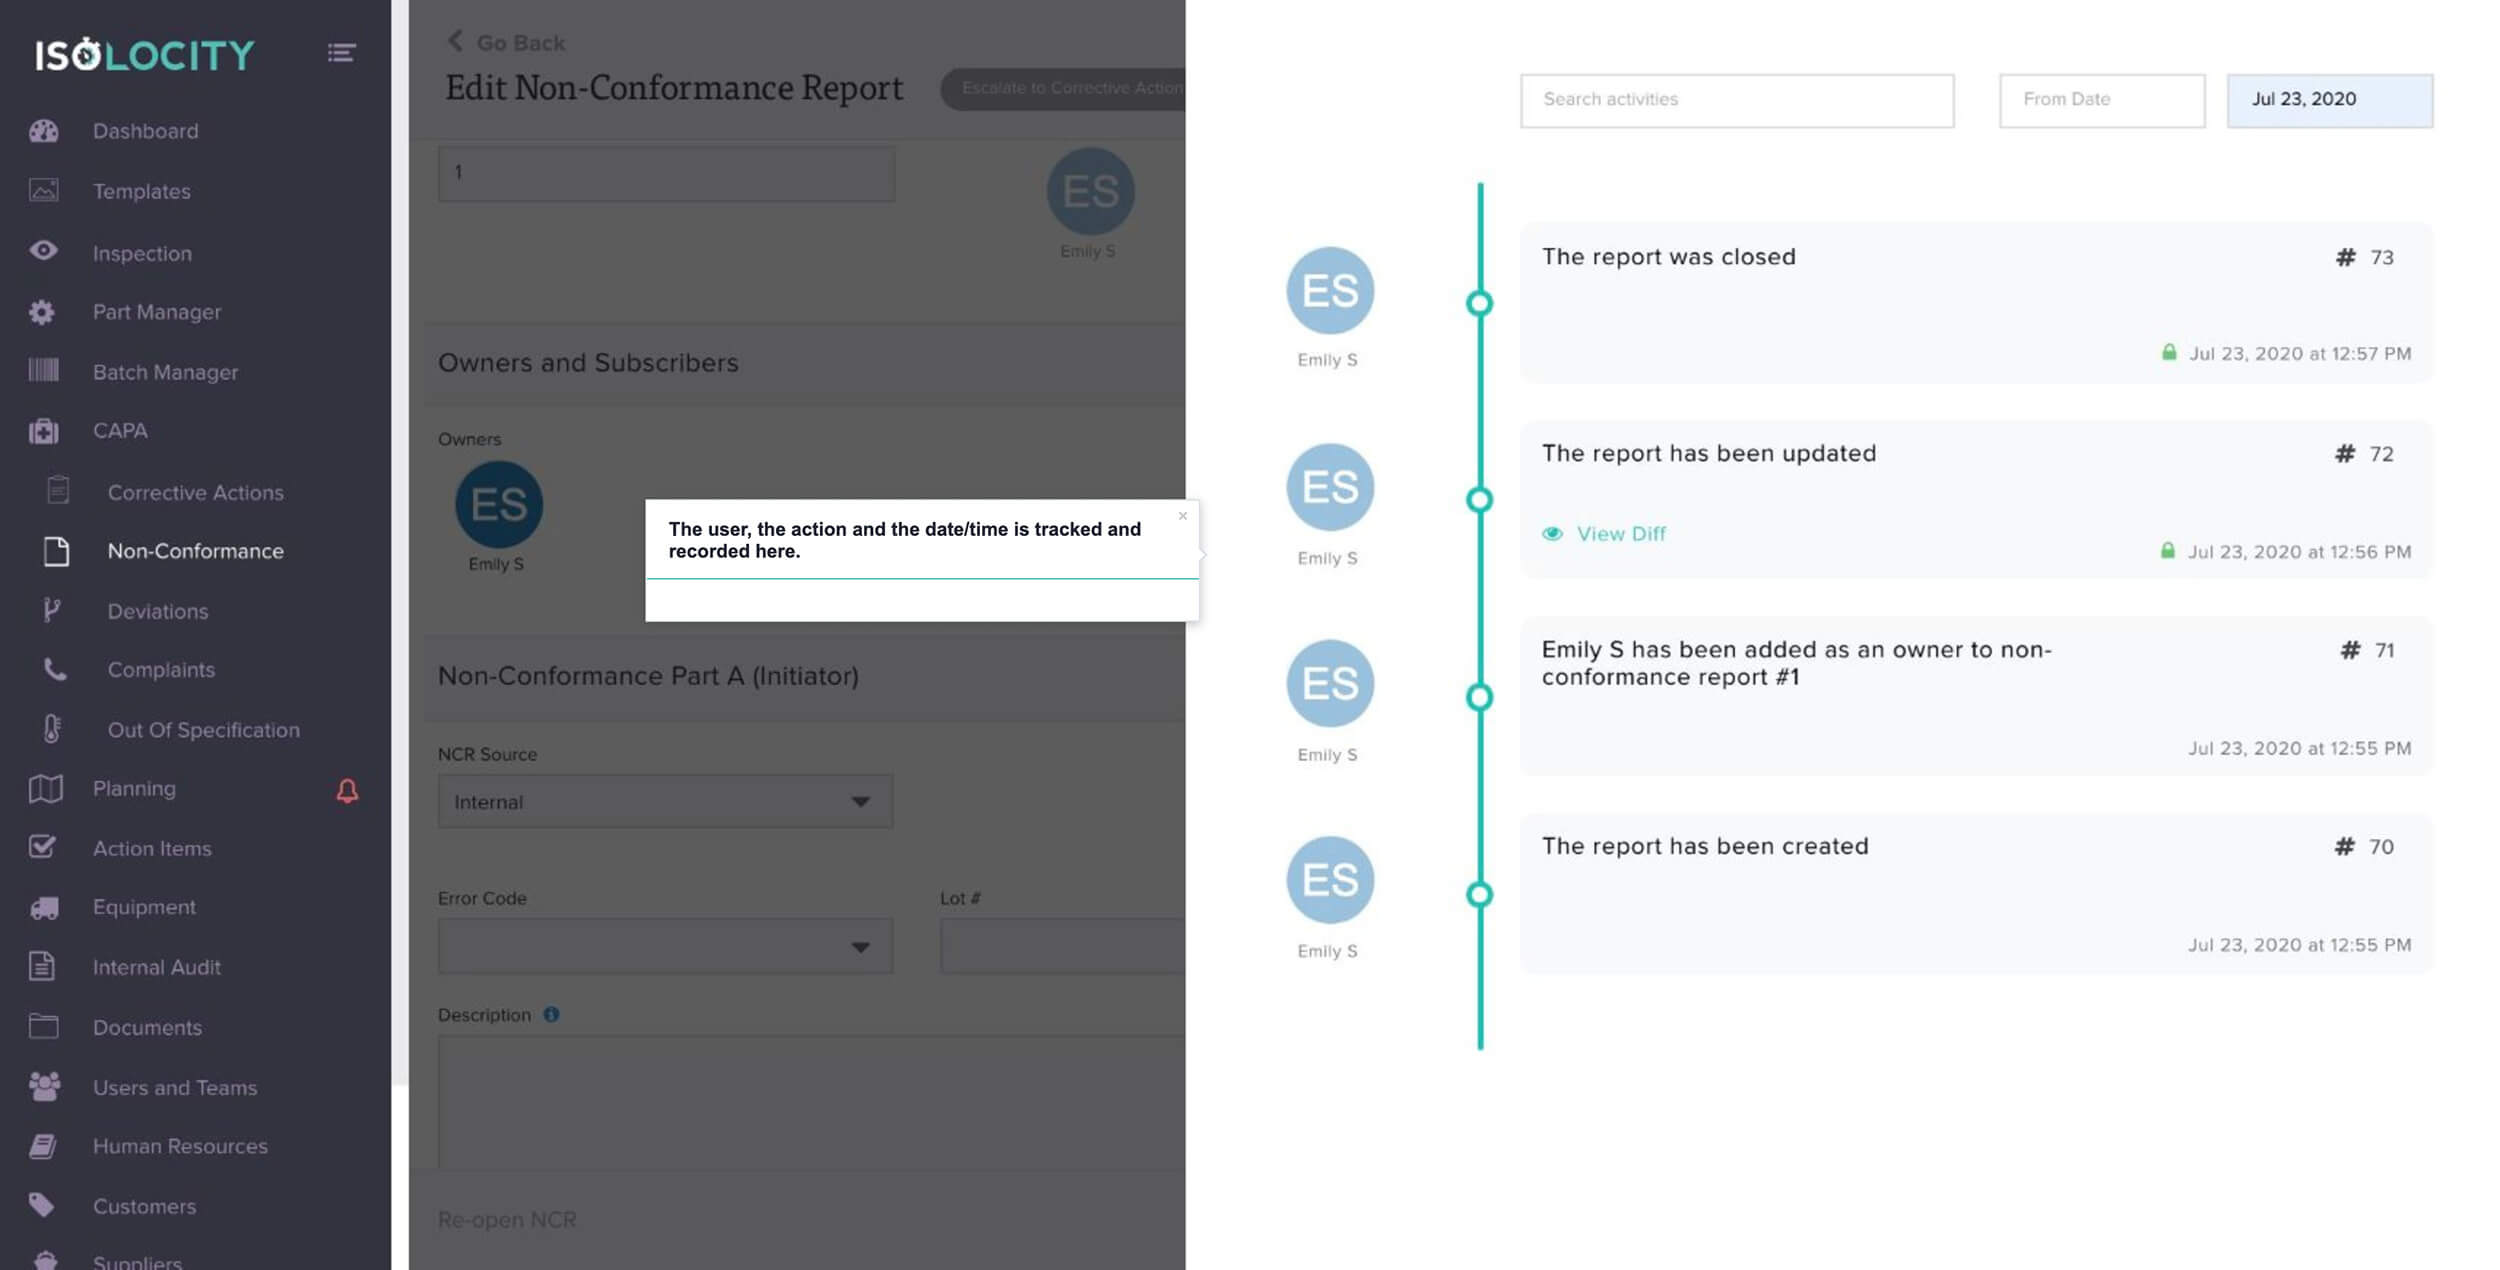
The activity tracker shows all activity for this report.
Step #29
Activities can be searched by key word or date range.
Step #30
The user, the action and the date/time is tracked and recorded here.
Step #31
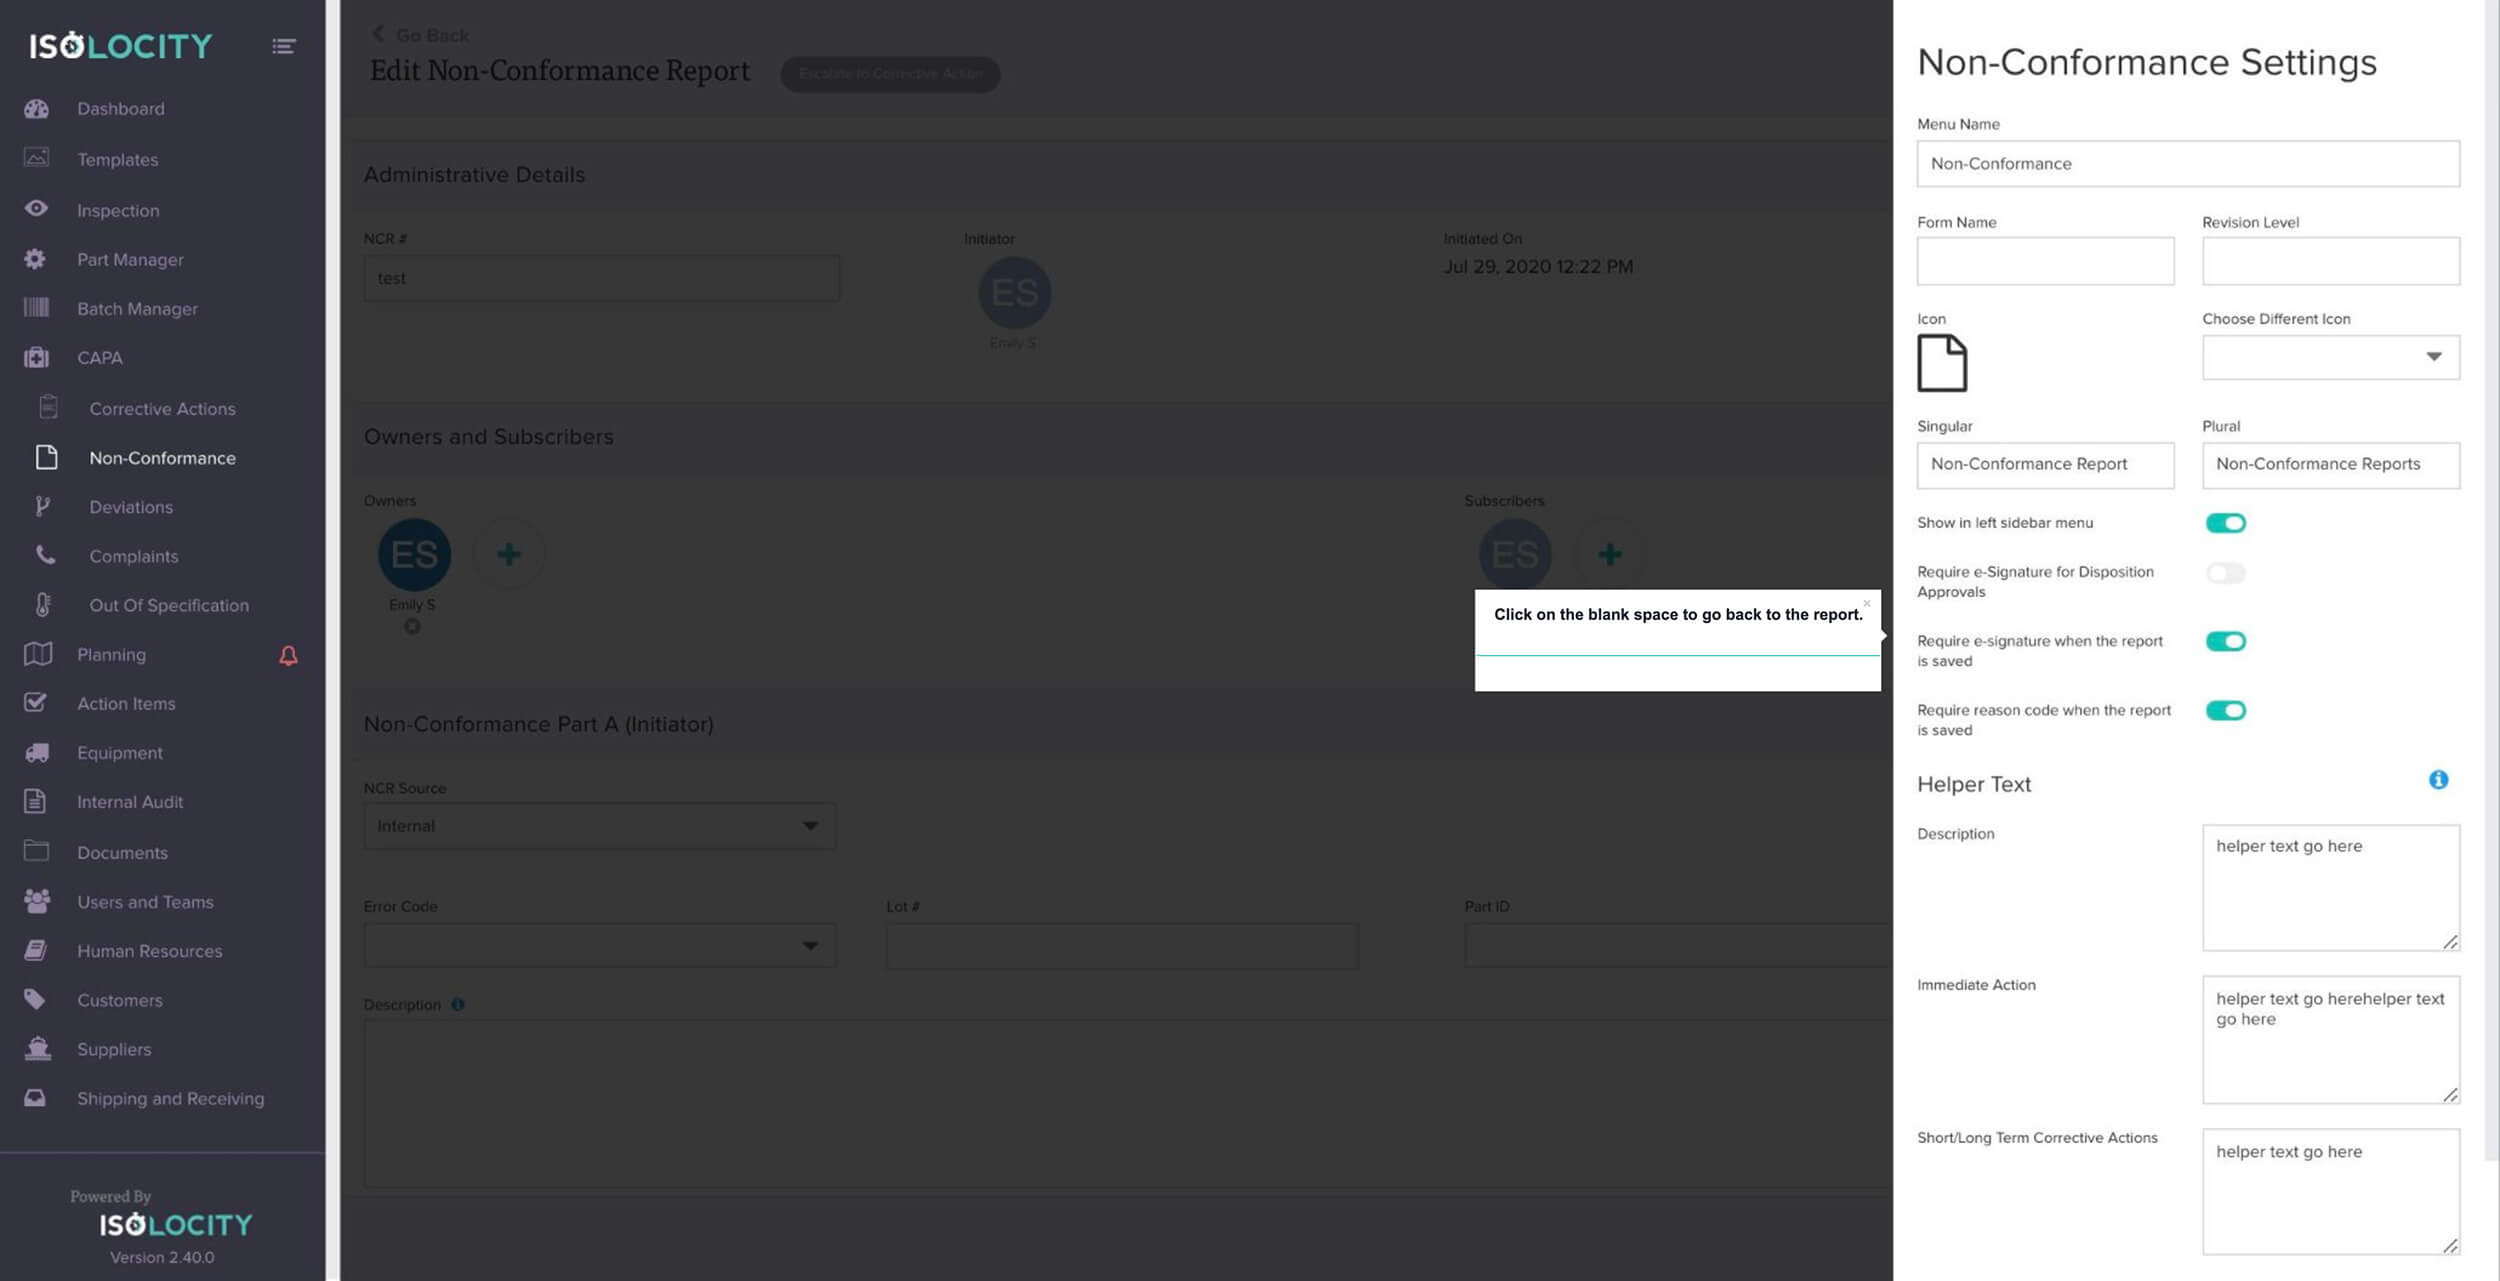
Click on the blank space to go back to the report.
Step #32
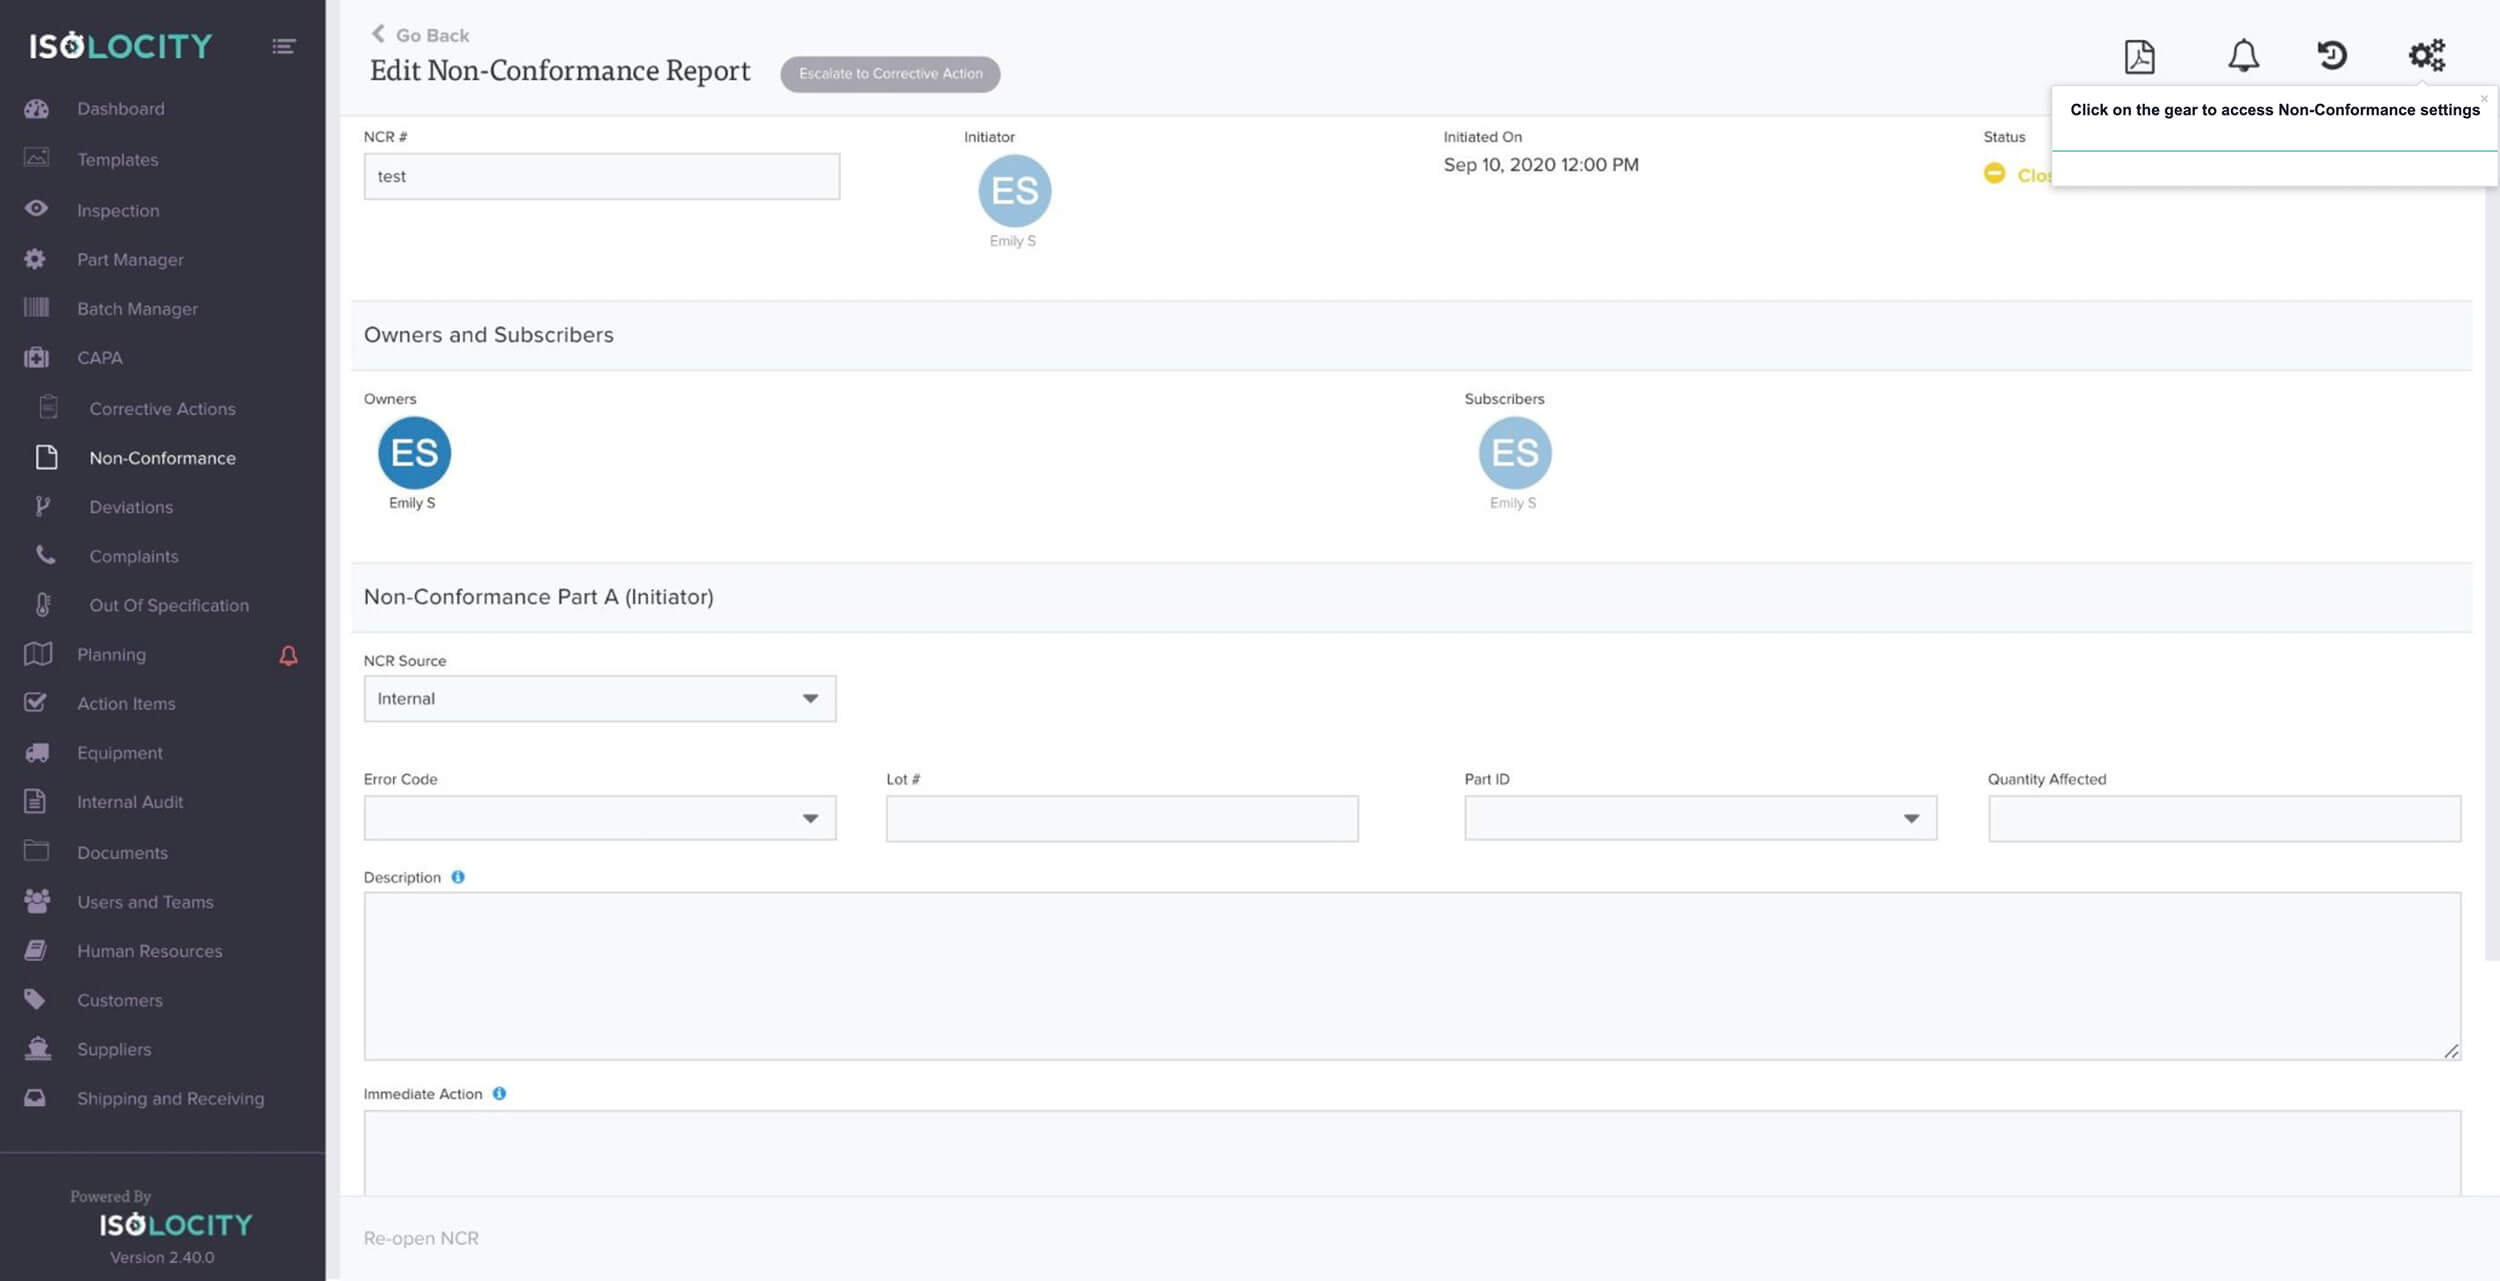
Click on the gear to access Non-Conformance settings
Step #33
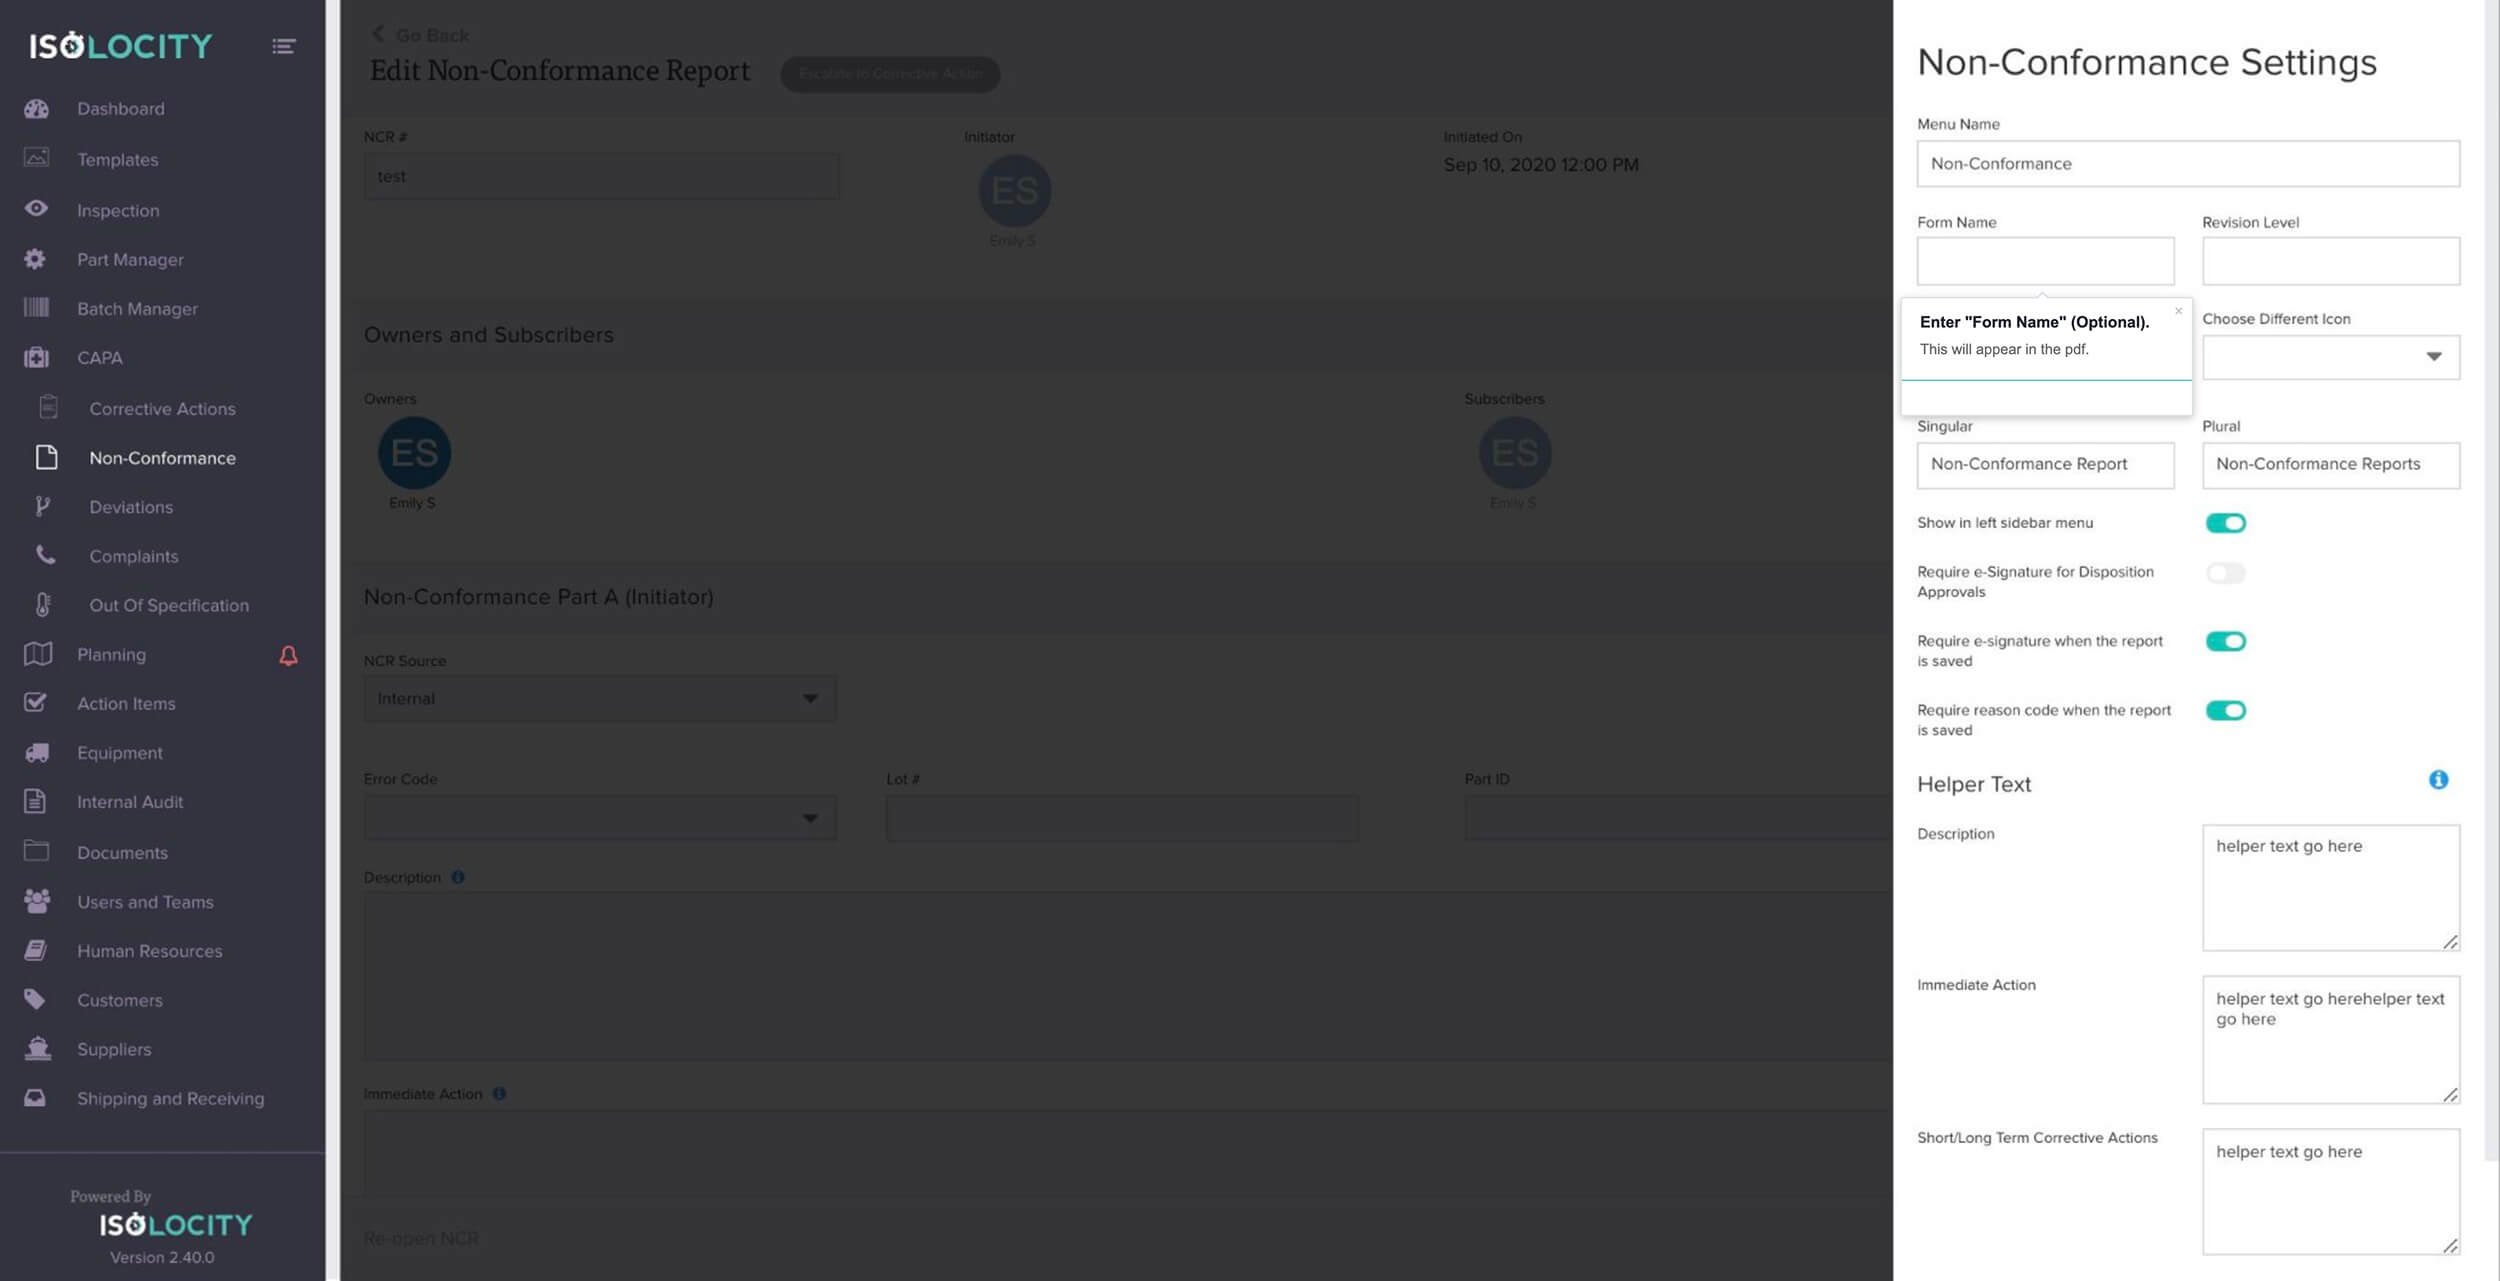
Enter “Form Name” (Optional).
Step #34
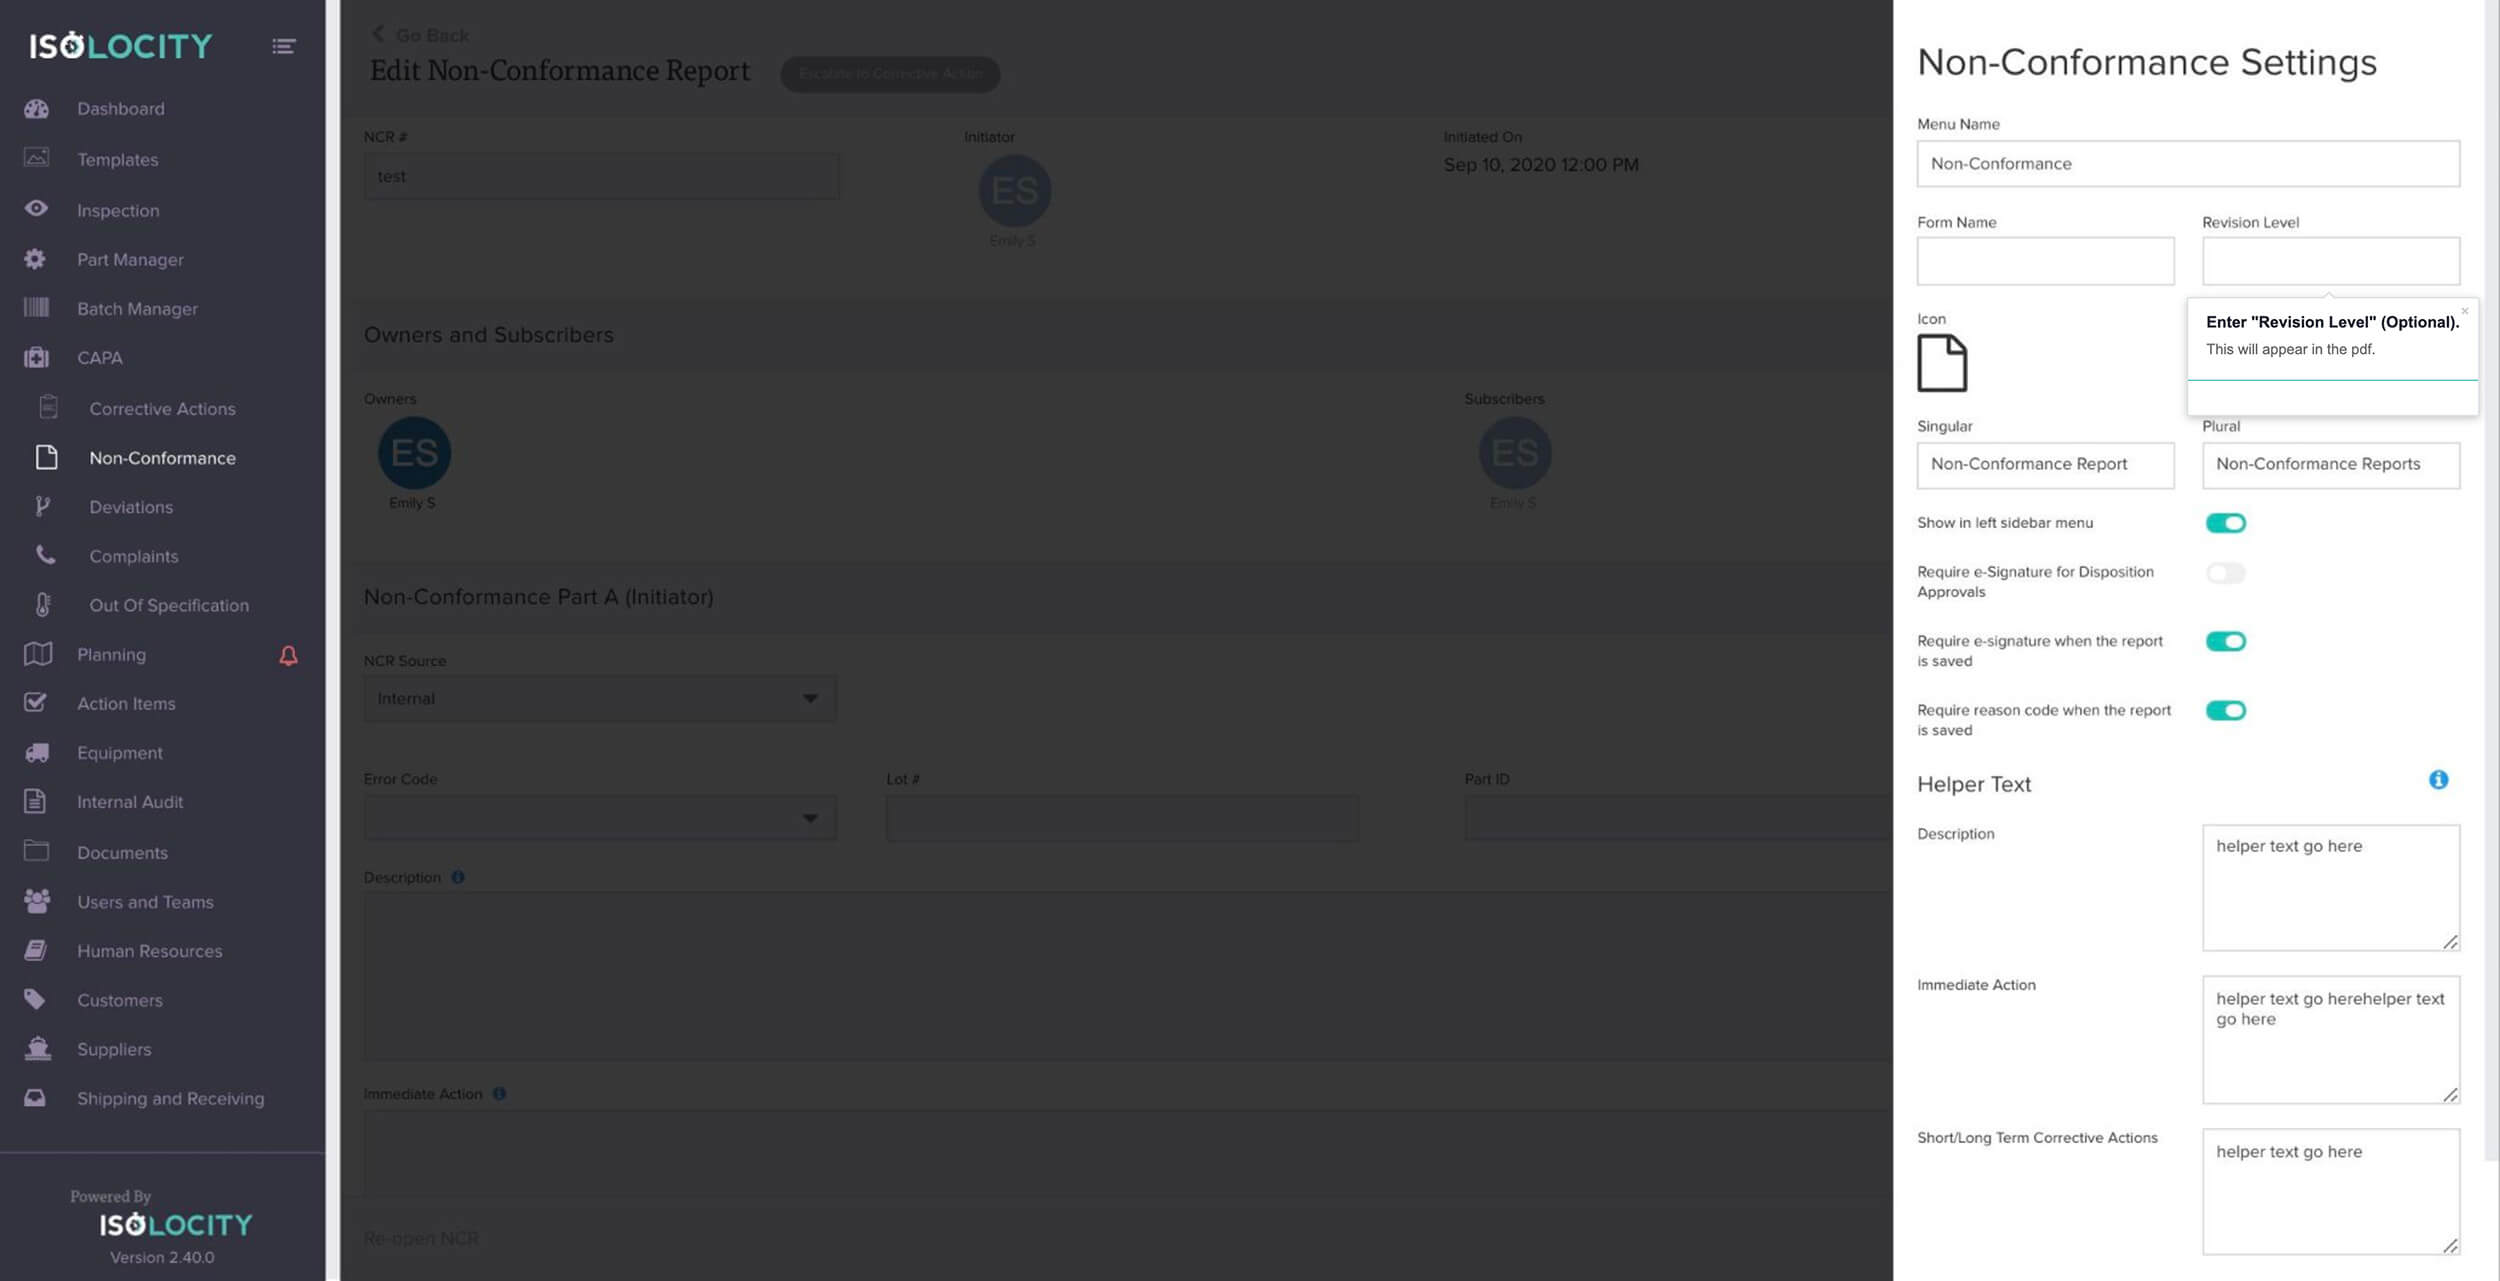
Enter “Revision Level” (Optional).
Step #35
Click on the blank space to go back to the report.
Step #36
Click here to download your report
Step #37
Click here when the form is complete.
